- How to Compile a Linux Kernel
- Downloading the kernel
- Installing requirements
- Extracting the source
- Configuring the kernel
- Compiling and installing
- Enable the kernel for boot
- Congratulations!
- Building Linux Kernel
- Step 1: Download the Source Code
- Step 2: Extract the Source Code
- Step 3: Install Required Packages
- Step 4: Configure Kernel
- Step 5: Build the Kernel
- Step 6: Update the Bootloader (Optional)
- Step 7: Reboot and Verify Kernel Version
How to Compile a Linux Kernel
Once upon a time the idea of upgrading the Linux kernel sent fear through the hearts of many a user. Back then, the process of upgrading the kernel involved a lot of steps and even more time. Now, installing a new kernel can be easily handled with package managers like apt. With the addition of certain repositories, you can even easily install experimental or specific kernels (such as real-time kernels for audio production) without breaking a sweat.
Considering how easy it is to upgrade your kernel, why would you bother compiling one yourself? Here are a few possible reasons:
- You simply want to know how it’s done.
- You need to enable or disable specific options into a kernel that simply aren’t available via the standard options.
- You want to enable hardware support that might not be found in the standard kernel.
- You’re using a distribution that requires you compile the kernel.
- You’re a student and this is an assignment.
Regardless of why, knowing how to compile a Linux kernel is very useful and can even be seen as a right of passage. When I first compiled a new Linux kernel (a long, long time ago) and managed to boot from said kernel, I felt a certain thrill coursing through my system (which was quickly crushed the next time I attempted and failed).
With that said, let’s walk through the process of compiling a Linux kernel. I’ll be demonstrating on Ubuntu 16.04 Server. After running through a standard sudo apt upgrade , the installed kernel is 4.4.0-121. I want to upgrade to kernel 4.17. Let’s take care of that.
A word of warning: I highly recommend you practice this procedure on a virtual machine. By working with a VM, you can always create a snapshot and back out of any problems with ease. DO NOT upgrade the kernel this way on a production machine… not until you know what you’re doing.
Downloading the kernel
The first thing to do is download the kernel source file. This can be done by finding the URL of the kernel you want to download (from Kernel.org ). Once you have the URL, download the source file with the following command (I’ll demonstrate with kernel 4.17 RC2):
wget https://git.kernel.org/torvalds/t/linux-4.17-rc2.tar.gz While that file is downloading, there are a few bits to take care of.
Installing requirements
In order to compile the kernel, we’ll need to first install a few requirements. This can be done with a single command:
sudo apt-get install git fakeroot build-essential ncurses-dev xz-utils libssl-dev bc flex libelf-dev bison Do note: You will need at least 12GB of free space on your local drive to get through the kernel compilation process. So make sure you have enough space.
Extracting the source
From within the directory housing our newly downloaded kernel, extract the kernel source with the command:
tar xvzf linux-4.17-rc2.tar.gz Change into the newly created directory with the command cd linux-4.17-rc2 .
Configuring the kernel
Before we actually compile the kernel, we must first configure which modules to include. There is actually a really easy way to do this. With a single command, you can copy the current kernel’s config file and then use the tried and true menuconfig command to make any necessary changes. To do this, issue the command:
cp /boot/config-$(uname -r) .config Now that you have a configuration file, issue the command make menuconfig . This command will open up a configuration tool ( Figure 1 ) that allows you to go through every module available and enable or disable what you need or don’t need.
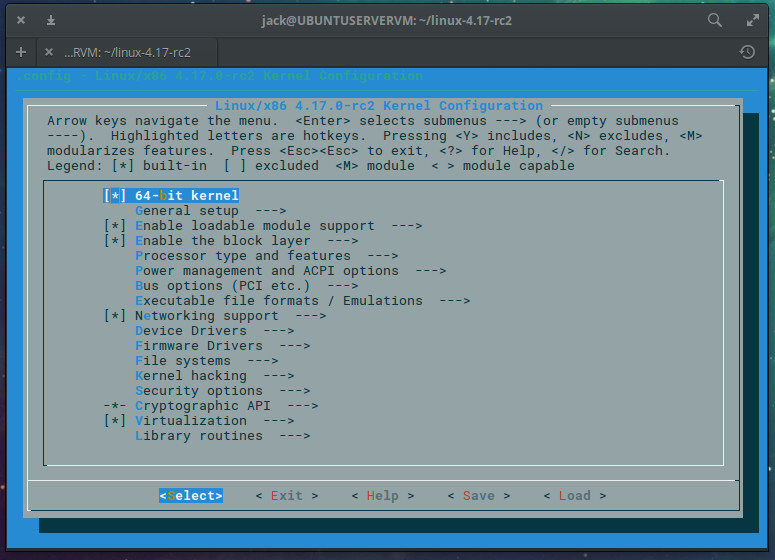
It is quite possible you might disable a critical portion of the kernel, so step through menuconfig with care. If you’re not sure about an option, leave it alone. Or, better yet, stick with the configuration we just copied from the running kernel (as we know it works). Once you’ve gone through the entire list (it’s quite long), you’re ready to compile!
Compiling and installing
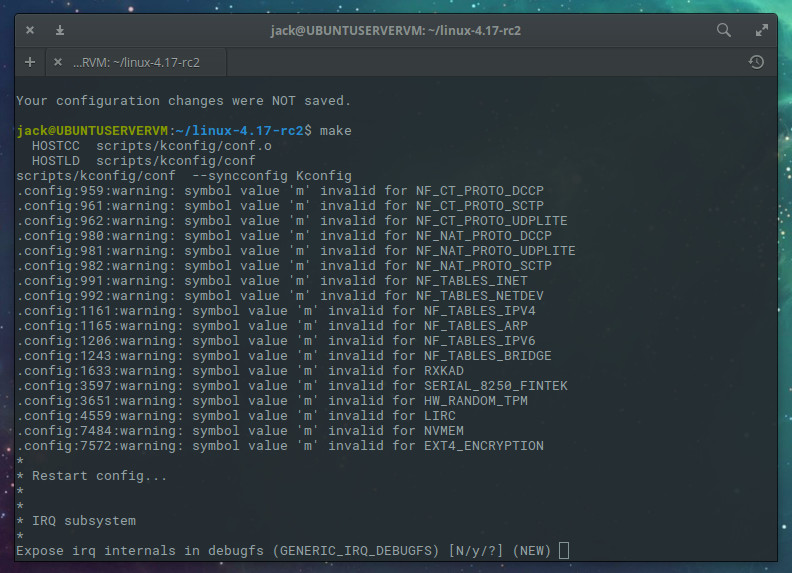
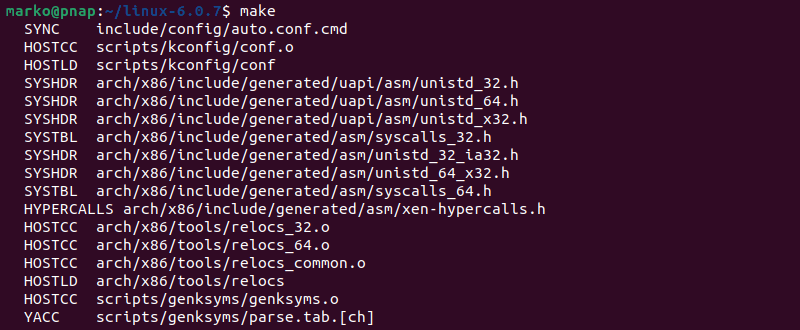
Now it’s time to actually compile the kernel. The first step is to compile using the make command. So issue make and then answer the necessary questions ( Figure 2 ). The questions asked will be determined by what kernel you’re upgrading from and what kernel you’re upgrading to. Trust me when I say there’s a ton of questions to answer, so give yourself plenty of time here.
After answering the litany of questions, you can then install the modules you’ve enabled with the command:
Once again, this command will take some time, so either sit back and watch the output, or go do something else (as it will not require your input). Chances are, you’ll want to undertake another task (unless you really enjoy watching output fly by in a terminal).
Now we install the kernel with the command:
Again, another command that’s going to take a significant amount of time. In fact, the make install command will take even longer than the make modules_install command. Go have lunch, configure a router, install Linux on a few servers, or take a nap.
Enable the kernel for boot
Once the make install command completes, it’s time to enable the kernel for boot. To do this, issue the command:
sudo update-initramfs -c -k 4.17-rc2 Of course, you would substitute the kernel number above for the kernel you’ve compiled. When that command completes, update grub with the command:
You should now be able to restart your system and select the newly installed kernel.
Congratulations!
You’ve compiled a Linux kernel! It’s a process that may take some time; but, in the end, you’ll have a custom kernel for your Linux distribution, as well as an important skill that many Linux admins tend to overlook.
Learn more about Linux through the free “Introduction to Linux” course from The Linux Foundation and edX.
How to Build Linux Kernel From Scratch
The Linux Kernel is the foundation of all the Linux distributions. The kernel is responsible for communication between hardware and software and the allocation of available resources.
All Linux distributions are based on a predefined kernel. But, if you want to disable certain options and drivers or try experimental patches, you need to compile your own Linux kernel.
In this step-by-step guide, you will learn how to build and compile a Linux kernel from scratch.

- A system running Linux
- Access to the terminal/command line
- A user account with sudo/root privileges
- 12GB of available space on the hard drive
Building Linux Kernel
The process of building a Linux kernel can be performed in seven easy steps. However, the procedure may require a significant amount of time to complete, depending on the system speed.
Follow the steps below to build the latest Linux kernel.
Note: If the latest kernel version on the official website does not match the one mentioned in the steps below, replace the version number in the commands with the current latest version.
Step 1: Download the Source Code
1. Visit the official kernel website and download the latest kernel version. The downloaded file contains a compressed source code.

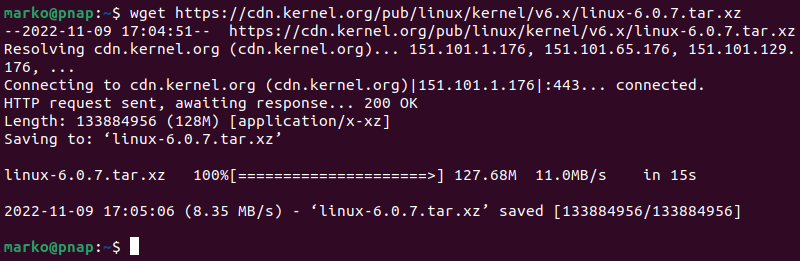
2. Open the terminal and use the wget command to download the Linux kernel source code:
wget https://cdn.kernel.org/pub/linux/kernel/v6.x/linux-6.0.7.tar.xzThe output shows the “saved” message when the download completes.
Note: Learn what to do when you get wget: command not found error.
Step 2: Extract the Source Code
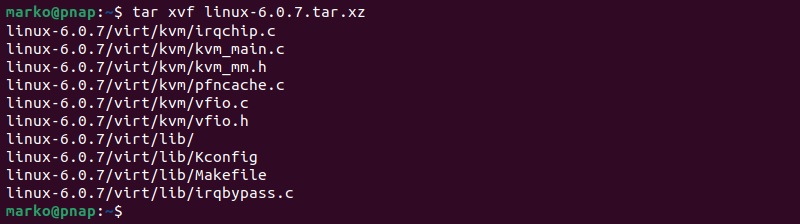
When the file is ready, run the tar command to extract the source code:
The output displays the extracted kernel source code:
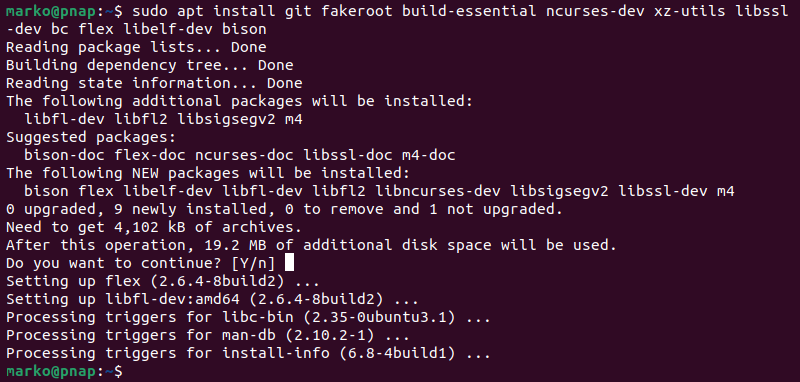
Step 3: Install Required Packages
Install additional packages before building a kernel. To do so, run this command:
sudo apt-get install git fakeroot build-essential ncurses-dev xz-utils libssl-dev bc flex libelf-dev bisonThe command we used above installs the following packages:
| Package | Package description |
| git | Tracks and makes a record of all changes during development in the source code. It also allows reverting the changes. |
| fakeroot | Creates the fake root environment. |
| build-essential | Installs development tools such as C, C++, gcc, and g++. |
| ncurses-dev | Provides API for the text-based terminals. |
| xz-utils | Provides fast file compression and decompression. |
| libssl-dev | Supports SSL and TSL that encrypt data and make the internet connection secure. |
| bc (Basic Calculator) | Supports the interactive execution of statements. |
| flex (Fast Lexical Analyzer Generator) | Generates lexical analyzers that convert characters into tokens. |
| libelf-dev | Issues a shared library for managing ELF files (executable files, core dumps and object code) |
| bison | Converts grammar description to a C program. |
Step 4: Configure Kernel
The Linux kernel source code comes with the default configuration. However, you can adjust it to your needs. To do so, follow the steps below:
1. Navigate to the linux-6.0.7 directory using the cd command:
2. Copy the existing configuration file using the cp command:
cp -v /boot/config-$(uname -r) .config
3. To make changes to the configuration file, run the make command:
The command launches several scripts that open the configuration menu:

4. The configuration menu includes options such as firmware, file system, network, and memory settings. Use the arrows to make a selection or choose Help to learn more about the options. When you finish making the changes, select Save, and then exit the menu.
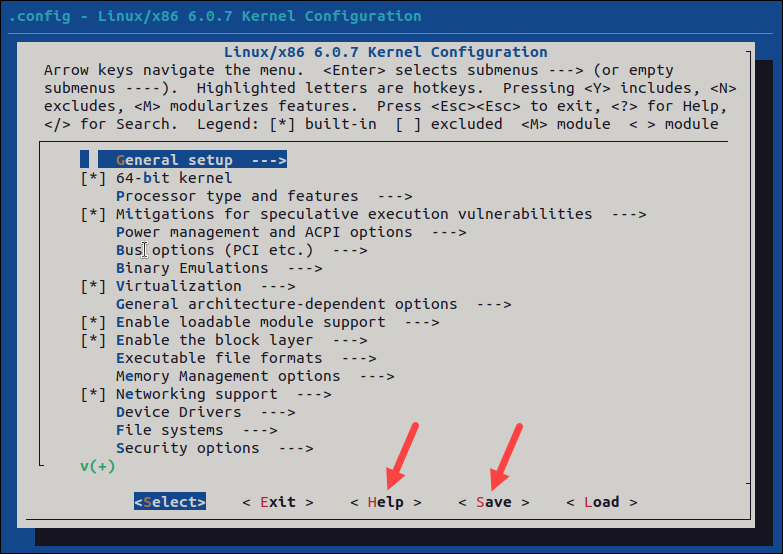
Note: Changing settings for some options can lead to a non-functional kernel. If you are unsure what to change, leave the default settings.
Step 5: Build the Kernel
1. Start building the kernel by running the following command:
The process of building and compiling the Linux kernel takes some time to complete.
The terminal lists all Linux kernel components: memory management, hardware device drivers, filesystem drivers, network drivers, and process management.
If you are compiling the kernel on Ubuntu, you may receive the following error that interrupts the building process:
No rule to make target 'debian/canonical-certs.pemDisable the conflicting security certificates by executing the two commands below:
scripts/config --disable SYSTEM_TRUSTED_KEYSscripts/config --disable SYSTEM_REVOCATION_KEYSThe commands return no output. Start the building process again with make , and press Enter repeatedly to confirm the default options for the generation of new certificates.
2. Install the required modules with this command:
sudo make modules_install
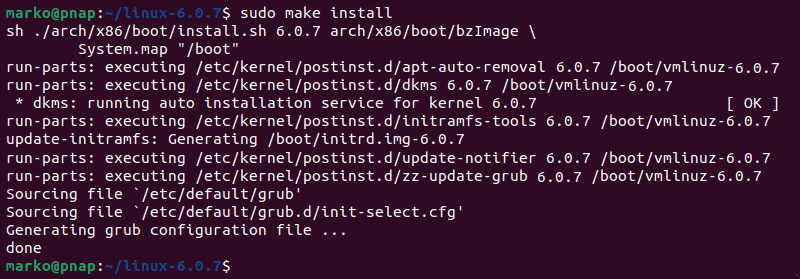
3. Finally, install the kernel by typing:
The output shows done when finished:
Step 6: Update the Bootloader (Optional)
The GRUB bootloader is the first program that runs when the system powers on.
The make install command performs this process automatically, but you can also do it manually.
1. Update the initramfs to the installed kernel version:
sudo update-initramfs -c -k 6.0.72. Update the GRUB bootloader with this command:
The terminal prints out the process and confirmation message:

Step 7: Reboot and Verify Kernel Version
When you complete the steps above, reboot the machine.
When the system boots up, verify the kernel version using the uname command:
The terminal prints out the current Linux kernel version.

In this step-by-step guide, you learned how to build a Linux kernel from scratch and install the required packages.
If you follow the instructions carefully, the process will complete successfully on your Linux machine.
The Linux kernel has a modular design. Functionality is extendible with modules or drivers. Learn how to use the modprobe command to add or remove modules on Linux.
Goran combines his leadership skills and passion for research, writing, and technology as a Technical Writing Team Lead at phoenixNAP. Working with multiple departments and on various projects, he has developed an extraordinary understanding of cloud and virtualization technology trends and best practices.
There are several methods to remove old or unused kernels. It’s also considered good system hygiene practice.
The Linux kernel is the underlying software architecture of each Linux distribution. It provides and defines.