Настройка NFS в Ubuntu
Сетевая файловая система NFS или Network File System, это популярный протокол сетевой файловой системы, который позволяет пользователям подключать удаленные сетевые каталоги на своей машине и передавать файлы между серверами. Вы можете использовать дисковое пространство на другой машине для своих файлов и работать с файлами, расположенными на других серверах. По сути, это альтернатива общего доступа Windows для Linux, в отличие от Samba реализована на уровне ядра и работает более стабильно.
В этой статье будет рассмотрена установка NFS в Ubuntu. Мы разберем установку всех необходимых компонентов, настройку общей папки, а также подключение сетевых папок.
Немного теории
Как уже было сказано, NFS, это сетевая файловая система. Для работы необходим сервер, на котором будет размещена общая папка и клиенты, которые могут монтировать сетевую папку как обычный диск в системе. В отличие от других протоколов NFS предоставляет прозрачный доступ к удаленным файлам. Программы будут видеть файлы как в обычной файловой системе и работать с ними как с локальными файлами, nfs возвращает только запрашиваемую часть файла, вместо файла целиком, поэтому эта файловая система будет отлично работать в системах с быстрым интернетом или в локальной сети.
Установка компонентов NFS
Перед тем как мы сможем работать с NFS, нам придется установить несколько программ. На машину, которая будет сервером нужно установить пакет nfs-kernel-server, с помощью которого будет выполнено открытие шары nfs в ubuntu 16.04. Для этого выполните:
sudo apt install nfs-kernel-server
Теперь давайте проверим правильно ли установился сервер. Сервис NFS слушает соединения как для TCP, так и для UDP на порту 2049. Посмотреть действительно ли сейчас используются эти порты можно командой:

Также важно проверить поддерживается ли NFS на уровне ядра:
cat /proc/filesystems | grep nfs
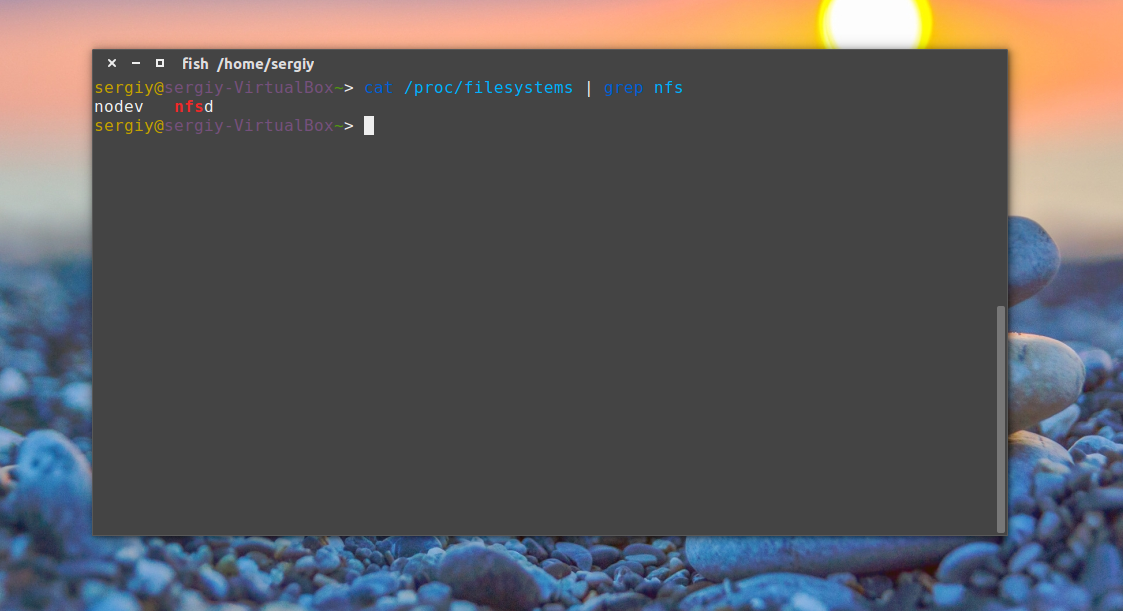
Видим, что работает, но если нет, нужно вручную загрузить модуль ядра nfs:
Давайте еще добавим NFS в автозагрузку:
sudo systemctl enable nfs-server
На клиентском компьютере вам нужно установить пакет nfs-common, чтобы иметь возможность работать с этой файловой системой. Вам необязательно устанавливать компоненты сервера, достаточно будет только этого пакета:
sudo apt install nfs-common
Вот и все, дальше настройка NFS в Ubuntu.
Настройка сервера NFS в Ubuntu
Мы можем открыть NFS доступ к любой папке, но давайте создадим для этих целей новую:
Дальше нас интересует настройка ubuntu nfs server. Все общие папки и другие настройки nfs находятся в файле /etc/exports. Синтаксис записи папки такой:
адрес_папки клиент (опции)
Адрес папки — это та папка, которую нужно сделать доступной по сети. Клиент — ip адрес или адрес сети, из которой могут получить доступ к этой папке. А вот с опциями немного сложнее. Рассмотрим некоторые из них:
- rw — разрешить чтение и запись в этой папке;
- ro — разрешить только чтение;
- sync — отвечать на следующие запросы только тогда, когда данные будут сохранены на диск (по умолчанию);
- async — не блокировать подключения пока данные записываются на диск;
- secure — использовать для соединения только порты ниже 1024;
- insecure — использовать любые порты;
- nohide — не скрывать поддиректории при, открытии доступа к нескольким директориям;
- root_squash — подменять запросы от root на анонимные, используется по умолчанию;
- no_root_squash — не подменять запросы от root на анонимные;
- all_squash — превращать все запросы в анонимные;
- subtree_check — проверять не пытается ли пользователь выйти за пределы экспортированной папки;
- no_subtree_check — отключить проверку обращения к экспортированной папке, улучшает производительность, но снижает безопасность, можно использовать когда экспортируется раздел диска;
- anonuid и anongid — указывает uid и gid для анонимного пользователя.
Например, для нашей папки, если вы хотите разрешить к ней подключаться только с определённого IP адреса, эта строка может выглядеть вот так:
Можно разрешить только нужную подсеть, например:
Для того чтобы разрешить все адреса используйте подсеть 0.0.0.0/0 или символ *.
Открытие шары NFS в Ubuntu почти завершено. Осталось разобраться с правами. Кроме ограничений IP адреса работает обычная система полномочий UNIX, поэтому если вы хотите чтобы определённый пользователь мог получить доступ к папке, то на сервере должен существовать пользователь с таким же UID и эта папка должна принадлежать ему или группе в которой он состоит.
Кроме того, обратите внимание на то, что все подключения от имени пользователя root считаются по умолчанию анонимными (nfsnobody), чтобы это отключить добавьте опцию монтирования no_root_squash, но это не безопасно, потому что любой root пользователь сможет получить доступ на запись ко всем файлам. Теперь попытаемся настроем клиента и попытаемся ее примонтировать.
Для того чтобы все пользователи могли получить доступ ко всем файлам можно создать пользователя с UID 1001 и попросить NFS все запросы считать запросами от анонимного пользователя, а анонимному пользователю присвоить UID 1001. Это делается такими опциями:
Когда все будет настроено, останется только обновить таблицу экспорта NFS:
Если на вашем сервере используется брандмауэр, то следует открыть порты 111 и 2049:
sudo ufw allow 111
sudo ufw allow 2049
Подключение NFS
Мы не будем подробно останавливаться на этом вопросе в сегодняшней статье. Это довольно большая тема, заслуживающая отдельной статьи. Но пару слов я все же скажу. Чтобы подключить сетевую папку вам не нужен никакой nfs клиент ubuntu, достаточно использовать команду mount:
sudo mount 127.0.0.1:/var/nfs/ /mnt/
Теперь вы можете попытаться создать файл в подключенной директории:
Также мы посмотрите подключенные файловые системы с помощью df:
127.0.0.1:/var/nfs 30G 6,7G 22G 24% /mnt
Чтобы отключить эту файловую систему достаточно использовать стандартный umount:
Выводы
В этой статье была рассмотрена настройка NFS в Ubuntu 20.04, как видите, все делается очень просто и прозрачно. Подключение NFS шары выполняется в несколько кликов, с помощью стандартных команд, а открытие шары NFS ненамного сложнее подключения. Если у вас остались вопросы, пишите в комментариях!
Обнаружили ошибку в тексте? Сообщите мне об этом. Выделите текст с ошибкой и нажмите Ctrl+Enter.
An introduction to the Linux /etc/fstab file

Operating systems have come a long way in recent years. They have a smaller footprint, are more efficient with resource management, and have become much faster than early computing systems. For all of the improvements made, there are still «old school» pieces of the puzzle that we simply can’t live without. Filesystems, and by necessity, filesystem tables, are one of these constants. These can be a bit tricky for a lot of users, so we will look at /etc/fstab ( fstab ) a little closer.
Your Linux system’s filesystem table, aka fstab , is a configuration table designed to ease the burden of mounting and unmounting file systems to a machine. It is a set of rules used to control how different filesystems are treated each time they are introduced to a system. Consider USB drives, for example. Today, we are so used to the plug and play nature of our favorite external drives that we may completely forget that operations are going on behind the scenes to mount the drive and read/write data.
In the time of the ancients, users had to manually mount these drives to a file location using the mount command. The fstab file became an attractive option because of challenges like this. It is designed to configure a rule where specific file systems are detected, then automatically mounted in the user’s desired order every time the system boots. Not only is it less work over time, but it also allows the user to avoid load order errors that could eat up valuable time and energy.
The table itself is a 6 column structure, where each column designates a specific parameter and must be set up in the correct order. The columns of the table are as follows from left to right:
- Device: usually the given name or UUID of the mounted device (sda1/sda2/etc).
- Mount Point: designates the directory where the device is/will be mounted.
- File System Type: nothing trick here, shows the type of filesystem in use.
- Options: lists any active mount options. If using multiple options they must be separated by commas.
- Backup Operation: (the first digit) this is a binary system where 1 = dump utility backup of a partition. 0 = no backup. This is an outdated backup method and should NOT be used.
- File System Check Order: (second digit) Here we can see three possible outcomes. 0 means that fsck will not check the filesystem. Numbers higher than this represent the check order. The root filesystem should be set to 1 and other partitions set to 2 .
Obviously your table will be different depending on your environment, however, I want to look at an example using a virtual machine so that we can see what information is provided and break down what we are seeing. You will see my fstab below:
[tcarrigan@rhel ~]$ vi /etc/fstab # # /etc/fstab # Created by anaconda on Mon Jan 27 10:04:34 2020 # # Accessible filesystems, by reference, are maintained under '/dev/disk/'. # See man pages fstab(5), findfs(8), mount(8) and/or blkid(8) for more info. # # After editing this file, run 'systemctl daemon-reload' to update systemd # units generated from this file. # /dev/mapper/rhel-root / xfs defaults 0 0 UUID=64351209-b3d4-421d-8900-7d940ca56fea /boot xfs defaults 0 0 /dev/mapper/rhel-swap swap swap defaults 0 0 ~ ~ ~ "/etc/fstab" [readonly] 14L, 579C 1,0-1 AllThis table consists of six columns defining certain parameters around a given filesystem. The first thing that pops out at you is the comments in the header. For now, ignore the Created by section and move to the Accessible filesystems portion. These directories and man pages are worth noting and can provide valuable information should you need it. Next, skip down to the After editing section and note the systemctl daemon-reload command used to update the systemd components after making changes to this file.
Now that we have looked at the comments, let’s break down the actual configuration that is present and look at the various bits of info that a user needs to note.
The first (and only, in this case) filesystem that you see is the root filesystem for this VM /dev/mapper/rhel-root . You also see that it is an xfs filesystem. You may see any number of options here, such as ext3, ext4, fat file systems, etc. Directly below the root filesystem, you find the Universally Unique Identifier (UUID). The UUID remains persistently assigned to the filesystem. UUIDs are a great way to label filesystems, especially in smaller environments. However, they can lead to issues in larger environments where network-based drives are in use. I digress the UUID of my filesystem here is: UUID=64351209-b3d4-421d-8900-7d940ca56fea
You also see that there is a swap partition present at this location, as well as the mount point for the root filesystem / . Moving to the right, you see a pair of zero’s. The first zero is a binary option (0=false and 1=true) for «dumping.» This is an outdated backup method and should be set to zero or unused. The next number to the right tells the system to run a filesystem check or fsck. Here, an option of 0 = skip. The root filesystem should be set to 1 and any others you want to be checked assigned after that.
NOTE: These options must be listed in order if the configuration is to work correctly.
Career advice
There are other options for more advanced users that I do not have configured here (therefore, there are no examples shown). However, there are some great resources on the web to explain these options. The ones that I would check out are as follows:
- auto/noauto: controls whether the partition is mounted automatically on boot (or not).
- exec/noexec: controls whether or not the partition can execute binaries. In the name of security, this is usually set to noexec.
- ro/rw: controls read and write privileges — ro = read-only, where rw= read-write.
- nouser/user: controls whether or not the user has mounting privileges. This defaults to noexec for all user accounts.
Hopefully, you now have a better grasp of the purpose of /etc/fstab and can make sense of what is shown on your system. Many casual users do not use this file. However, if you find yourself curious or in need of making changes, you are now better equipped to do so!