- How to bridge WiFi and Ethernet adapters to share internet on Windows 11 or 10
- How to share internet using wifi adapter to Ethernet cable
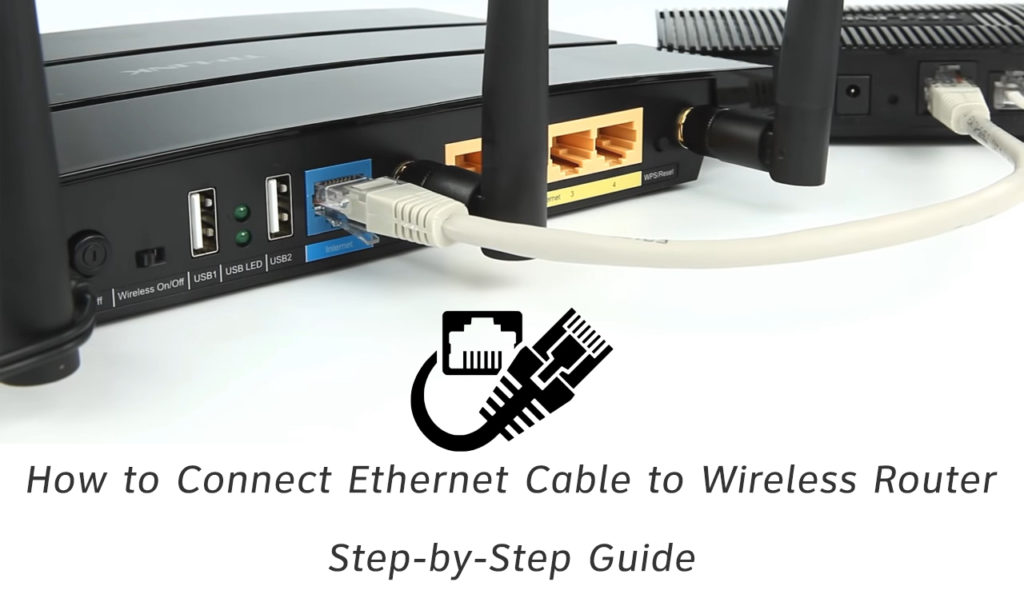
- How to Connect Ethernet Cable to Wireless Router? Step-by-Step Guide
- When to Use Ethernet Cables to Connect to a Wireless Router?
- How to Connect Ethernet Cable to Wireless Router?
- Conclusion
- How to connect Ethernet devices to WiFi via WDS
How to bridge WiFi and Ethernet adapters to share internet on Windows 11 or 10
Everybody is not using a router in their home to connect internet. Nowadays, when the Wifi adapter is almost in every laptop and PC (via Wireless adapter card); the users mostly ad hoc smartphone’s hotspots to share and use the internet. Another reason why the users started using Wifi over the ethernet connection; because nobody wants to run long Ethernet cables in their homes. That’s why Wifi adapters and WiFi hotspots are more popular nowadays. So, in such circumstances, if someone wants to share a computer’s WiFi Internet connection with other Ethernet devices, how will he do that?
You might be thinking, why would we do this? Just imagine you don’t have a router with a LAN ethernet port to connect some old devices. Since there are certain devices in home and offices that still do not offer WiFi connectivity option like smart TVs (old), media players, NAS devices, and more… Such kind of devices needs a wired Ethernet connection to connect to the Internet.
So, if you think without a router, how do you share the internet from a laptop or PC then here is the answer…
We don’t need any Virtual router to share an internet connection in Windows 7, 8, or 10. Just bridge Wifi to ethernet in Windows 10 or whatever Windows version you are on and that’s it. Not only Wifi adapter to Ethernet but also one can use this method for Ethernet adapter to Ethernet adapter too.
How to share internet using wifi adapter to Ethernet cable
Although there are a few software available online those let us create virtual routers on Windows to share the internet from PC to PC via ethernet. But actually, we don’t need them. Just follow the below steps… We are using Windows 10 here but the steps are the same for Windows 8 and Windows 7 too.
- Go to the search bar of Windows 10 or 7.
- Search for Control Panel.
- Click on the Control Panel to open it.
- Select the Network and Internet option.
- You will see View network status and task under Network and Sharing Center, click on that.
- From the left side panel, click on Change adapter settings.
- Now press the Shift button and without releasing it, click on the Wifi adapter and then on the Ethernet adapter for which you want to share the network connection.
- Right-click on any of the adapters and select the Bridge connection option.
Above tutorial steps in detail:
Step 1: As I said in the above-mentioned steps that first you need to connect the ethernet cable to the computer or laptop from where your want to share the wireless network internet connection. For example, I want to share Wi-Fi internet from my PC to a NAS device that doesn’t have a WLAN card. Then, search and open the control panel on Windows 10 or Windows 7. When it appears just click on that.
How to Connect Ethernet Cable to Wireless Router? Step-by-Step Guide
In today’s modern era, most devices use a wireless connection to connect to the Internet , and even desktops are manufactured with the ability to connect to Wi-Fi (previously only with laptops).
Of course, we are all well aware of the benefits of wireless connectivity such as convenience – the ability to connect a large number of devices without the use of cables (which is definitely a big advantage because you don’t have to go through painful wiring process).
So, is there any need to connect to a router with the help of an Ethernet cable ? The answer is certainly yes. In this article, in addition to a detailed, step-by-step guide to connecting your Ethernet cable to the wireless router , we will also explain in which situations you should use this type of connection.
When to Use Ethernet Cables to Connect to a Wireless Router?
Connecting to the Internet using an Ethernet cable may seem old-fashioned to some – like a return to the last century, but it’s not because it still has its benefits. Although it is used much less than Wi-Fi, there are definitely several situations when this way of connecting devices makes sense.
- When You Need Minimal Latency – Latency is the time it takes for data from your computer to reach its desired destination and then return to your device. Latency (aka delay or ping) can be higher or lower. If you use an Ethernet cable to connect to the Internet, it’s significantly lower compared to a Wi-Fi connection. One of the situations where you need minimal latency is playing online games . Gamers are well aware of how embarrassing a situation can be when it comes to being late when playing a game online . In addition to playing online games, we also recommend using an Ethernet cable for streaming and online conferencing.
- When You Want a Higher Level of Security – Connecting to the Internet with an ethernet cable is much safer than a wireless connection . It allows you to physically connect to your network equipment.
- When You Need Max Speed – If you want to test your internet speed, we recommend that you use Ethernet cables to connect to the router (Wi-Fi does not deliver full internet speed for several reasons – you may be too far away from the router , there may be obstacles and walls between your router and connected devices, etc.)
- When You HaveProblems with Wi-Fi – Although you use Wi-Fi every day, it is certainly very useful to always have one spare Ethernet cable in your home as it can be useful in case you have some problems with your Wi-Fi connection – until you fix the Wi-Fi problem, connecting with an ethernet cable will allow you to stay connected.
- When Your Router is Physically Damaged – You may have dealt with this issue in the past. Any kind of antenna damage or software malfunction may prevent you from using Wi-Fi. Until you replace the part or buy a new router , Ethernet cables will allow you to connect.
How to Connect Ethernet Cable to Wireless Router?
Now that we have introduced you to the situations when using an Ethernet Cable to connect to the wireless router is recommended, we will show you, step-by-step, how to do this.
You will need two Ethernet cables – one to connect your modem to the router and another to connect your router to your device (laptop, PC, TV, etc.).
- Connect one end of the first Ethernet cable to the Ethernet port on the back of your modem.
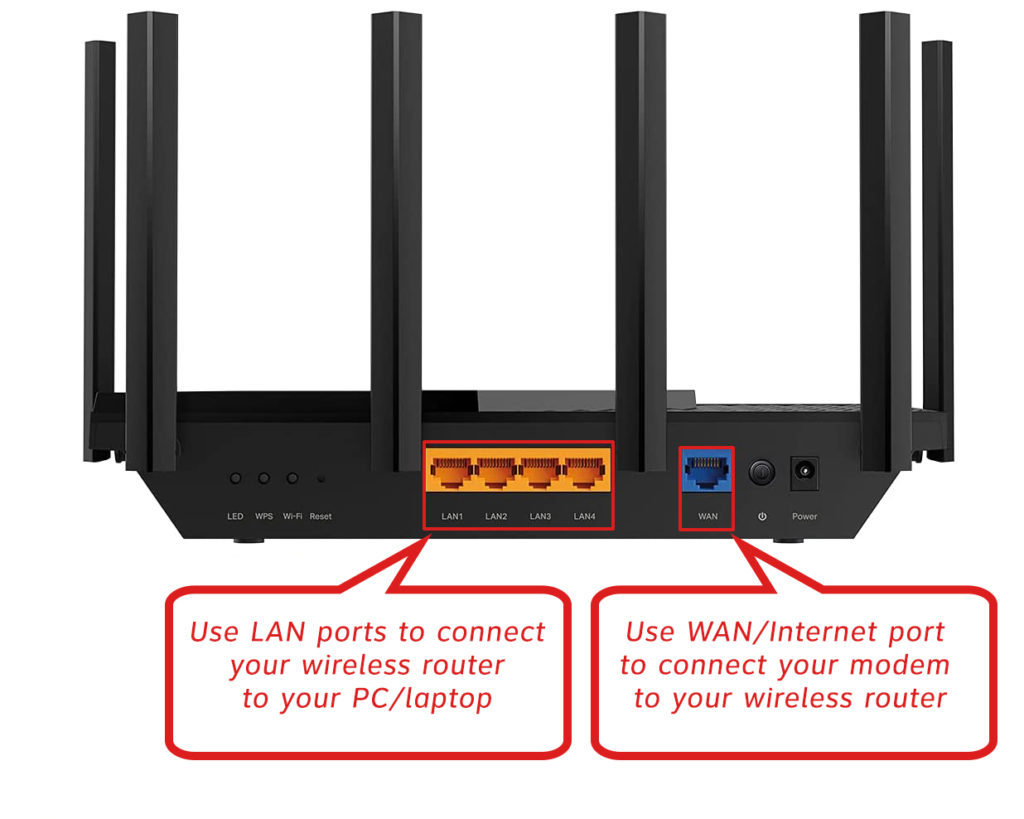
- Connect the other end of the cable to the WAN/Internet port on the back of your router
- On the back of your router, there is a LAN port (you will easily notice it because it is marked as “LAN”. Usually, you will see at least 4 LAN ports. Plug one end of the other Ethernet Cable into any of those LAN ports.
- Now, connect the other end of the Ethernet cable into the LAN port of your device (laptop / desktop computer).
- After connecting the computer and the router with an Ethernet cable, look at the screen of your computer, you should be connected to the Internet.
If your computer did not automatically connect to the Internet, do the following:
- Open the Control Panel.
- From the Control Panel, select Network and Internet, and then click Network and Sharing Center.
- You will see the Change adapter settings option. Click on it (located on the left).
- Now right-click on the Ethernet and select Enable.
- If the Internet is still not turned on, right-click on the Ethernet and go to Properties.
- You need to check the Internet Protocol Versions 4 box and confirm by clicking OK.
That’s it, you’re connected to the internet.
Conclusion
We hope our article helped you connect your wireless router via Ethernet cable without any problems. As we have already mentioned, Wi-Fi is a more popular, more convenient, and much more widespread way of connecting, but we definitely advise you to always have Ethernet cables at hand if you find yourself in any of the situations discussed above.

Hey, I’m Jeremy Clifford. I hold a bachelor’s degree in information systems, and I’m a certified network specialist. I worked for several internet providers in LA, San Francisco, Sacramento, and Seattle over the past 21 years.
I worked as a customer service operator, field technician, network engineer, and network specialist. During my career in networking, I’ve come across numerous modems, gateways, routers, and other networking hardware. I’ve installed network equipment, fixed it, designed and administrated networks, etc.
Networking is my passion, and I’m eager to share everything I know with you. On this website, you can read my modem and router reviews, as well as various how-to guides designed to help you solve your network problems. I want to liberate you from the fear that most users feel when they have to deal with modem and router settings.
My favorite free-time activities are gaming, movie-watching, and cooking. I also enjoy fishing, although I’m not good at it. What I’m good at is annoying David when we are fishing together. Apparently, you’re not supposed to talk or laugh while fishing – it scares the fishes.
How to connect Ethernet devices to WiFi via WDS

In this blog post I will show you how to connect an Ethernet only device to Wi-Fi using an extra router and the WDS functionality. I initially wanted to install the TP Link Archer T4U WiFi adapter driver on my Ubuntu 20.04 PC but unfortunately the driver is no longer supported.
Since I really needed high internet speed for my PC, I decided to connect it via an Ethernet cable and buy another TP-Link router to use in WDS mode.
WDS mode allows routers to communicate with one another without using wires.
⚙️ The configuration of the WDS router is as follows. I left the operation mode in Router Mode.

Then, I navigated to Network -> LAN and set the IP address to 192.168.0.2 . Because my old router had the IP address of 192.168.0.1.
The next step would be to navigate to Wireless -> WDS . Click survey and select the SSID of your root router. If the WDS bridging is successfully you should see a Connected message ✅.

Finally, go to Network -> DHCP Server and disable it. All these operations should be performed on the router that you want to bridge, not the root router! 🕸️
Now that your router has a WDS bridge to the root router, you can connect your PC to it via an Ethernet cable and place it next to your PC. A brand new 5GHz Wi-Fi adapter might have the same price 💰 as a new router 🤑, and to be honest unless you’re doing some penetration testing I don’t see the need of a WiFi adapter.
Thanks for reading and happy hacking! 🐧