- HP printer setup (Wi-Fi network)
- Restore Wi-Fi setup mode on the printer
- Install the HP Smart app
- Additional Wi-Fi connection options
- Connect the printer with the Wireless Setup Wizard (printers with a touchscreen)
- Connect the printer using Wi-Fi Protected Setup (printers without a touchscreen)
- Connect the printer using Wi-Fi Direct
- How to Connect a Printer to Wi-Fi
- What to Know
- How to Set up a Wireless Printer
- How to Set up Your Mobile Devices to Print Wirelessly
- How to Test Your Wireless Printer
- The Advantages to Wireless Printing
- HP printer setup (Wi-Fi network)
- Restore Wi-Fi setup mode on the printer
- Install the HP Smart app
- Additional Wi-Fi connection options
- Connect the printer with the Wireless Setup Wizard (printers with a touchscreen)
- Connect the printer using Wi-Fi Protected Setup (printers without a touchscreen)
- Connect the printer using Wi-Fi Direct
- How to Connect a Wifi Printer
- 1. Connect your wireless printer to WiFi
- 2. Add the wireless printer to computer
- Windows can’t find my printer?
- Way 1: The printer that I want isn’t listed
- Way 2: Update your printer driver
HP printer setup (Wi-Fi network)
Connect an HP printer to a local Wi-Fi network to wirelessly print from a personal computer, smartphone, or tablet.
If you are using a guest network, such as those found in many hotels or college campuses, connecting a device to your printer might not be possible over the network. Instead, use a Wi-Fi Direct connection to print.
Restore Wi-Fi setup mode on the printer
Prepare a printer for a Wi-Fi connection by restoring Wi-Fi setup mode.
Restore Wi-Fi setup mode from the printer control panel.
Install the HP Smart app
The HP Smart app is the main software for your printer.
Install the HP Smart app to your mobile device or computer. Once installed, you can open the HP Smart app and use it to set up your printer on your network.
Additional Wi-Fi connection options
Use these methods to connect a printer if you changed your router or ISP, or a local network is unavailable.
Connect the printer with the Wireless Setup Wizard (printers with a touchscreen)
Use the Wireless Setup Wizard from the printer control panel to connect your printer to your Wi-Fi network.
Note: If the Wireless Setup Wizard is not listed, select Wi-Fi Protected Setup or WPS , select Push Button , and then follow the steps to connect to the network.
Connect the printer using Wi-Fi Protected Setup (printers without a touchscreen)
Use the Wi-Fi Protected Setup (WPS) button on your router to connect the printer to your Wi-Fi network.
- Most printers without a touchscreen control panel: Press and hold the Wireless button for five seconds or until the wireless light starts to flash.
- HP Deskjet 6000 and 6400, ENVY 6000 and 6400, and Tango printers: Press and hold the Wi-Fi button and the Power button on the back of the printer for five seconds until the blue bar flashes.
Wait for the Wireless light or bar on the printer to stop flashing. The printer is now connected to the network.
Connect the printer using Wi-Fi Direct
Wi-Fi Direct is a method to temporarily connect your device directly to your printer.
Set up a Wi-Fi Direct connection to quickly and easily access your printer from your mobile device or computer.
How to Connect a Printer to Wi-Fi
Julia Borgini is a former Lifewire writer and a technical copywriter. She’s written for B2B News Network, Kissmetrics, Social Media Examiner, and more.
What to Know
- Power on the printer and connect it to your Wi-Fi network. You’ll need the Wi-Fi network name (SSID) and password.
- Your computer has to be on the same Wi-Fi network for wireless printing.
- On iOS, you can use AirPrint to print wirelessly, and Android lets you choose a default printer.
This article explains how to set up wireless printing for computers, smartphones, and tablets and test a wireless printer.
How to Set up a Wireless Printer
The first step is to connect the printer to Wi-Fi, so any device on the network can print to it, including laptops, smartphones, and tablets.
Specific directions to connect your printer to the network should be in the box. Usually, it’s a simple process of powering on the system and connecting to the network through the printer interface or a companion app on your computer or mobile device.
How to Set up Your Mobile Devices to Print Wirelessly
Now that the printer is connected to the network, it’s time to set up the device you want to print from.
- To print wirelessly from your computer: Add the printer to the computer’s printer list following the appropriate instructions to add a printer to Windows or a Mac.
- To print wirelessly from iOS mobile devices: Use AirPrint if the printer supports it, or a printing app if it doesn’t, such as handyPrint or Printopia. The printing apps help the computer receive data from AirPrint, then send it to the wireless printer.
- To print wirelessly from Android mobile devices: Add the printer to Android’s Default Printing Service settings page, which lets you send print jobs from any app that supports printing, such as Google Chrome.
How to Test Your Wireless Printer
The final step is to test your wireless printer setup to make sure it’s correct.
If the printer doesn’t appear in the list, restart the printer or the mobile device. If you continue to experience issues, refer to the printer manufacturer’s website for help.
The Advantages to Wireless Printing
Wireless printing is convenient, whether you’re at home, work, or school. Here are a few of the benefits of wireless printing.
- Printers for every budget: The major printer manufacturers include Wi-Fi in their printer models, often at all price points. You can buy a wireless printer for less than $50.
- Print from anywhere: With cloud printing solutions like HP ePrint, you can print wirelessly to a printer in another physical location. (Typically, to print wirelessly, the device and the printer must be on the same network.) It makes it easier for people to print because it eliminates the need to install the printer and its drivers beforehand. You can also print from any device connected to the same network.
- Eliminate extra cords and cables: A wireless printer only has a power cord attached to it, eliminating the extra wires. You can set it up in a suitable location, and it frees up a USB port on your computer that you can use for something else.
- Save on energy and paper costs: Instead of having multiple printers set up wherever anyone needs to print, you can centralize printing to a single wireless printer. You could save on paper, toner, and ink costs because everyone might think twice before printing.
Most new printers connect to any wireless network. So you can print from your laptop, tablet, or smartphone. For most people, wireless printing refers to Bluetooth-enabled printing or Wi-Fi printing. Both allow you to print without connecting any cables between your device and the printer.
HP printer setup (Wi-Fi network)
Connect an HP printer to a local Wi-Fi network to wirelessly print from a personal computer, smartphone, or tablet.
If you are using a guest network, such as those found in many hotels or college campuses, connecting a device to your printer might not be possible over the network. Instead, use a Wi-Fi Direct connection to print.
Restore Wi-Fi setup mode on the printer
Prepare a printer for a Wi-Fi connection by restoring Wi-Fi setup mode.
Restore Wi-Fi setup mode from the printer control panel.
Install the HP Smart app
The HP Smart app is the main software for your printer.
Install the HP Smart app to your mobile device or computer. Once installed, you can open the HP Smart app and use it to set up your printer on your network.
Additional Wi-Fi connection options
Use these methods to connect a printer if you changed your router or ISP, or a local network is unavailable.
Connect the printer with the Wireless Setup Wizard (printers with a touchscreen)
Use the Wireless Setup Wizard from the printer control panel to connect your printer to your Wi-Fi network.
Note: If the Wireless Setup Wizard is not listed, select Wi-Fi Protected Setup or WPS , select Push Button , and then follow the steps to connect to the network.
Connect the printer using Wi-Fi Protected Setup (printers without a touchscreen)
Use the Wi-Fi Protected Setup (WPS) button on your router to connect the printer to your Wi-Fi network.
- Most printers without a touchscreen control panel: Press and hold the Wireless button for five seconds or until the wireless light starts to flash.
- HP Deskjet 6000 and 6400, ENVY 6000 and 6400, and Tango printers: Press and hold the Wi-Fi button and the Power button on the back of the printer for five seconds until the blue bar flashes.
Wait for the Wireless light or bar on the printer to stop flashing. The printer is now connected to the network.
Connect the printer using Wi-Fi Direct
Wi-Fi Direct is a method to temporarily connect your device directly to your printer.
Set up a Wi-Fi Direct connection to quickly and easily access your printer from your mobile device or computer.
How to Connect a Wifi Printer

1. Connect your wireless printer to WiFi
Assuming that you have WiFi available in your office or house, we can start connecting your WiFi printer to your WiFi network. 1) Unpack your printer, run the startup routine for your printer, including plug in, turn on your printer, and install cartridges, etc. 2) After the startup routine, connect your WiFi printer to your WiFi network. This varies not only from manufacturer to manufacturer, but from printer to printer as well, so you can refer to the printer manual to connect it to your WiFi network step by step. Generally you’d need your SSID, network name and password to connect. Many printers now can directly search for your network name, so you can just select your WiFi network, and enter your WiFi password in your printer network settings.
Note: Make sure that your printer is within your WiFi network range when processing.
2. Add the wireless printer to computer
Now you’ve connected your WiFi printer to your wireless network, you can start adding it to your computer to print. To do so, follow these steps:
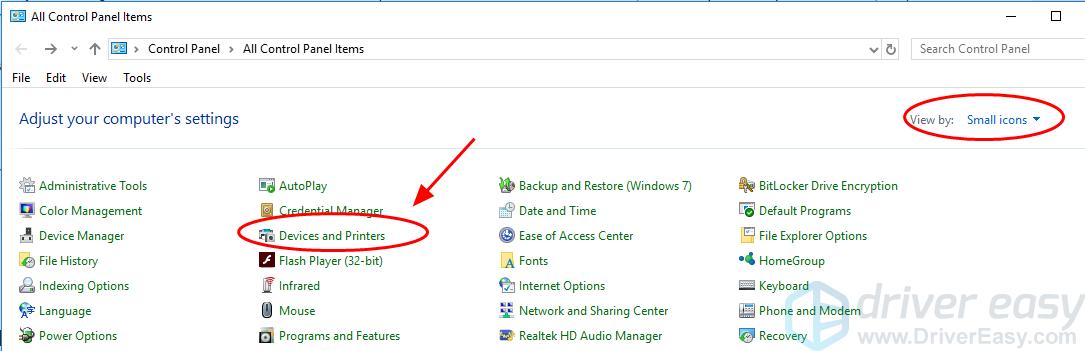
1) On your computer, open Control Panel. 2) Click Devices and Printers. Kindly note that you need to view by small icons in Control Panel.
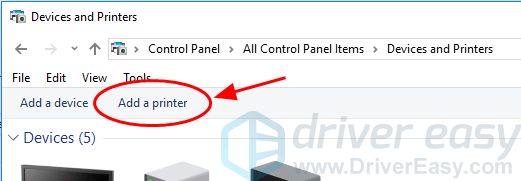
3) Click Add a printer.
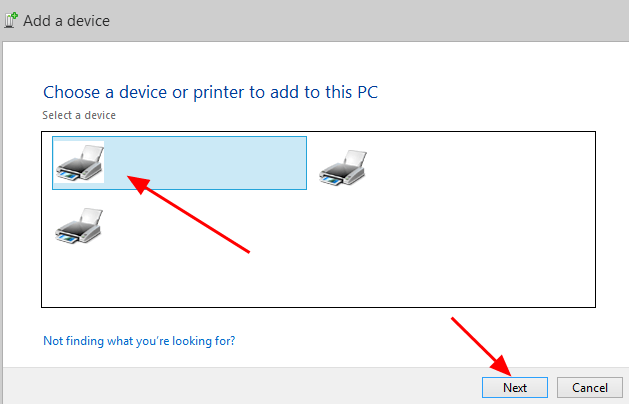
4) Select Add a network, wireless or Bluetooth printer (skip to the next step if you don’t have this option). 5) Wait for a while to your computer to search, then select your wireless printer from the device list, and click Next.

6) Follow the wizard to install the printer and its driver to your computer. Now you’ve finished connecting your WiFi printer, you can start a test print and it should work. It’s easy and quick, isn’t it?!
Windows can’t find my printer?
It’s possible that Windows can’t find your WiFi printer or you may fail to connect your WiFi printer to your computer, but don’t worry. There’re fixes to solve the issue. Way 1: The printer that I want isn’t listed Way 2: Update your printer driver
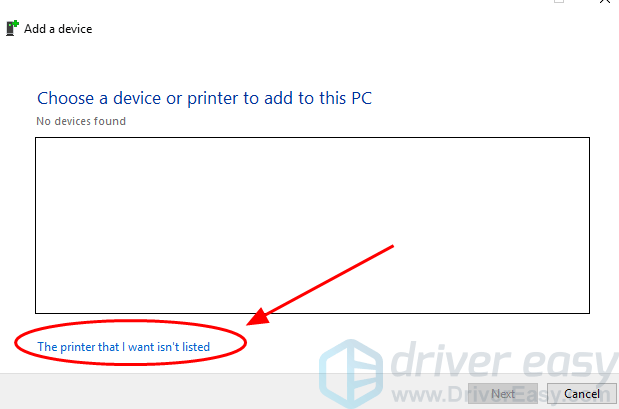
Way 1: The printer that I want isn’t listed
Wait for a while for Windows to search for your printer, until you see No device found: 1) Click The printer that I want isn’t listed.
2) Select Add s local printer or network printer with manual settings, and click Next.
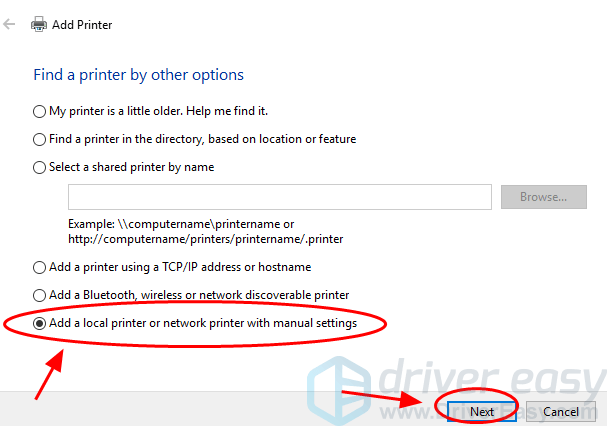
3) Follow the wizard prompted to add your printer.
Way 2: Update your printer driver
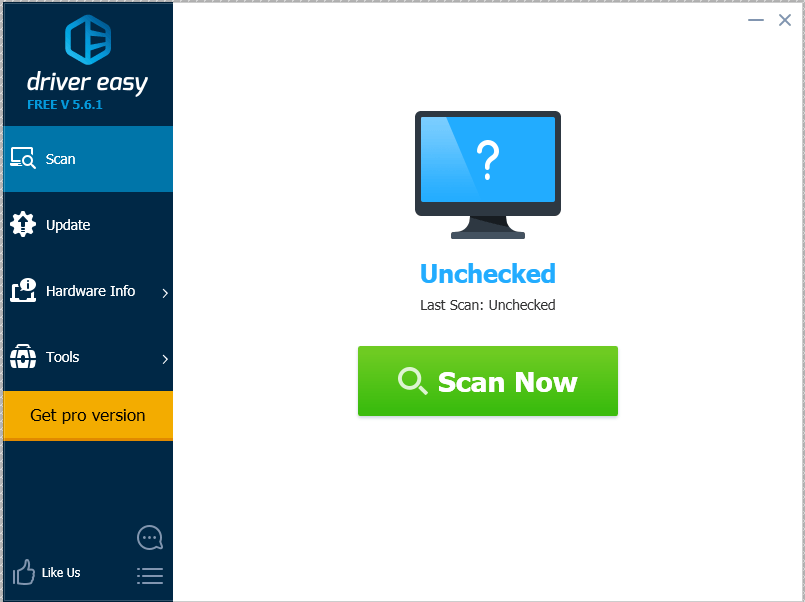
The missing or outdated printer driver can cause the issue, so you should update your printer driver to fix it. There are two ways to update drivers: manually and automatically. Manually – You can manually update the printer driver by searching the correct driver that is matched with your Windows OS on the manufacturer’s website, and install it in your computer. This requires the time and computer skills. Automatically – If you don’t have time or patience to manually update drivers, you can do that automatically with Driver Easy. Driver Easy will automatically recognizes your system after scanning, then find and install automatically the latest drivers for you, which saves your time – It only takes 2 clicks to automatically update your printer driver with Pro version and you’ll have a 30-day money back guarantee. 1) Download and install Driver Easy. 2) Run Driver Easy and click Scan Now. Driver Easy will then scan your computer and detect any problem drivers. 3) Click the Update button next to a flagged printer driver to automatically download and install the latest printer driver (you can do this with the FREE version). Or click Update All to automatically download and install the all the latest correct drivers that is missing or outdated in your system (This requires the Pro version . You will be prompted to upgrade when you click Update All).

4) Restart your computer and check whether your printer works. There you have it – connect you WiFi printer to your WiFi network and your computer. Now try printing and enjoy the flawless workload. If you have any question or idea, feel free to leave us a comment below.