- Access the CLI via PuTTY using a Console Connection on 300 and 500 Series Managed Switches
- Objective
- Applicable Devices | Software Version
- Accessing the CLI via PuTTY with a Console Connection
- iSmooth Blog
- How to Connect Cisco Switch with Serial Console Port on Linux
- Install Minicom from Package Manager
- Debian/Ubuntu
- RPM
- Pacman
- Connect RJ45 Console Port to Linux Computer
- RS232 to RJ45
- USB to RJ45
- Configure Minicom to Work with Cisco Switch
- Find Serial Connection Path
- Create Configuration File
- Communicate with Cisco Switch Serial Console
Access the CLI via PuTTY using a Console Connection on 300 and 500 Series Managed Switches
The documentation set for this product strives to use bias-free language. For the purposes of this documentation set, bias-free is defined as language that does not imply discrimination based on age, disability, gender, racial identity, ethnic identity, sexual orientation, socioeconomic status, and intersectionality. Exceptions may be present in the documentation due to language that is hardcoded in the user interfaces of the product software, language used based on RFP documentation, or language that is used by a referenced third-party product. Learn more about how Cisco is using Inclusive Language.
Objective
Switches can be accessed and configured through the Command Line Interface (CLI). Accessing the CLI allows commands to be entered in a terminal based window. For a user who has had more experience with terminal commands, this may be an easier alternative to navigating the web configuration utility. Certain tasks such as recovering an administrator password can only be performed through the CLI. In order to access the CLI you must use an SSH client. PuTTY is a standard SSH client and can be found here. This document assumes you are connecting to the switch using PuTTY. The objective of this document is to show you how to access the Command Line Interface (CLI) of a switch and a Secure Shell (SSH) client. Note: Cisco 200 Series Small Business Managed Switches do not support the CLI.
Applicable Devices | Software Version
- Sx300 Series | 1.2.7.76 (Download latest)
- Sx350 Series | 1.2.7.76 (Download latest)
- SG350X Series | 1.2.7.76 (Download latest)
- Sx500 Series | 1.2.7.76 (Download latest)
- Sx550X Series | 1.2.7.76 (Download latest)
Accessing the CLI via PuTTY with a Console Connection
Step 1. Connect the switch to the computer using a standard 9-pin serial cable.
The Cisco DB9 to RJ45 Console Cable also supports console connections, but only if the switch has an RJ45 Console port. An RJ45 Console port resembles an Ethernet port and is labeled CONSOLE on the back of the switch.
Newer laptops don’t have Serial ports on them, so in this case you have to use a USB to Serial adapter. When plugging that into a computer it assigns a COM port number to it that is not COM1. If this is the case for you, you need to know where to look to find the correct COM port number when setting up the connection with PuTTY. Right-click on the Windows logo/Start menu and click on Device Manager to open it.
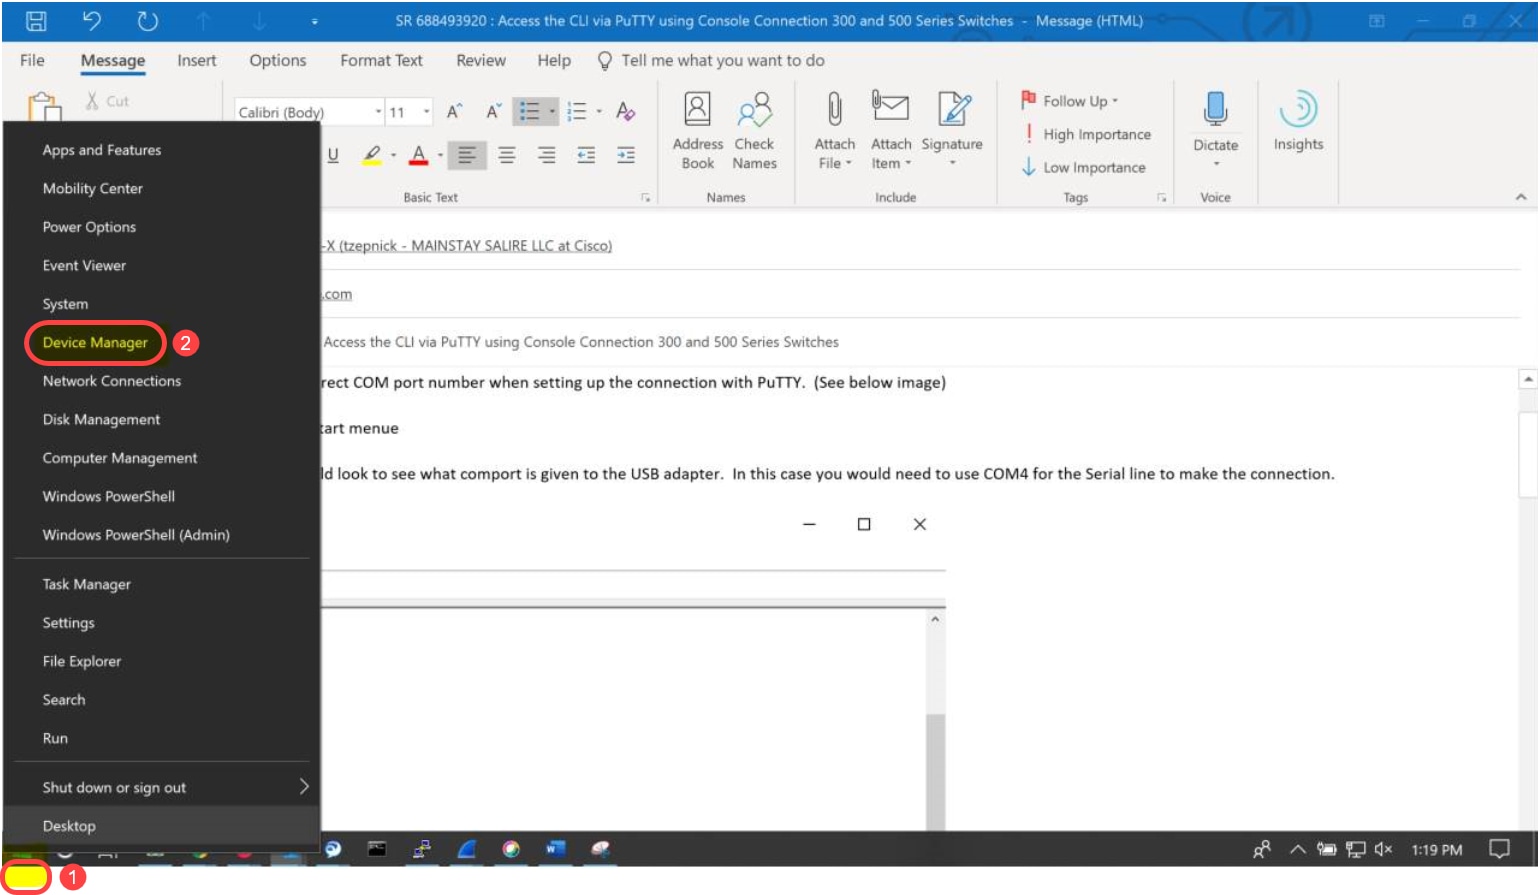
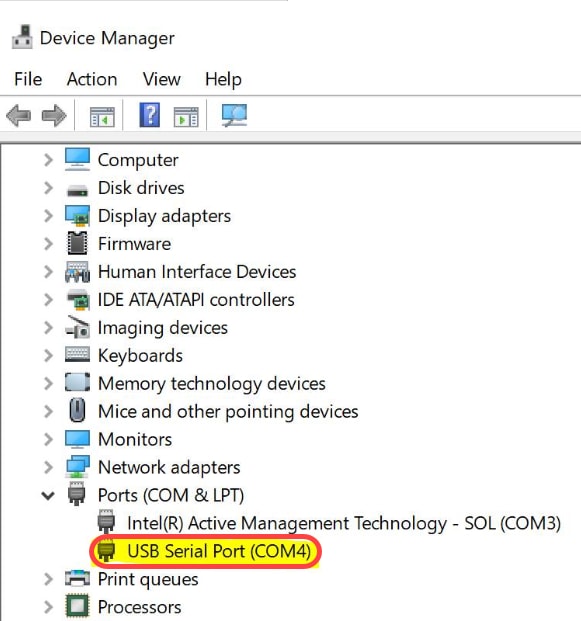
In the Device Manager, you would look to see what COM port is given to the USB adapter. In this case you would need to use COM4 for the Serial line to make the connection.
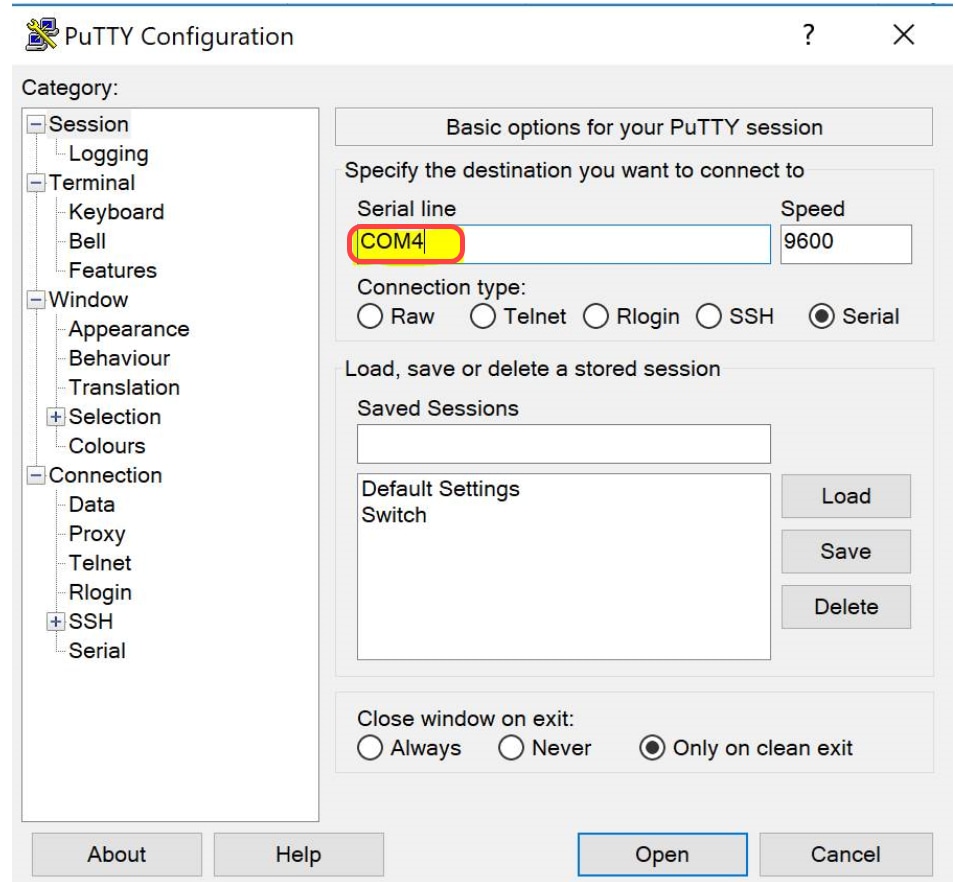
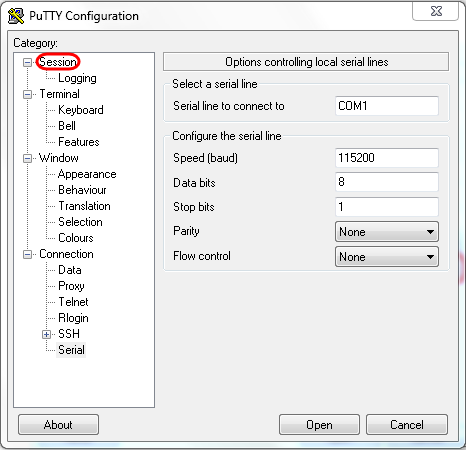
Step 2. Open the PuTTY application. The PuTTY Configuration window opens:
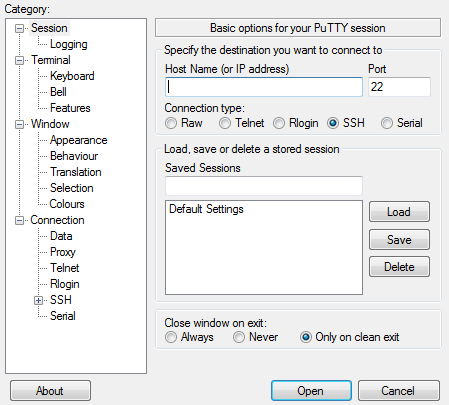
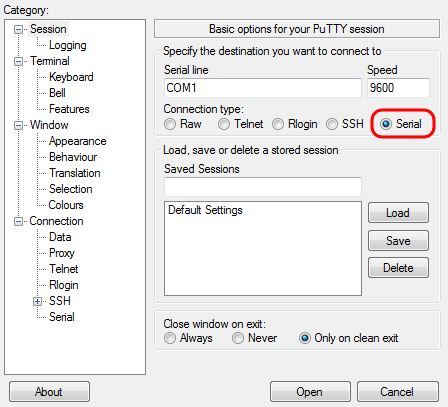
Step 3. Under the Connection Type field, click the Serial radio button.
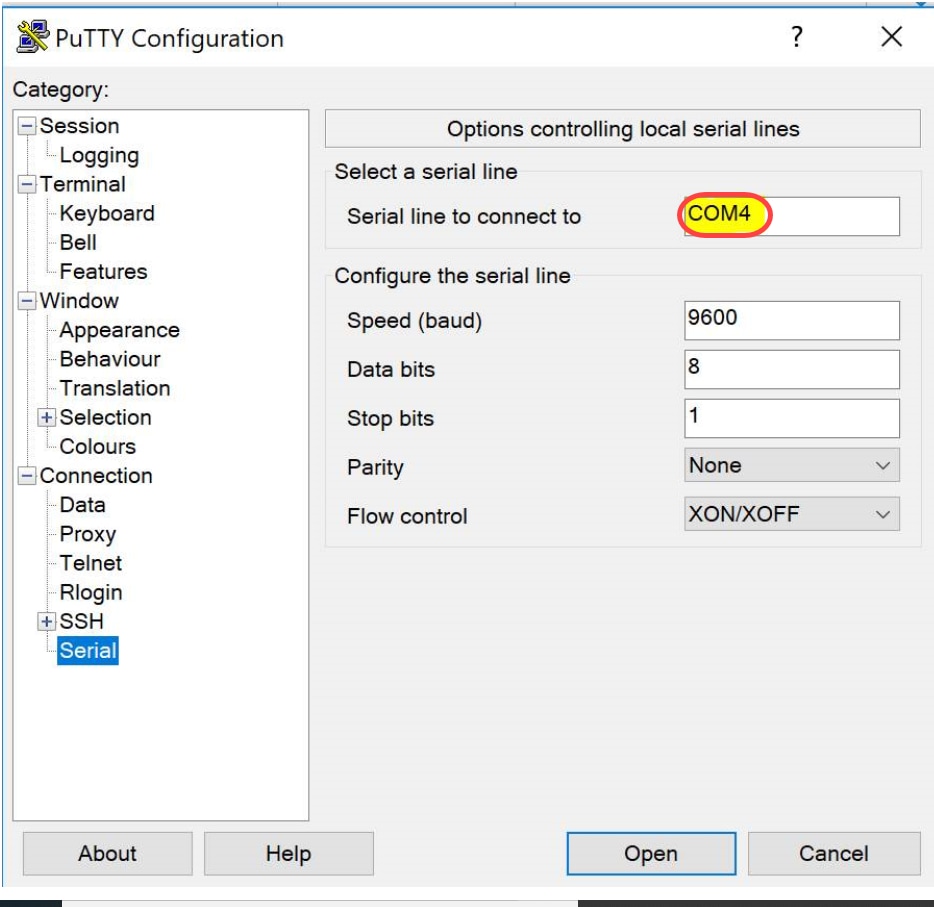
Step 4. In the Category navigation field, choose Serial.
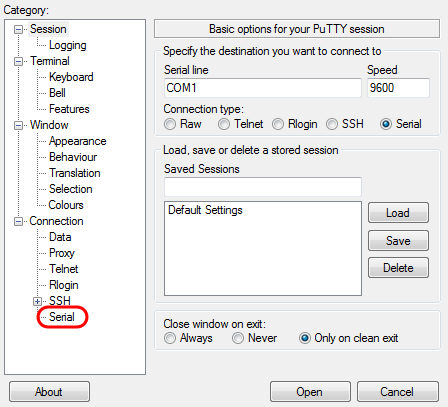
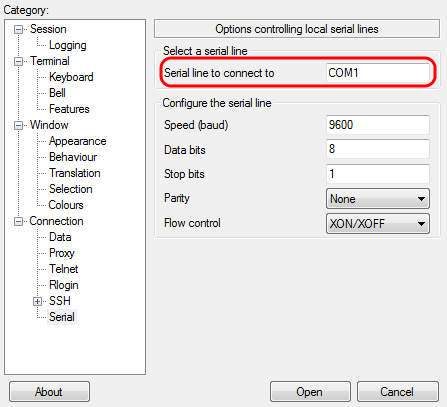
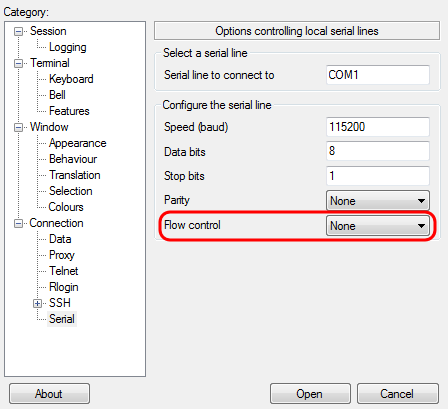
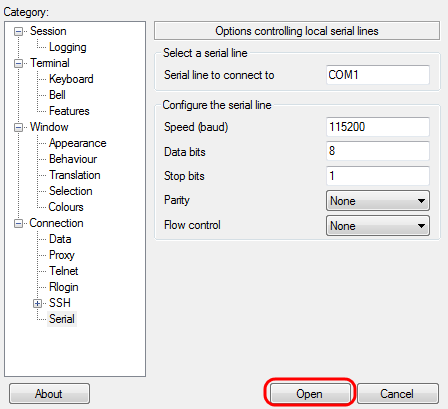
The Options controlling local serial lines page opens:
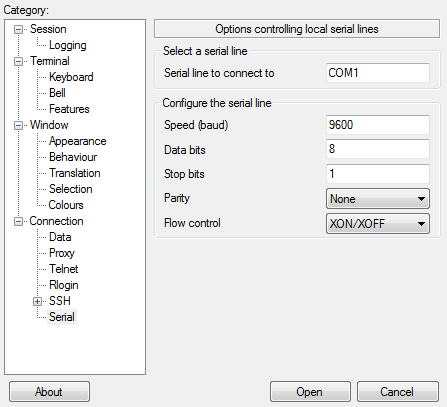
Step 5. In the Serial line to connect to field, enter the COM port that your device is connected to. The default COM port is COM1.
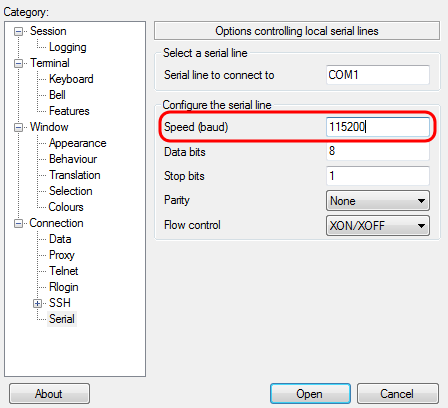
Step 6. In the Speed (baud) field, enter the digital transmission speed that is compatible with the switch. For 300 and 500 Series Managed Switches, the speed must be set to 115200.
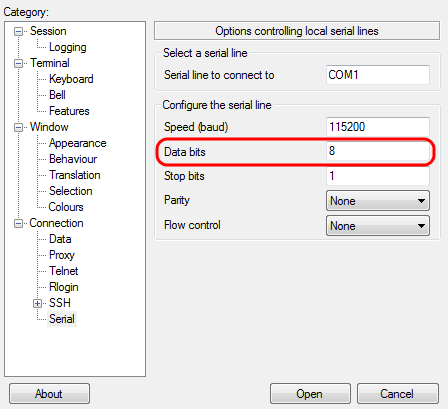
Step 7. In the Data bits field, enter the number of data bits used for each character. The recommended value is 8.
Step 8. In the Stop bits field, enter the number of bits to be sent at the end of every character. The stop bit informs the machine that it has reached the end of a byte. The recommended value is 1.
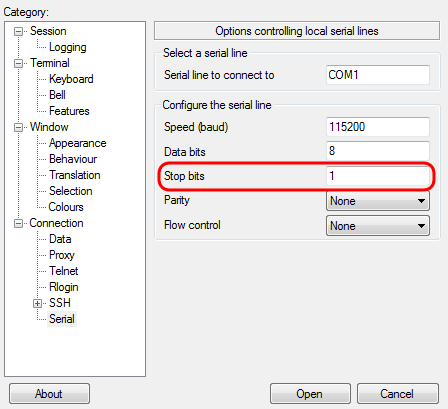
Step 9. In the Parity drop-down menu, select the method of detecting errors in transmission. The recommended method for detecting errors in transmission is None.

Step 10. In the Flow Control drop-down menu, select the method of preventing data overflow. The recommended method for preventing data overflow is None.
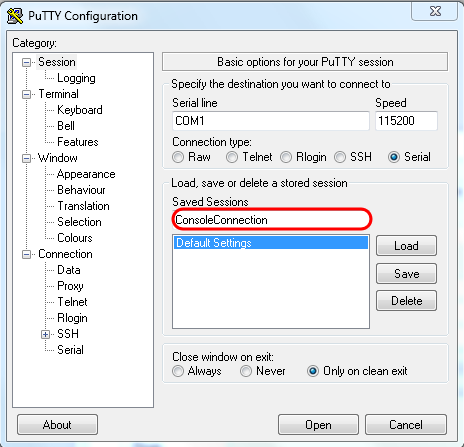
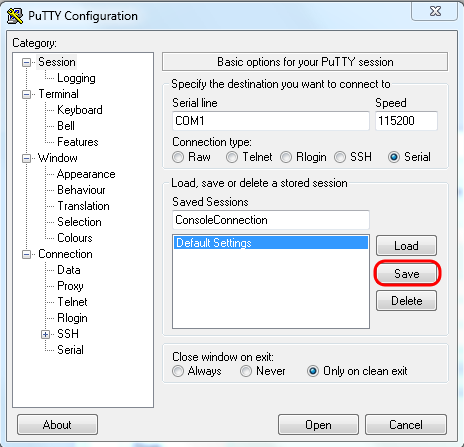
Step 11. (Optional) In order to save the connection settings for future use, go to the Category navigation pane and choose Session. If you do not wish to save the connection settings, skip to Step 14.
Step 12. Under the Saves Sessions field, enter a name for the settings to be saved as.
The COM1 – PuTTY console window opens.
Step 15. Hit Enter on the keyboard to activate the Command Line Interface (CLI). The log in prompt is displayed:
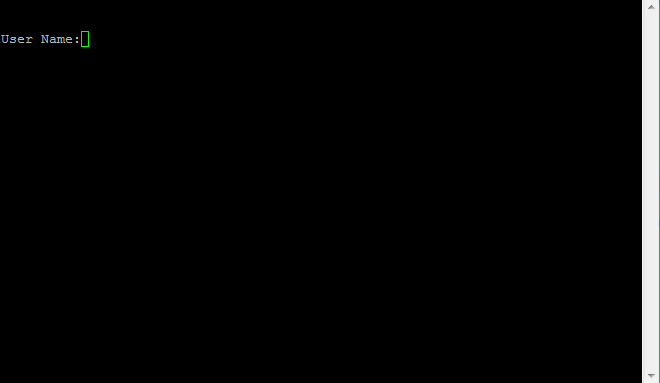
Step 16. Enter the User Name. The default username is cisco.

Step 14. Enter the Password. The default password is cisco.
iSmooth Blog
How to Connect Cisco Switch with Serial Console Port on Linux
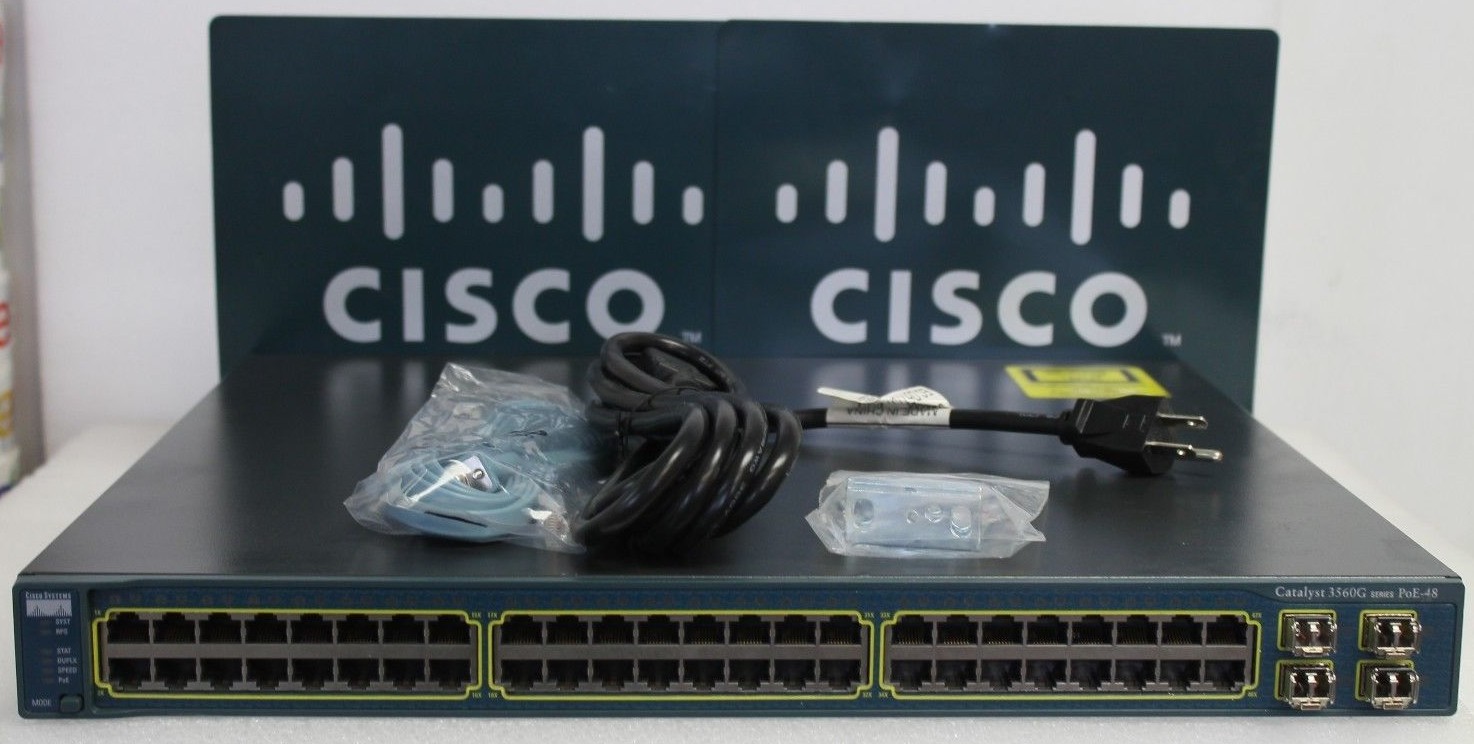
Yeah, I managed to put my hands on a Cisco Catalyst 3560G Series switch which was specifically meant for enterprise use cases and I actually got it from the local market selling used stuff at my country, it’s working perfectly in a very good condition.

Of course, the first thing you will have to do after purchasing a used network switch is resetting it to factory settings and it’s really straight forward when it comes to Cisco switches, I will write about that later on in a new post.
Then, you definitely want to configure it to work in your own network with specific settings because it is a smart switch for which you want to reach its command line through the serial console interface and that’s what I am going to explain in details today.
Since I am labeling this as a Homelab tutorial where we mostly like to run Linux on our servers and desktop computers, I would rather explain through steps specifically on that operating system and its widely known distributions including:
- Debian based distributions like Ubuntu, Elementary OS, Mint, etc.
- RPM Package Manager (RPM) based distributions like CentOS, Fedora, etc.
- Pacman Package Manager based distributions like Arch and Manjaro.
And many others, there’s no limit for the diversity of an open source project like Linux but definitely the software and steps we are going to use are the same.
Install Minicom from Package Manager
That’s why I’ve been mentioning each distribution matched with its package manager. We need to install the package for «Minicom» which is described by the maintainer as follows:
Minicom is a text-based serial port communications program. It is used to talk to external RS-232 devices such as mobile phones, routers, and serial console ports.
Now, just figure out what is the package manager for your Linux distribution and open up a terminal on your screen.
Debian/Ubuntu
sudo -s apt update apt install minicom exitRPM
sudo -s yum install minicom exitPacman
sudo -s pacman -S minicom exitThat’s about it, you should now be ready to go.
Connect RJ45 Console Port to Linux Computer
In order to connect with the RJ45 console port on the back of your Cisco switch you have two options.
RS232 to RJ45
This is actually the cable that comes packed originally in the box when you buy the switch, if you don’t have one of these just buy from AliExpress or Amazon. I got mine from this seller on that link.
This won’t work if your Linux computer motherboard doesn’t have an RS232 DB9 COM Serial Port which leaves you with the second option.
USB to RJ45
This might be the ideal choice for many of you, because every motherboard will definitely include some USB ports. I also happen to have one of these and I bought it from this seller on that link.
Configure Minicom to Work with Cisco Switch
Okay, it’s time to create a Minicom configuration file.
Find Serial Connection Path
The moment you connect the switch from its RJ45 console port to your Linux computer, open up a terminal and enter.
Let me show you a sample output if you are using an RS232 to RJ45 cable.
[ 0.000000] console [tty0] enabled [ 0.726168] 00:08: ttyS0 at I/O 0x3f8 (irq = 4, base_baud = 115200) is a 16550AIn the other hand if you are using an USB to RJ45 cable, you should get something like this.
[155582.296838] usb 3-2: FTDI USB Serial Device converter now attached to ttyUSB0What you are looking for is the text marked with white colour as shown in the samples above. Now, accordingly for each output sample the serial connection path is:
Note yours down and proceed to the next step.
Create Configuration File
Again, open the terminal and enter.
You will be greeted with the main menu list for Mnicom now go to Configuration → Serial Port Setup and you should see another menu to define which serial port path you are going to use.
Now, press A on your keyboard and enter the serial connection path that you have noted from the previous step which is for example something like this /dev/ttyUSB0 in my case, then press Enter to go back to the serial port setup menu.
Next, press E on your keyboard, resulting in another menu for Bps/Par/Bits rate, from that menu press C to set the rate to 9600 8N1 then press Enter to go back to the serial port setup menu.
Last but not least, I prefer to enable the Hardware Flow Control so just press F on your keyboard and toggle that option to Yes then press Enter to go back to Minicom main menu.
In the main menu choose the Save setup as option and give it a name, in my case I named it as cisco then finally press Enter and you have successfully created a Minicom configuration file to connect with your Cisco switch.
Communicate with Cisco Switch Serial Console
Basically, every time you want to communicate with your Cisco switch you will only have to load the configuration file that you have created for Minicom with a simple single command from the terminal.
Notice that I am running Minicom calling the «cisco» configuration file that we created earlier, if everything is done correctly press «Enter» right after you run that command and you will be presented with something like this:
Welcome to minicom 2.7.1 OPTIONS: I18n Compiled on Aug 13 2017, 15:25:34. Port /dev/ttyUSB0, 02:35:45 Press CTRL-A Z for help on special keys Switch>If you can see the hostname «Switch» then that indicates it has connected successfully, enter any command to the switch like show interface for example, and see if you are getting a response to make sure.