- How do I connect my RTH8500WF WiFi Series WiFi Touchscreen Programmable Thermostat to WiFi and register it?
- CONTACT US
- MESSAGE US
- CHAT US
- CALL US
- Honeywell ScanPal RUS. Как настроить wifi (пошаговая инструкция)
- Honeywell Thermostat WIFI Setup and Register
- How To Set up Honeywell Thermostat Wifi?
- Use the below steps for Honeywell thermostat wifi setup:
- Registration Failed – what to do?
- Conclusion
- Author
- How To Connect A Honeywell Thermostat To WiFi: All Models
- Troubleshooting Thermostat WiFi Connections
How do I connect my RTH8500WF WiFi Series WiFi Touchscreen Programmable Thermostat to WiFi and register it?
Connecting your thermostat to WiFi can be performed during the initial setup and configuration, or later at a time you choose. Connecting to WiFi – Initial Setup: After the Configuration step during the initial install, you will be prompted to connect your VisionPRO WiFi 8000 to your Home WiFi. The VisionPRO WiFi 8000 (TH8321WF) can be connected to WiFi on the thermostat itself after initial setup / configuration, or from the Menu > WiFi Setup screen. After successful connection, register your product on the mytotalconnectcomfort.com/portal website to complete the process and control the thermostat remotely. The VisionPRO WiFi 8000 (RTH8580WF / TH8320WF) uses a 3-step connection and registration process Step 1 – Connect your mobile device to the thermostat’s WiFi network (NewThermostatxxxxxx) Step 2 – Connect the thermostat to your home WiFi (via an internet browser on your mobile device) Step 3 – Register in the My Total Connect Comfort web portal *Registration cannot be performed with the mobile app, currently only supported via the web portal* Step 1 – Connecting your mobile device to the thermostat’s WiFi network (NewThermostatxxxxxx) Once installed and configured, the (TH8320WF / RTH8580WF) thermostat will display “WiFi Setup”. Open the Settings – WiFi on your mobile device and connect to the WiFi network named “NewThermostatxxxxxx”. *If your thermostat does not display WiFi Setup remove the thermostat faceplate from the wall plate for 30 seconds and then reattach it. If WiFi setup does not display, enter the Installer Setup (press the System button, then hold the center blank box at the bottom of the thermostat display for 5-10 seconds until the screen changes) and use the User / Installation Guide to navigate the settings to function 0890 . Make sure function 0890 is set to 1, then proceed to function 0900. Use the up or down arrow to change function 0900 function to 0 then press done. WiFi setup will then be displayed on the screen. Return to step 1.* **TH8321WF – After initial configuration, you will be prompted to connect to WiFi. Select your Home WiFi network, then enter the password on your thermostat screen** Step 2 – Connect the thermostat to your home WiFi (via an internet browser on your mobile device) Skip this step for the TH8321WF. TH8320WF / RTH8580WF — After connecting to the thermostat WiFi, open a web browser (Safari, Chrome, etc.) You should be automatically guided to a page labeled “Thermostat WiFi Setup. If you are not automatically guided there, enter the IP address: 192.168.1.1 into the address bar on your browser to navigate there manually. You should see your Home WiFi network listed. Select it and enter your WiFi password. After a brief connection period, your thermostat will display a “Connection Success” message. Reconnect your phone to your home WiFi network if your device does not reconnect automatically *If you do not see your home WiFi network, refresh the list. If your WiFi network is still not displayed, check the Trouble Connecting? / WiFi network recommendations below.* Step 3 – Register at mytotalconnectcomfort.com/portal Registration is completed at mytotalconnectcomfort.com/portal. Navigate to the page and create an account / login. Select the “Add Device” icon and Input the MAC ID / CRC for your device. (MAC ID / CRC are located on your thermostat information card, on the back of the thermostat, or from the Menu > Equipment Status screen]) Complete the security check (if prompted) and follow the directions within the web portal to complete the registration.
Thanks for your feedback! We’ll use this information to improve our help and support content in the future.
CONTACT US
MESSAGE US
Message us on Twitter for help with our products. Monday through Friday:
9am to 6pm CDT
Saturday and Sunday:
9am to 5pm CDT
CHAT US
Connect with an agent for quick assistance. Monday through Friday:
9am to 8pm CDT
Saturday and Sunday
9am to 5pm CDT
CALL US
Homeowner Support
1-800-633-3991
Open Hours:
Monday through Friday: 9am — 8pm CDT
Saturday and Sunday: 9am — 5:30pm CDT
Online Order Support and Customer Service
1-800-664-2751
Open Hours:
All day (24 hours), Monday through Sunday
Professional Contractor Support Call the Homeowner number above and select the ‘Contractor’ option. Open Hours:
Monday through Friday: 9am — 5:30pm CDT
Honeywell ScanPal RUS. Как настроить wifi (пошаговая инструкция)

Honeywell ScanPal RUS – терминал сбора данных, адаптированный производителем под российского потребителя: на клавиатуре помимо латинских букв напечатаны русские. ScanPal RUS берут для работы в магазинах и других торговых предприятиях, на складах и в офисах. В ТСД ScanPal RUS установлена емкая литий-ионная батарея (ее хватает на восьмичасовой рабочий день с интенсивной нагрузкой), передача данных может вестись несколькими способами, один из них – wi-fi. Своими впечатлениями о том, как настраивается wi-fi в тсд ScanPal RUS, делится исполнительный директор ЦАМБ Дмитрий Бычков. Добрый день, коллеги.  Сегодня, отгружая одному из клиентов терминал Honeywell ScanPal RUS, у меня возник вопрос – насколько быстро и просто на таком недорогом терминале настраивается вайфай. Оговорюсь, я старый и большой поклонник Motorola, но при этом знаю, что в бюджетных версиях тсд Motorola настроить wi-fi – то еще удовольствие что по времени, что по количеству действий. Итак, берем Honeywell ScanPal RUS.
 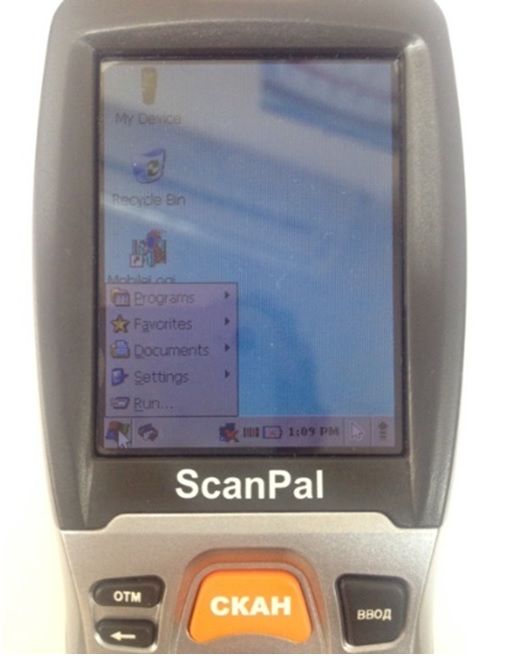 Меню Пуск – все как на компьютере. Только управлять мышкой приходится с клавиатуры – экран-то у ScanPal не сенсорный. Управление напоминает игру змейка на Nokia 3310.
 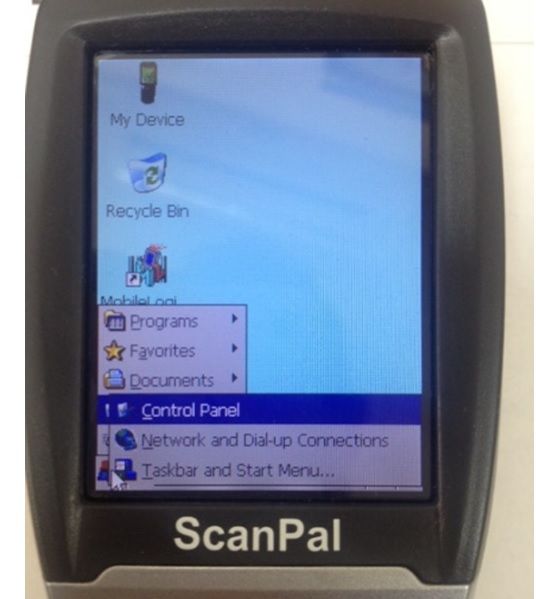 Контрольная панель ScanPal RUS.
  Панель вполне вменяемая. Обычно у бюджетных устройств практически нет никаких возможностей конфигурирования, а тут тебе — пожалуйста. Полный разгул фантазии.
 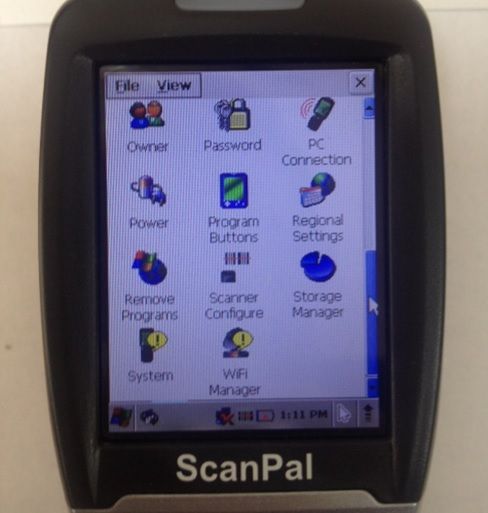 Спускаемся в самый низ и выбираем «WiFi Manager».
 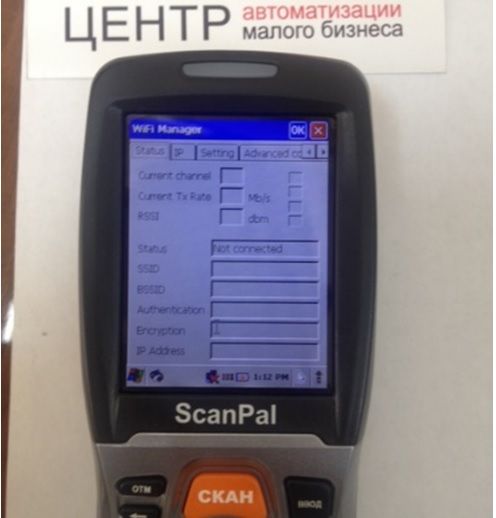 Выбираем нужную вкладку и нажимаем единственную кнопку для поиска сети.
 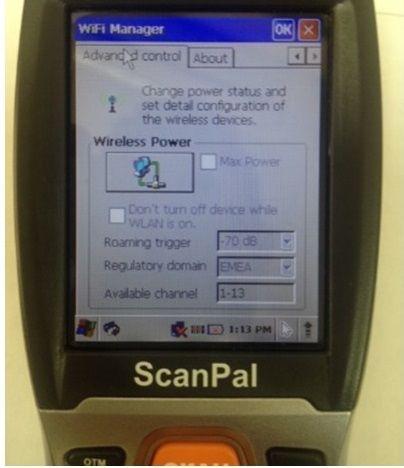 Выбираем нужную сеть и нажимаем «Ок» вверху окна. Вуаля – сеть на scanpal rus настроена. Ну и грех было не проверить, работает или нет. Работает.
 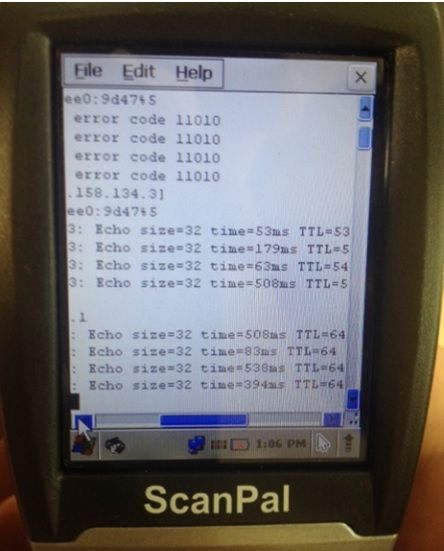 Итак, настроить WiFi на Honeywell ScanPal RUS очень просто, интуитивно понятно. Быстро: сделать скриншоты и написать эту инструкцию времени заняло больше, чем настроить WiFi. Вывод: Для своей цены у Honeywell ScanPal RUS всё очень хорошо и удобно. Рекомендую. С уважением, Дмитрий Бычков. По вопросам покупки, настройки обслуживания Honeywell ScanPal RUS и других терминалов сбора данных обращайтесь к нам. Всегда рады сотрудничеству!
Honeywell Thermostat WIFI Setup and Register

I recently bought the Honeywell thermostat for my home. People who come to my blog regularly know that I had been using the Nest Learning thermostat previously but looking at the demand and reviews of the Honeywell Thermostat, I thought of trying one and see how good it is compared to Nest.
But this article is all about the setup process for Honeywell Thermostat. Since I am new to using it and couldn’t find the exact setup steps while searching on the internet, I thought of sharing this with you all.
There are a lot of benefits that a smart Wifi thermostat provides, you can control your home temperature using your smartphone and even set up the temperature when you are on a vacation or away and need to save money on your energy bill.
But before we talk about the benefits of using a smart thermostat, let’s get into how to do a Honeywell thermostat Wifi setup!
Two things you need before you connect to a wireless network-
- Wireless Network Name (SSID)
- Wireless Network Key (Password)
How To Set up Honeywell Thermostat Wifi?
So, before we start to connect the Honeywell thermostat to wifi, download Honeywell Total Connect Comfort App.
Use the below steps for Honeywell thermostat wifi setup:

- Most of the time, you will see the “Wi-Fi SETUP” displaying on the thermostat screen. If you don’t see it, you can put it in to set up mode manually.
- Press and hold the FAN and UP button for 5-10 seconds. You will see 2 numbers appearing on the screen.
- Now, use the NEXT button and change the number to 39.
- Use the Arrow keys and bring the number to 0 and press Done.
- Voila! You are done with bringing the Honeywell thermostat to wifi setup mode.
- Search the network that starts with NewThermostat….. and connect your smartphone to the network.
- Open your web browser and it will automatically take you to the Wifi setup page. If it doesn’t open automatically, you can open the address http://192.168.1.1 in your browser.
- Now, search your home wifi and connect to it and Enter the password if prompted.
- You will see a waiting message appearing on the screen and once the process is completed it would go away automatically.
- Now, you can control your thermostat through the App or website.
When you use your device for the first time, registration is needed. You can register your device by following the below steps.
- Go to “https://www.mytotalconnectcomfort.com/portal”.
- Click on “create on Account”, if using a new thermostat, or click on “Login” if using a used thermostat.
- Click on “Add a Device” and enter MAC ID / CRC. You can find this MAC ID on the back of the thermostat.
- Follow the on-screen instruction and your device will be registered.
- You will get the confirmation message once the thermostat is registered.
Registration Failed – what to do?
Some of the time registration fails and mostly it happens when you are using your used Honeywell thermostat and the previous has not deleted the account.
In this case, you can contact the previous owner and ask them to remove the device from their account or you can contact customer care to deregister the device.
Conclusion
Honeywell Thermostat Wifi setup is 5 mins job if you know the exact steps. Once you connect your Honeywell thermostat to Wifi, you can monitor and control your house temperature, humidity and even see the outside temperature from anywhere around the globe.
I am liking this thermostat and if you need to know How To Set Honeywell Thermostat Temperature you can go through my article where I have included the troubleshooting procedure for all models.
Author
Jason is an expert writer and is passionate about Smart Homes and Home Improvements writing as well as lifestyle and Lawn Care. He spent the past twelve years living in Hawaii, where he worked closely alongside event planners and resort owners to perfect his knowledge of luxury products and aesthetics. He discovered his passion for DIY projects and home improvement there. Currently, he lives in Washington D.C with his family and 2 pets. View all posts
How To Connect A Honeywell Thermostat To WiFi: All Models

Some Honeywell thermostats have a WiFi feature built into the product, which opens up a new world of convenience for the homeowner. Getting the WiFi on these devices set up and working can pose a challenge, mainly when things don’t go according to plan. Following the steps closely to get your WiFi set up on your Honeywell thermostat will get you going in no time!
Each Honeywell Thermostat has a different method for setting up WiFi connectivity. Honeywell manufactures several WiFi thermostats and allows the unit to be controlled remotely via your smartphone or other devices connected to the internet.
Suppose you have a new Honeywell WiFi compatible thermostat installed, or for some reason, your existing thermostat has lost connection to the WiFi network. In that case, you will want to get your device back on the network to access all the features that this offers. It is not always necessary to call out an HVAC professional to fix this problem, so we have provided some information to get the job done yourself.
Troubleshooting Thermostat WiFi Connections
First, if it is a new unit, and you are trying to set it up for the first time on your network, or secondly, it is an existing unit that has lost its connection, and you are trying to re-establish the connection. These are some scenarios that fall into the scope of connecting your Honeywell thermostat to the WiFi network.
When troubleshooting a problem, it is always best to start with the simplest potential issues and work towards the more complicated issues as you eliminate the possibilities one by one.
If your thermostat is new and you are trying to connect it to the WiFi network for the first time, then you can skip down to the steps on how to get your thermostat connected.
If your thermostat was connected to the WiFi and, for some reason, it has now lost connection; you may want to perform some troubleshooting as the initial step before looking at the thermostat itself.