- (Resolved) SSH Connection Refused on Ubuntu & Debian
- The Problem:
- How to Resolve “Port 22: Connection refused” Error
- 1. SSH Server is not installed
- 2. Check SSH Service is Active and Running
- 3. SSH service is running on a different port
- 4. SSH port is blocked by the firewall
- Conclusion
- How to Fix Connection Refused by Port 22 Debian/Ubuntu
- Verify OpenSSH Installation on Your Linux System
- Check SSH Service
- Allow SSH in Firewall
- Resolve Duplicate IP Address Conflict
- Conclusion
- About the author
- Karim Buzdar
- Как решить? «ECONNREFUSED — connection refused by server»
- Первый Метод. Изменение Дефолтного Значения Порта FileZilla
- Второй Метод. Отключение Антивируса/Брандмауэра
- Третий Метод. Изменение Мастера Настройки Сети FileZilla
- Выводы
(Resolved) SSH Connection Refused on Ubuntu & Debian
The “Connection Refused” error means that the computer is not accepting connection requests to the requested IP address and port. Connection requests may be blocked by a firewall, which is why “Connection refused” is displayed.
When a computer receives a connection request from an IP address and port that it wants to connect to, but the firewall blocks the connection, the “Connection Refused” error message appears. “Connection refused” can be due to a firewall blocking connection requests. In some cases, none of the services are listening on the requested port also causes the “Connection Refused” error.
The Problem:
Today, I installed a new Ubuntu system on my LAN network. I faced an error “Port 22: Connection refused” during the SSH connection to this system. After a bit troubleshoot, I got that there is no SSH server running on the newly installed system.
I got the error message below:

How to Resolve “Port 22: Connection refused” Error
There are the 4 most common reasons behind this error. One or more reasons can cause this issue as listed blow.
- SSH Server is not installed
- SSH service is not active
- SSH service is running on a different port
- SSH port is blocked by the firewall
Let’s discuss all the possible solutions one by one.
1. SSH Server is not installed
The OpenSSH is used for SSH service on Debian-based systems. Some of the newly installed systems may not have SSH daemon. Most likely, when you install a new Desktop system, the OpenSSH packages are not included by default.
You can run the following commands to install the ssh service on your system.
sudo apt udpate && sudo apt install openssh-server Once the installation is finished, you can connect to your system on port 22. If you are still facing issues, check for other reasons defined below.
2. Check SSH Service is Active and Running
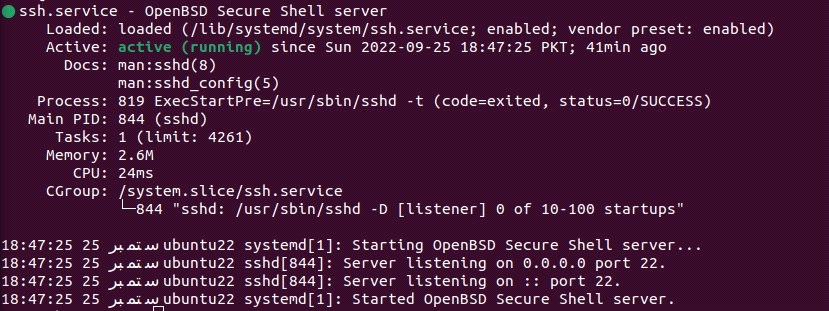
Generally, the SSH service is started automatically after the installation. But might be service is stopped due to some reason. To check the current status of the SSH service, execute:
sudo systemctl status ssh If the SSH service is not running or not active, use the below-mentioned commands to enable service on system startup and start service.
sudo systemctl enable sshsudo systemctl start ssh
Once the service is started successfully, you can connect to your system over ssh. In case, you still face the same error, check for the next possible issue.
3. SSH service is running on a different port
Might be the SSH service is listening on a different port. That is also a best practice for securing servers. You can find out the SSH server port by running the following command.
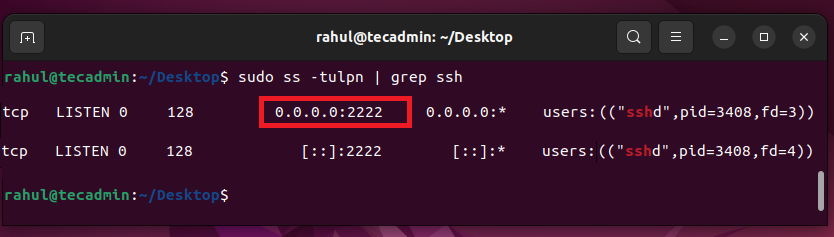
The above screenshot shows that the SSH service is listening on port 2222. You should connect the remote system with SSH on port 22. We can define a port number with an SSH connection as the below-mentioned command.
Hope this will resolve your issue. If still you are facing the same issue, check the below suggestion.
4. SSH port is blocked by the firewall
This is the most common cause that the firewall is blocking the requests.
Now, you need to identify, what firewall are you using. If the remote system is on the cloud hosting, check the security group of that hosting.
On the systems with physical access, can check if UFW or Firewalld is active.
sudo systemctl status firewalld If the output shows Active: active (running) , then you can open the SSH port by running the following command.
sudo firewall-cmd --permanent --zone=public --add-port=80/tcp Conclusion
In this blog post, we have discussed four possible issues for the error “Port 22: Connection refused”. Also provides the solutions for each issue. Hope this tutorial help to resolve your issue.
If you found any other reason for this issue, please mention it in the comment.
How to Fix Connection Refused by Port 22 Debian/Ubuntu
![]()
SSH provides a secure channel to access Linux servers. Sometimes we come across the error Connection refused while connecting to SSH servers. There could be several reasons behind the error like the SSH service is inactive, the port is blocked by UFW firewall, the server is using a different port, or because of some IP conflict. Today, we will explore different ways we can resolve the Connection Refused issue on an Ubuntu/Debian system.
Verify OpenSSH Installation on Your Linux System
First, check if OpenSSH is installed on your system or not. The command mentioned below will verify it.
If OpenSSH is installed, you will see the following output on the terminal.

In case OpenSSH is not installed, we will install it by executing the following command:
Check SSH Service
Let’s now check what’s the status of the SSH service on our system. It should be active or in the running state. The reason why you are getting a connection refused error could be the inactive state of SSH on your system. Run the following command to check the status:
The output tells us it is in the active (running state).
If your SSH service is inactive, you can start it by executing the following commands:
Check SSH Server Listening Port
Perhaps, you are connecting to the wrong port which is why you are getting a connection refused error. For example, the server is listening for a connection on port 1068 but you are trying to connect to port 22.
Before trying to connect, first, verify which port is being used by the SSH server to listen to new connections. If the server is listening on default port 22, then you can use the following command syntax to make a connection:
Issue the following command to check on which port the OpenSSH server is listening:

As we can see 22 port is in use by OpenSSH to listen to connections.
In case, some other port is being used in place of 22, you will issue the command like this:
Allow SSH in Firewall
A connection refused message could also be because the firewall on your system is blocking the SSH port. To allow the port through firewall, execute this command:
If a port other than 22 is being used, you will issue the command like this:
Once the rules are updated, you will get this output on the terminal:
Reload the firewall with this command to update the rules:
Now check the status of firewall to verify if the SSH port has been allowed or not.
You will see the following message if you are using port 2244 for SSH:

Resolve Duplicate IP Address Conflict
Another reason that may be causing this issue is a duplicate IP address. So, we need to verify if the system has a duplicate address or not. To do that, we need arping utility on our system. Install it using the following command:
Now, ping the server IP address using the command syntax below:
If you receive a reply from more than one MAC address, that means a duplicate IP address is running on the system. To resolve this issue, change the IP of the SSH server.
Conclusion
In today’s guide, we discussed several reasons that could be causing the Connection refused error and several ways to resolve this issue. This article will surely help you in troubleshooting the error.
About the author
Karim Buzdar
Karim Buzdar holds a degree in telecommunication engineering and holds several sysadmin certifications. As an IT engineer and technical author, he writes for various web sites. He blogs at LinuxWays.
Как решить? «ECONNREFUSED — connection refused by server»
Вы тоже столкнулись с ошибкой ECONNREFUSED — connection refused by server в FileZilla? Тогда здорово, что вы нашли это руководство. Я покажу вам три метода, как можно исправить эту ошибку FTP.
Первый Метод. Изменение Дефолтного Значения Порта FileZilla
Причиной ошибки может быть неправильный порт при подключении через FileZilla. В этой ситуации вам просто нужно изменить порт FTP по умолчанию на дефолтный номер порта SFTP. Просто измените 21 на 22 в поле ввода “Port”.

Второй Метод. Отключение Антивируса/Брандмауэра
Иногда эта ошибка может возникать, когда антивирусное программное обеспечение и/или брандмауэр отказывает FileZilla в попытках установить соединение.
В случае, если антивирус или брандмауэр вызывает ECONNREFUSED, вам нужно просто отключить это ПО, а затем снова подключиться. Сначала я покажу вам, как это сделать в macOS:
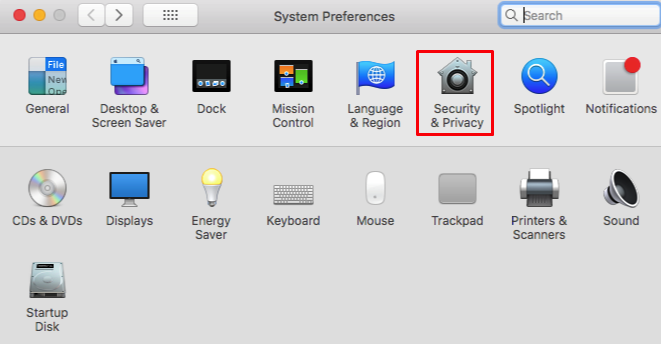
- Нажмите на иконку “Apple” в верхнем меню. Перейдите в “System Preferences”.
- Найдите раздел настроек “Security & Privacy”.
Перейдите во вкладку “Firewall” и выберите “Turn Off Firewall”.

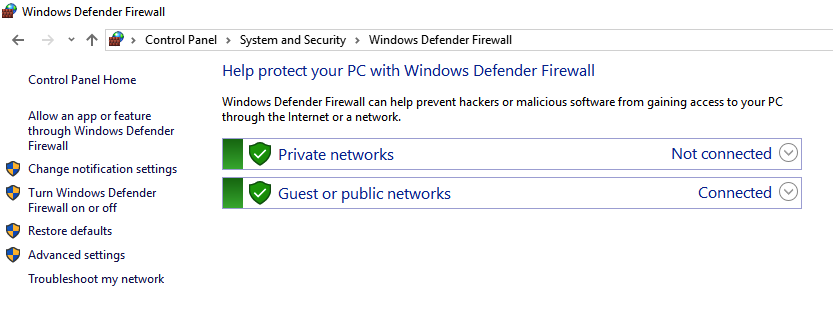
Если вы используете Windows, выполните следующие действия:
- В строке поиска по Windows введите запрос “Control Panel”.
- Затем перейдите в раздел “System & Security” и найдите “Windows Defender Firewall”.

В меню слева найдите “Turn Windows Defender Firewall on or off”.
Подробней о том, как деактивировать разное антивирусное программное обеспечение можно прочитать здесь (англ).
Если отключение антивируса или брандмауэра не помогло и вы по-прежнему получаете ошибку «ECONNREFUSED — connection refused by server», попробуйте следующий метод.
Третий Метод. Изменение Мастера Настройки Сети FileZilla
Что делать, если предыдущие решения не принесли желаемого результата? Чтобы исправить ошибку, вы также можете попробовать изменить конфигурации сети FileZilla:
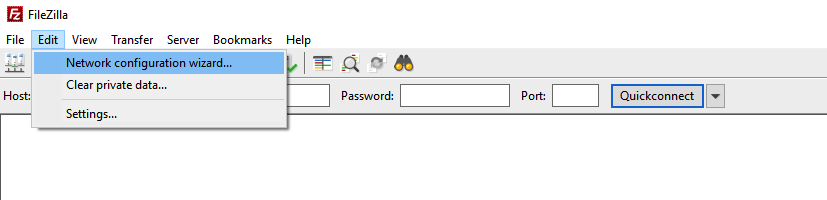
- Подключитесь к FTP-клиенту FileZilla, затем перейдите в “Edit” и выберите “Network Configuration Wizard”.
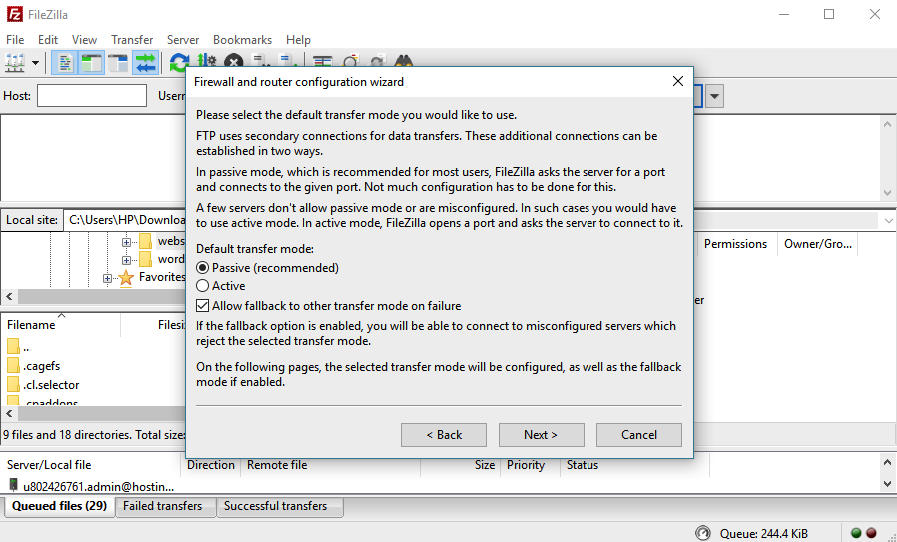
На этом этапе вам необходимо убедиться, что все настройки были выполнены правильно. Нажмите кнопку “Test”, чтобы FileZilla попыталась установить соединение с probe.filezilla-project.org. Программа выполнит несколько простых тестов.
Если тестирование пройдет без сбоев, попробуйте снова подключиться к вашей учетной записи хостинга. В этот раз все должно работать отлично. Если же ошибка ECONNREFUSED все равно не исчезла, обратитесь в службу поддержки вашего хостинга.
Выводы
Вот и все. Это и есть три метода, как исправить ошибку «ECONNREFUSED — connection refused by server». Надеемся, что один из них таки поможет вам решить проблему с FileZilla. Если у вас остались вопросы или вы знаете другие решения, не стесняйтесь оставить комментарий!