- How to convert JPEG image file to PDF format on Linux
- Convert JPEG image file to PDF format using ImageMagick
- For Debian/Ubuntu system:
- For CentOS/RHEL/Fedora system:
- Convert JPEG image file to PDF format using Ghostscript
- For Debian/Ubuntu system:
- For CentOS/RHEL/Fedora system:
- Support Xmodulo
- How to Convert Image to PDF on Linux Command Line
- 1. ImageMagick
- 2. Img2PDF
- Conclusion
- About the author
- Denis Kariuki
- 4 способа конвертировать JPG в PDF в Linux
- В этой статье
- Способ 1. JPG в PDF в Linux с помощью ImageMagick
- Способ 2. JPG в PDF в Linux с помощью LibreOffice
- Способ 3. JPG в PDF в Linux с помощью Gscan2PDF
- Способ 4. JPG в PDF в Linux с помощью PDF2Go (OCR)
- How can I convert a series of images to a PDF from the command line on Linux? [closed]
- 2 Answers 2
How to convert JPEG image file to PDF format on Linux
The JPG (JPEG) format is without any doubt the most popular format used to share images on the Internet. However, there are several advantages in using PDF images compared to JPG images. For one, while JPG is a raster format with lossy compression, PDF is a layout format that contains both vector and raster graphics.
This means that while the printing quality of JPG images depends on their pixel dimensions, PDF image files can print out exactly what you see on screen. Besides, the PDF format supports text search within PDF files using OCR, and can contain richer metadata than JPG format.
If you would like to convert JPG image file to PDF format on Linux, you can use ImageMagic or GhostScript, both of which are free Linux software.
Convert JPEG image file to PDF format using ImageMagick
First, install ImageMagick on your system.
For Debian/Ubuntu system:
$ sudo apt-get install imagemagick
For CentOS/RHEL/Fedora system:
$ sudo yum install imagemagick
Among the utilities contained in ImageMagick package, a utility called convert can convert from JPG to PDF. The convert command will scale input image such that it will fit either page width or page height. You can run convert command as follows.
$ convert input.jpg output.pdf
If you want to convert multiple JPG images to one PDF file with multiple pages:
$ convert input1.jpg input2.jpg input3.jpg output.pdf
Then each JPG file will be converted into one page of the multi-page PDF file.
The convert utility also supports various transformations of input images before PDF conversion, as described in the following.
To specify the dimension of page (i.e., image canvas), you can use -page option of convert command. If page dimension is larger than input image size, the image will be placed in lower left corner of a page.
$ convert -page 1600x1200 input.jpg output.pdf
To specify the dimension of image:
$ convert -size 800x600 input.jpg output.pdf
$ convert -resize 50% input.jpg output.pdf
Convert JPEG image file to PDF format using Ghostscript
First, install ghostscript on your system.
For Debian/Ubuntu system:
$ sudo apt-get install ghostscript
For CentOS/RHEL/Fedora system:
$ sudo yum install ghostscript
Then, run gs command to convert a JPG image to PDF format as follows.
$ gs -sDEVICE=pdfwrite -o output.pdf /usr/share/ghostscript/8.71/lib/viewjpeg.ps -c "(input.jpg) viewJPEG"
To convert multiple JPG images (e.g., input1.jpg , input2.jpg , input3.jpg ) to one PDF file (with multiple pages):
$ gs -sDEVICE=pdfwrite -o output.pdf /usr/share/ghostscript/8.71/lib/viewjpeg.ps -c "(intput1.jpg) viewJPEG showpage (input2.jpg) viewJPEG showpage (intput3.jpg) viewJPEG showpage"
Support Xmodulo
This website is made possible by minimal ads and your gracious donation via PayPal or credit card
Please note that this article is published by Xmodulo.com under a Creative Commons Attribution-ShareAlike 3.0 Unported License. If you would like to use the whole or any part of this article, you need to cite this web page at Xmodulo.com as the original source.
How to Convert Image to PDF on Linux Command Line
![]()
Often, you may need to convert or add the images to the PDF files, especially if you have an application and you want the users to download the images as PDF files.
There are different online tools that convert the images to PDF. But security is always a concern, and you can’t trust these online sites with your data. The best method is to convert the images on your machine. Linux offers various command-line utilities to aid you with that. The two common tools are Img2PDF and ImageMagick.
1. ImageMagick
ImageMagick stands out for the image conversion to PDF for its fast speed. The open-source Linux tool utilizes the multiple CPU threads to keep the conversion process fast. Whether converting one image or multiple images, ImageMagick gets the job done.
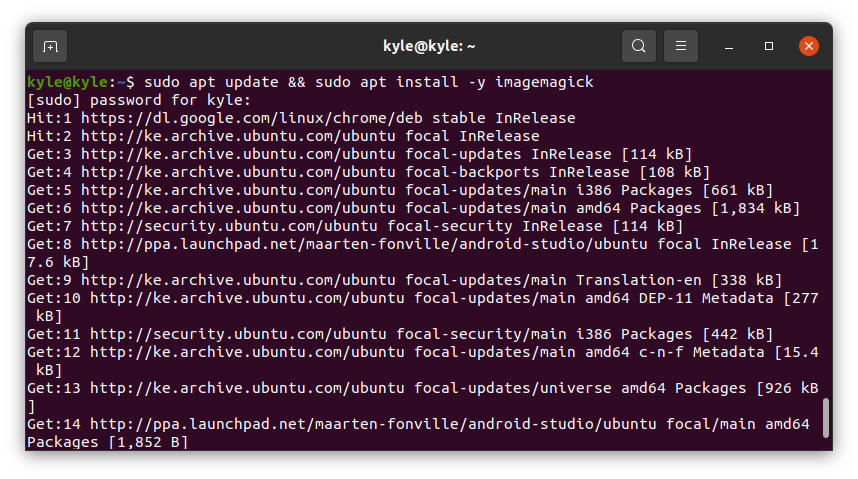
Let’s first install ImageMagick using the following command:
$ sudo apt install -y imagemagick
For Fedora users, the command is as follows:
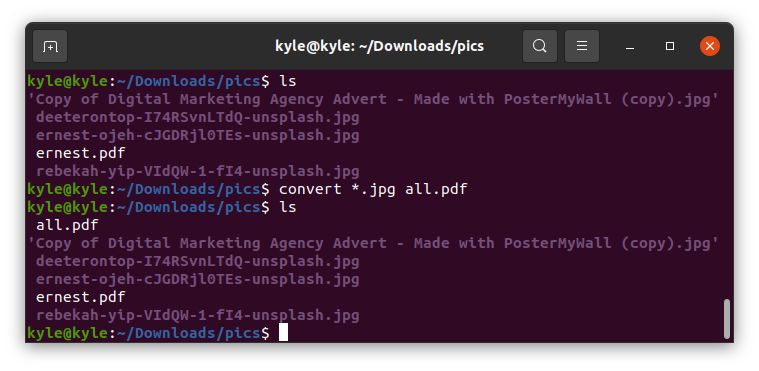
With the ImageMagick already installed, navigate to the directory containing your pictures. We have different images in our example. We will see how we can convert them one by one and how to convert them all at once.
The syntax for conversion is as following:
Note that we are using convert, a utility for ImageMagick. Let’s start by converting one image.
If you run the previous convert command, it should work fine. However, you may end up with an error message like the one reflected in the following image:
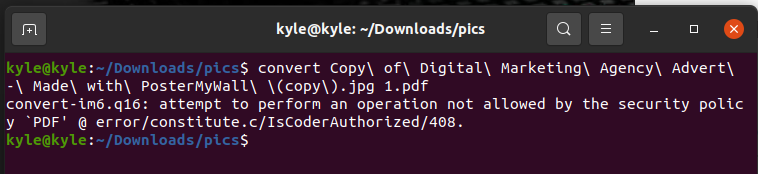
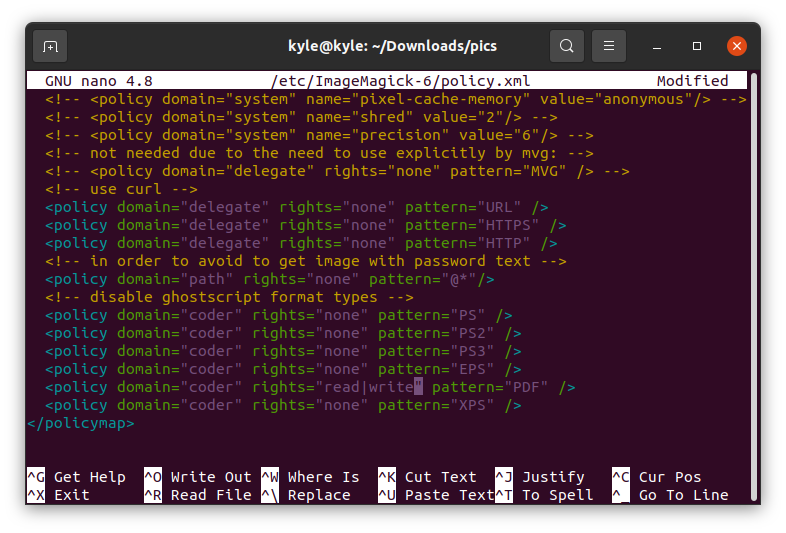
In that case, all you need is to edit the policy.xml file using an editor like nano.
Look for the line in the following example:
To fix the error, replace the rights from “none” to “read|write”
Save the file and rerun the command. You will now have a PDF file of the converted image.
To convert all the images in the current directory to PDF, you can add their names one by one or select the image format if they are the same. In our case, the image formats are in “.jpg”. In this case, our command is as follows:
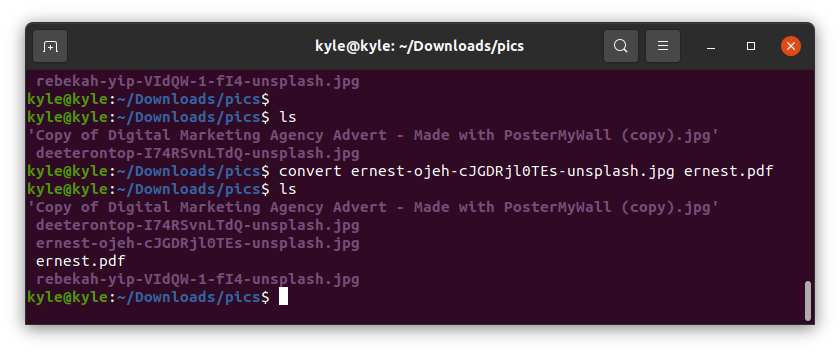
That’s it! You now have all your images converted into one PDF.
ImageMagick is a great tool for converting the images to PDF on the command line. The only bad side of it is that the resolution for the images changes and the PDF file doesn’t have the full resolution, reducing the image quality.
 2. Img2PDF
 2. Img2PDF
The ImageMagick converts the images to PDF, but the quality of the images reduces. The alternative is to use the Img2PDF to convert the same photos without losing the image quality. Besides, Img2PDF allows the specification of the image size when converting.
Start by installing Img2PDF using the following command:
You can verify the installation by checking the version.

Img2PDF can also be installed using pip in other distributions:
With the tool installed, let’s proceed to convert our images. We use the same pictures as we did with ImageMagick. First, navigate to the directory that contains your images. To convert a single file, use the following syntax:

We now have a PDF version of the image. If you want to convert multiple images, you can list them all. Or if they have the same format, use the * shorthand like in the following example:

To specify the page size or the image size for the output, use the –imgsize or –pagesize.
For instance, to specify the image size to 30cm by 45cm, the command is:

Conclusion
Converting the images of different formats to PDF shouldn’t trouble you when using Linux. There are command-line utilities at your disposal, and the syntax is easy. This guide has presented two utilities, Img2PDF and ImageMagick, that you can use to convert either one or multiple images to PDF.
About the author
Denis Kariuki
Denis is a Computer Scientist with a passion for Networking and Cyber Security. I love the terminal, and using Linux is a hobby. I am passionate about sharing tips and ideas about Linux and computing.
4 способа конвертировать JPG в PDF в Linux
Вот 4 эффективных способа конвертировать JPG в PDF в Linux: с помощью ImageMagick, LibreOffice, Gscan2PDF и PDF2Go.

Василий Лебедев
Существует 4 различных способа, которые можно использовать для преобразования файла JPG в файл PDF в Linux. Но не волнуйтесь, эта статья покажет вам, как максимально эффективно использовать каждый способ.
В этой статье
Способ 1. JPG в PDF в Linux с помощью ImageMagick
Вы должны будете выполнить следующие действия, если хотите преобразовать JPG в PDF с помощью ImageMagick (включая несколько JPG в PDF).
Шаг 1. Щелкните правой кнопкой мыши на рабочем столе и выберите параметр «Открыть терминал здесь».

Шаг 2. Чтобы конвертировать фотографии в PDF, просто используйте команду конвертировать:
$ sudo convert /path/to/image /path/to/pdf
$ sudo convert /home/ubuntu/flower.jpg to /home/files/flowers.pdf
$ sudo vi /etc/ImageMagick-6/policy.xml
Шаг 3. Используйте команду mogrify с параметром -format для преобразования нескольких фотографий. Все файлы JPG в каталоге /home/ubuntu будут преобразованы в файлы PDF с помощью этой команды:
$ mogrify -format pdf /home/ubuntu/*.jpg
$ mogrify -format pdf -path /home/data /home/ubuntu/*.jpg
Шаг 4. Вы можете использовать вышеупомянутую команду в сценарии оболочки для автоматизации преобразования JPG в PDF, как показано ниже. Создайте новый сценарий оболочки:
$ sudo vi jpg_to_pdf.sh
#!/bin/sh
$ mogrify -format pdf /home/ubuntu/*.jpg
Шаг 5. Затем документ можно сохранить и закрыть. Чтобы разрешить доступ, используйте следующую формулу:
$ sudo chmod +x jpg_to_pdf.sh
$ ./jpg_to_pdf.sh
Шаг 6. Вы даже можете настроить cronjob для запуска вышеупомянутого скрипта в 10 утра каждый день. Чтобы войти в crontab, просто выполните следующую команду.
$ crontab –e
0 10 * * * sudo ./jpg_to_pdf >/dev/null 2>&1
Шаг 7. Сохраните и закройте файл.
Способ 2. JPG в PDF в Linux с помощью LibreOffice
Если вы хотите преобразовать JPG в PDF с помощью LibreOffice, вы должны сделать следующее:
Шаг 1. Перейдите в LibreOffice и выберите «LibreOffice Draw».
Шаг 2. Вставьте туда свое изображение.
Шаг 3. Нажмите на вкладку «Файл», затем выберите «Экспортировать как», а затем «Экспортировать как PDF».
Шаг 4. Нажмите значок «Экспорт».
Шаг 5. Нажмите кнопку «Сохранить».

Способ 3. JPG в PDF в Linux с помощью Gscan2PDF
Если вы хотите преобразовать JPG в PDF с помощью Gscan2PDF, вы должны сделать следующее:
Шаг 1. Откройте Gscan2PDF и нажмите на значок папки.
Шаг 2. Выберите, какие фотографии будут заменены.
Шаг 3. Выберите вариант «Сохранить» в меню «Файл».
Шаг 4. Выберите параметр «PDF», а затем нажмите кнопку «Сохранить», чтобы сохранить его в нужном месте.

Способ 4. JPG в PDF в Linux с помощью PDF2Go (OCR)
Вы должны будете выполнить следующие действия, если хотите преобразовать JPG в PDF с помощью PDF2Go.
Шаг 1. Скопируйте URL-адрес изображения, которое нужно преобразовать в PDF2Go. Вы также можете отправить свою фотографию с помощью селектора папок.
Шаг 2. Появится полоса загрузки. Когда вы закончите, ваш экран будет разделен. Вы всегда можете увидеть свое изображение в правой части страницы, а текст, который вы извлекли, — в правой.
Шаг 3. Чтобы настроить язык вашего проекта, нажмите кнопку рядом с символом папки.
How can I convert a series of images to a PDF from the command line on Linux? [closed]
I have a scanning server I wrote in CGI and Bash. I want to be able to convert a bunch of images (all in one folder) to a PDF from the command line. How can that be done?
Use img2pdf, not ImageMagick. ImageMagick decodes the JPEG, resulting in generation loss and is 10–100 times slower than img2pdf.
img2pdf $(find . -iname ‘*.jpg’ | sort -V) -o ./document.pdf will give you document.pdf containing all images with jpg or JPG extension in the current dir — one image per page. document.pdf will have all images ordered as pages naturally ( -V option for sort ) so there is no need to add any leading zeros when numbering image files.
2 Answers 2
what if page*.png does not sort the images in the way you want ? e.g. page_1.png, page_2.png . page_10.png -> page_10 will appear before page_1
To sort the files, you can use: ls page*.png | sort -n | tr ‘\n’ ‘ ‘ | sed ‘s/$/\ mydoc.pdf/’ | xargs convert
FYI you almost never need to use ls for anything apart from displaying files. i.e. do not parse it’s output. find is a much more suitable tool. Here is an example convert $(find -maxdepth 1 -type f -name ‘page*.png’ | sort -n | paste -sd\ ) output.pdf . Keep in mind that the aforementioned command will not work if your pathnames contain spaces. The addition of characters that need to be escaped makes things a little more complicated.
This is simple and works very well, thank you! To avoid generating huge PDF files, use something like convert -compress jpeg -quality 85 *.png out.pdf
ImageMagick decodes the JPEG, resulting in generation loss. Use img2pdf instead; it’s also 10–100 times faster.