- Creality wifi box firmware
- Slicing Software
- How to Install KlipperWRT on Creality Box?
- What is KlipperWRT?
- Why Install KlipperWRT on the Creality Box?
- Steps to install KlipperWRT on the Creality Box
- Connect the Creality Box to a network
- Flash KlipperWRT firmware
- Connect KlipperWRT to Wi-Fi
- Install Klipper
- Video Guide for KlipperWRT
- Wrapping up
Creality wifi box firmware
Discover thousands of 3D printable models anytime and anywhere in this pocket model library. Earn an income from your original 3D designs.
Powerful in-App slicer allows you to slice multiple 3D models at one time to help you save more time.
Remotely control your 3D printer with advanced print settings whenever and wherever with Creality Cloud App on your phone.
World players gather together. Share content and get advice or solutions on 3D printing to improve your skills!
Slicing Software
Creality Print is a self-developed FDM slicing software produced by Shenzhen Creality 3D Technology Co., Ltd. It’s a practical and easy-to-use tool that can help you remote control and monitor your 3D printer and help print directly from your computer. With Creality Print, you can access your Creality Cloud account to operate the printing process, including searching, uploading, importing, editing models, setting printing and slicing parameters, remote controlling your 3D printing, etc. It allows you to save the G-code on your computer and send it to the printer through a USB serial port or Wi-Fi connectivity, or to import and export the G-code from Creality Cloud and print directly from the Creality Cloud APP.
Creality Print is a self-developed FDM slicing software produced by Shenzhen Creality 3D Technology Co., Ltd. It’s a practical and easy-to-use tool that can help you remote control and monitor your 3D printer and help print directly from your computer. With Creality Print, you can access your Creality Cloud account to operate the printing process, including searching, uploading, importing, editing models, setting printing and slicing parameters, remote controlling your 3D printing, etc. It allows you to save the G-code on your computer and send it to the printer through a USB serial port or Wi-Fi connectivity, or to import and export the G-code from Creality Cloud and print directly from the Creality Cloud APP.
How to Install KlipperWRT on Creality Box?
![]()
The Creality Box isn’t the most useful piece of hardware. But you can get more out of it by installing KlipperWRT and turning it into a Klipper controller. In this guide, I will show you how to install OpenWRT on the Creality Box, then convert it to Klipper.
What is KlipperWRT?
KlipperWRT is an OpenWRT linux distro which is mostly used with network devices like routers. Because most of the time these routers don’t have a lot of computing power, the distro needs to be as efficient as possible. This is the main reason OpenWRT is a good choice as a base for installing Klipper on the Creality Box.
Why Install KlipperWRT on the Creality Box?
The Creality Box specs are quite underwhelming, and Creality chose to use this box as a bridge between the internet and their 3D printers. You can connect the Creality Box to your printer and send STL files from Creality Cloud directly to your machine. Besides that, you can also connect a Webcam to the Creality Box and watch over your print. If you decide to upgrade the Creality Box with KlipperWRT, you will be able to use the device as a Raspberry Pi replacement and run Klipper directly from it. Klipper will allow you to print faster with your 3D printer and you will also be able to control the printer using a Web Interface, directly from your computer. Besides that, after you install Klipper on your 3D printer, you can use features like Pressure Advance and Input Shaper, which will greatly improve your print quality.
Steps to install KlipperWRT on the Creality Box
Connect the Creality Box to a network
The first step is to connect the Creality Box to a network via Wi-Fi or via a LAN cable. I used the Creality Cloud app to connect on my Wi-Fi access point. You just need to install Creality Cloud and follow the steps in the app to connect to your network. After you connect to Wi-Fi, you need to find out what IP is used by your Creality Box. You can check this by connecting to your router, but I use the WIFIMan app which automatically scans my network and lists the IPs of my machines. After you find your IP, you can move to the next step.
Flash KlipperWRT firmware
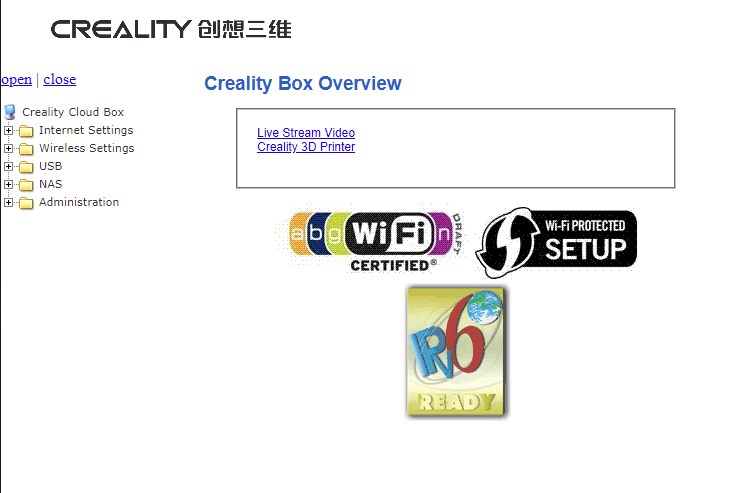
After you found the IP address of your Creality Box, open up a browser and open the Admin interface using the following address, after you change the IP to your own. http://192.168.0.14/adm/system_command.shtml The default username is admin and the password is admin. After the login, you will land on this page:
Download the OpenWRT firmware, extract the archive, then navigate to Administration -> Upload Firmware. Click on Choose File, select the .bin firmware you just downloaded and click on Apply. The firmware will be uploaded to the box.
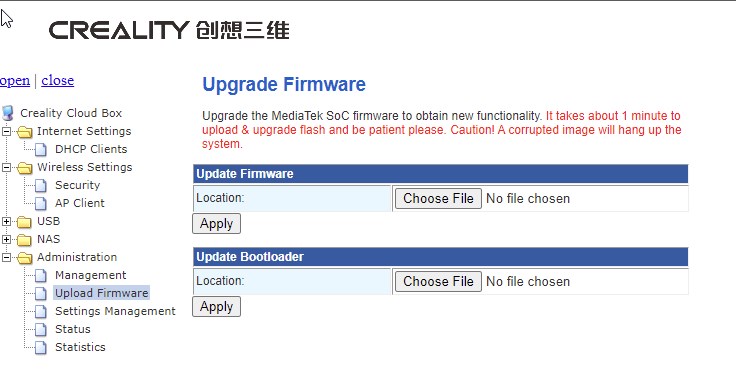
After the firmware is uploaded, you will get a failure message: “Not a valid firmware. Bag Magic Number: “/var/tmpFW” is no valid image”. Ignore the message and continue to the next step.

Open up the system command terminal. In my case, the address is http://192.168.0.14/adm/system_command.shtml. In this terminal, we need to run the following command:
mv /var/tmpFW /media/mmcblk0p1/cxsw_update.tar.bz2After you run this command, we need to reboot the Creality Box. Just type the following command, then enter.
The Creality Box will be rebooted, and after about 5 mintes, the printer will broadcast a new Wi-Fi network called KlipperWRT. On your computer, connect to the KlipperWRT Wi-Fi network and open the LUCI interface which is running on port 81. In my case, the address is http://192.168.0.1:81/.
Connect KlipperWRT to Wi-Fi
Navigate to Network ->Wireless then click on the Scan button to scan for Wi-Fi networks.


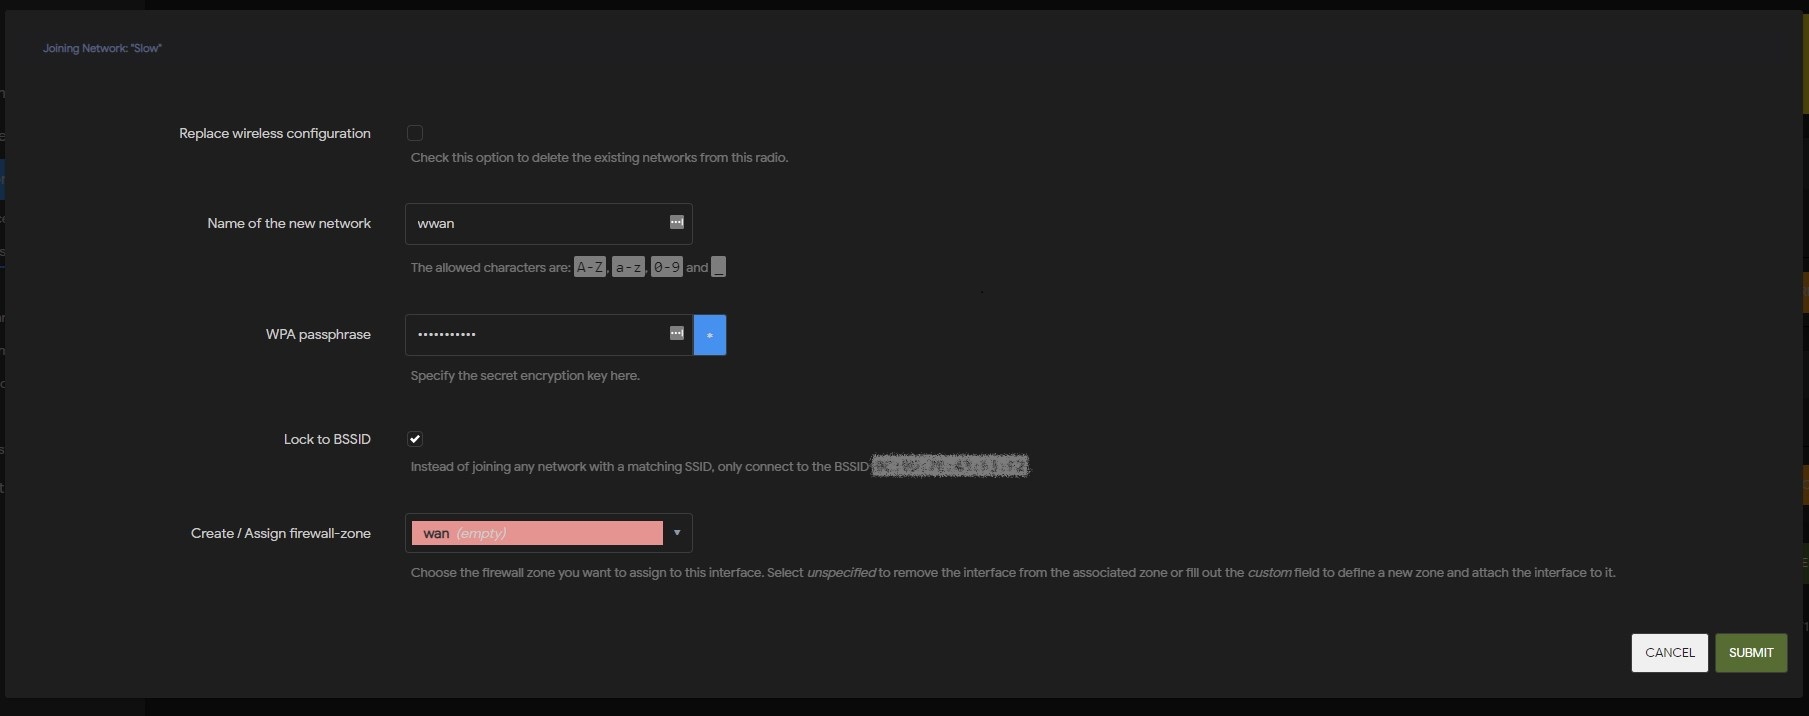
Select the Wi-Fi network you want to connect to, and click Join Network In the next screen, ensure that you configure everything like in the image below, then click Submit. The Create/Assign Firewall Zone should be set on WWAN.
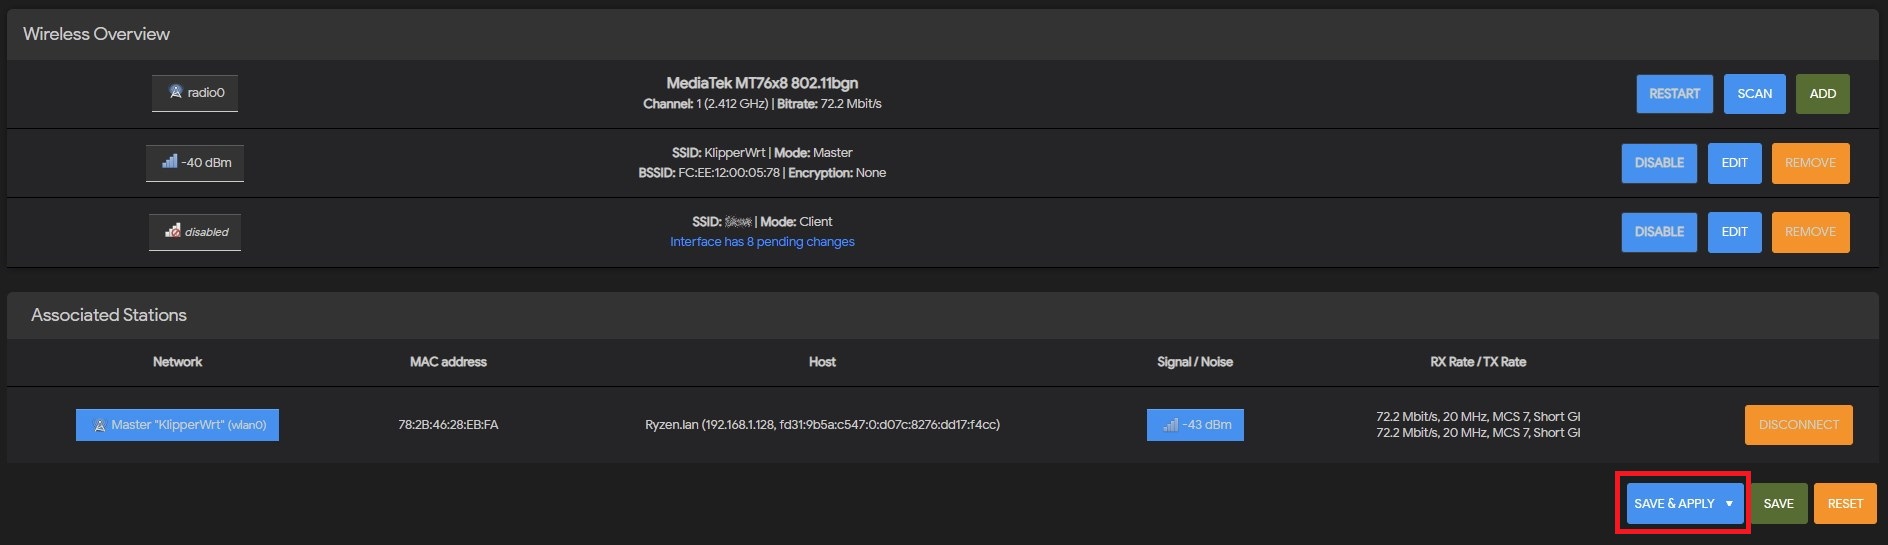
Finally, click on Save & Apply to save the newly created connection and connect to the Wi-Fi network. Now you can disconnect from the KlipperWRT Wi-Fi network and connect back to your default Wi-Fi. The Wi-Fi box will connect to your Wi-Fi. If everything is right, the LuCi webpage can be opened with the new IP. You can now go to Services-> Terminal -> Config and change the Interface to WWAN, then save your changes. This will allow you to use the integrated terminal, and install KlipperWRT.
Install Klipper
In your Terminal window, paste the 1_format_extroot.sh script from GitHub and wait for the installation to complete.
cd ~ wget https://github.com/ihrapsa/KlipperWrt/raw/main/scripts/1_format_extroot.sh chmod +x 1_format_extroot.sh ./1_format_extroot.sh 
When prompted to reboot, type the reboot command and access the terminal again, to paste the installation script.
cd ~ wget https://github.com/ihrapsa/KlipperWrt/raw/main/scripts/2_script_manual.sh chmod +x 2_script_manual.sh ./2_script_manual.sh The Kipper installation guide will start. The process takes about 20 minutes, and during that time, your will be prompted to select the type of web interface you want to use (Fluidd/Mainsail). When finished, remove the scripts with the following command:
That’s it. Now you can import the printer.cfg file of your 3D printer, and start using Klipper on the Creality Box
Video Guide for KlipperWRT
Since I wrote this guide, a video showing the installation process was posted on YouTube. Feel free to check it out if you get stuck.
Wrapping up
I hope this guide has been helpful for you in adding more use to your Creality Box. In a future article, I will show you how to install Klipper on the CR-10 Smart which already has a Creality Box inside the printer. You can also join the 3DPrintBeginner Forum where there’s a dedicated thread for Klipper Firmware, with Klipper enthusiasts ready to help.