- Use A File As A Linux Block Device
- Create a file and filesystem to use as a block device
- Mounting a loop device
- Unmounting a loop device
- How to Create Device Files in Linux Using mknod Command
- mknod Command Syntax
- 1. Create Unnamed Pipe in Linux
- 2. Create a Named Pipe in Linux
- 3. Create a Character Device File in Linux
- 4. Create a Block Device File in Linux
- 5. Create a Device File With Permissions
- How to Create a Virtual Block or Loop Device in Linux
- How to Create A Loop Device
- 1. Create a File of Desired Size
- 2. Create the Loop Device
- 3. Mount the Loop device
- How to Remove loop device
- Final Words
Use A File As A Linux Block Device
Just like when creating a SWAP file, you can create a file on a disk and present it as a block device. The block device would have a maximum file size of the backing file, and (as long as it’s not in use) be moved around like a normal file. For example, I could create a 1GB file on the filesystem and make Linux treat the file as a disk mounted in /dev/. And guess what – that’s what we’re going to do.
Create a file and filesystem to use as a block device
First off, use dd to create a 1GB file on an existing disk that we’ll use for our storage device:
dd if=/dev/zero of=/root/diskimage bs=1M count=1024
Then ‘format’ the file to give it the structure of a filesystem. For this example we’re going to use ext4 but you could choose any filesystem that meets your needs.
You’ll be promoted with Proceed anyway?. Type y and press return to proceed with the process.
mke2fs 1.42.5 (29-Jul-2012) /root/diskimage is not a block special device. Proceed anyway? (y,n) y Filesystem label= OS type: Linux Block size=4096 (log=2) Fragment size=4096 (log=2) Stride=0 blocks, Stripe width=0 blocks 65536 inodes, 262144 blocks 13107 blocks (5.00%) reserved for the super user First data block=0 Maximum filesystem blocks=268435456 8 block groups 32768 blocks per group, 32768 fragments per group 8192 inodes per group Superblock backups stored on blocks: 32768, 98304, 163840, 229376 Allocating group tables: done Writing inode tables: done Creating journal (8192 blocks): done Writing superblocks and filesystem accounting information: done
Mounting a loop device
Before mounting the file we need to check that there is a free /dev/loopX loopback device that we can use to represent our new block device.
Run the below command, and if there is any output then check if it’s one of your loop devices, which will more than likely reference /dev/loop as the mounted device. If you do have a reference to our loop device then see the below section on Unmounting a loop device, or choose a number higher than the highest listed loop device, for example: usually there are several loop devices, starting with loop0 and going up in value to loop1, loop2, and so on.
cat /proc/mounts | grep /dev/loop
Once you have the file that you’d like to mount and a free loop device then you can go ahead and mount the file as a block device. You have two options:
- Mount the file as a block device only
- Mount the file as a block device and mount the filesystem of it on a local mount point (eg. /mnt/mymountpoint).
For option 1; to only mount the file as a device in /dev/, run the below command and change /root/diskimage to the path of the file you’d like to mount. loop0 can also be incremented as explained above.
losetup /dev/loop0 /root/diskimage
If you’d like this to be remounted after a machine reboot then add the above line to the rc.local file.
losetup /dev/loop0 /root/diskimage
For option 2; to mount the file and the filesystem on it, use the mount command. You must have already created the mount point locally before running the command, as you would when mounting a disk or NFS share.
Then run the mount command and specify the loop device, the path of the file and the path to mount the filesystem on:
mount -o loop=/dev/loop0 /root/diskimage /mnt/mymountpoint
To check the file has been mounted you can use the df command:
df -h | grep mymountpoint /dev/loop0 976M 1.3M 924M 1% /mnt/mymountpoint
Unmounting a loop device
If you’ve mounted the filesystem on the block device using the mount command then make sure it’s unmounted before proceeding.
To then free the loop0 device (or which ever loop device you’ve used) you’ll need the losetup command with the d switch.
How to Create Device Files in Linux Using mknod Command
In Linux, everything is a file, even physical devices such as disk drives, CD/DVD ROM, and floppy disks are represented using files. However, these files are not regular data files. Instead, these special files are called device files and they can generate or receive the data.
Usually, all the special files are present under the /dev directory. Some of the common examples of special files are /dev/null, /dev/zero, /dev/full, and /dev/sr0.
The special files can be of the type character or block. As the name suggests, the character files process one character at a time where as the block files process multiple characters at a time.
In this advanced guide, we will discuss how to create a device file using the mknod command. After following this guide, Linux users will be able to work with different kinds of device files confidently.
mknod Command Syntax
The syntax of the mknod command is slightly different than the other Linux commands. The main difference is that we need to specify the major and minor numbers while creating a character and block device files:
$ mknod [OPTIONS] [MAJOR] [MINOR] .
In the above syntax, the square brackets ([]) represent the optional arguments whereas angular brackets (<>) represent the mandatory arguments.
In Linux, the major number is used to specify the device driver that needs to be used. This number is assigned while registering a device driver.
In a similar way, the minor number is used to specify the actual device. We can find the reserved major and minor numbers in the Linux kernel’s documentation.
1. Create Unnamed Pipe in Linux
In Linux, we use pipes to enable inter-process communication. In Shell, the pipe is represented using the vertical line (|) . It reads the output of the previous process and sends it as the input to the next process.
Let’s understand this with a simple example:
In this example, we are using the pipe to read the output of the echo command and send it as the input to the wc command for further processing.
Here, we have used the vertical line (|) to create a pipe. However, this creates an unnamed pipe and its scope is limited to the current command only. In the next example, we will see how to create a named pipe.
2. Create a Named Pipe in Linux
We can use the mknod command to create a named pipe. The named pipe resides on the file system just like any other regular file. However, its main purpose is to allow inter-process communication between unrelated processes.
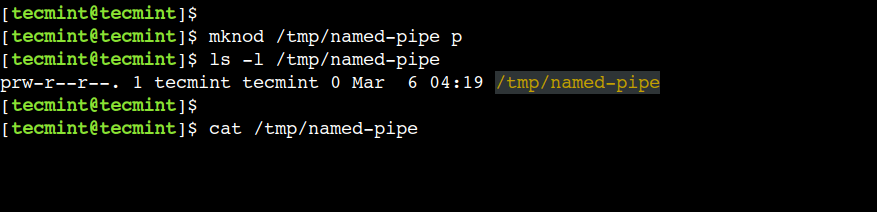
First, let’s specify the device type as p to create a named pipe:
$ mknod /tmp/named-pipe p $ ls -l /tmp/named-pipe
Now, let’s try to read the file:
Here, we can see that the cat command is waiting infinitely:
Next, let’s open another terminal and write some data to the /tmp/named-pipe file:
$ echo "tecmint.com" > /tmp/named-pipe
Finally, head over to the first terminal to view the result:
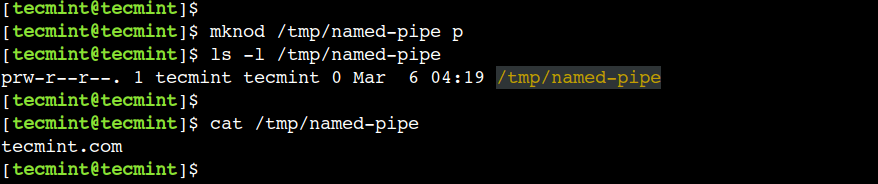
Here, we can see that the echo and cat commands are able to communicate using the named pipe.
3. Create a Character Device File in Linux
In a similar way, we can use the device type as c to create a character device. However, we must have to use the major and minor numbers while creating a character device.
Let’s use the ls command to find the major and minor numbers of the /dev/full device:

In the above output, the comma-separated pair of numbers i.e. 1, 7 represent the major and minor numbers respectively.
In Linux, the /dev/full device always returns the No space left on the device error. To understand this, let’s write some data to this device:

Now, let’s use the mknod command to create a new device that behaves the same as /dev/full device:
$ sudo mknod /tmp/full-device c 1 7
Next, let’s change the file permissions:
$ sudo chmod 666 /tmp/full-device $ ls -l /tmp/full-device
Finally, write some data to the newly created device:
$ echo "tecmint" > /tmp/full-device
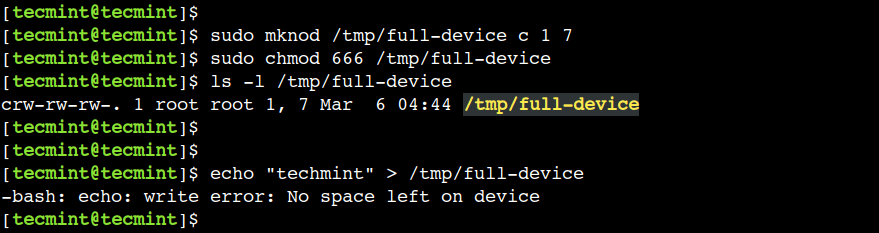
It is important to note that, the newly created character device behaves like the /dev/full device because of the same major and minor numbers.
4. Create a Block Device File in Linux
In addition to this, we can specify the device type as b to create a block device. To create a block device we must have to use the major and minor numbers.
In Linux, /dev/sr0 represents the CD/DVD ROM device. Now, let’s create a new block device that behaves the same as /dev/sr0.
First, let’s find out the major and minor numbers of the /dev/sr0:

In the above output, we can see that its major and minor numbers are 11 and 0 respectively.
Now, let’s create a new block device with the same major and minor numbers:
$ sudo mknod /tmp/dvd-rom b 11 0 $ ls -l /tmp/dvd-rom

Next, let’s mount the ISO image from the CD/DVD ROM to the /mnt directory and verify that the mount operation succeeds:
$ sudo mount /tmp/dvd-rom /mnt/ $ ls -1 /mnt/
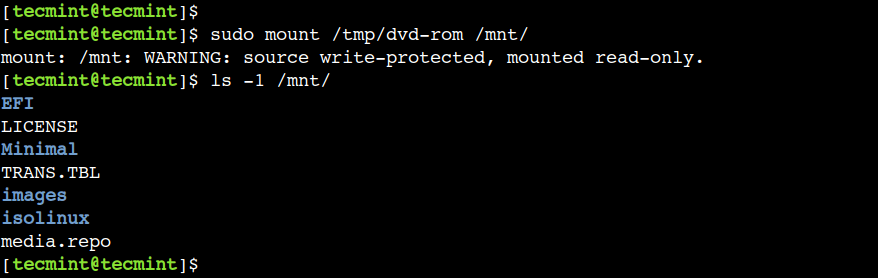
In this example, we can see that the /tmp/dvd-rom block device is able to access the ISO image from the CD/DVD ROM.
5. Create a Device File With Permissions
Sometimes, we need to modify the access permission of the device file before using it. In such cases, we have to use the chmod command. However, we can achieve the same result using the mknod command instead of using two separate commands.
To understand this, let’s use the -m option to set access permissions while creating a named pipe:
$ sudo mknod -m 444 /tmp/pipe-with-permissions p
Now, let’s verify that the permissions have been set properly:
$ ls -l /tmp/pipe-with-permissions

In this example, we used the -m option with the named pipe. However, we can use it with the character and block devices as well.
Do you know of any other best example of the mknod command in Linux? Let us know your views in the comments below.
How to Create a Virtual Block or Loop Device in Linux
Loop device is getting popular in Linux, specially for isolation. Here’s a quick guide on creating loop devices on Linux.
Linux users can have a virtual block device called a «loop device» that maps a normal file to a virtual block, making it ideal for tasks related to isolating processes.
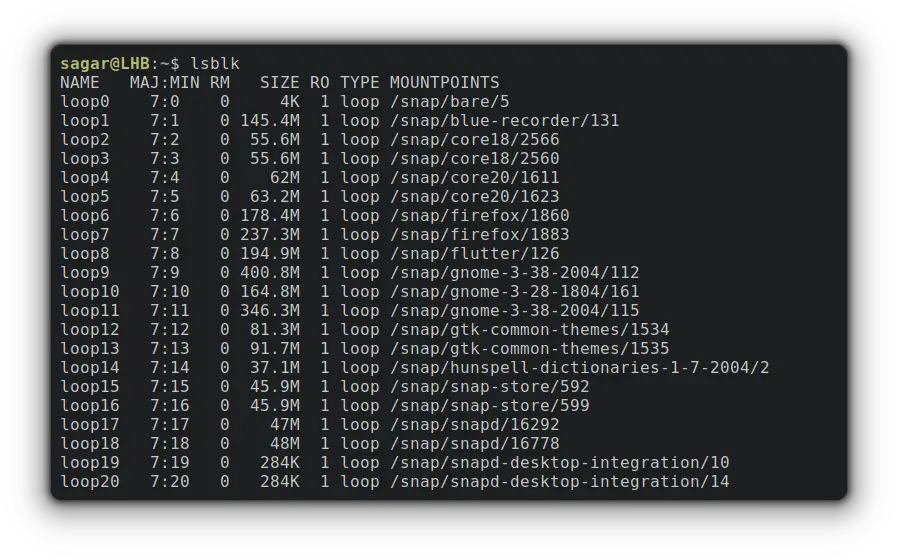
And the best example for utilizing loop devices is snap packages, a sandboxed software solution containing every necessary dependency and mounted as a loop devices:
And if you’re interested in creating your own virtual block device, here’s a simple guide.
How to Create A Loop Device
For ease of understanding, I’ve decided the entire process in the form of simple steps so it can be easier to grasp.
And if you’re interested in learning more about loop device in Linux and its use, I’ll recommend the other guide of ours that covers the basics:
1. Create a File of Desired Size
In the first step, you’re required to create a file as per your needs. For this example, I’ll be creating a file of 3 Giga bytes:
dd if=/dev/zero of=VirtBlock.img bs=100M count=30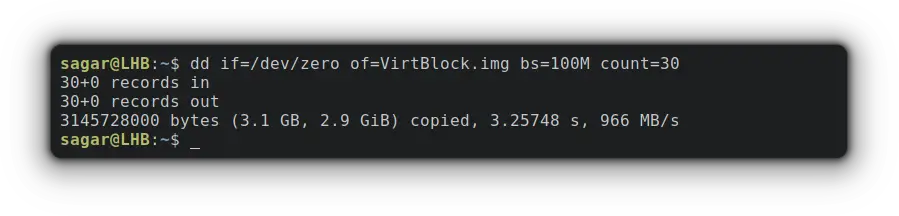
- if=/dev/zero will create a block of 0s to hold data.
- of=VirtBlock.img is where you’ll specify the name. I went with VirtBlock.img.
- bs=100M will set the size of a single block.
- count=30 will create copies of single blocks for given times. Meaning 100Mb * 30 times is about 3 GB in size.
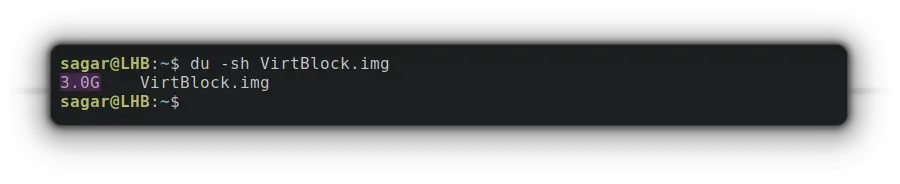
Now, let’s verify the size of the recently created block by the given command:
2. Create the Loop Device
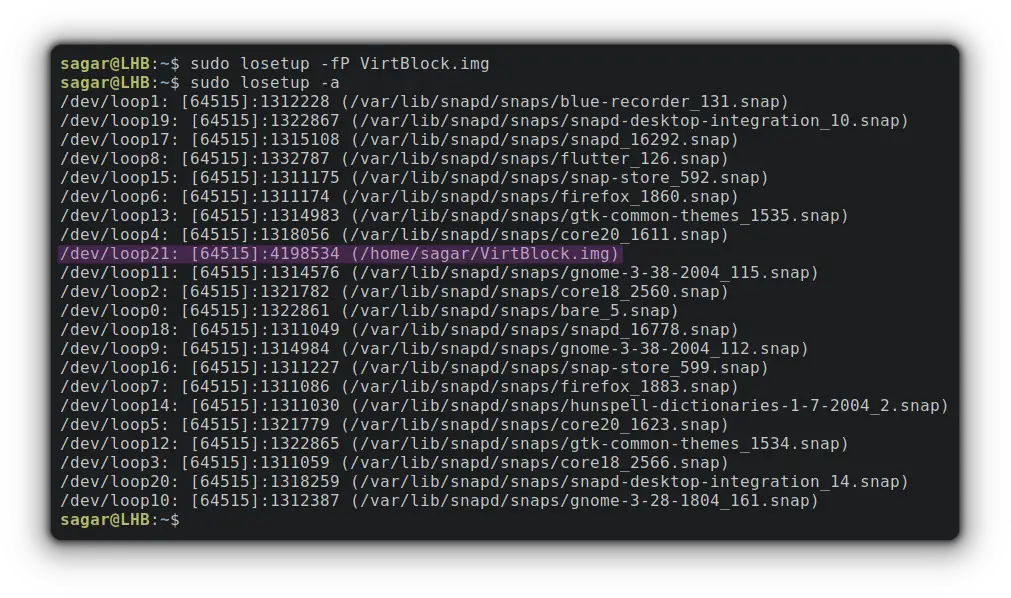
In this step, I’ll be utilizing the losetup utility to create a loop device mapping at a recently created file.
sudo losetup -fP VirtBlock.img- -f (find) will find us unused loop devices and save us from errors like «losetup: TO_BLOCK: failed to set up loop device: Device or resource busy”.
- -P will force the kernel to scan the partition table on the newly created loop device.
Now, its time for us to print all the loop devices using the -a option with losetup as given:
But your block needs to have a file system to create, store and configure files to that block and I’ll be going with ext4:
sudo mkfs.ext4 /home/sagar/VirtBlock.img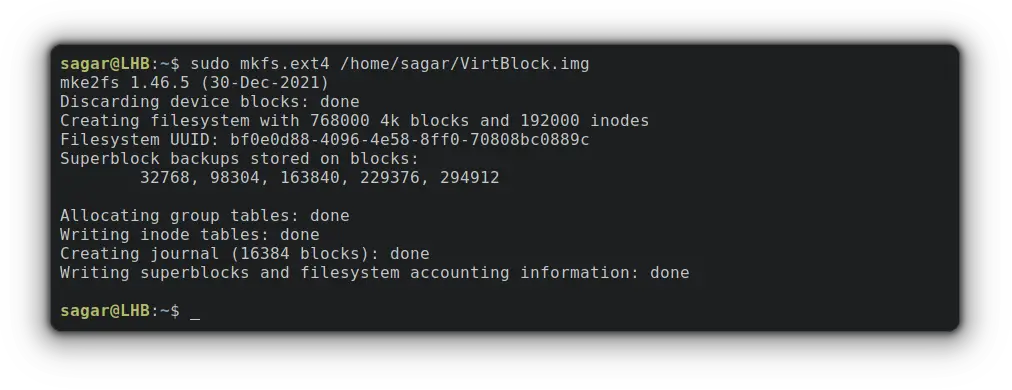
Make sure to use the exact path or it will throw an error. Use the reference from sudo losetup -a command.
3. Mount the Loop device
To mount created loop device, the first step should be creating a mounting directory which can be done through the given command:
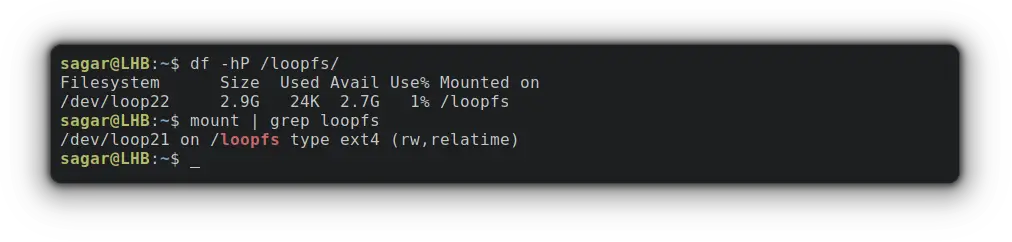
To mount the loop device (mine is loop21), I’ll be using the -o loop option as given:
sudo mount -o loop /dev/loop21 /loopfsNow, you can verify the mounting point and size of the recently mounted loop device:
To verify the file system, you can go with the given command:
How to Remove loop device
Removing a piece of software is always easy than installation/configuration and that’s the same case here!
First, you’ll have to unmount and remove the mounting directory:
sudo umount /loopfs sudo rmdir /loopfsNow, you’ll have to detach the loop device (mine is loop21) which was created by «losetup -d» command:
Finally, you have to remove the file (VirtBlock.img) by the given command:
sudo rm /home/sagar/VirtBlock.imgFinal Words
Using a loop device for isolation is a handy Linux feature.
This guide went through the configuration and removal process in an easy manner. If you encounter any issues, leave a comment and I’ll try to help you out.