- How to Install QEMU/KVM on Ubuntu to Create Virtual Machines
- Step 1: Check Virtualization Enabled in Ubuntu
- Step 2: Install QEMU/KVM on Ubuntu 20.04/22.04
- Step 3: Launch Virtual Machine Manager in Ubuntu
- Step 4: Create Virtual Machine with QEMU/KVM in Ubuntu
- How to Install KVM on Ubuntu 20.04
- Check Virtualization Support on Ubuntu 20.04
- Install KVM on Ubuntu 20.04
- Step 1: Install KVM Packages
- Step 2: Authorize Users
- Step 3: Verify the Installation
- Creating a Virtual Machine on Ubuntu 20.04
- Method 1: Virt Manager GUI
- Method 2: Using Command Line
How to Install QEMU/KVM on Ubuntu to Create Virtual Machines
Virtualization is one of the most widely used technologies both in enterprise and home environments. Whether you are a seasoned IT expert, a programmer, or an IT novice, virtualization can be one of your greatest friends.
Virtualization is the abstraction of a computer’s hardware resources using a software application known as a hypervisor. The hypervisor creates an abstraction layer over computer hardware and virtualizes various components of the system including but not limited to memory, processor, storage, USB devices, etc.
In doing so, it allows you to create virtual computers also known as virtual machines off of the virtualized elements, and each virtual machine, also known as a guest, runs independently from the host system.
KVM, short for Kernel-based Virtual Machine is an open-source type 1 hypervisor (bare metal hypervisor) that is integrated into the Linux kernel. It allows you to create and manage virtual machines running Windows, Linux, or UNIX variants such as FreeBSD, and OpenBSD.
As mentioned earlier, each virtual machine has its own virtual resources such as storage, memory, CPU, network interfaces, USB interfaces, and video graphics to mention a few.
QEMU (Quick Emulator) is a software module that emulates various components of computer hardware. It supports full virtualizations and works alongside KVM to provide a holistic virtualization experience.
In this guide, we will demonstrate how to install QEMU/KVM on Ubuntu 20.04 / 22.04 distributions.
Step 1: Check Virtualization Enabled in Ubuntu
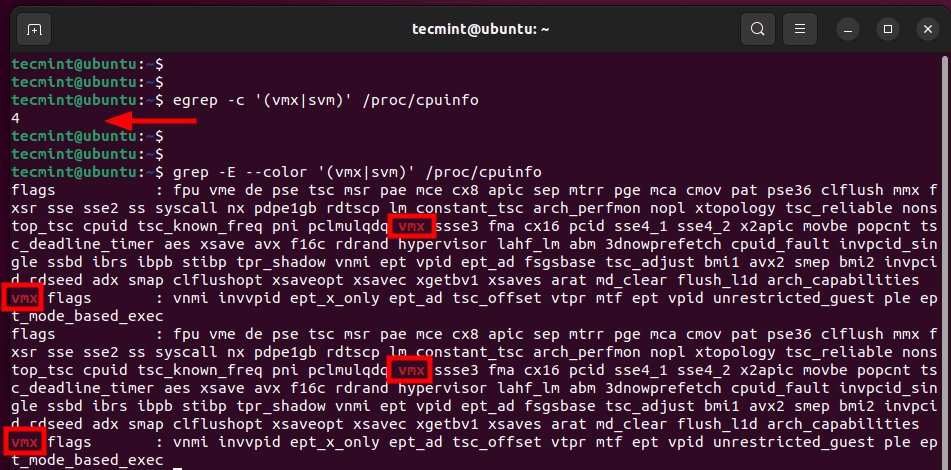
To start off check if your CPU supports virtualization technology. Your system needs to have an Intel VT-x (vmx) processor or AMD-V (svm) processor.
To verify this, run the following egrep command.
$ egrep -c '(vmx|svm)' /proc/cpuinfo
If Virtualization is supported, the output should be greater than 0, for example, 2,4,6, etc.
Alternatively, you can run the following grep command to display the type of processor your system supports. In our case, we are running Intel VT-x denoted by the vmx parameter.
$ grep -E --color '(vmx|svm)' /proc/cpuinfo
Equally important, check if KVM virtualization is supported by running the following command:

If the kvm-ok utility is missing, install the cpu-checker package as follows.
$ sudo apt install cpu-checker -y
Now that we have verified that our system supports KVM virtualization, let us proceed and install QEMU.
Step 2: Install QEMU/KVM on Ubuntu 20.04/22.04
Next up, update the package lists and repositories as follows.
Thereafter, install QEMU/KVM alongside other virtualization packages as follows:
$ sudo apt install qemu-kvm virt-manager virtinst libvirt-clients bridge-utils libvirt-daemon-system -y
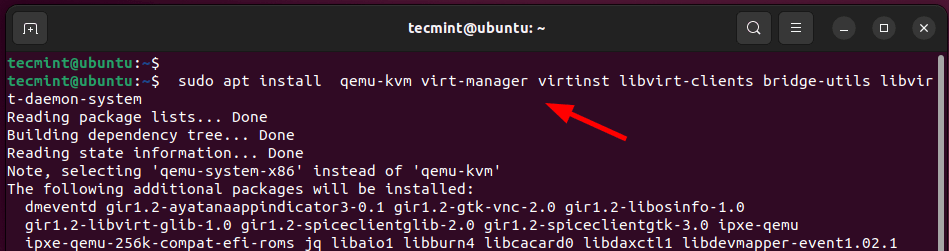
Let us examine what role each of these packages plays.
- qemu-kvm – This is an open-source emulator that emulates the hardware resources of a computer.
- virt-manager – A Qt-based GUI interface for creating and managing virtual machines using the libvirt daemon.
- virtinst – A collection of command-line utilities for creating and making changes to virtual machines.
- libvirt-clients – APIs and client-side libraries for managing virtual machines from the command line.
- bridge-utils – A set of command-line tools for managing bridge devices.
- libvirt-daemon-system – Provides configuration files needed to run the virtualization service.
At this point, we have installed QEMU and all the essential virtualization packages. The next step is to start and enable the libvirtd virtualization daemon.
So, run the following commands:
$ sudo systemctl enable --now libvirtd $ sudo systemctl start libvirtd
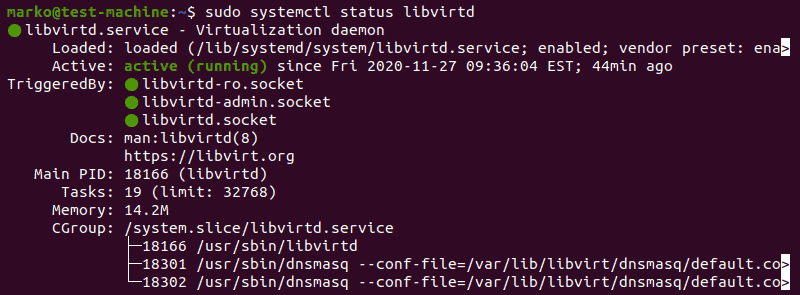
Next, verify if the virtualization service is running as shown.
$ sudo systemctl status libvirtd
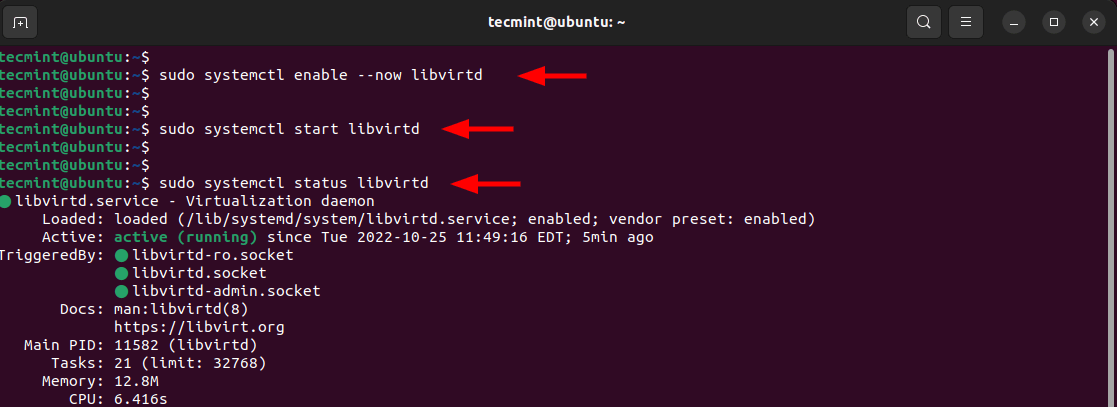
From the output above, the libvirtd daemon is up and running as expected. Additionally, add the currently logged-in user to the kvm and libvirt groups as shown.
$ sudo usermod -aG kvm $USER $ sudo usermod -aG libvirt $USER
Step 3: Launch Virtual Machine Manager in Ubuntu
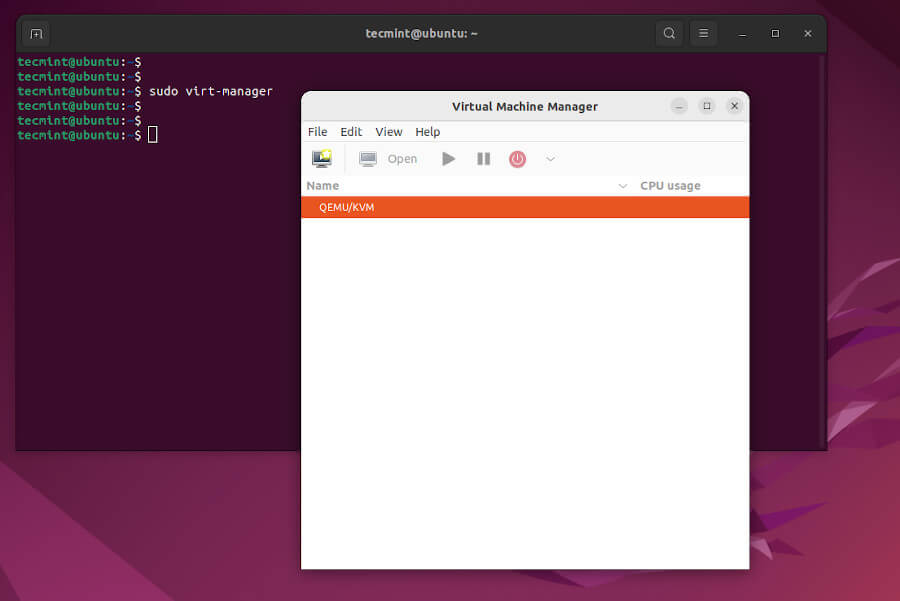
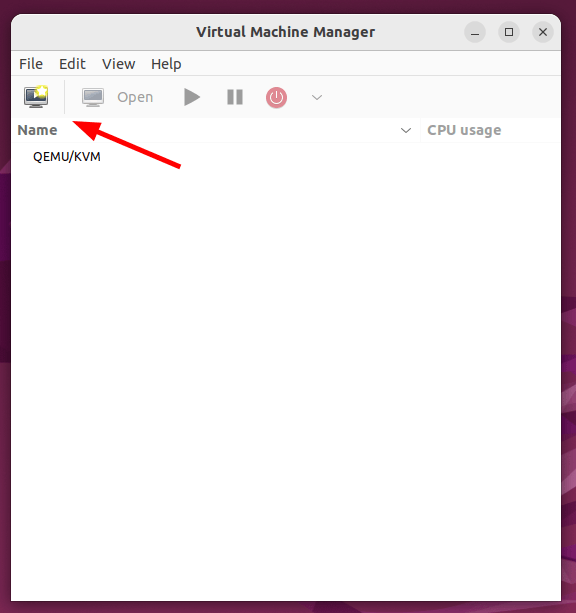
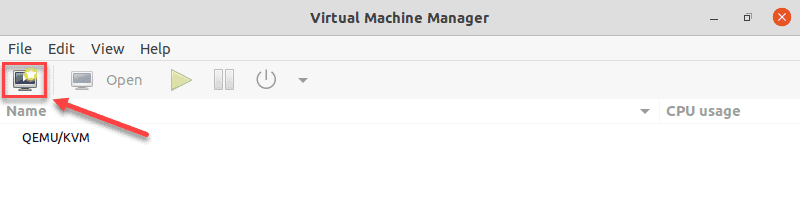
The next step is to launch the QEMU/KVM GUI tool which is the Virtual Machine Manager.
The Virtual Machine Manager will pop up as shown. From here, you can start creating and managing virtual machines as we shall demonstrate shortly.
Step 4: Create Virtual Machine with QEMU/KVM in Ubuntu
In this section, we will demonstrate how you can create a virtual machine using an ISO image. For demonstration purposes, we will use a Fedora Live ISO image. You can use an ISO image of your preferred OS and follow along.
To begin, click on the icon at the top left corner as shown below.
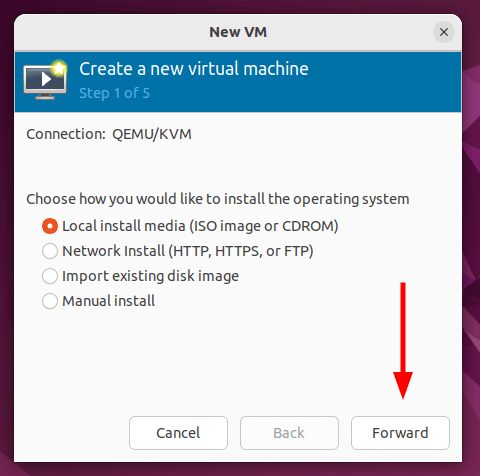
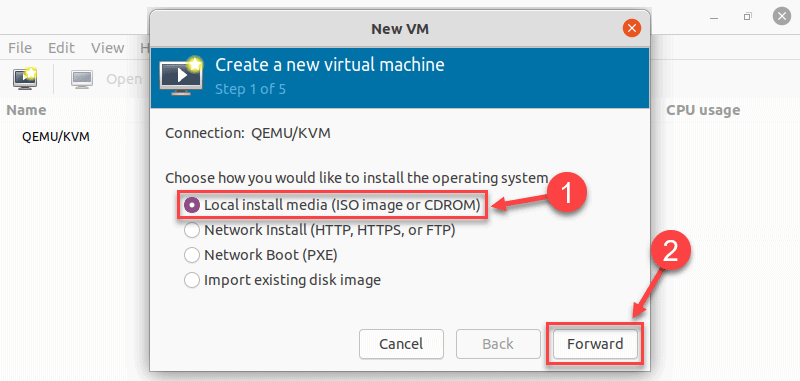
Since we are creating a virtual machine from an ISO file, select the first option – ‘Local install media (ISO image or CDROM)‘. Then click ‘Forward‘.
Next, click ‘Browse’ to navigate to the location of the ISO file.
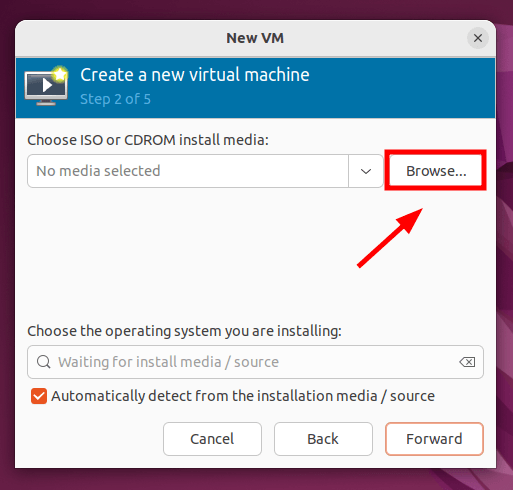
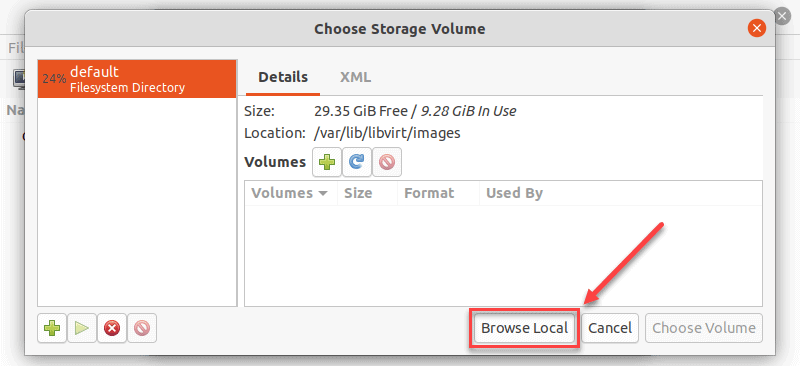
Since the ISO file is saved locally on your system, we will click ‘Browse Local’.

Be sure to navigate to the location of your ISO file. Click it and then click ‘Open’.
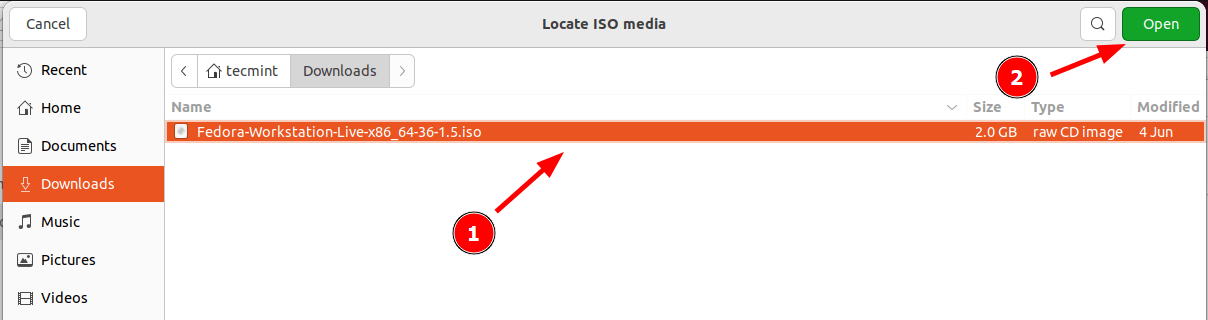
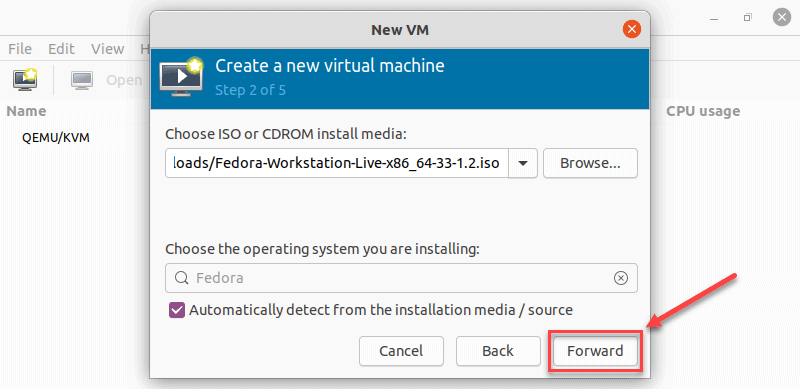
Before proceeding, ensure that you have selected the operating system from the drop-down menu. Then click ‘Forward’.

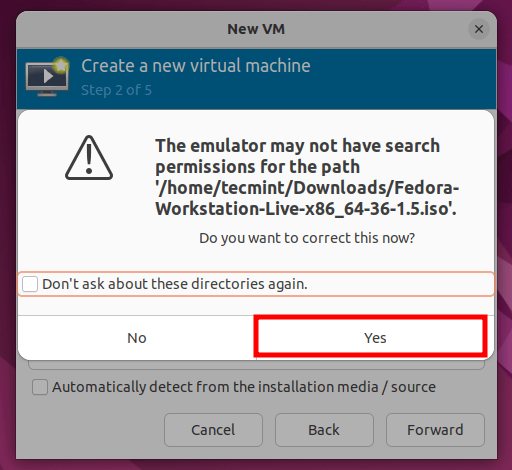
Click ‘Yes’ on the pop-up to grant the emulator search permissions to the ISO file.
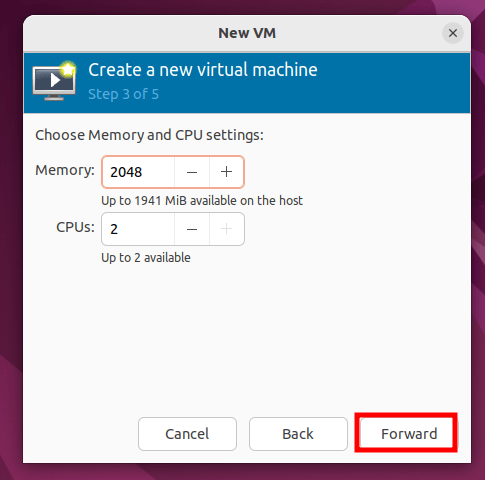
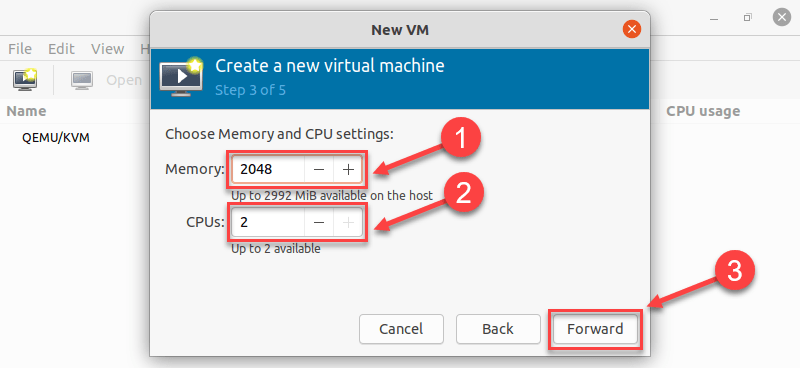
Next, select the Memory size and the number of CPU cores and click ‘Forward’.
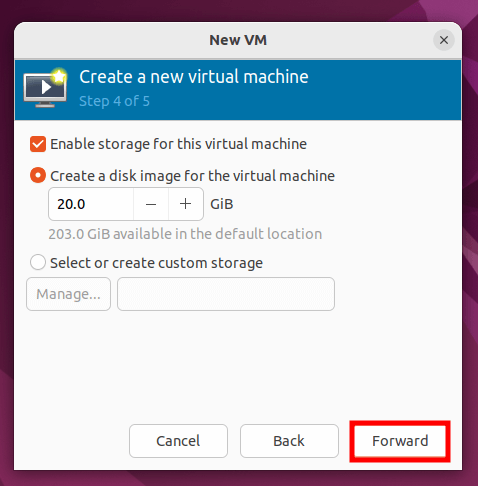
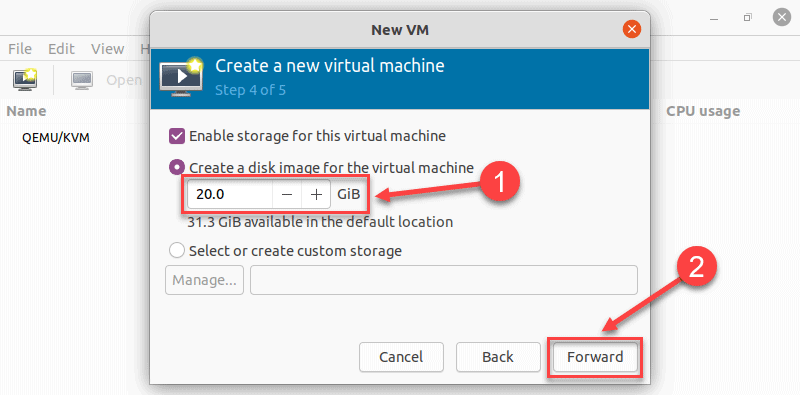
In the next step, enable storage for the virtual machine and specify the virtual disk size. Then click ‘Forward’.
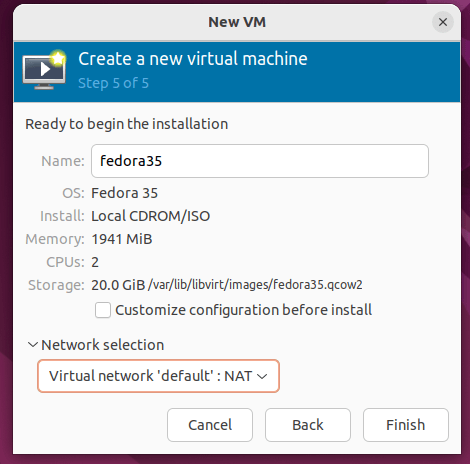
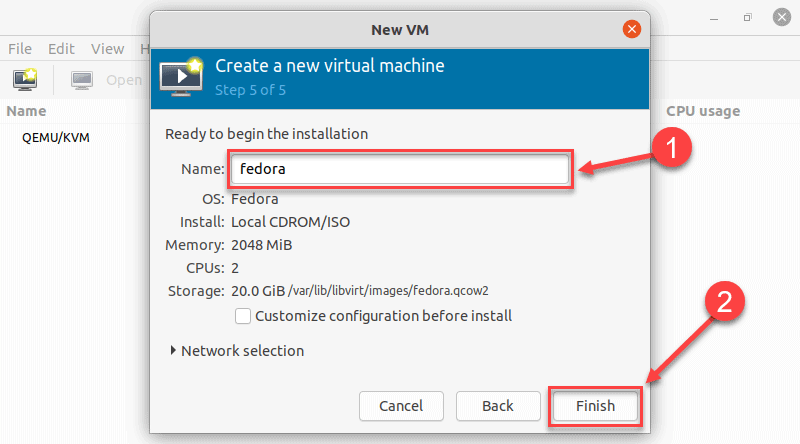
Finally, review all the settings that you have defined, and if all looks good, click ‘Finish’ to create the virtual machine. Else, click ‘back’ and make the necessary changes.
Once you click ‘Finish’ the virtual machine manager will start creating the virtual machine based on the set configurations.
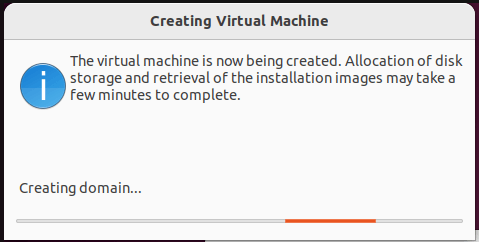
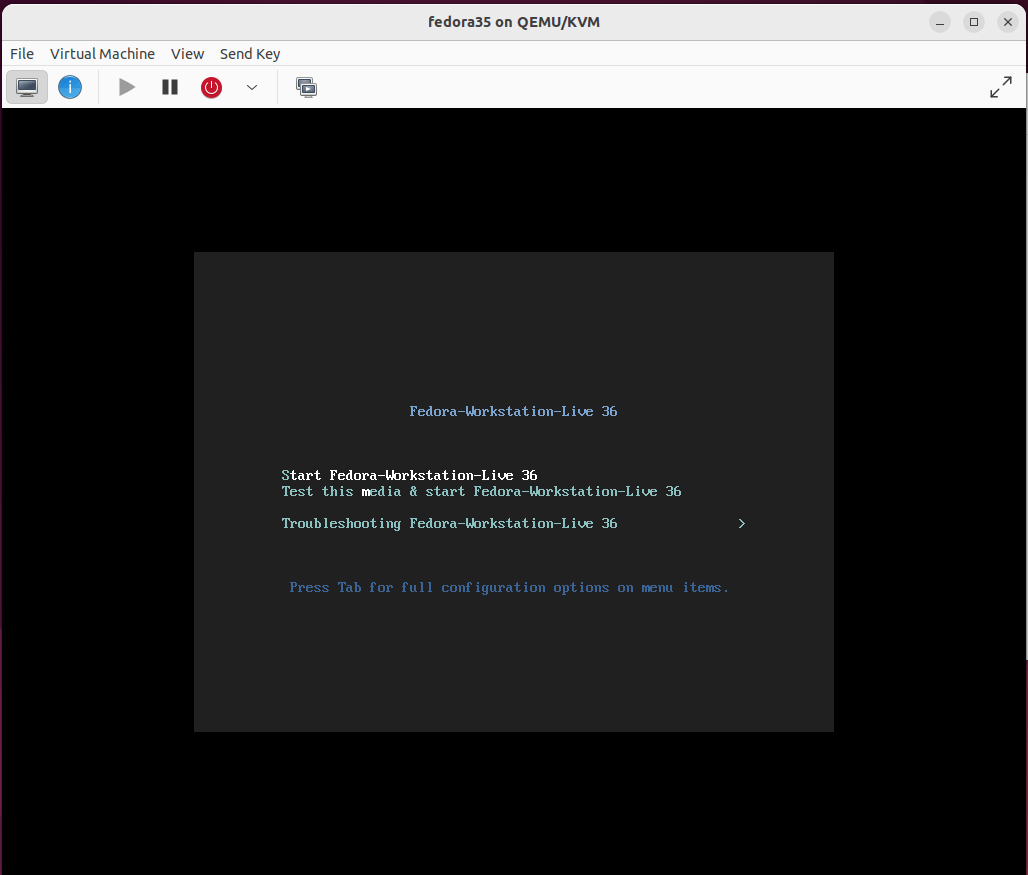
And in a matter of seconds, the virtual machine installation wizard will pop up. You can proceed with the installation as you would on a physical system.
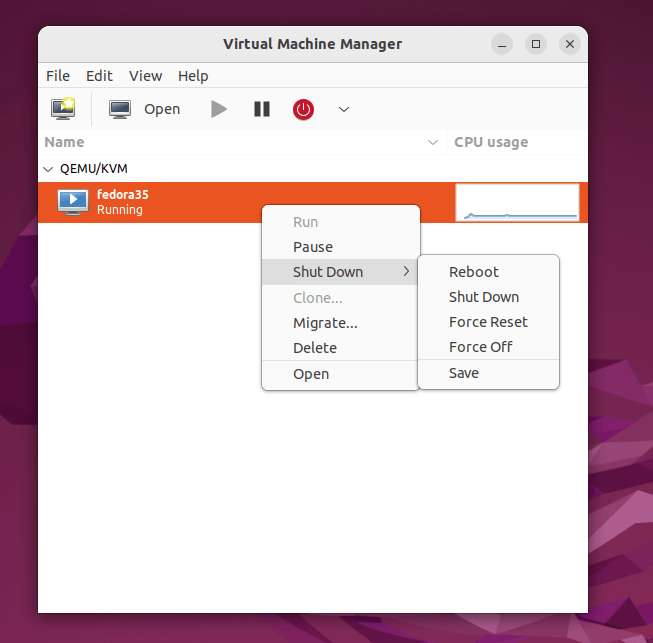
In addition, your virtual machine will be listed on the Virtual machine manager as shown. By right-clicking on your VM, you can perform a variety of tasks including pausing, rebooting, resetting, and deleting the virtual machine among many others.
In this guide, we have demonstrated how to install QEMU/KVM on Ubuntu 20.04 / 22.04. In addition, we went a step further and created a virtual machine using an ISO image file.
To manage KVM virtual machines, read our following articles:
How to Install KVM on Ubuntu 20.04
A type 2 hypervisor enables users to run isolated instances of other operating systems inside a host system. As a Linux based OS, Ubuntu supports a wide range of virtualization solutions.
Aside from popular third-party apps, such as VirtualBox and VMWare, the Linux kernel has its own virtualization module called KVM (Kernel-based Virtual Machine).
In this tutorial you will learn how to install and set up KVM on Ubuntu 20.04.
- A system running Ubuntu 20.04
- An account with sudo privileges
- Access to the command line/terminal
Check Virtualization Support on Ubuntu 20.04
1. Before you begin with installing KVM, check if your CPU supports hardware virtualization via egrep command:
egrep -c '(vmx|svm)' /proc/cpuinfoCheck the number in the output:

If the command returns a value of 0 , your processor is not capable of running KVM. On the other hand, any other number means you can proceed with the installation.
2. Now, check if your system can use KVM acceleration by typing:
The output should look like this:

If kvm-ok returns an error stating KVM acceleration cannot be used, try solving the problem by installing cpu-checker.
3. To install cpu-checker, run the following command:
sudo apt install cpu-checker4. When the installation completes, restart the terminal.
You are now ready to start installing KVM.
Note: When it is performed for servers, hardware virtualization is referred to as server virtualization.
Install KVM on Ubuntu 20.04
To enable KVM virtualization on Ubuntu 20.04:
- Install related packages using apt
- Authorize users to run VMs
- Verify that the installation was successful
Step 1: Install KVM Packages
1. First, update the repositories:
2. Then, install essential KVM packages with the following command:
sudo apt install qemu-kvm libvirt-daemon-system libvirt-clients bridge-utilsThis will start the installation of four KVM packages:

3. When prompted, type Y , press ENTER, and wait for the installation to finish.
Step 2: Authorize Users
1. Only members of the libvirt and kvm user groups can run virtual machines. Add a user to the libvirt group by typing:
sudo adduser ‘username’ libvirtReplace username with the actual username.

2. Now do the same for the kvm group:
sudo adduser ‘[username]’ kvm
Note: If you need to remove a user from the libvirt or kvm group, just replace adduser with deluser in the command above.
Step 3: Verify the Installation
1. Confirm the installation was successful by using the virsh command:
You can expect an output as seen below:

2. Or use the systemctl command to check the status of libvirtd:
sudo systemctl status libvirtdIf everything is functioning properly, the output returns an active (running) status.
3. Press Q to quit the status screen.
4. If the virtualization daemon is not active, activate it with the following command:
sudo systemctl enable --now libvirtdCreating a Virtual Machine on Ubuntu 20.04
1. Before you choose one of the two methods listed below, install virt-manager, a tool for creating and managing VMs:
sudo apt install virt-manager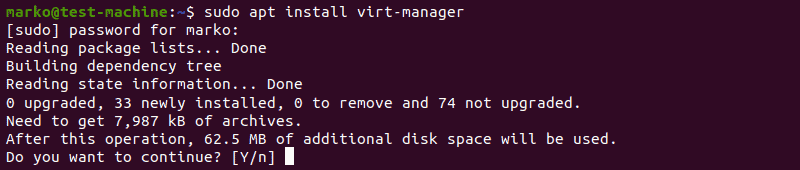
2. Type Y and press ENTER. Wait for the installation to finish.
Make sure you download an ISO containing the OS you wish to install on a VM and proceed to pick an installation method.
Method 1: Virt Manager GUI
2. In the first window, click the computer icon in the upper-left corner.
3. In the dialogue box that opens, select the option to install the VM using an ISO image. Then click Forward.
4. In the next dialogue, click Browse Local and navigate to the path where you stored the ISO you wish to install.
5. The ISO you chose in the previous window populates the field in Step 2. Proceed to Step 3 by clicking Forward.
6. Enter the amount of RAM and the number of CPUs you wish to allocate to the VM and proceed to the next step.
7. Allocate hard disk space to the VM. Click Forward to go to the last step.
8. Specify the name for your VM and click Finish to complete the setup.
9. The VM starts automatically, prompting you to start installing the OS that’s on the ISO file.

Method 2: Using Command Line
Use the virt-install command to create a VM via Linux terminal. The syntax is:
virt-install --option1=value --option2=value . In the following example, virt-install is used to install Fedora 33 Workstation.
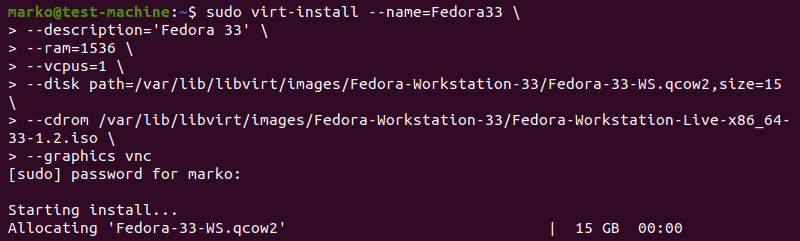
Tip: For tidier appearance of commands with many options, type a back-slash after each option. That way, when you press Enter, the command will not execute, and the cursor will go to the next line.
Options behind the command serve to define the parameters of the installation.
Here is what each of them means:
| Option | Description |
|---|---|
| —name | The name you give to the VM |
| —description | A short description of the VM |
| —ram | The amount of RAM you wish to allocate to the VM |
| —vcpus | The number of virtual CPUs you wish to allocate to the VM |
| —disk | The location of the VM on your disk (if you specify a qcow2 disk file that does not exist, it will be automatically created) |
| —cdrom | The location of the ISO file you downloaded |
| —graphics | Specifies the display type |
After reading this article, you should know how to install KVM on Ubuntu 20.04. Additionally, the article describes two methods of setting up virtual machines, using the virt-manager GUI and the virt-install command.