- cut command in Linux with examples
- 8 Cut Command Examples [Cut Sections of Line in File]
- cut Command Syntax
- 1. Print First Byte of File
- 2. Print Multiple Bytes of File
- 3. Print a Range of Bytes of File
- 4. Print Specify Start Byte Position of File
- 5. Print Specify End Byte Position of File
- 6. Cut First Byte by Character Position
- 7. Cut a String by Delimiter in Linux
- 8. Print All Bytes or Characters Except Selected Ones
cut command in Linux with examples
The cut command in UNIX is a command for cutting out the sections from each line of files and writing the result to standard output. It can be used to cut parts of a line by byte position, character and field. Basically the cut command slices a line and extracts the text. It is necessary to specify option with command otherwise it gives error. If more than one file name is provided then data from each file is not precedes by its file name.
cut OPTION. [FILE].
Let us consider two files having name state.txt and capital.txt contains 5 names of the Indian states and capitals respectively.
$ cat state.txt Andhra Pradesh Arunachal Pradesh Assam Bihar Chhattisgarh
Without any option specified it displays error.
$ cut state.txt cut: you must specify a list of bytes, characters, or fields Try 'cut --help' for more information.
Options and their Description with examples:
1. -b(byte): To extract the specific bytes, you need to follow -b option with the list of byte numbers separated by comma. Range of bytes can also be specified using the hyphen(-). It is necessary to specify list of byte numbers otherwise it gives error. Tabs and backspaces are treated like as a character of 1 byte.
List without ranges $ cut -b 1,2,3 state.txt And Aru Ass Bih Chh List with ranges $ cut -b 1-3,5-7 state.txt Andra Aruach Assm Bihr Chhtti
It uses a special form for selecting bytes from beginning upto the end of the line:
In this, 1- indicate from 1st byte to end byte of a line $ cut -b 1- state.txt Andhra Pradesh Arunachal Pradesh Assam Bihar Chhattisgarh In this, -3 indicate from 1st byte to 3rd byte of a line $ cut -b -3 state.txt And Aru Ass Bih Chh
2. -c (column): To cut by character use the -c option. This selects the characters given to the -c option. This can be a list of numbers separated comma or a range of numbers separated by hyphen(-). Tabs and backspaces are treated as a character. It is necessary to specify list of character numbers otherwise it gives error with this option.
$cut -c [(k)-(n)/(k),(n)/(n)] filename
Here,k denotes the starting position of the character and n denotes the ending position of the character in each line, if k and n are separated by “-” otherwise they are only the position of character in each line from the file taken as an input.
$ cut -c 2,5,7 state.txt nr rah sm ir hti
Above cut command prints second, fifth and seventh character from each line of the file.
$ cut -c 1-7 state.txt Andhra Arunach Assam Bihar Chhatti
Above cut command prints first seven characters of each line from the file.
Cut uses a special form for selecting characters from beginning upto the end of the line:
$ cut -c 1- state.txt Andhra Pradesh Arunachal Pradesh Assam Bihar Chhattisgarh Above command prints starting from first character to end. Here in command only starting position is specified and the ending position is omitted. $ cut -c -5 state.txt Andhr Aruna Assam Bihar Chhat Above command prints starting position to the fifth character. Here the starting position is omitted and the ending position is specified.
3. -f (field): -c option is useful for fixed-length lines. Most unix files doesn’t have fixed-length lines. To extract the useful information you need to cut by fields rather than columns. List of the fields number specified must be separated by comma. Ranges are not described with -f option. cut uses tab as a default field delimiter but can also work with other delimiter by using -d option.
Note: Space is not considered as delimiter in UNIX.
$cut -d "delimiter" -f (field number) file.txt
Like in the file state.txt fields are separated by space if -d option is not used then it prints whole line:
$ cut -f 1 state.txt Andhra Pradesh Arunachal Pradesh Assam Bihar Chhattisgarh
If -d option is used then it considered space as a field separator or delimiter:
$ cut -d " " -f 1 state.txt Andhra Arunachal Assam Bihar Chhattisgarh
Command prints field from first to fourth of each line from the file. Command: $ cut -d " " -f 1-4 state.txt Output: Andhra Pradesh Arunachal Pradesh Assam Bihar Chhattisgarh
4. –complement: As the name suggests it complement the output. This option can be used in the combination with other options either with -f or with -c.
$ cut --complement -d " " -f 1 state.txt Pradesh Pradesh Assam Bihar Chhattisgarh $ cut --complement -c 5 state.txt Andha Pradesh Arunchal Pradesh Assa Biha Chhattisgarh
5. –output-delimiter: By default the output delimiter is same as input delimiter that we specify in the cut with -d option. To change the output delimiter use the option –output-delimiter=”delimiter”.
$ cut -d " " -f 1,2 state.txt --output-delimiter='%' Andhra%Pradesh Arunachal%Pradesh Assam Bihar Chhattisgarh
Here cut command changes delimiter(%) in the standard output between the fields which is specified by using -f option .
6. –version: This option is used to display the version of cut which is currently running on your system.
$ cut --version cut (GNU coreutils) 8.26 Packaged by Cygwin (8.26-2) Copyright (C) 2016 Free Software Foundation, Inc. License GPLv3+: GNU GPL version 3 or later . This is free software: you are free to change and redistribute it. There is NO WARRANTY, to the extent permitted by law. Written by David M. Ihnat, David MacKenzie, and Jim Meyering.
Applications of cut Command
1. How to use tail with pipes(|): The cut command can be piped with many other commands of the unix. In the following example output of the cat command is given as input to the cut command with -f option to sort the state names coming from file state.txt in the reverse order.
$ cat state.txt | cut -d ' ' -f 1 | sort -r Chhattisgarh Bihar Assam Arunachal Andhra
It can also be piped with one or more filters for additional processing. Like in the following example, we are using cat, head and cut command and whose output is stored in the file name list.txt using directive(>).
$ cat state.txt | head -n 3 | cut -d ' ' -f 1 > list.txt $ cat list.txt Andhra Arunachal Assam
Thanks Saloni Gupta for providing more examples.

8 Cut Command Examples [Cut Sections of Line in File]
As Linux users, we interact with the text files on a regular basis. One of the common operations we perform on these files is text filtering. Linux provides many command-line utilities for text filtering, such as – grep, fgrep, sed, awk, and the list goes on.
However, in this guide, we will discuss one more text-filtering utility called cut, which is used to remove a particular section from the input line. The cut command performs filtering based on the byte position, character, field, and delimiter.
In this beginner’s guide, we will learn about the cut command with examples in the Linux command line. After following this guide Linux command line users will be able to use the cut command efficiently in their day-to-day life.
cut Command Syntax
The syntax of the cut command is just like any other Linux command:
In the above syntax, the angular bracket (<>) represents the mandatory arguments whereas the square bracket ([]) represents the optional parameters.
Now that we are familiar with the syntax of the cut command. Next, let’s create a sample file to use as an example:
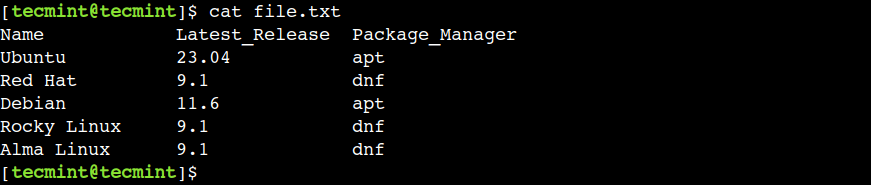
1. Print First Byte of File
The cut command allows us to extract the text based on byte position using the -b option.
Let’s use the below command to extract the first byte from each line of the file:
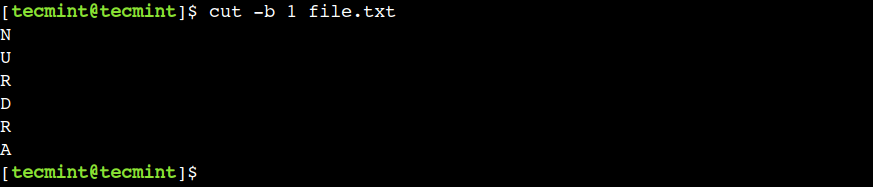
In this example, we can see that the cut command shows only the first character because all characters are one byte long.
2. Print Multiple Bytes of File
In the previous example, we saw how to select a single byte from the file. However, the cut command also allows us to select multiple bytes using the comma.
Let us use the below command to select the first four bytes from the file:

In this example, we have selected the consecutive bytes but that is not mandatory. We can use any valid byte position with the cut command.
3. Print a Range of Bytes of File
In the previous example, we used commas to select consecutive bytes. However, that approach is not suitable if we want to select a large number of bytes consecutively. In such cases, we can use the hyphen (-) to specify the byte range.
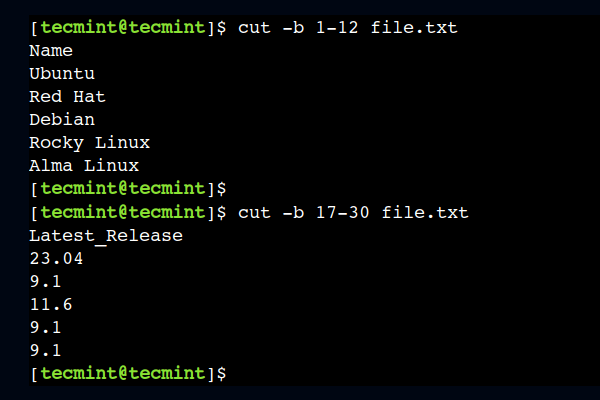
To understand this, let’s use the 1-12 as a byte range to select the first twelve bytes from each line:
In a similar way, we can select a byte range from the middle as well. For example, the below command selects bytes from column numbers 17 to 30:
4. Print Specify Start Byte Position of File
Sometimes, we want to extract all the text from a certain byte position. In such cases, we can omit the end byte position.
For example, we can use the following command to print all bytes starting from position 17:
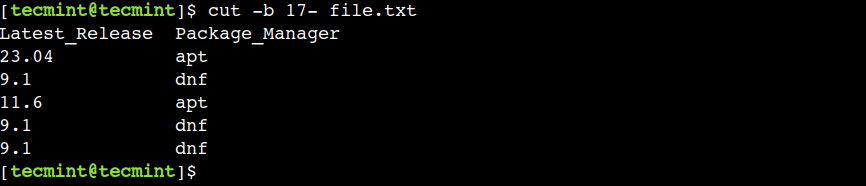
In the above command, 17 represents the starting byte position whereas the hyphen (-) represents the end of the line.
5. Print Specify End Byte Position of File
In a similar way, we can also specify the end byte position only. For example, the below command prints all the bytes from the start of the line till the 12th column:

In the above command, the hyphen (-) represents the start of the line whereas 12 represents the end byte position.
6. Cut First Byte by Character Position
In the last few sections, we saw how to perform text extraction based on byte position. Now, let’s see how to perform the text extraction by character position.
To achieve this, we can use the -c option to cut the first byte from the following multi-byte string:
$ echo école | cut -b 1 �
In the above output, we can see that, the cut command shows a question mark instead of the character é . This happens because we are trying to print the first byte from the multi-byte character.
Now, let’s use the -c option to cut the same multi-byte character and observe the result:
$ echo école | cut -c 1 é
In the above output, we can see that now the cut command shows the expected output.
It is important to note that, not all versions of the cut commands support the multi-byte characters. For example, Ubuntu and its derivatives don’t support multi-byte characters.
To understand this, let’s run the same command on the Linux Mint which is derived from Ubuntu:

Here we can see that, the cut command treats both multi-byte characters and single-byte characters the same. Hence it doesn’t generate the expected output.
7. Cut a String by Delimiter in Linux
By default, the cut command uses a TAB character as a delimiter. However, we can override this default behavior using the -d option.
Oftentimes, the -d option is used in combination with the -f option which is used to select a particular field.
To understand this, let’s use the space character as a delimiter and print the first two fields using the -f option:
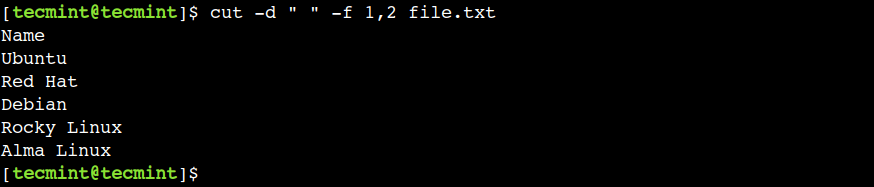
In the above example, we have used the comma with the -f option to select multiple fields.
8. Print All Bytes or Characters Except Selected Ones
Sometimes, we want to print all the characters except a few ones. In such cases, we can use the —complement option. As the name suggests, this option prints all the columns except the specified ones.
$ cut -c 1 --complement file.txt
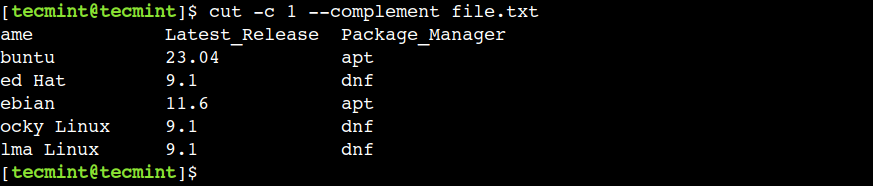
In the above output, we can see that the —complement option prints all the characters except the first character.
It is important to note that, in this example, we have used commas to select multiple fields. However, we can also use the other supported ranges as well. We can refer to the first few examples of this tutorial to understand more about the ranges.
Conclusion
In this beginner’s guide, we discussed the practical examples of the cut command with text filtering based on the byte position, character position, and delimiter.
Do you know of any other best example of the cut command in Linux? Let us know your views in the comments below.