- Linux Mint Forums
- D-Link DWA-171 not detected (Linux Mint 16) [SOLVED]
- D-Link DWA-171 not detected (Linux Mint 16) [SOLVED]
- WiFi-адаптер D-Link DWA-171 в Ubuntu 14.04
- Start Using Ubuntu
- Saturday, August 2, 2014
- Install Driver for D-Link DWA-171
- Update 161005
- Set D-Link DWA 171 As Wireless Device and not as USB Stick on Ubuntu
Linux Mint Forums
D-Link DWA-171 not detected (Linux Mint 16) [SOLVED]
Forum rules
Before you post please read how to get help. Topics in this forum are automatically closed 6 months after creation.
D-Link DWA-171 not detected (Linux Mint 16) [SOLVED]
Post by trtolson » Mon May 05, 2014 10:47 pm
I apologize in advance, I am extremely green when it comes to Linux. Running older hardware, but it runs really well. Unfortunately, the internal WiFi doesn’t work. The system sees the internal card, and I can install the broadcom driver in «Driver Manager», but the «WiFi Catcher» selector switch on this dell I believe is fried, so even though the system sees the internal card, «WiFi» isn’t enabled. So I picked up the D-Link DWA-171 USB adapter. I had tested with a Linksys AE1000 USB adapter from my windows box. That worked without any issues. This D-Link, not so much. Below is the inxi -Fxz output, I’m not sure what else will be needed to assist with this problem. Thank you in adavance for your assistance and your understanding
thomas@Mint-Laptop ~ $ inxi -Fxz
System: Host: Mint-Laptop Kernel: 3.11.0-12-generic i686 (32 bit, gcc: 4.8.1) Desktop: Gnome Distro: Linux Mint 16 Petra
Machine: System: Dell product: Inspiron 1521
Mobo: Dell model: 0GU163 Bios: Dell version: A01 date: 06/20/2007
CPU: Dual core AMD Turion 64 X2 Mobile TL-56 (-MCP-) cache: 1024 KB flags: (lm nx sse sse2 sse3 svm) bmips: 3191.74
Clock Speeds: 1: 800.00 MHz 2: 800.00 MHz
Graphics: Card: Advanced Micro Devices [AMD/ATI] RS690M [Radeon Xpress 1200/1250/1270] bus-ID: 01:05.0
X.Org: 1.14.3 drivers: ati,radeon (unloaded: fbdev,vesa) Resolution: 1280×800@61.1hz
GLX Renderer: Gallium 0.4 on ATI RS690 GLX Version: 2.1 Mesa 9.2.1 Direct Rendering: Yes
Audio: Card: Advanced Micro Devices [AMD/ATI] SBx00 Azalia (Intel HDA) driver: snd_hda_intel bus-ID: 00:14.2
Sound: Advanced Linux Sound Architecture ver: k3.11.0-12-generic
Network: Card-1: Broadcom BCM4401-B0 100Base-TX driver: b44 ver: 2.0 bus-ID: 03:00.0
IF: eth0 state: up speed: 100 Mbps duplex: full mac:
Card-2: Broadcom BCM4311 802.11a/b/g driver: b43-pci-bridge bus-ID: 0b:00.0
IF: N/A state: N/A mac: N/A
Drives: HDD Total Size: 250.1GB (4.0% used) 1: id: /dev/sda model: WDC_WD2500BEVT size: 250.1GB
Partition: ID: / size: 227G used: 9.3G (5%) fs: ext4 ID: swap-1 size: 3.08GB used: 0.00GB (0%) fs: swap
RAID: No RAID devices detected — /proc/mdstat and md_mod kernel raid module present
Sensors: System Temperatures: cpu: 44.5C mobo: N/A
Fan Speeds (in rpm): cpu: N/A
Info: Processes: 154 Uptime: 1:05 Memory: 539.3/2902.0MB Runlevel: 2 Gcc sys: 4.8.1 Client: Shell inxi: 1.8.4
thomas@Mint-Laptop ~ $ lsusb
Bus 001 Device 003: ID 05a9:2640 OmniVision Technologies, Inc. OV2640 Webcam
Bus 001 Device 009: ID 2001:3314 D-Link Corp.
Bus 001 Device 001: ID 1d6b:0002 Linux Foundation 2.0 root hub
Bus 006 Device 001: ID 1d6b:0001 Linux Foundation 1.1 root hub
Bus 005 Device 001: ID 1d6b:0001 Linux Foundation 1.1 root hub
Bus 004 Device 001: ID 1d6b:0001 Linux Foundation 1.1 root hub
Bus 003 Device 001: ID 1d6b:0001 Linux Foundation 1.1 root hub
Bus 002 Device 001: ID 1d6b:0001 Linux Foundation 1.1 root hub
Last edited by LockBot on Wed Dec 28, 2022 7:16 am, edited 2 times in total.
Reason: Topic automatically closed 6 months after creation. New replies are no longer allowed.
WiFi-адаптер D-Link DWA-171 в Ubuntu 14.04
В последнее время набирает популярность новый стандарт WiFi — 802.11ac, работающий исключительно в диапазоне 5GHz. Распространённый ныне стандарт 802.11n так же допускает работу в диапазоне 5GHz, однако большинство бюдженых адаптеров этого стандарта поддерживают только 2.4GHz.
В силу пока ещё малой распространнёности устройств с поддержкой диапазона 5GHz он не так сильно зашумлён как 2.4GHz, что может быть полезно в городе (нет помех от соседей). А стандарт 802.11ac позволяет передавать данные с большей скоростью, по сравнению с 802.11n, что как минимум приятно:).
И если замена домашнего роутера на новый не является большой проблемой в силу относительно низкой цены, то замена, например, ноутбука уже сложнее и тут на помощь приходят различные USD-адаптеры вроде D-Link DWA-171.
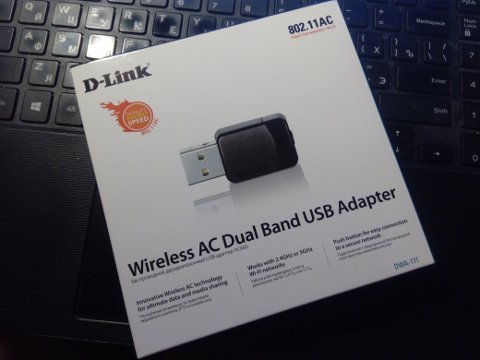
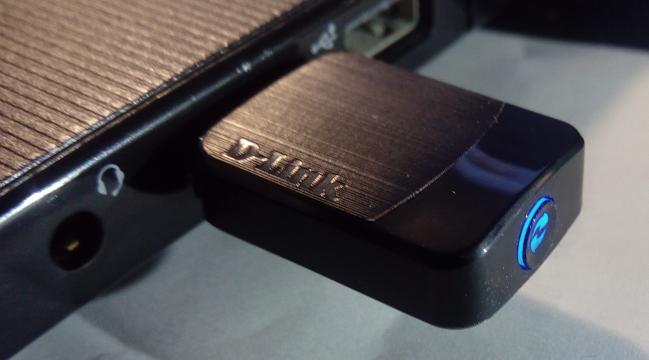
Адаптер D-Link DWA-171 отличается миниатюрностью, поддержкой всех современных стандартов WiFi (802.11a/b/g/n/ac), пусть и в самой простой конфигурации (одна антенна и ширина канала до 80MHz в 802.11ac, что обеспечивает скорость до 433 мбит/с).
Существует две ревизии этого адаптера: DWA-171 rev A1 на чипе Realtek RTL8811AU и rev B1 на чипе MediaTek MT7610U. Ниже будет показано как настроить работу адаптера ревизии A1 в Ubuntu Linux 14.04 и 16.04.
В Ubuntu 16.04 «из коробки» идёт ядро версии 4.4. В Ubuntu 14.04 по умолчанию используется ядро 3.13, которое лучше заменить на 4.4. Если ваша система не использует UEFI то это можно сделать командой:
apt-get install linux-generic-lts-xenial
apt-get install linux-signed-generic-lts-xenial
Далее нужно скачать драйвер. Теоретически можно скачать драйвер с сайта D-Link, но он давно не обновляется, поддерживает ограниченное количество ядер и не отличается большой стабильностью. Различные энтузиасты пытаются дорабатывать этот драйвер, добавляя поддержку новых ядер и исправляя ошибки. Результаты их трудов можно найти на github. Неплохая подборка ссылок есть на WikiDevi.
Автор этих строк остановился на варианте от пользователя github с ником ulli-kroll. Склонируем исходные тексты командой:
cd /usr/src && git clone https://github.com/ulli-kroll/rtl8821au.git rtl8821au-1
Для сборки мы будем использовать систему dkms, которая позволяет автоматически пересобирать модули при обновлении ядра. Для этого создаём файл /usr/src/rtl8821au-1/dkms.conf следующего содержания:
PACKAGE_NAME="rtl8821au" PACKAGE_VERSION="1" BUILT_MODULE_NAME[0]="rtl8821au" MAKE="'make'" CLEAN="'make' clean" DEST_MODULE_LOCATION[0]="/updates/dkms" AUTOINSTALL="YES"
Сразу копируем файлы прошивок (firmware) из директории с исходными текстами в системную директорию:
mkdir -p /lib/firmware/rtlwifi cp -n /usr/src/rtl8821au-1/firmware/* /lib/firmware/rtlwifi/.
dkms build -m rtl8821au -v 1
dkms install -m rtl8821au -v 1
После этого подключаем модуль и если всё прошло хорошо то в системе появляется новый сетевой интерфейс. Посмотреть список беспроводных интерфейсов можно командой:
Дальше настраиваем соединение любым привычным инструментом.
Из известных ограничений: не поддерживается работа в режиме точки доступа. Для кого-то это может быть критичным.
На этом всё. Приятной работы!
Start Using Ubuntu
A blog to share all the experience in starting using ubuntu.
Saturday, August 2, 2014
Install Driver for D-Link DWA-171

It is a mini size USB WiFi dongle that support dual band and comes with IEEE 802.11ac. I tried it on my Windows maching, it is working great, I can easily get the driver provided on its product page. But it does not work out of the box in my Ubuntu.
I previously found this page here, where it provide the driver for ubuntu, I downloaded, and try to make and install, but the make itself doesn’t successfully complete. It shows 2 errors on the summary of the make.
After more searches, I found this discussion here, where people also discussing on how to install the driver for DWA-171, until I found this comment.

sudo apt-get install git
git clone https://github.com/abperiasamy/rtl8812AU_8821AU_linux.git
cd rtl8812AU_8821AU_linux
make
sudo make install
sudo modprobe 8812au
I followed it and now it successfully installed. I guess the difference between the method above and the method of downloading the driver from its wikidevi page is the 2nd method actually using the latest version of its driver, and the its wikidevi page might still carrying its older version of driver.
Update 161005
The original method above seems not works for 5GHz network. To support 5GHz network, please use the updated command:
Set D-Link DWA 171 As Wireless Device and not as USB Stick on Ubuntu
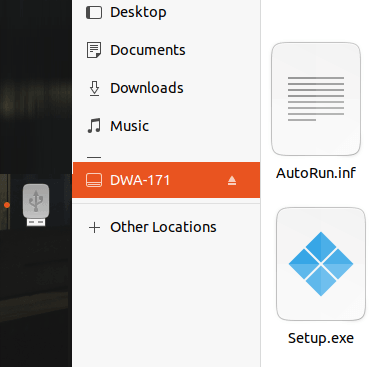
The problem many people face after installing the dual-band Wi-Fi drivers for D-Link DWA USB dongle is that Linux system doesn’t recognize them.
So, if you are on Linux and struggling with setting up a DWA device, then here’s the guide for you to follow.
- The very first thing you have to do is get the correct drivers from the official D-Link support page.
- Install the drivers, and to do that, extract the archive and cd into the root of the main directory.
- Run these commands to install the module.


Connect to any Wi-Fi and start browsing the internet without any worried.
Note: Sometimes, when you restart your computer, there are chances that Wi-Fi option disappears again. For that, I will suggest you to keep a bash script in some folder with the following lines.
lsusb
#Bus 003 Device 005: ID 0bda:1a2b Realtek Semiconductor Corp.
/usr/sbin/usb_modeswitch -K -v 0bda -p 1a2b
lsusb
Save the above lines in a file names usb.sh and then run with root privileges to get the Wi-Fi working again.