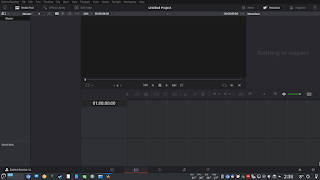
- Install DaVinci Resolve in Linux (Ubuntu, Arch, and Fedora)
- Fedora (NVIDIA)
- Fedora (AMD)
- Debian/Ubuntu (NVIDIA)
- Arch Linux (NVIDIA and AMD)
- Read next
- How to make an Apache Webserver with SSL
- The ULTIMATE RetroPie Setup Guide
- Installing Arch Linux the EASY WAY! – archfi Guide
- Comments ()
- Subscribe to TechHut Media
- Блог начинающего линуксоида.
- 4 комментария:
Install DaVinci Resolve in Linux (Ubuntu, Arch, and Fedora)
Installing DaVinci Resolve in Linux is not the easiest thing to do despite having native support. Resolve is a professional level video editor that requires a very specific environment to run properly. Below are the minimum requirements.
Minimum system requirements for Linux
- CentOS 7.3
- 16-32 GB of system memory
- Discrete GPU with at least 2GB of VRAM
- GPU which supports OpenCL 1.2 or CUDA 11
- NVIDIA/AMD Driver version – As required by your GPU
Important Note: Using the free version of DaVinci Resolve in Linux will require the use of uncompressed .mov files. These file sizes are LARGE, around 5-30gb for a 10min video. If this is a no go for you I’d recommend Kdenlive.
As you can see there are some hefty requirements for the software. This application will not run on integrated graphics and it’s very specific on the CentOS requirement. Luckily their are tools and other options for installing Resolve on Fedora, Debain/Ubuntu, and Arch based systems.
As of writing this, I’ve only had repeated success installing DaVinci Resolve with an AMD GPU in a Arch Linux system. So please refer the the Arch guide below if you’re running team red.
Fedora (NVIDIA)
If you are running Fedora AND have a NVIDIA GPU in you’re system you are in the best spot when it comes to running Resolve. Fedora and CentOS both fall under the umbrella of Red Hat Linux. Fedora is developed by the community backed Fedora project with this comes similar code thus we are able to use the files directly from Blackmagic Design.
First make sure you have the proper drivers. You’ll need RPM Fusion enabled. I recommend following the wiki, but you’ll need CUDA driver for sure. Install it using the command below.
sudo dnf install xorg-x11-drv-nvidia-cudaOnce you have the NVIDIA drivers properly set up on your system you’re you’re going to want to head over to Go to Blackmagic Design and download the official installer *.zip archive. Once downloaded open the terminal, go to the download directory and extract the files.
cd ~/Downloads unzip DaVinci_Resolve_Studio_17.1.1_Linux.zipNow we need to make sure the installer .run file can be extracted.
sudo chmod +x DaVinci_Resolve_17.1.1_Linux.runNow, we will run this command to execute the installer.
sudo ./DaVinci_Resolve_17.1.1_Linux.runWhen the installer opens running though it is fairly simple. Hit next, skim though the read me, agree to their terms of service, and click start install. And that’s it launch the application and have fun.
Fedora (AMD)
I had success one time using this guide on Reddit. When I tried to do it a second time my drivers had a error there was a white screen on boot. Proceed with caution and make sure your system is backup up with Timeshift or another tool. I do not recommend this, but here is the resource.
Debian/Ubuntu (NVIDIA)
First lets update our system and grab some dependencies.
sudo apt update sudo apt upgrade sudo apt-get install fakeroot xorrisoNow, lets make sure we have the proper NVIDIA drivers installed.
sudo apt-get install nvidia-driver nvidia-opencl-icd libcuda1 libglu1-mesa sudo apt-get install libnvidia-encode1Next you’re going to want to head over to Go to Blackmagic Design and download the official installer *.zip archive. Then head over to Daniel Tufvesson | MakeResolveDeb and download the latest MakeResolveDeb into the same directory.
Now we are going to want to extract the archived files we downloaded. Easiest way is to open a terminal application and run the following command. Change directory as needed.
cd ~/Downloads unzip DaVinci_Resolve_Studio_17.1.1_Linux.zip tar zxvf makeresolvedeb_1.5.0_multi.sh.tar.gzOnce extacted you should have these two files in the directory.
DaVinci_Resolve_Studio_17.1.1_Linux.run makeresolvedeb_1.5.0_multi.shWith the terminal open in the correct directory we are going to use the makesolvedeb script to convert the .run file into a proper installation file for debian based systems. Run the following command.
./makeresolvedeb_1.5.0_multi.sh DaVinci_Resolve_Studio_17.1.1_Linux.runThis will take a bit and be resource intensive. When indicated by the last line saying “[DONE]” and the reported number of errors 0 you can move on to the next step.
Now we will use dpkg to install the Debian package. Make sure you replace the file name with the proper version.
sudo dpkg -i davinci-resolve_17.1.1-mrd1.0_amd64.debThat’s it! The package is installed and it should open with no errors if everything was set up correctly. Please note, occasionally there are issues with the first welcome screen. You may need to force close this and re-open the application.
Most content in this section was pulled from Daniel Tufvesson | MakeResolveDeb please refer here for updated information, and FAQ.
Arch Linux (NVIDIA and AMD)
First, lets get our proper GPU drivers. One of the awesome things about Arch is the AUR and the community around it. Luckily for us the Arch community has packaged the amdgpu-pro drivers so it’s an easy installation. You will need AUR access so make sure you have yay or pamac .
AMD GPU Drivers
yay -S amdgpu-pro-libgl opencl-amdNVIDIA GPU Drivers
pacman -Syu nvidia nvidia-utils opencl-nvidiaNow that we have the proper drivers the AUR is going to come in again to help us out. Just run the command below to install resolve. As a reminder if you paid for the full version you’ll want the -studio package. For the free version, install 2 davinci-resolve and for the Studio version, install davinci-resolve-studio.
And that it! You have it installed. If you’re running a AMD card their are a few more things to do as this will require the progl script to run.
To launch DaVinci Resolve with the AMD pro drivers you will need to run this in termial.
progl /opt/resolve/bin/resolveYou will notice opening the .desktop application with application menus will result in… nothing happening. We need to fix this by adding the progl command to our .desktop file within usr/share/applications . Open terminal and run the following command,
sudo nano usr/share/applications/com.blackmagicdesign.resolve.desktopYou should see something that looks like this in nano:
Version=1.0 Type=Application Name=DaVinci Resolve GenericName=DaVinci Resolve Comment=Revolutionary new tools for editing. > Path=/opt/resolve/ Exec=/opt/resolve/bin/resolve %u Terminal=false MimeType=application/x-resolveproj; Icon=/opt/resolve/graphics/DV_Resolve.png StartupNotify=true Name[en_US]=DaVinci Resolve StartupWMClass=resolveAll we need to do is add progl after Exec= as if we were running it in termial. Should look something like this.
Exec=progl /opt/resolve/bin/resolve %uHit ctrl-o to save out the file. Restart or logout of your desktop environment and it should open with no errors! (Tested this in gnome. To restart press alt+F2 then input ‘r’)
For more information including detailed driver support and other helpful info the Arch wiki is a great place to be: DaVinci Resolve – ArchWiki.
If you have any other suggestions, tip, tricks, or updates let us know down below!
Read next
How to make an Apache Webserver with SSL
Creating yourself a basic Apache webserver is often the first step in your web development journey. Apache is the base requirement for many web applications and products. Better yet you can use an Apache webserver to host your self-made or generated static websites with something like HUGO. In this video
The ULTIMATE RetroPie Setup Guide
Nothing is better than sitting back and playing some of your favorite games when you were a kid, or even better; showing the next generation some of the awesome games that we grew up with. In this guide we will be setting up our very own RetroPie console using the
Installing Arch Linux the EASY WAY! – archfi Guide
This is a simple installation script written in bash by the developer MatMoul 2. This will allow you to install Arch by selecting various options and packages instead of needing to run commands.
Comments ()
Subscribe to TechHut Media
Don’t miss out on the latest tech and open-source news. Subscribe now for FREE or become a member to get access to the library of members-only content.
Блог начинающего линуксоида.
Если вы следите за новостями, то знаете, что знаменитый профессиональный видеоредактор и система цветокоррекции DaVinci Resolve, в своей бесплатной редакции, доступен теперь и для Linux. Однако официально разработчиками поддерживаются только CentOS и Red Hat Enterprise Linux, как системы для профессиональных графических станций. Однако это вовсе не означает, что Resolve не будет работать в других дистрибутивах. И в этой заметке я покажу как установить его в Debian, Ubuntu и их производных.
Важно: программа работает только с проприетарными видеодрайверами Nvidia и AMD. И вообще оптимизирована по большей части под Nvidia, поэтому убедитесь что у вас установлена последняя версия видеодрайвера.
Прежде всего нужно скачать сам редактор. Переходим по ссылке, выбираем версию DaVinci Resolve для Linux. Нас попросят зарегистрироваться. Вводите абсолютно левые данные и качайте архив :). После скачивания и распаковки у вас окажутся установочный пакет и PDF’ка с инструкцией. Она нам не нужна. Открываем терминал в том каталоге, куда распаковали установочный файл и вводим:
Начнётся установка. Программа ставится в каталог /opt и создаёт нужный для запуска ярлык на рабочем столе и в меню приложений. Так как она собирается с учётом CentOS — то требует старые версии некоторых библиотек, в частности libSSL и libPNG. Первую даунгрейдить не нужно, нужно просто создать несколько символьных ссылок:
Далее если у вас Debian 9 — качаем пакет libpng12 отсюда (в самом низу странице, выбрав свою архитектуру) и устанавливаем, например, в GDebi. Юзерам Ubuntu 16.10 (и новее) и производных — сюда.
У приложения отсутствует рамка окна, так что не пугайтесь, это не баг 🙂 Однако в бесплатной линуксовой версии присутствует досадное ограничение: нет возможности экспорта видео кодеком H.264, хотя в Win и Mac версиях эта возможность есть.
4 комментария:
Доброго времени суток вам Алексей!Читаю все ваши статьйи и почти все они очень полезные и познавательные,также смотрел ваши видео с youtube.Но хотелось бы попросить вас написать статью о действительно нужном и полезном инструменте для (начинающих линуксоидов).А именно о программах и утилитах ремастеринга, и или создания так называемых iso образов из установленой и настроенной системы так как для Debian они есть но нормальной инструкции на дустуупном языке их практически нету. Systemback прекратил своё развитие на данный момент .Хотелось бы почитать про нативные debian(овские) утилиты типа live-bild, Ну и ещё есть один проект Refracta- http://www.ibiblio.org/refracta/documents.html Ответить Удалить
Зачем начинающему линуксоиду создавать свои сборки системы? Если вы о бэкапах — то о таком могу написать Ответить Удалить


