- How to install and use DBeaver in Linux
- Prerequisites:
- Downloading DBeaver Community:
- Installing DBeaver in Linux:
- Using DBeaver in Linux:
- Setting JVM Parameters for DBeaver:
- How To Install DBeaver Universal Database Tool in Linux
- DBeaver Features
- Installing DBeaver Community Edition via Snap
- Installing DBeaver Community Edition via a Package Manager
- How to Use DBeaver in Linux
- How to configurate the home client in dbeaver for Postgresql
- 5 Answers 5
- Saved searches
- Use saved searches to filter your results more quickly
- Native Client missing — #13608
- Native Client missing — #13608
- Comments
- System information:
- Connection specification:
- Describe the problem you’re observing:
- Steps to reproduce, if exist: See above
- Include any warning/errors/backtraces from the logs
How to install and use DBeaver in Linux
In this article we are going to install and setup a Database management tool which is DBeaver. DBeaver is available for the cross platforms to support multiple databases including MySQL, Postgresql and GreenPlum. DBeaver can be used as an alternative of MySQL-Workbench and PGAdmin. It has a user-friendly interface that makes it more useful for its new users. Using DBeaver, you can create local databases and also configure the maximum result size to avoid session hanging issues in case the query results take time to process big queries.
DBeaver comes with a community edition which is free to use as well as with an enterprise edition that supports NoSQL Databases. We will be using its latest available community edition on a Linux CentOS 7 Desktop and LinuxMint Desktop.
Prerequisites:
The prerequisite for this article is to have a Linux System running with Linux based GUI system with user having sudo rights.
Login to your system and update with the latest available security updates using yum command as below.
For RHEL/CentOS:
For Ubuntu/LinuxMint:
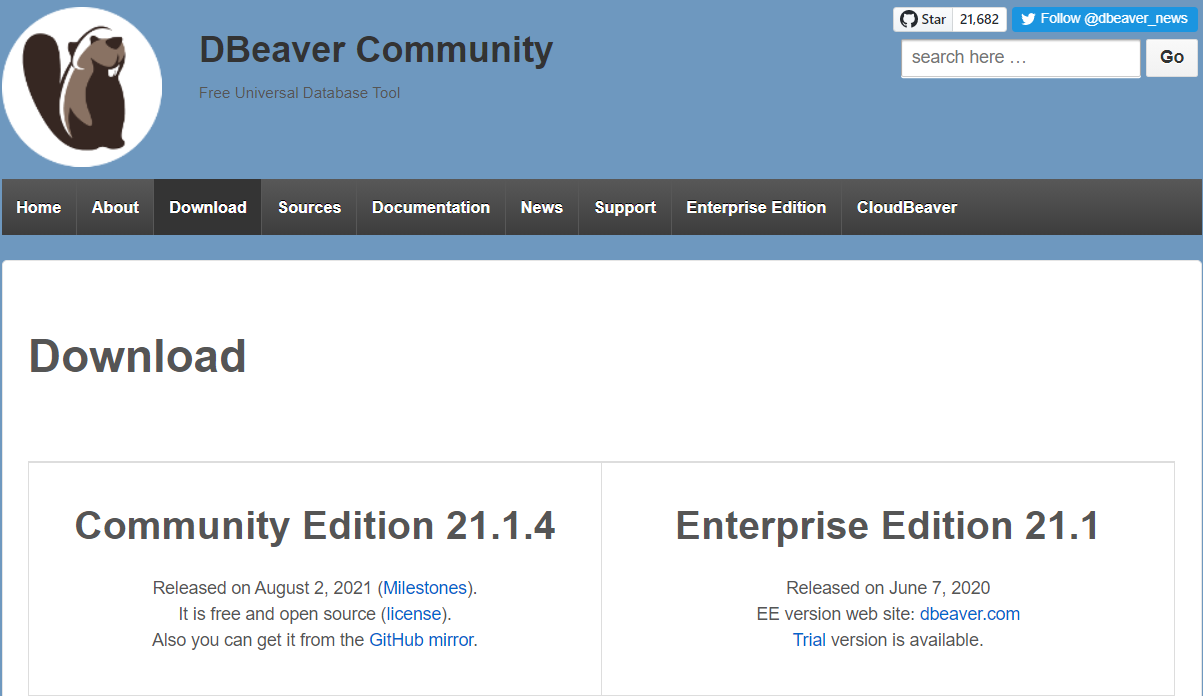
Downloading DBeaver Community:
You can get the DBeaver Community edition download installer from their official web link https://dbeaver.io/download/ where you can choose the installer for your system.
Let’s get the RPM package for your RHEL/CentOS based system and DEBIAN in case you are using Ubuntu or LinuxMint.
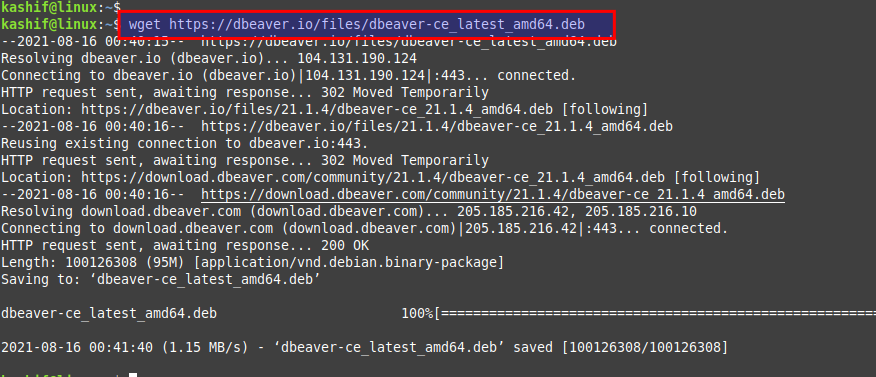
Get it downloaded on your system and then upload on the server you have to make its setup or simply use the ‘wget’ command as below on your system.
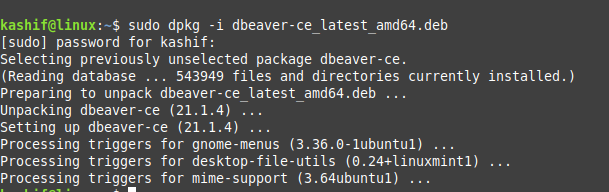
Installing DBeaver in Linux:
Once you have got your Dbeaver package uploaded, let install it using the command below.
On RHEL/CentOS:
On Debian/LinuxMint:
Using DBeaver in Linux:
Now, as we have installed DBeaver, let’s open it from the menu or search it in the application finder.

You will be prompted with an option to create the sample database or start with a new connection.
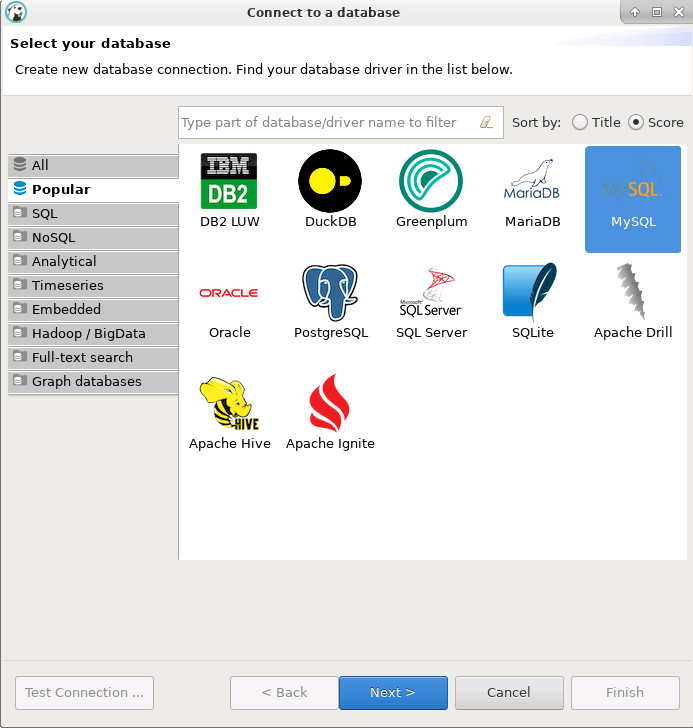
Point to the Database tab and select to create a new connection by choosing your desired Database as shown below.
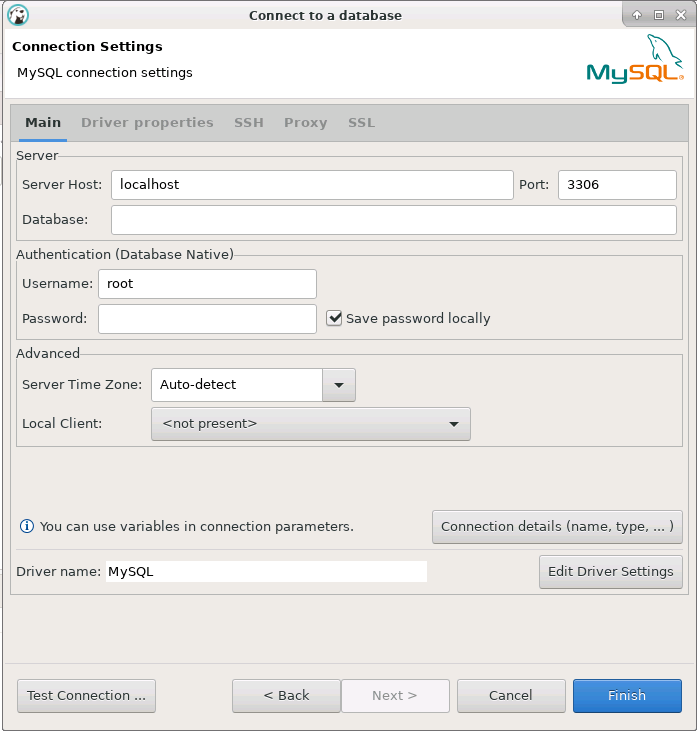
Moving next to the database connection settings, give the details of your database server you want to connect with and click to finish.
As we have mentioned earlier, DBeaver supports multiple ranges of database engines, so in some cases, you may need to upload its jar files.
Just like in the image below, you can see that while loading the Greenplum DB it asks to load the required drivers that you can directly download.
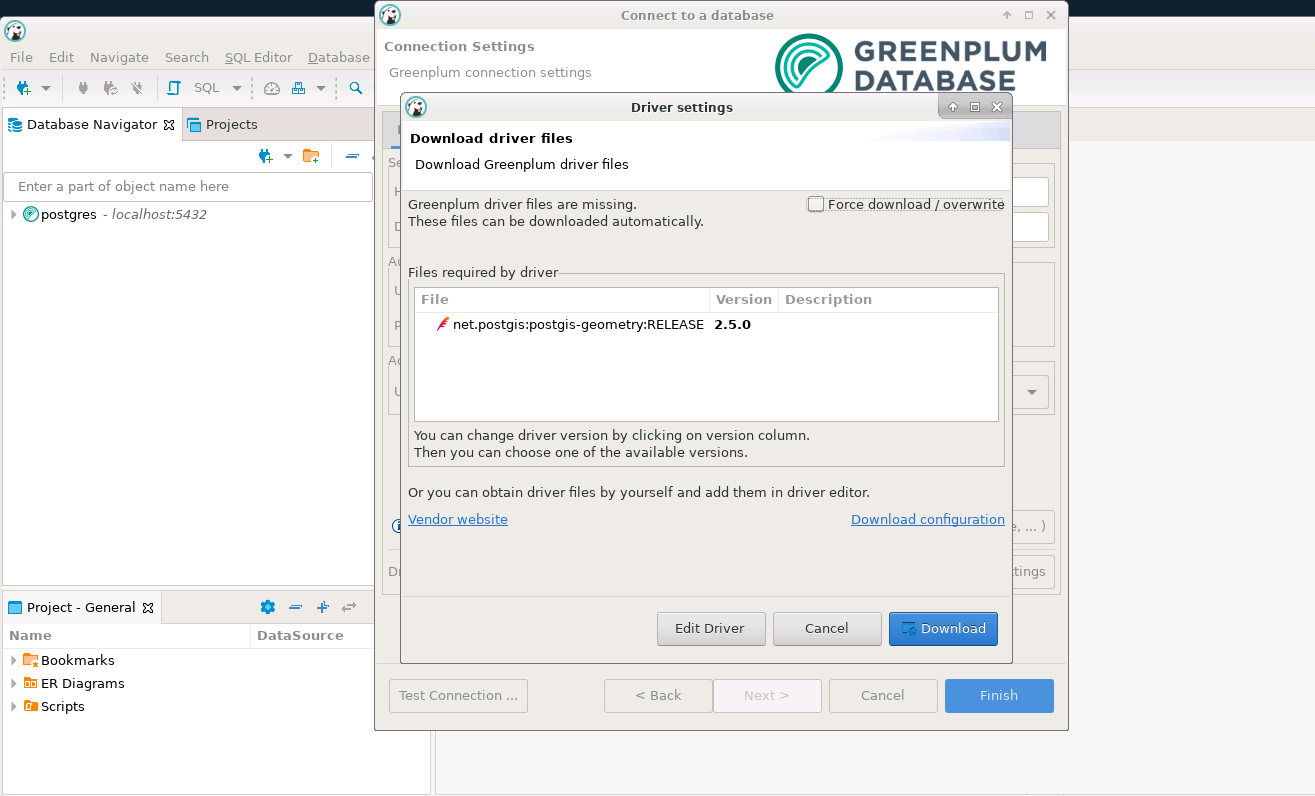
In case if you don’t have internet access available on your system, you can take the offline jars required for your database and upload using the DBeaver Driver Manager.

Here, when you have successfully uploaded the jars, you can delete the old one which is not required for your db connection.
Setting JVM Parameters for DBeaver:
In case you have multiple databases and high workloads that may impact the performance of dbeaver. In that case you can also tweak its JVM parameters by editing the file below with its XMS and XMX values.
How To Install DBeaver Universal Database Tool in Linux
DBeaver is an open-source, fully-featured, and cross-platform universal database management tool and SQL client that runs on Linux operating systems, Windows, and macOS. It supports more than 80 database management systems including PostgreSQL, MySQL, Oracle, SQL Server, SQLite, DB2, MS Access, and a lot more.
DBeaver Features
DBeaver has the following key features:
- It supports any database management system having a JDBC driver, but can also handle other external data sources with or without a JDBC driver.
- It has a well-designed and implemented user interface (UI) for usability.
- It provides a powerful SQL editor with auto-completion of keywords, schema names, table names, and column names.
- It ships with several plugins for different database systems and management utilities for ERD generation, data import and export(in an appropriate format), data transfer, mock data generation, and much more.
- It supports extensions for integration with Excel, Git, and many other tools.
- It also supports cloud data sources.
- Additionally, it supports monitoring database connection sessions and lots of other advanced database administration features.
DBeaver is available in two flavors: DBeaver Community Edition which is free for use and DBeaver Enterprise Edition which is a paid-for version (you need a license to use it); however a trial version is available.
In this article, we shall show various ways to install DBeaver Community Edition on Linux systems. Before we proceed, note that DBeaver requires Java 11 or higher to run, importantly, starting version 7.3.1 all DBeaver distributions include OpenJDK 11 bundle.
Installing DBeaver Community Edition via Snap
Snaps are a cool and easy way to install and run applications on Linux operating systems because they ship with all the dependencies of an application. To run snaps, your Linux system must have snapd installed.
DBeaver has a snap which you can install as follows. The commands below show how to install snapd and DBeaver snap (dbeaver-ce). If you already have snapd installed, simply copy and run the command to install the dbeaver-ce:
--------- On Ubuntu/Debian/Mint --------- $ sudo apt update && sudo apt install snapd $ sudo snap install dbeaver-ce --------- On n RHEL-based Systems --------- $ sudo dnf install snapd $ sudo ln -s /var/lib/snapd/snap /snap $ sudo snap install dbeaver-ce --------- On Arch Linux --------- $ git clone https://aur.archlinux.org/snapd.git $ cd snapd $ makepkg -si $ sudo systemctl enable --now snapd.socket $ sudo ln -s /var/lib/snapd/snap /snap $ sudo snap install dbeaver-ce
Installing DBeaver Community Edition via a Package Manager
DBeaver is also available as a 64-bit DEB or RPM package. On Debian and its derivatives such as Ubuntu and numerous others, you can install and upgrade DBeaver from the official Debian repository by running the following commands:
$ wget -O - https://dbeaver.io/debs/dbeaver.gpg.key | sudo apt-key add - $ echo "deb https://dbeaver.io/debs/dbeaver-ce /" | sudo tee /etc/apt/sources.list.d/dbeaver.list $ sudo apt-get update && sudo apt-get install dbeaver-ce
Besides, on Ubuntu and its derivatives including Linux Mint, Kubuntu, you can use the PPA repository to install and upgrade DBeaver as follows:
$ sudo add-apt-repository ppa:serge-rider/dbeaver-ce $ sudo apt-get update $ sudo apt-get install dbeaver-ce
To install DBeaver via the DEB or RPM 64-bit package installer, download it, and install it using the appropriate package manager as follows.
--------- On Ubuntu/Debian/Mint --------- $ wget -c https://dbeaver.io/files/dbeaver-ce_latest_amd64.deb $ sudo dpkg -i dbeaver-ce_latest_amd64.deb --------- On RHEL-based Systems --------- $ wget -c https://dbeaver.io/files/dbeaver-ce-latest-stable.x86_64.rpm $ sudo rpm -ivh dbeaver-ce-latest-stable.x86_64.rpm
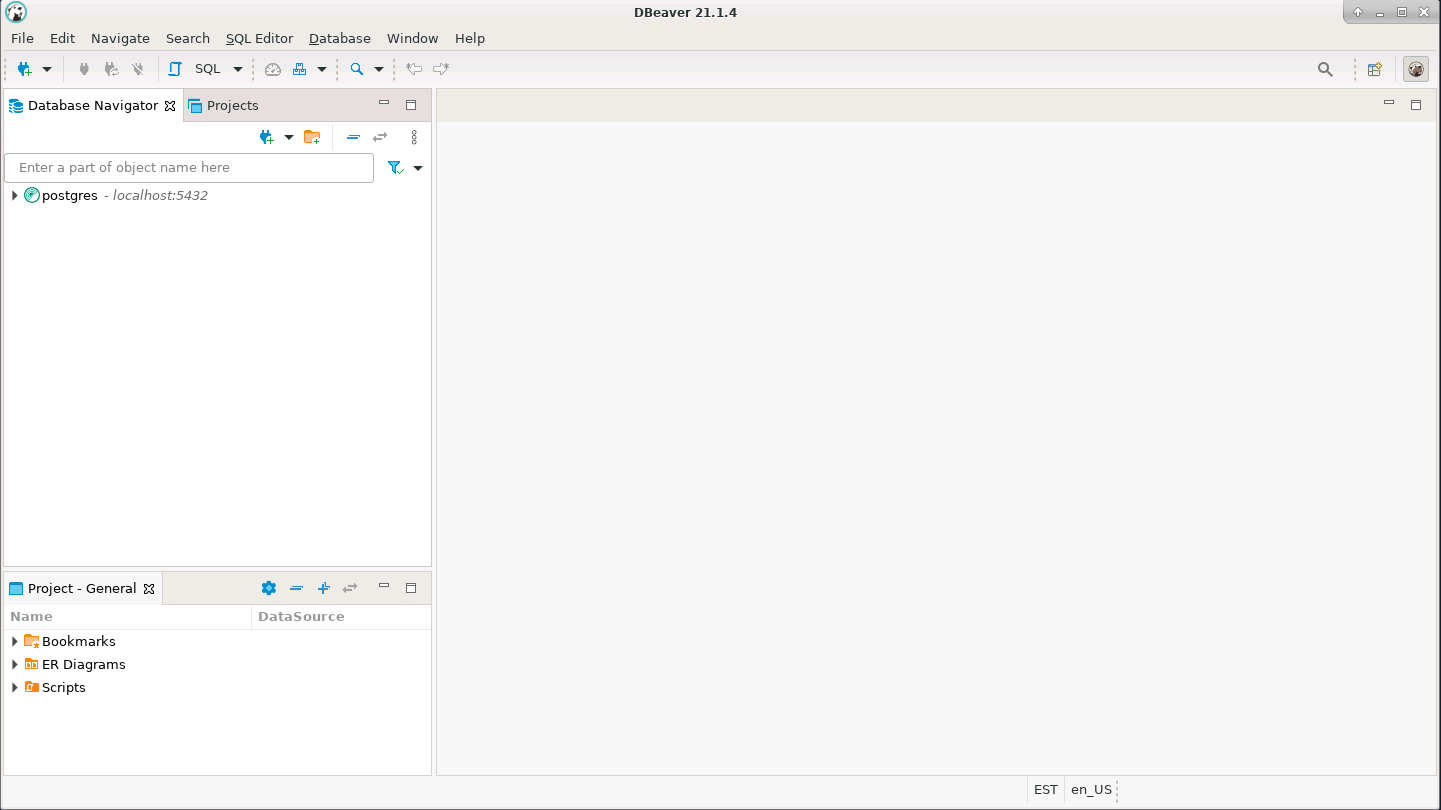
Once you have successfully installed DBeaver, search and open it from the system menu.
How to Use DBeaver in Linux
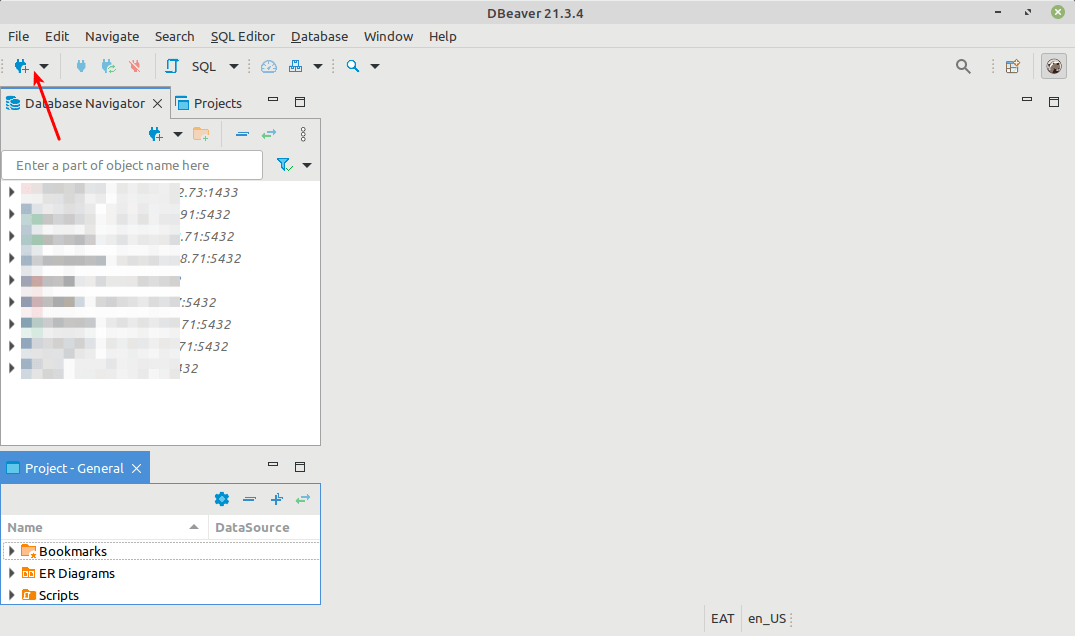
To create a new database connection click on the highlighted button in the following screenshot or click Databases, then select New Database Connection.
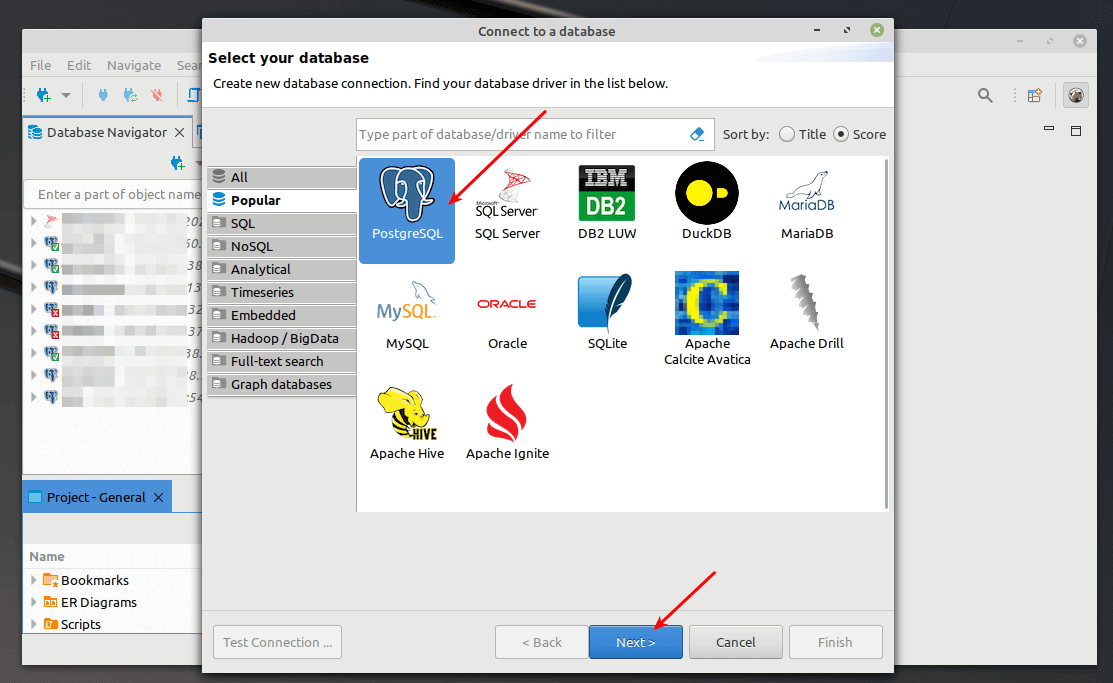
Find your database driver from the list of databases as shown in the following screenshot. Then click Next. At this point, DBeaver will attempt to download and install the selected driver, ensuring that your computer is connected to the Internet.
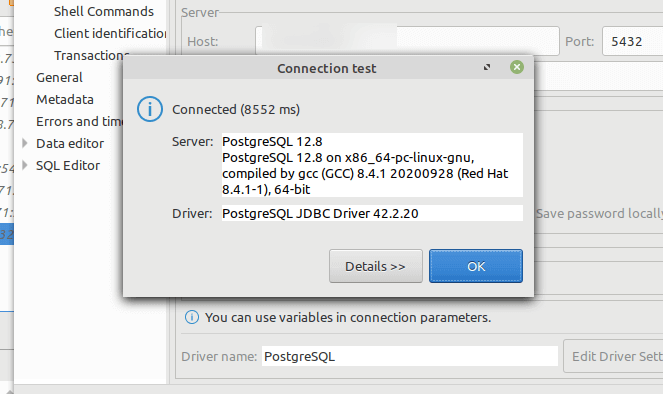
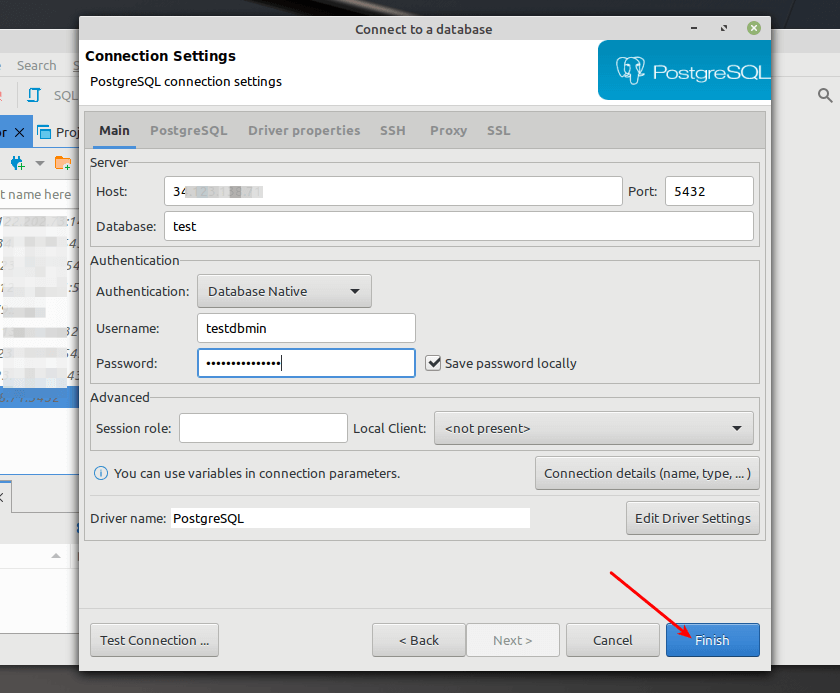
Next, enter the database connection settings (database Host, Database name under Server settings, Username, and user’s Password under Authentication settings). Then click Test Connection.

If the database connection settings are correct, you should see the database server details like so. Click OK to continue.
Now complete the database connection setup by clicking Finish as shown in the following screenshot.
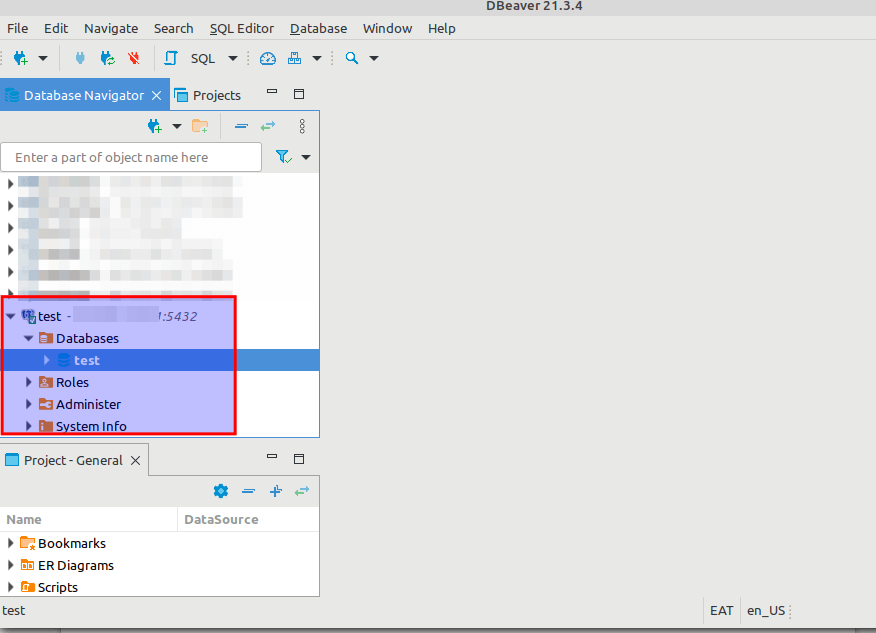
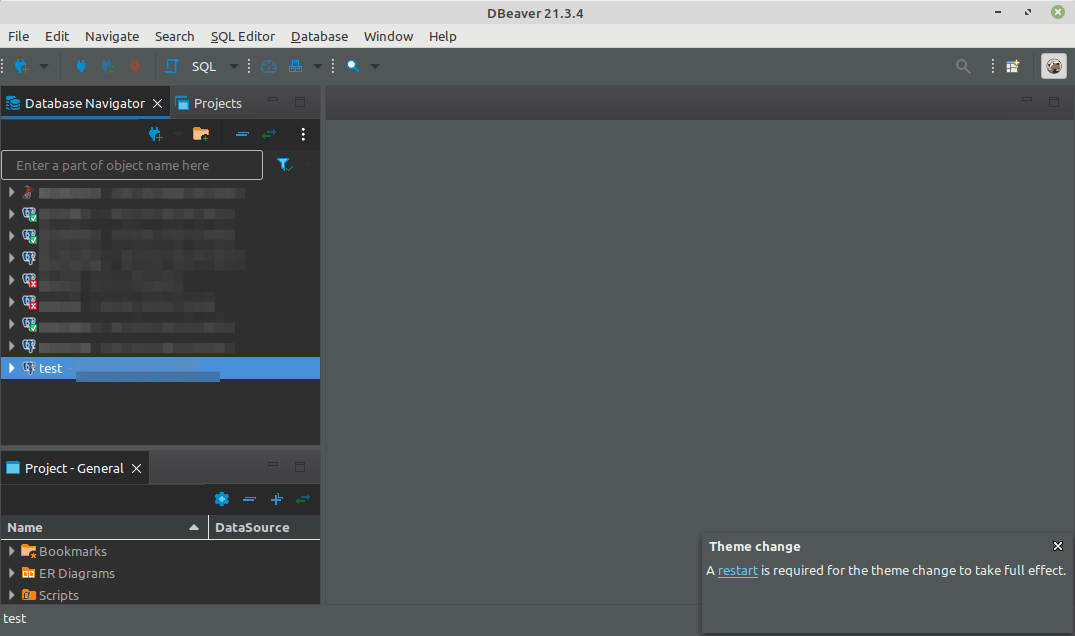
Your new database connection should now appear under the Database Navigator as shown below. To open the SQL editor, right-click on the database name, then select SQL editor, then Open SQL script.
Last but not least, if you love dark mode or theme, you can switch to it. Simply click on Windows –> Preferences, then click on Appearance. Then under the Theme setting, select Dark, then click Apply and Close.
That’s all we had for you in this guide. To find more information about DBeaver including the documentation, check out the official DBeaver website. You can drop any comments about this guide in the comments section below.
How to configurate the home client in dbeaver for Postgresql

I guess that i have to configurate the cliente, however i dont’t know how to fill these form, i’ve already tried, putting in the forms: /etc/postgresql/13/main, but does not work.
I’ve get rid of snap and used deb version, but still I’m unable to select «psql» binary it’s grayed out
5 Answers 5
I was getting the error native client is not specified for connection when trying to export a database. In Terminal, ran the command which postgres resulting in /opt/homebrew/bin/postgres . Then in Dbeaver went to the database and right clicked > Edit Connection > Edit Driver Settings > choose the Native Client tab > Add Home > choose Mac HD > once that comes up hit Command + Shift + . to unhide the hidden folders. Then navigate to opt/homebrew/bin and click Open. It will find the postgres info it needs and add the home. Click OK > OK to close the pop-ups. Now I can do the export.
Actually the issue was the snap version of DBeaver. You can’t access directories outside your snap home folder(in this case Dbeaver Snap home folder). So I reverted back to APT version of DBeaver using this link (for debain based version) and it worked like a charm.
So you just remove your snap version of DBeaver and install the official package from their website for your OS and you should be able to load the client without any issue.
- Just install the pgsql from apt. you can follow this link to install.
- Then setup client as: /usr/lib/postgresql/XX/
where XX is the version of the pgsql you installed.
The following error occursError executing process Utility ‘pg_dump’ not found in client home ‘/usr/share/postgresql/15’ (/usr/share/postgresql/15)
Saved searches
Use saved searches to filter your results more quickly
You signed in with another tab or window. Reload to refresh your session. You signed out in another tab or window. Reload to refresh your session. You switched accounts on another tab or window. Reload to refresh your session.
Have a question about this project? Sign up for a free GitHub account to open an issue and contact its maintainers and the community.
By clicking “Sign up for GitHub”, you agree to our terms of service and privacy statement. We’ll occasionally send you account related emails.
Already on GitHub? Sign in to your account
Native Client missing — #13608
Native Client missing — #13608
Comments
System information:
- Operating system : Ubuntu 21.04
- DBeaver version : 21.1.5.202108160727
- Java version : 1.8.0_221
- Additional extensions
Connection specification:
- Database name and version : MySQL community version 8.0.26
- Driver name : mysql connector/J8.0
- Do you use tunnels or proxies (SSH, SOCKS, etc)?
Describe the problem you’re observing:
When right clicking the database and right clicking Tools->Restore database the database import dialog shows the message «Native client is not specified for connection». When selecting the «Local Client» button I am presented with a dialog that expects me to navigate or browse to the directory holding the client programs. The client programs are located in /usr/bin but the dialog browser doesn’t allow you to input that location.
Steps to reproduce, if exist: See above
Include any warning/errors/backtraces from the logs
The text was updated successfully, but these errors were encountered: