- Diff with color linux
- Synopsis
- Description
- Usage
- Options
- Files
- Bugs
- How to Color diff Output?
- Sample Files:
- Use the “diff –color” Command
- Example 1: Highlight Different Context
- Example 2: Print Output in Unified Format
- Example 3: Display Colorized Output
- Example 4: Change the Default Colour Scheme
- Example 5: Create Alias for “diff –color” Temporarily
- Example 6: Create Alias for “diff –color” Permanently
- Open the “.bashrc” File
- Update the “.bashrc” File
- Run the “diff” alias
- Alternative: Use the “colordiff” Command
- Install the “colordiff” Tool
- Use the “colordiff” Command
- Conclusion
Diff with color linux
colordiff — a tool to colorize diff output
Synopsis
colordiff [ diff options ] [ colordiff options ] file1 > file2 >
Description
colordiff is a wrapper for diff and produces the same output as diff but with coloured syntax highlighting at the command line to improve readability. The output is similar to how a diff -generated patch might appear in Vim or Emacs with the appropriate syntax highlighting options enabled. The colour schemes can be read from a central configuration file or from a local user ~/.colordiffrc file.
colordiff makes use of ANSI colours and as such will only work when ANSI colours can be used — typical examples are xterms and Eterms, as well as console sessions.
colordiff has been tested on various flavours of Linux and under OpenBSD, but should be broadly portable to other systems.
Usage
Use colordiff wherever you would normally use diff , or instead pipe output to colordiff :
$ colordiff file1 file2 $ diff -u file1 file2 | colordiff
You can pipe the output to ‘less’, using the ‘-R’ option (some systems or terminal types may get better results using ‘-r’ instead), which keeps the colour escape sequences, otherwise displayed incorrectly or discarded by ‘less’:
$ diff -u file1 file2 | colordiff | less -R
If you want to force disable colour escape sequences (for example pipe the output to patch ), you can use option ‘—color=no’ to do so:
$ diff -u file1 file2 | colordiff --color=no | patch -p0 -d another-working-dir
If you have wdiff installed, colordiff will correctly colourise the added and removed text, provided that the ‘-n’ option is given to wdiff :
$ wdiff -n file1 file2 | colordiff
You may find it useful to make diff automatically call colordiff . Add the following line to ~/.bashrc (or equivalent):
Any options passed to colordiff are passed through to diff except for the colordiff-specific option ‘difftype’, e.g.
colordiff --difftype=debdiff file1 file2
Valid values for ‘difftype’ are: diff, diffc, diffu, diffy, wdiff, debdiff; these correspond to plain diffs, context diffs, unified diffs, side-by-side diffs, wdiff output and debdiff output respectively. Use these overrides when colordiff is not able to determine the diff-type automatically.
Alternatively, a construct such as ‘cvs diff SOMETHING | colordiff’ can be included in ~/.bashrc as follows:
Or, combining the idea above using ‘less’:
Note that the function name, cvsdiff, can be customized.
By default colordiff returns the exit code of the underlying diff invocation (if there is one), but there are some circumstances where it is useful to force colordiff’s exit code to be zero: to do this use the option ‘—fakeexitcode’:
Options
colordiff will send most options through to diff, but there are various colordiff-specific options which can be used:
Show these colordiff-specific options
Force (or suppress) display of colours in output
Force (or suppress) inclusion of colour codes in patch output
Force colour to only appear in terminal output
Force difftype detection to specified format. DIFFTYPE can be: diff, diffc, diffu, diffy, debdiff, wdiff
Show (or suppress) the colordiff banner
Files
Central configuration file. User-specific settings can be enabled by copying this file to ~/.colordiffrc and making the appropriate changes.
Alternate configuration template for use with terminals having light backgrounds. Copy this to /etc/colordiffrc or ~/.colordiffrc and customize.
Alternate configuration template for use with terminals having dark backgrounds, with colour defaults set to match the output of ‘git diff’. Copy this to /etc/colordiffrc or ~/.colordiffrc and customize.
Bugs
Bug reports and suggestions/patches to please.
How to Color diff Output?
In Linux, the “diff(difference)” command compares the files line by line and provides instructions like add, delete, and change to make them identical. However, the simple “diff” command does not provide a syntax highlighting feature that improves the readability of the output. For this purpose, the “–color” flag of the “diff” utility is beneficial in the form of the “diff –color” command. It displays the colorized output for better visual repression as compared to the “diff” command.
This guide lists possible ways to get the output of the diff command:
Sample Files:
A sample file named “File.txt” is taken whose content is displayed in the terminal with the “cat” command followed by “-n(numbering)” flag:

Another file “File2.txt” is displayed in the terminal that also contains 5 number of lines:

Use the “diff –color” Command
This section carries out the various practical examples that demonstrate the working of “diff –color” command for colorizing the “diff” output.
Example 1: Highlight Different Context
The “diff –color” command without any argument scans the difference between two files. It also gives suggestions to add, remove, or change the lines that are different:
$ diff --color File1.txt File2.txt

The above command has highlighted the different lines of “File1” and “File2”. The “4c4” instructs to change(c) the fourth line of File1 with the fourth line of File2.
Example 2: Print Output in Unified Format
The “diff –color” command is also compatible with the “-u(unified format)” flag. It displays the output in a unified format and prevents unnecessary lines i.e the same lines of compared files:
$ diff --color -u File1.txt File2.txt
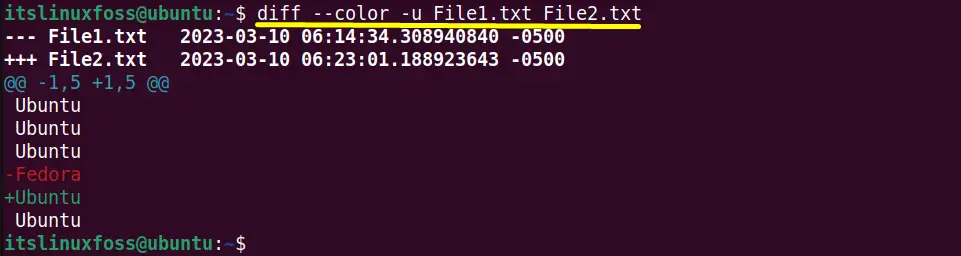
- The “File1.txt” name along with its timestamp is marked with “—” characters. Whereas the “+++” characters are used for “File2.txt”.
- The “@@” denotes the range of both files i.e “-1,5” of File1.txt and “+1,5” of File2.txt.
- The “–” symbol tells the user to delete the “red” line of File1.txt and “+” instructs that add the “green” line of File2.txt into FIle1.
Example 3: Display Colorized Output
Apart from the unified format the “diff –color” command can also colorize the complete output with the “-c” flag in this way:
$ diff --color -c File1.txt File2.txt
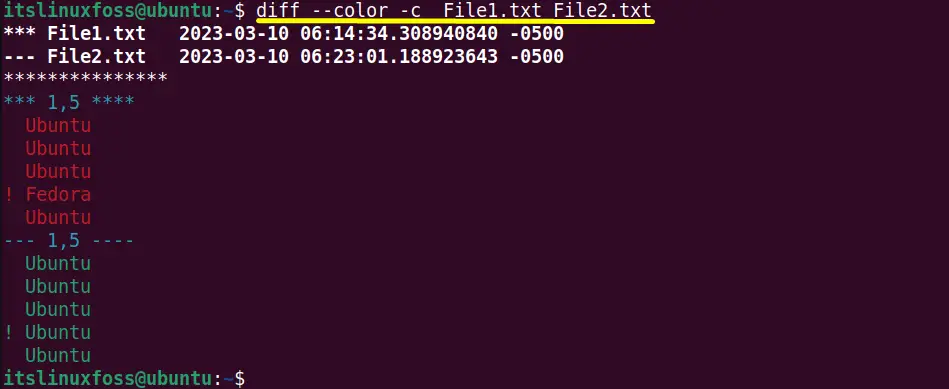
The output is a little bit different from the unified format:
- The ******* acts as a separator between files content and the timestamp.
- The ***1,5**** shows the “File1.txt” range and the —1,5 —- represents the “File2.txt”.
- Red lines show the “File1.txt” content and green lines display “File2.txt” data.
- The “!” symbol denotes the different lines of File1 and File2
Example 4: Change the Default Colour Scheme
By default, the “diff –color” highlights the output in the “RGB” color pattern. In order to change the default color selection, the “palette” flag is used with the ANSI color code:
$ diff --color --palette=':ad=36:de=33:ln=31' File1.txt File2.txt
In the above command, the “ad(add lines)” ANSI color code is “36(for Cyan)”. The “de(delete lines)” uses “33(yellow)” color code, and “ln(line number)” uses “31(red)”:

The output shows the specified new color scheme.
Example 5: Create Alias for “diff –color” Temporarily
If the user wants to always display the colorized output of the “diff” command, then create an alias for it:
The basic syntax follows for creating an alias is “alias [name]=[command]”. For instance, the “diff” alias is set to run the single-quoted “diff –color” command:

The alias has been created successfully.
Now, run the alias “diff” instead of the “diff –color” command in this format:

The above command has displayed the colorized output in the terminal.
Example 6: Create Alias for “diff –color” Permanently
The above “alias” is created for temporarily basic that automatically deletes after the system shuts down. It can be created permanently by following this set of instructions.
Open the “.bashrc” File
To make the permanent alias open the “.bashrc” file in the “nano” text editor:
Scroll down the opened “.bashrc” file and add the following lines to the end of it:
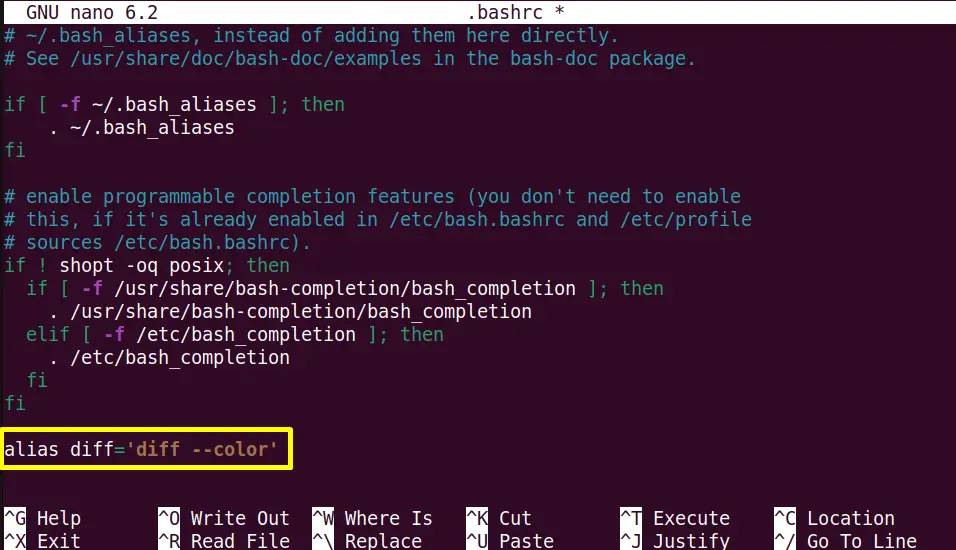
Press “Ctrl+S” to save the file and “Ctrl+X” to exit the text editor.
Update the “.bashrc” File
Update/reload the file to make the changes effective by using the “source” command:

All the new changes have been made in the “.bashrc” file.
Run the “diff” alias
Now execute the “diff” alias with the “-c(colorized)” flag to display the colorized output of compared files:
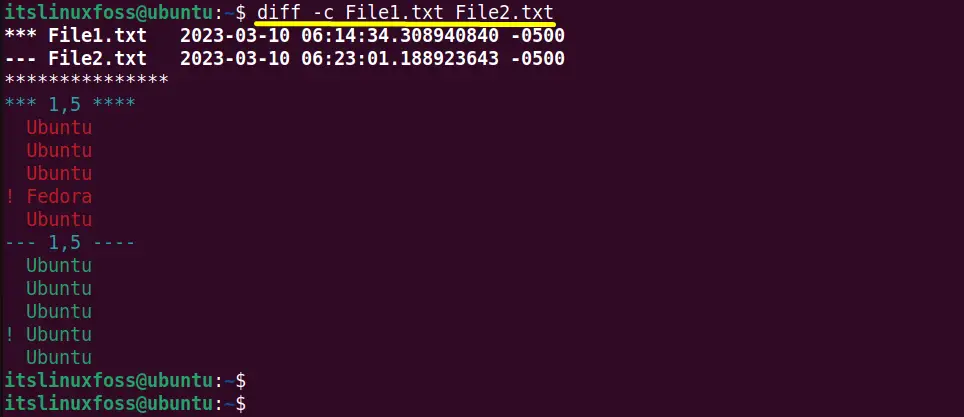
The newly created permanent “diff” alias has done its job successfully.
Alternative: Use the “colordiff” Command
The “–color” option comes in the “3.4” version of the “diff” command. If you are using an older version then the “diff –color” command may generate an error. In such situations use an external “colordiff” utility that performs the same as the “diff –color” command.
Install the “colordiff” Tool
First install the “colordiff” command line tool using the default package managers as per Linux distributions:
$ sudo yum install colordiff # For RHEL/CentOS $ sudo dnf install colordiff # For Fedora $ sudo apt install colordiff # For Ubuntu/Debian
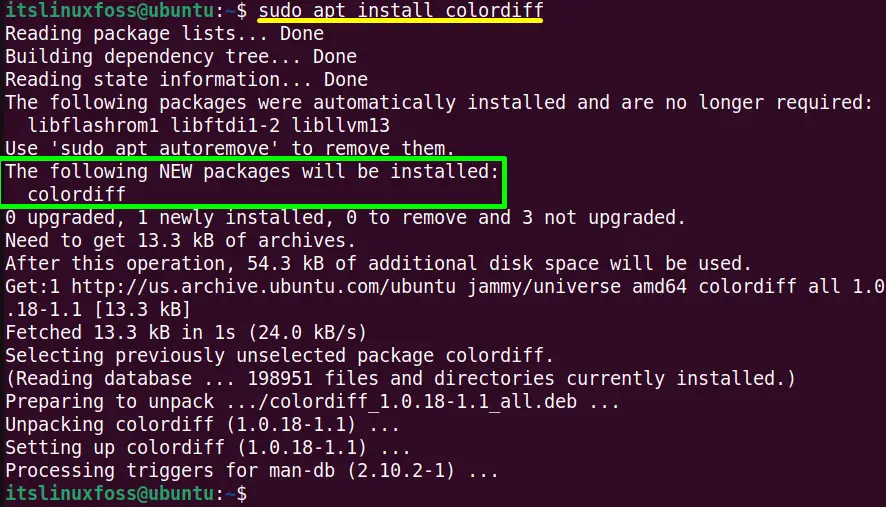
The installation of “colordiff” tool has been completed.
Use the “colordiff” Command
The “colordiff” command without any argument displays the same output as “diff –color”. Let’s see its practical implementation:
$ colordiff File1.txt File2.txt

The “colordiff” command has scanned the different lines of File1 and File2.
For getting the options list of the “colordiff” utility executes its “–help” command in the terminal:
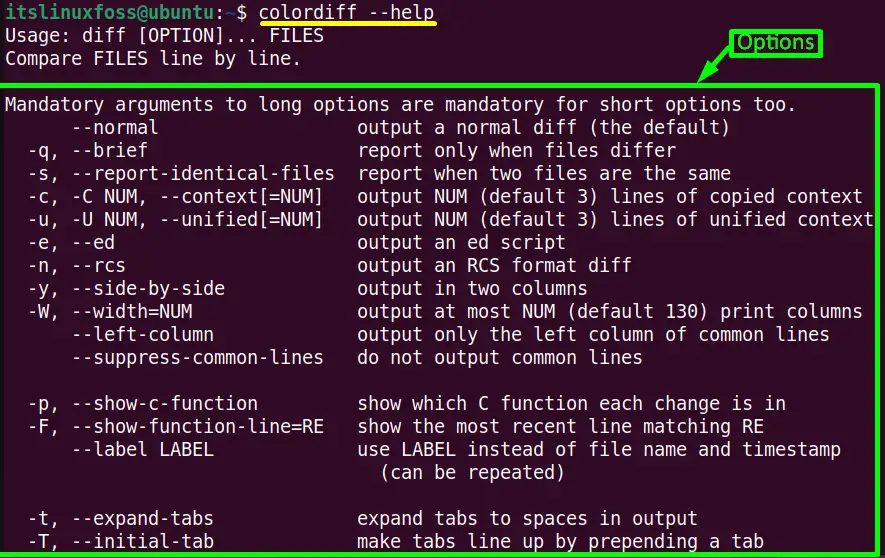
Scroll down the page for more flags/arguments.
Conclusion
In Linux, the “diff” color command line tool offers the “–color” option that scans the difference between compared files and prints the colorized output. The user can also use the “colordiff” command line tool for the older versions of the “diff” command to colorize its output.
This guide has described the complete procedure to color diff output.