- The Lesser Known Dir Command in Linux
- Using dir command to list directory contents
- Displaying Color Output
- Using Long Listing Format
- Listing Hidden Files
- Displaying File Type Indicators
- Displaying Output in Human Readable Format
- Displaying Files by Size
- Conclusion
- How to Use ‘dir’ Command with Different Options and Arguments in Linux
- dir Command Usage with Examples
- Listing Files and Directories in a Particular Path
- Listing Hidden Files and Directories
- Listing Directory Entries
- Listing Index Number of Files
- Listing Files According to Sizes
- Listing Files Without Owners
- Listing Directories Before Files
- Listing Files with User and Group IDs
- Listing Files Separated by Commas
- Conclusion
The Lesser Known Dir Command in Linux
Learn about the dir command, the less known but identical cousin of the popular ls command.
How do you see the contents of a folder in the Linux terminal? You use the ls command.
In fact, the ls command is so popular that many Linux users don’t even know about dir.
Yes, there exists a dir command with the sole purpose of showing you the directory contents. And in this tutorial, I’ll show you how to use it.
Using dir command to list directory contents
The basic syntax for the dir command is as follows:
dir [options] [Directory] [Files] - options: These are optional parameters that can be used to control the output of the dir command.
- Directory: This is the directory whose contents need to be listed.
- Files: This is a list of specific files that need to be listed.
The most basic use of the dir command is to list the contents of the current directory.
To do this, simply type dir without any options and press enter. If no directory is specified, the dir command will list the contents of the current working directory.
The default behavior is to sort the output in alphabetical order.
Displaying Color Output
Unlike the ls command, the dir command doesn’t display output in colors by default. If you want, you can enable color output for the dir command by using the —color option.
This option is useful when you want to identify certain files or folders based on their color quickly.
There are more colors available that are used to differentiate between different file types.
- Green: Regular files
- Blue: Directories
- Cyan: Symbolic links
- Red: Broken links
- Yellow: Device files
Using Long Listing Format
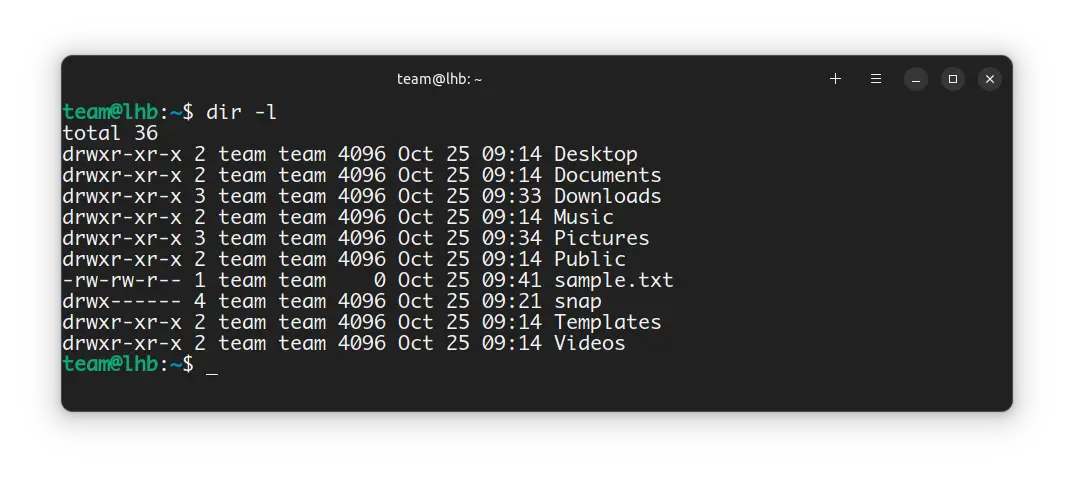
You can use the -l option with the dir command to display output in a long listing format.
This displays information like permissions, ownership, timestamps, etc.
The dir command also supports other listing format options:
- -1: list entries in a single column
- -C: list entries in columns
- -m: list entries in a comma-separated format
The -m option is especially useful when you want to quickly generate a list of files that other programs or scripts can use. Machine learning is an example of where this might be useful.
Listing Hidden Files
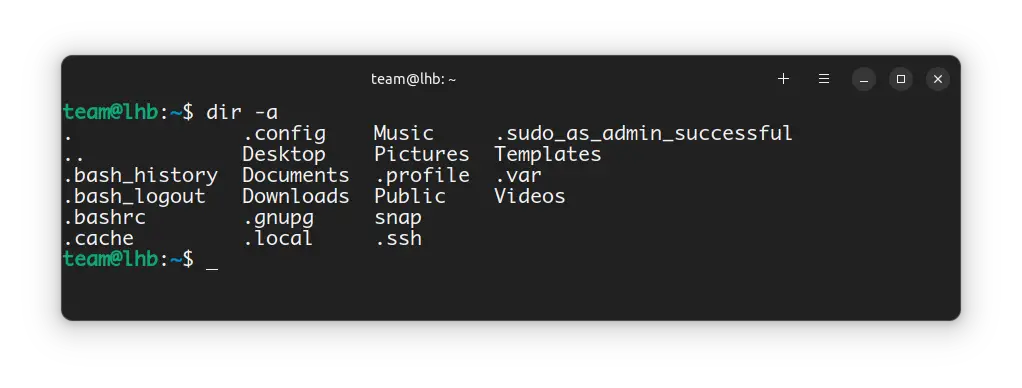
The files beginning with a dot ( . ) are hidden files in Linux and they are not displayed by default.
Similar to ls, you use the option -a (short for all) to list all the files including hidden ones:
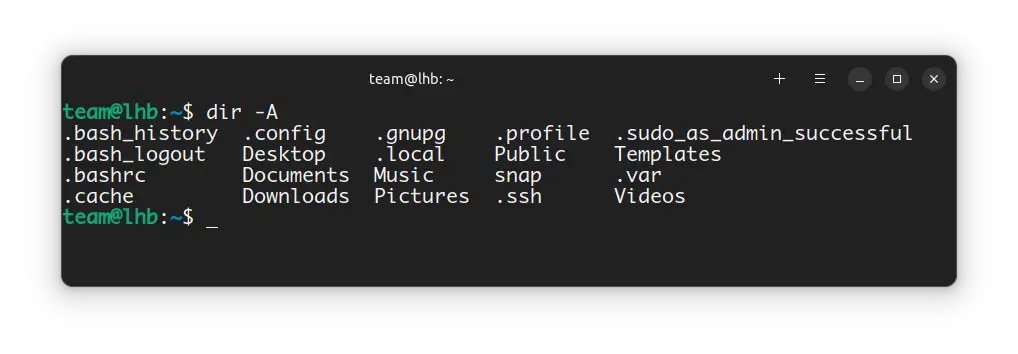
In the output above, you might notice that there are two special entries — . (current directory) and .. (parent directory). These are called pseudo-files.
If you don’t want to see these special entries in the output, you can use the -A option (short for almost-all).
Displaying File Type Indicators
The -F option, short for “classify”, appends a character after each entry to indicate the type of file. This information can be very useful, especially when you want to identify certain types of files quickly.
As you can see in the screenshot above, the -F option appends a ‘ / ’ character after each directory. Other indicators are
- — \ for directories
- — @ for soft links
- — * for executable files
- — | for FIFO (named pipes)
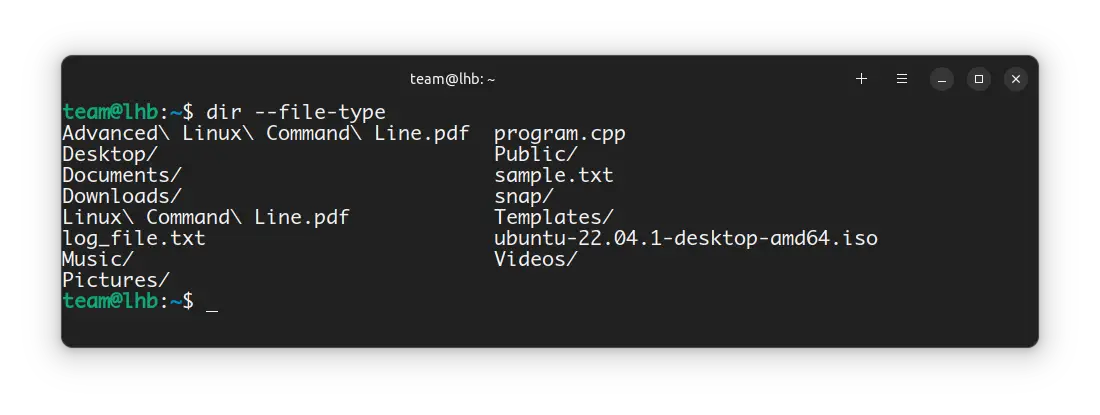
There is a similar option called —file-type that does the same except showing * for executable files.
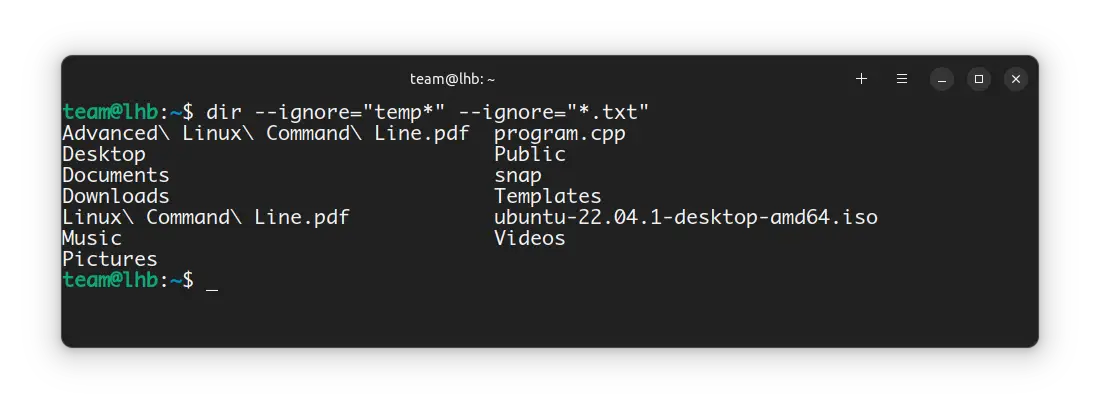
I like to use it for ignoring files of certain types from the display.
As you can see, all the files that start with “temp” and all the files that end with “.txt” are ignored.
Displaying Output in Human Readable Format
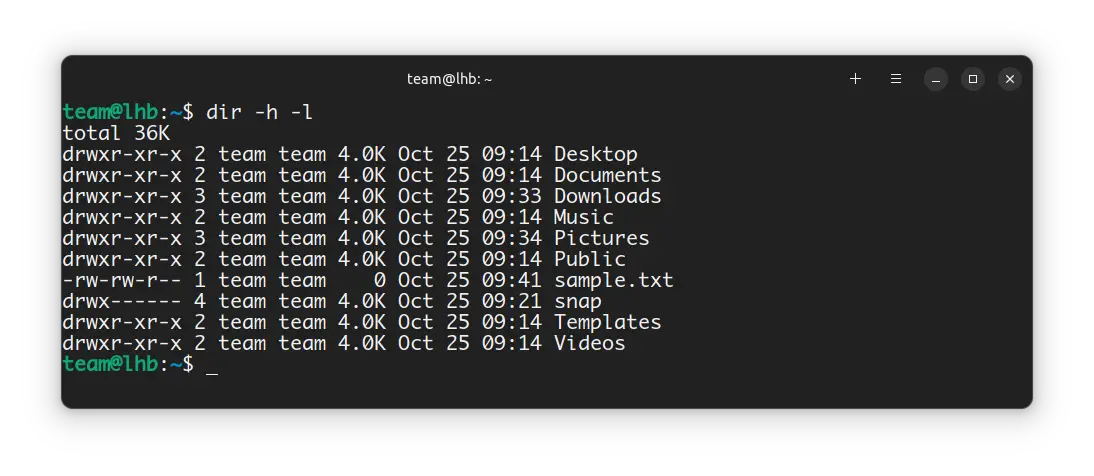
The dir command also supports the -h option, short for “human-readable”.
If a file is of size 1024 bytes, it will be displayed as 1K. Similarly, if a file is of size 1048576 bytes, it will be displayed as 1M. This option uses 1000 as the base for file sizes, not 1024.
This can come in handy when you want to see the file sizes quickly.
You should use the -l option along with -h .
Displaying Files by Size
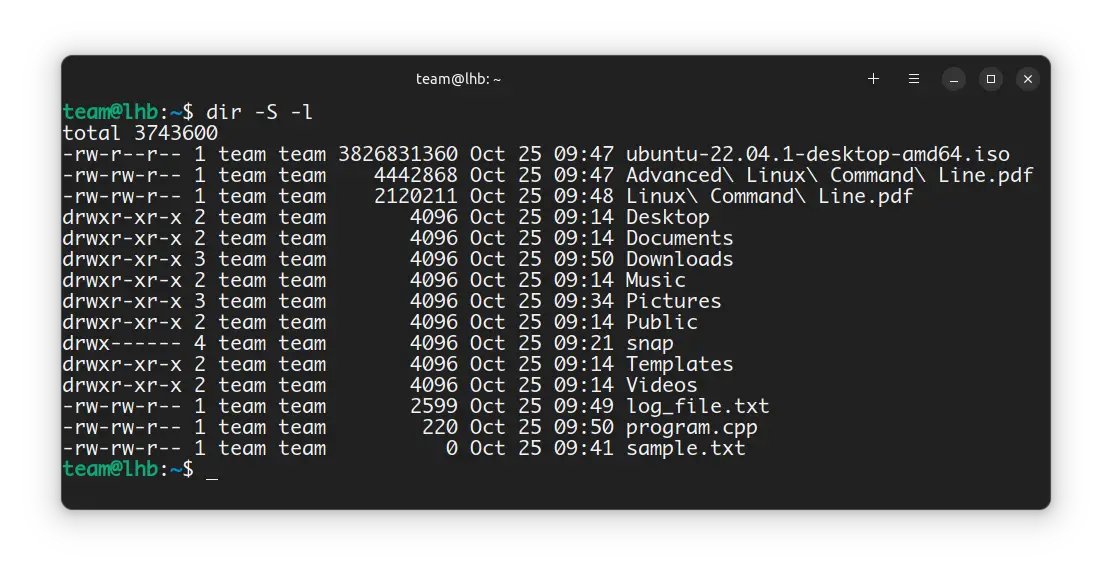
The dir command also supports the -S option to sort files by size. This can come in handy when you want to see which files are taking up the most space.
As you can see in the screenshot below, the most space-consuming files are displayed on top.
Conclusion
You might have realized that the dir command is no different than the ls command. ls is more popular and almost every Linux user knows about it. Since dir command doesn’t offer anything special, it doesn’t give reasons to ditch ls command.
How to Use ‘dir’ Command with Different Options and Arguments in Linux
This article shows some examples of using the dir command to list the contents of a directory. The dir command is not a commonly used command in Linux, but it works less like the ls command which most Linux users prefer to use.
[ You might also like: Linux mkdir Command Examples ]
We’ll be discussing the dir command where we shall look at how to use different options and arguments.
The general syntax of the dir command is as follows.
dir Command Usage with Examples
The most common usage of the dir command is to display the contents of a directory in ascending order alphabetically.
If you run the dir command without any options or location of the directory it will display all files and directories in your current working directory.
Listing Files and Directories in a Particular Path
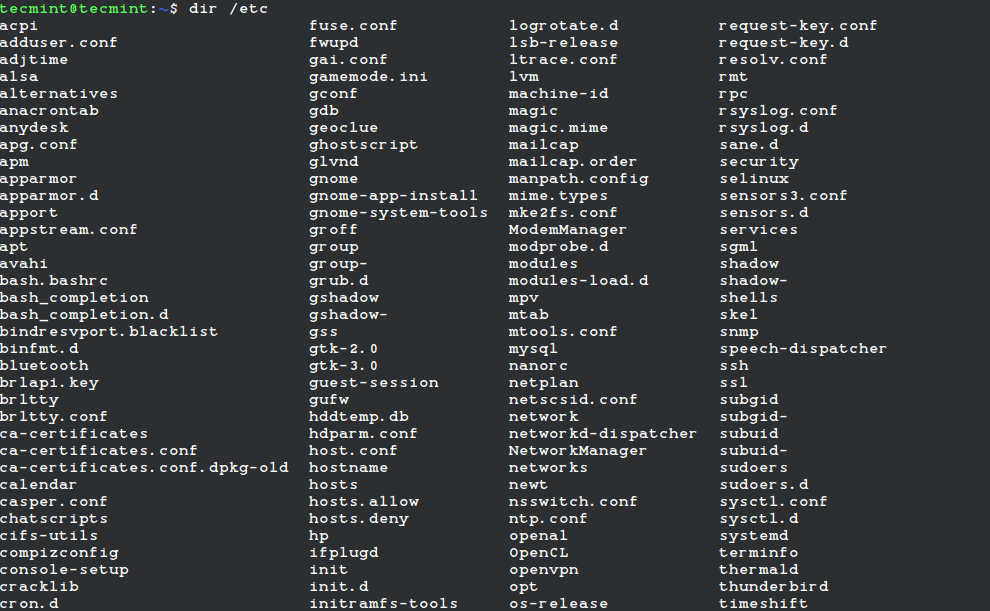
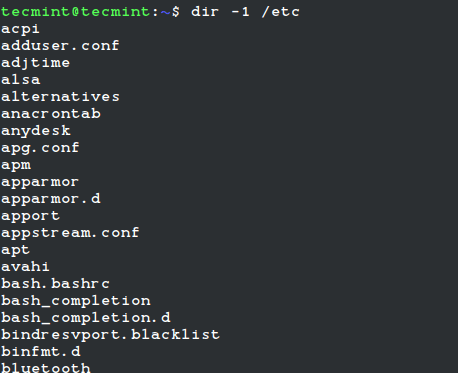
If you want to list all the files and directories of a particular path, then append the path of your directory as shown. Here, we will list files and directories under the /etc directory.
To list one file per line use -1 option as follows.
Listing Hidden Files and Directories
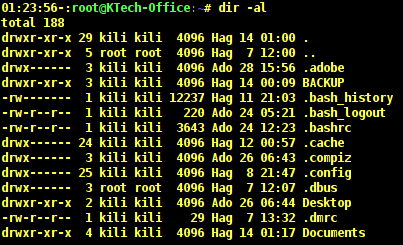
To list all files in a directory including . (hidden) files, use the -a option. You can include the -l option to format output as a list (detailed information).
Listing Directory Entries
When you need to list only directory entries instead of directory content, you can use the -d option. In the output below, the option -d lists entries for the /etc directory.
When you use -dl , it shows a long listing of the directory including the owner, group owner, and permissions.
Listing Index Number of Files
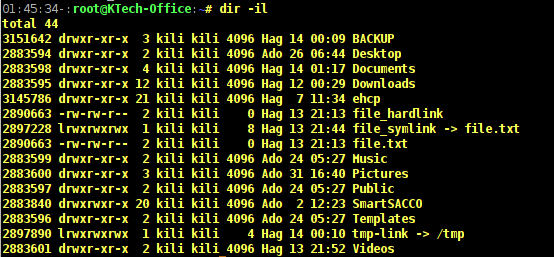
In case you want to view the index number of each file, use the option -i . From the output below, you can see that the first column shows numbers. These numbers are called inodes which are sometimes referred to as index nodes or index numbers.
An inode in Linux systems is a data storage on a filesystem that stores information about a file except for the filename and its actual data.
Listing Files According to Sizes
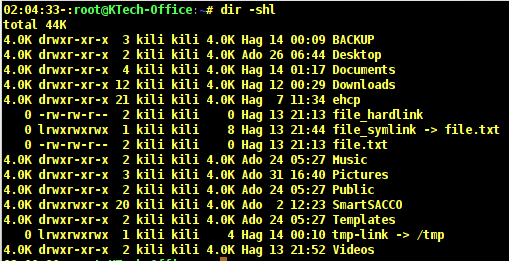
You can view files sizes using the -s option. If you need to sort the files according to size, then use the -S option.
In this case, you need to also use the -h option to view the file sizes in a human-readable format.
In the output above, the first column shows the size of files in Kilobytes. The output below shows a sorted list of files according to their sizes by using the -S option.
You can also sort files by modification time, with the file that has recently been modified appearing first on the list. This can be done using the -t option.
Listing Files Without Owners
To list files without their owners, you have to use the -g option which works like the -l option only that it does not print out the file owner. And to list files without a group owner use the -G option as follows.
As you can notice from the output above that the name of the file owner and the group owner is not printed. You can as well view the author of a file by using the —author flag as follows.
In the output above, the fifth column shows the name of the author of a file. The examples.desktop files are owned by user kone, belong to group kili and it was authored by user kone.
Listing Directories Before Files
You may wish to view directories before all other files and this can be done by using the —group-directories-first flag as follows.
# dir -l --group-directories-first
When you observe the output above, you can see that all the directories are listed before the regular files. The letter d before the permissions indicate a directory and a indicates a regular file.
You can also view subdirectories recursively, meaning that you can list all other subdirectories in a directory using the -R option as follows.
In the above output, the (.) sign means the current directory and home directory of user Kone have three subdirectories that are Backup, dir, and Docs.
The Backup subdirectory has two other subdirectories that are mariadb and mysql which have no subdirectories.
The dir subdirectory does not have any subdirectory. And the Docs subdirectory has two subdirectories namely Books and Tuts which do not have subdirectories.
Listing Files with User and Group IDs
To view user and group IDs, you need to use -n option. Let us observe the difference between the next two outputs.
Output without -n option.
Listing Files Separated by Commas
This can be archived by using -m option.
To find help in using the dir command use —help flag and to view version details of dir use —version .
Conclusion
These are just examples of basic usage of the dir command, to use many other options see the manual entry for the dir command on your system.
In case you find any other interesting options or ways of using the dir command, let us know by writing a comment. Hope you find this article useful.


