- How to Backup Linux Filesystem Using dump Command
- How to Install Dump Utility in Linux
- Linux Dump Command Usage
- How to Backup Linux System using Dump Command
- Backup Linux Home Directory
- Backing Up Data to a Regular File
- How to Restore Linux System using Dump Command
- Аникин
- Перенос linux на другой диск на примере debian/ubuntu
How to Backup Linux Filesystem Using dump Command
On a Linux operating system environment, mastering how to create and restore backups is a very important skill set. It is easier for well-versed Linux user to attain their data backup goals from the terminal environment without the need for a GUI-oriented application package.
The Linux dump utility is effective in creating filesystem backups on an availed storage device. However, the filesystem supported by this backup utility disregards the likes of ReiserFS and FAT.
The dump command only supports ext4, ext3, and ext2 filesystem and incremental backups. Under incremental backup support, a Linux user can flexibly execute their backup operations on daily, weekly, or monthly time frames.
It makes it easy to decide when and how you want your backups done. You get to decide which files should be involved in the scheduled backup process. Therefore, a Linux user can only focus on backing up files with significant changes or the ones that were recently added to the targeted filesystem.
How to Install Dump Utility in Linux
If you do not have the dump utility installed on your Linux machine, you can install it by executing one of the following installation commands in regards to the Linux operating system distribution you are using.
$ sudo apt-get install dump [On Debian, Ubuntu and Mint] $ sudo yum install dump [On RHEL/CentOS/Fedora and Rocky Linux/AlmaLinux] $ sudo emerge -a sys-apps/dump [On Gentoo Linux] $ sudo pacman -S dump [On Arch Linux] $ sudo zypper install dump [On OpenSUSE]
Linux Dump Command Usage
Once you run the dump backup utility, it first examines your existing Linux filesystem files and points out the ones that are worthy of any backup effort. The dump command needs several parameters for it to execute successfully:
- The targeted dump level.
- The media to host the created filesystem backup.
- The filesystem to backup.
The dump command also accommodates optional parameters pointing to:
- Specific backup media size.
- Next tape request method.
- Times and status of filesystem dump recording.
A typical dump command string adheres to the following syntax:
$ sudo dump options arguments filesystem
The dump command options:
- 0-9 – This range signifies available dump levels. 0 caters for full filesystem backup while a higher number like 9 only prioritizes the backup of modified filesystem files.
- -B records – Highlights how many dump records should exist in a single volume.
- -b kbperdump – Highlights the number of kilobytes within a single dumb record.
- -h level – With this option, a nodump attribute is associated with your backup files.
- -f file – Points to a file or device name that will accommodate the created dump.
- -d destiny – Defines the needed tape density.
- -n – Use to alert operator group users when something like a tape change is required by the dump operation.
- -s feet: Specifies the dump tape length in feet.
- -u – Creates a record of all successful backups under the file /etc/dumpdates.
- -t date – Specifies the date and time values associated with incremental backups.
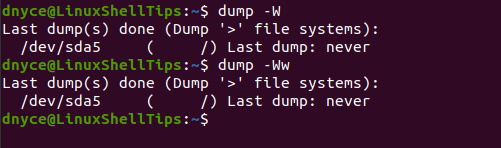
- -W – This option references the /etc/fstab and /etc/dumpdates files and highlights filesystem files that need backup.
- -w – Goes hand in hand with the W option and highlights specific/individual files that need backup.
How to Backup Linux System using Dump Command
To determine the files that need backup on your Linux system, you will run a command similar to the following:
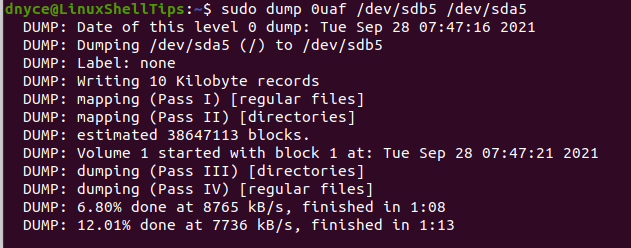
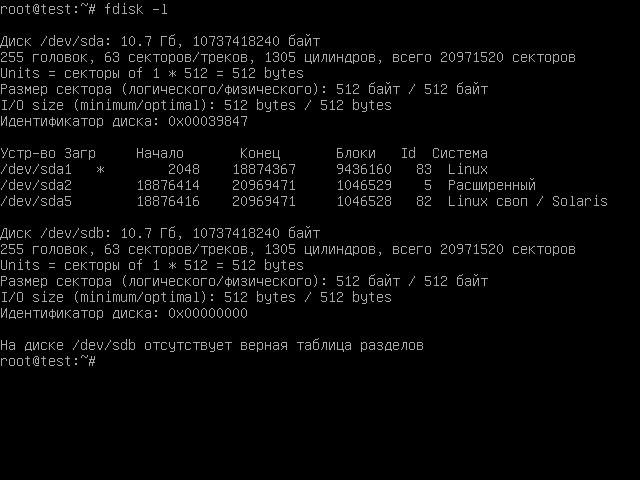
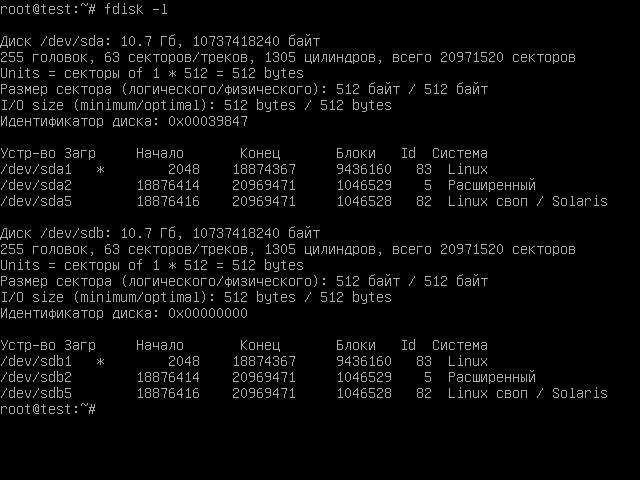
To back up the above filesystem (/dev/sda5) to an external device like /dev/sdb5 (identified by running the command sudo fdisk -l ), I would implement a dump command similar to the following:
$ sudo dump 0uaf /dev/sdb5 /dev/sda5
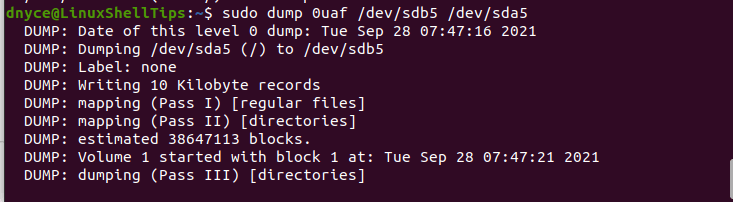
The dump command has the dump option 0 since it’s a first-time backup attempt.
If you need your backup compressed, you would run the above command in the following manner:
$ sudo dump 0ufz /dev/sdb5 /dev/sda5
The created backup will be compressed with the z library. The dump backup command updates the system user as it continues to execute:
Backup Linux Home Directory
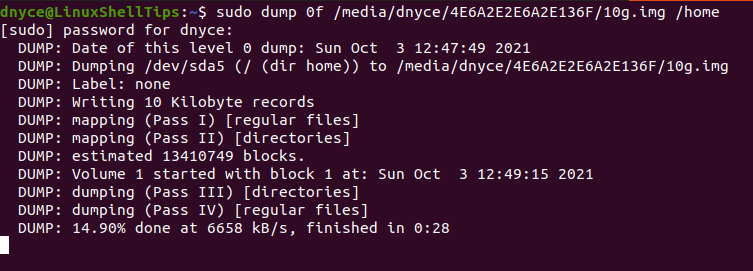
To back up the files from a specific filesystem directory like your Home directory:
$ sudo dump 0ufz /dev/sdb5 /home
To back up files to a remote machine named linuxshelltips or identified by an IP address and with the tape device named /dev/sdb5, we will use the rdump command.
$ sudo rdump 0uf linuxshelltips:/dev/sdb5 /home
Backing Up Data to a Regular File
Supposing we want to back up the home directory to an existing regular file called 10g.img, we would implement the needed command in the following manner:
$ sudo dump 0f /media/dnyce/4E6A2E2E6A2E136F/10g.img /home
To create such a writable image file to hold your backup data, run the following command. Also, specify the size of this writable image file.
$ dd if=/dev/zero of=10g.img bs=1 count=0 seek=10G
Afterward, check the created backup file:

The created .img file backup can now be written to a disk device of your choice with this command:
$ sudo dd if=10g.img of=/dev/sdb5 bs=1M
How to Restore Linux System using Dump Command
To fully restore the above-created backup, we would run a command similar to the following:
The restored files will be written on the current directory path of the active Linux system user.
To restore filesystem backups from a remote machine we will use the rrestore command:
$ sudo rrestore tf linuxshelltips:/dev/sdb5
With the dump command, you can easily achieve full and incremental backups of your Linux filesystem files. The restore command reverses or does the opposite of the dump command to successfully re-instate your filesystem backups.
To learn more about these two commands and their usage, run:
Аникин

Перенос linux на другой диск на примере debian/ubuntu
Навеяно статьей про перенос freebsd на другой диск. Будем делать тоже самое но на linux. В linux все несколько сложнее.
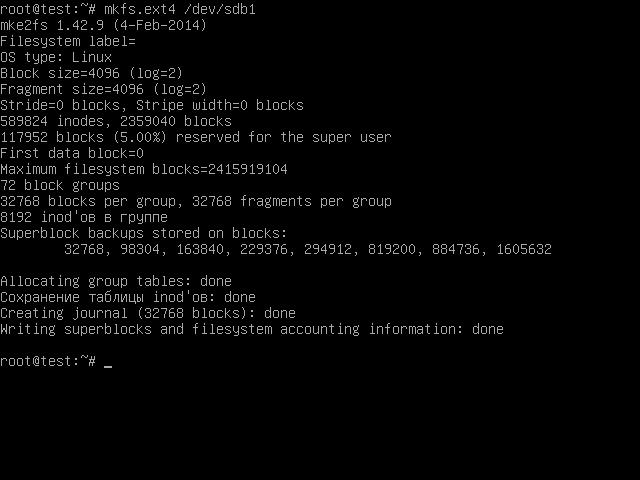
Для начала нужно подсоединить новый диск и загрузится. В системе должны присутствовать 2 диска, первый с нашей системой, а второй пустой. Второй мы можем разметить по своему усмотрению или же скопировать разметку с первого диска(если второй диск идентичен первому). Как скопировать разметку можно прочесть здесь. Как разметить вручную думаю разберётесь сами, благо мануалов в интернете полно. После создания разметки разделы надо отформатировать примерно так.
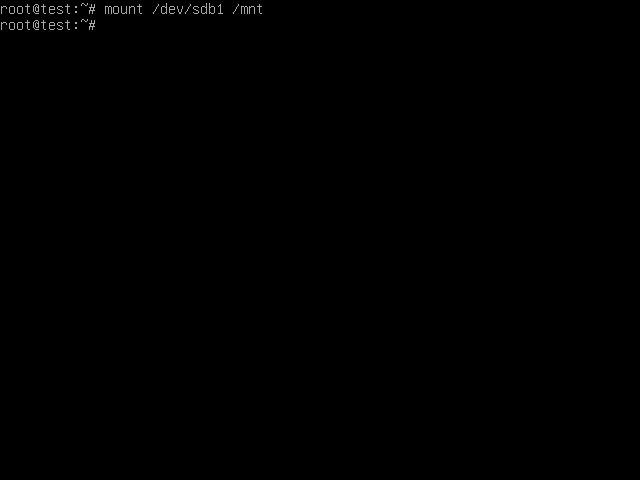
Затем примонтируем его в /mnt
Теперь нам нужно создать дампы разделов, в данном случае нужно создать только дамп sda1. Установим утилиты dump/restore.
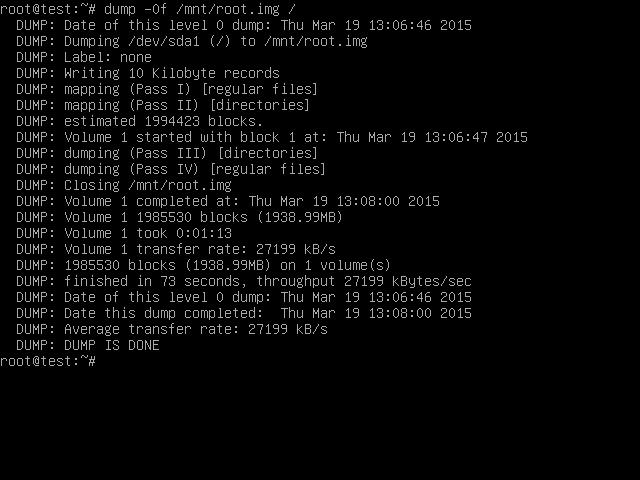
И создаем дамп раздела в файл /mnt/root.img
Создание дампа в /mnt/root.img возможно когда на разделе используется менее 50% от /dev/sdb1. Иначе на разматывание дампа места не хватит. В остальных случаях нужно создавать дамп в другом месте, но не в разделе корня, чтобы дамп не мотал сам себя. Можно использовать раздел другой тачки примонтированный по sshfs, я проверял это прекрасно работает.
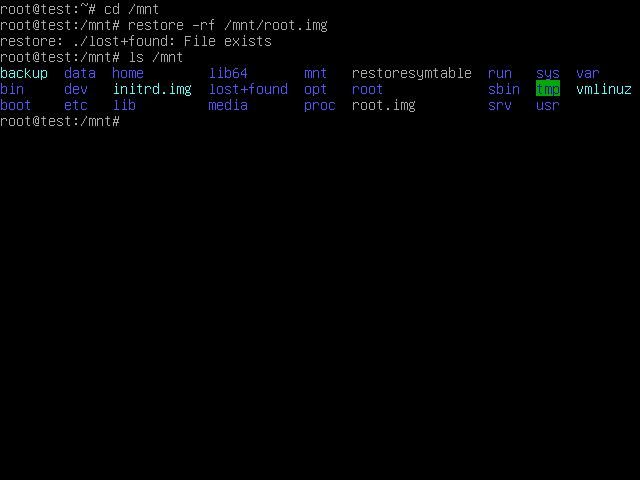
Переходим в /mnt и разматываем дамп.
# cd /mnt # restore -rf /mnt/root.imgКак видим раздел перенесся на /dev/sdb1. Если у нас /boot на отдельном разделе, то переносим его аналогично.
Теперь нам нужно установить загрузчик.
# grub-install --root-directory=/mnt /dev/sdbЗатем если требуется правим /mnt/etc/fstab и меню grub в /mnt/boot/grub/grub.cfg.
# nano /mnt/etc/fstab # nano /mnt/boot/grub/grub.cfgТут немного поясню зачем проверять и править эти файлы. У меня например в этих файлах были прописаны uuid разделов, и если мы уберем старый диск то ОС соответственно не загрузится, т.к у новых разделов у нас другие uuid. Я вместо uuid прописал реальные устройства корня и свопа /dev/sda1 и /dev/sda3. Все устройства sdb, станут у нас sda после извлечение первого диска.
Теперь выключаем тачку, отсоединяем первый диск и загружаемся с нового диска.
P.S. Утилиты dump и restore не ограничиваются переносом ОС с одного диска на другой. Таким образом можно переносить linux вообще на другую тачку с другим железом и дисками. Процедура почти такая же за небольшими изменениями.
- На первой тачке создаем дамп ОС;
- Загружаем вторую тачку с livecd;
- Размечаем и форматируем диски;
- Копируем туда дамп c первой тачки(по scp, например);
- Разворачиваем дамп с помощью restore;
- Устанавливаем загрузчик;
- Загружаемся.