- How to Open Ports in a Eltex NTP-RG-1402G-W Router
- When you use Network Utilities you get your port forwarded right now!
- Step 1
- Step 2
- Having Trouble?
- Step 3
- Step 4
- Test the Port Forward
- More Information
- More From Portforward
- Настройка оборудования
- Блог о модемах, роутерах и GPON терминалах Ростелеком
- Проброс порта на Eltex NTE-RG-1402G-W (rev.A и rev.B)
- [NTU-RG-5XXX Ростелеком] Настройка проброса портов через NAT
How to Open Ports in a Eltex NTP-RG-1402G-W Router
Most routers including the Eltex NTP-RG-1402G-W router has a firewall to help protect your home network from unwanted Internet access. Your firewall works by blocking all connections to and from your network unless already authorized. In order to authorize a connection (port) for online gaming or other program you need to make a port forward rule that tells the firewall this particular port or group of ports are okay.
In this guide we will be walking you through each of the following port forwarding steps for the Eltex NTP-RG-1402G-W:
- We will show you how to setup a static IP address on the device you are forwarding these ports to.
- We will then show you how to login to the Eltex NTP-RG-1402G-W router.
- Next, we show you how to find the port forwarding section of the router.
- And finally, we will show you what information to enter in your router for the port forward entry.
We think that forwarding a port should be easy. That’s why we created Network Utilities. Our software does everything that you need to forward a port.
When you use Network Utilities you get your port forwarded right now!
Step 1
It is important to setup a static ip address in the device that you are forwarding a port to. This ensures that your ports will remain open even after your device reboots.
- Recommended — Our free Static IP Setter will set up a static IP address for you.
- Another way to get a permanent IP address is to set up a DHCP reservation.
- Or, manually create a static ip address with our Static IP Guides.
Step 2
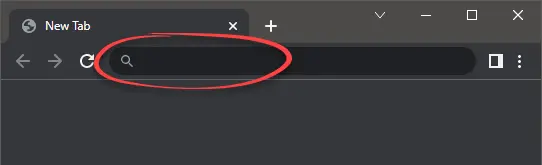
It is now time to login to the Eltex NTP-RG-1402G-W router. To do this you need to open a web browser. This can be Google, Internet Chrome, Firefox, or any other browser you want to use. After you have opened the web browser, look for the address bar. This is normally be at the top of the page like this: Above is an example of what a web browser address bar looks like. Find the address bar in your router and type in your router’s IP address.
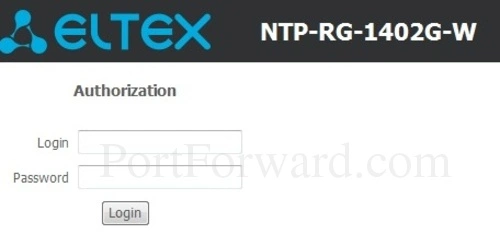
If you changed the router’s IP address in the past, then enter that address instead of the one above. If you changed the IP address and don’t remember what you changed it to, you need to find out what you changed it to. In order to do this, follow the directions on the How To Find Your Router’s IP Address page. Once you have entered the router’s IP address in the address bar, click the Enter key on your keyboard. This should give you a dialogue box if everything went according to plan: You should see a page like the one above with a space for a Login and Password.
- The Default Eltex NTP-RG-1402G-W Router Username is: admin
- The Default Eltex NTP-RG-1402G-W Router Password is: password
Enter the router’s Login and Password then press the Login button to gain access to the Eltex NTP-RG-1402G-W router interface.
Having Trouble?
- First, we recommend trying other Eltex username/password combinations. Sometimes if you have a different firmware version you also have a different username and password combination. Here is our list of Default Eltex Router Passwords.
- The second thing we recommend trying is our Find Password App. The number one reason a username and/or password does not work is because it was changed and forgotten. To help you guess use this app. Learn all about it on our Router Password Cracker page.
- Finally if the above two options did not work, it might be time to consider a factory reset. DO NOT reset your router unless you have exhausted all other troubleshooting options first. A factory reset erases everything you or your ISP has changed in the past. If you are a DSL customer you need the DSL username and password before you can reconfigure the router so be aware. If a reset is in your future, learn the basics of resetting a router on this How to Reset a Router page.
Step 3
Step three is finding the port forwarding section of the Eltex NTP-RG-1402G-W router. To do that we will have you begin on the Device Info Summary page:
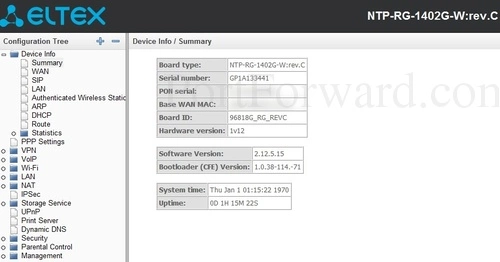
- Click the option in the left sidebar labeled NAT.
- Under that choose the new option of Virtual Server.
- Now select Add button near the bottom of the page in the center section.
Congratulations, you are now on the correct page to make a port forward.
Step 4
- TCP Ports: 3074
- UDP Ports: 3074
- Browsing our List of Games
- Check out our our List of Games by Genre
- See our List of all Applications
Make sure that the Custom Service radio button is selected.
You need to name this entry in the Custom Service box. The name does not make any difference in the forward; it’s just there so that you can remember later why you setup this forward.
Enter the IP address to forward these ports to into the Server IP Address box. If you are forwarding ports so you can run a program on a device other than your computer then you can enter your device’s IP address into that box.
If you are forwarding a single port, enter that port number into the External Port Start, External Port End, Internal Port Start and Internal Port End boxes. If you are forwarding a range of ports, enter the lowest number of the range into the External Port Start and Internal Port Start boxes. Then enter the highest number of the range into the External Port End and Internal Port End boxes.
In the Protocol box select the protocol that you want to forward these ports over.
When you are finished, click the Apply/Save button.
Test the Port Forward
Did the port forward go through? It is always a good idea to check if the ports forwarded properly. To do this we recommend using our Free Open Port Checker. There are a lot of port checkers on the Internet but ours does not make any assumptions on what programs you have installed on that computer. Our port checker uses a local application to see if the server is listening on the desired ports. If it is, your ports are open guaranteed.
More Information
Are you still having trouble port forwarding? Here at portforward.com we believe port forwarding should be easy. Our Port Forwarding Software troubleshoots, diagnoses, and fixes all your port forwarding issues. Here at portforward.com we make port forwarding easy.
Don’t forget to check out what else we have for you. We have a bunch of free guides about networking, gaming, and much more.
Need help setting up your router? setuprouter.com is the best source for setting up your home or business router.
More From Portforward

NAT Type Open in Overwatch
Overwatch is much more stable with an open port. Also if you never ever win then maybe you should read this.

Opening Ports for Pokémon Trading Card Game Live using Your Router
Forwarding some ports in your router for Pokémon Trading Card Game Live can help improve your online connections.

SOLVED: Quake Champions Connection Issues
Quake Champions is so fast that it might be faster than your router. Find out how to fix that little problem.

Forwarding Ports in Your Router for World of Tanks
You can forward some ports for World of Tanks in your router can help improve your online connections.

How to Port Forward Old School RuneScape in Your Router
You can forward some ports in your router for Old School RuneScape to help improve your online connections.

How to Port Forward Destiny 2
Welcome Guardian. When Destiny 2 arrives you want to be the first with a forwarded port in the Crucible.

Opening Ports for Splitgate using Your Router
You can help reduce lag and improve your overall experience in Splitgate by forwarding ports in your router.

Open Ports on Your Router for Yu-Gi-Oh! Master Duel
You can help improve your online connections for Yu-Gi-Oh! Master Duel by forwarding some ports in your router.
Настройка оборудования
Блог о модемах, роутерах и GPON терминалах Ростелеком

Проброс порта на Eltex NTE-RG-1402G-W (rev.A и rev.B)
Инструкция по пробросу портов на Оптическом терминале GPON ONT Eltex NTP-RG-1402G-W.
В этой инструкции я расскажу как пробросить порт на оптическом модеме GPON ONT Eltex NTP-RG-1402G-W на примере порта 12321 для клиента файлообменной сети DC++.
IP-адрес оптического терминала Eltex NTP-RG-1402G-W по умолчанию — 192.168.1.1. Вводим в адресную строку браузера адрес веб-интерфейса — http://192.168.1.1. Логин для доступа в веб-интерфейс Eltex — user, пароль по умолчанию — user.
Примечание: В случае, если у Вас версия Eltex NTP-RG-1402G-W rev.B , то в этом случае IP-адрес оптического модема будет 192.168.0.1, а адрес веб-интерфейса — http://192.168.0.1. Аутентификационные данные те же.

Вводим логин и пароль в форму авторизации и нажимаем ОК.
В меню, расположенном в левой части интерфейса выбираем пункт NAT => Virtual Servers Setup:

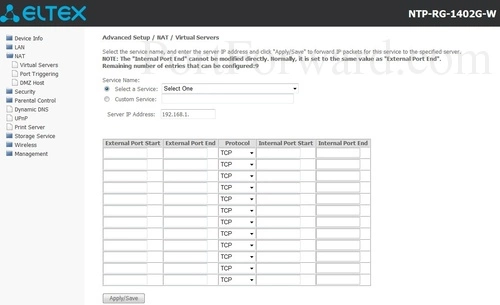
В открывшемся разделе настройки виртуальных серверов Вам надо создать новое правило. Для этого нажимаем кнопку Add. Откроется окно создания правил виртуального сервера:
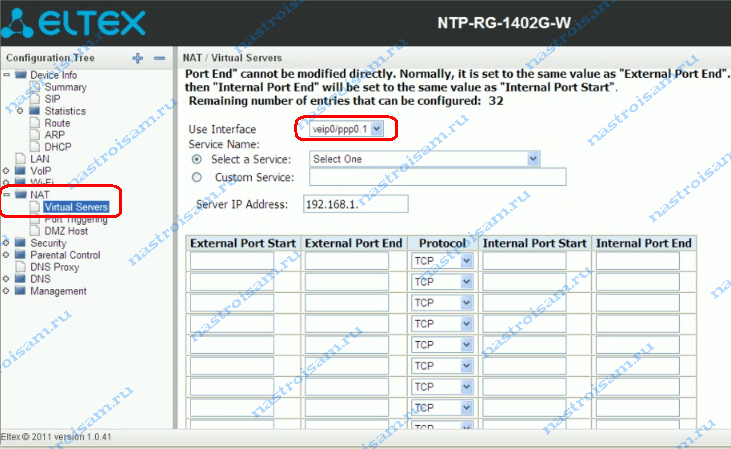
В списке Use Interface Вам надо выбрать Интернет соединение. В моем случае — это ppp0.1 . Ниже, в списке Select a Service можно выбрать вариант из предложенных стандартных сервисов — FTP, WWW и пр. Мы же будем создавать собственное правило. Для этого надо поставить точку Custom Service и прописать имя создаваемого сервиса — dcpp, например:
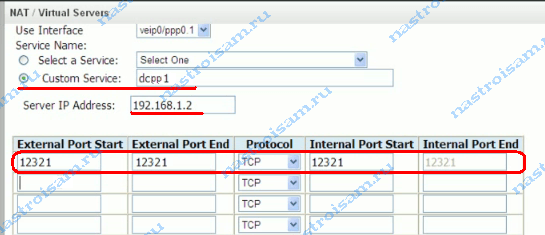
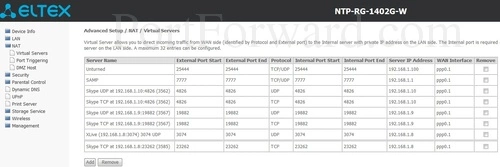
В поле Server IP Address надо ввести IP-адрес компьютера, для которого проброшен порт. Затем ниже, в таблицу вписываем номер порта, который хотим пробросить. Если нужно открыть только один порт, то прописываем номер порта в поля External Port Start, External Port End и Internet Port Start. В списке протокол Вам надо выбрать тип используемого протокола. Как правило, для клиентов файлообменных сетей надо открывать и TCP и UDP порт. В этом случае, в списке Protocol надо выбрать вариант Both. После этого нажимаем кнопку Apply. Я, для примера, специально открыл один порт TCP и один порт UDP . Результат получился такой:
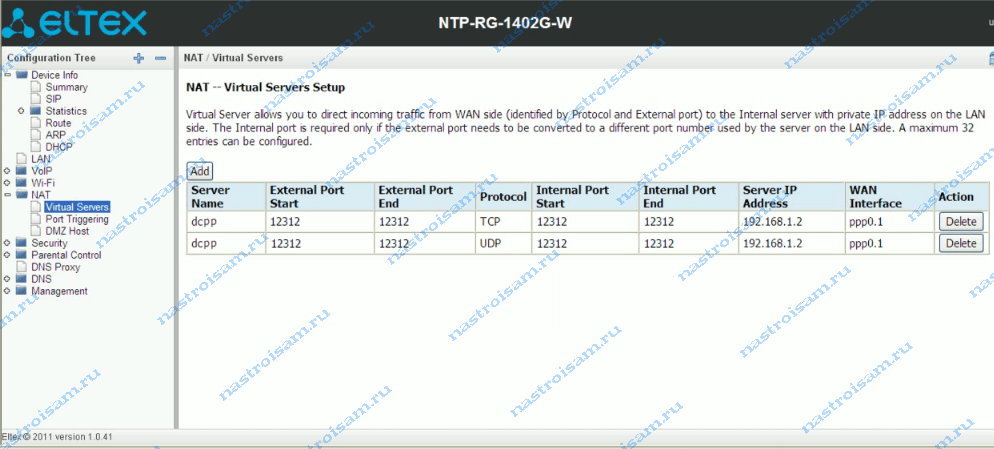
Готово, мы пробросили порт на оптическом терминале Eltex NTE-RG-1402G-W. Теперь можно проверять из-вне. Обратите внимание, что тот порт, который Вы открыли на оптическом модеме должен быть открыт и на компьютере в настройках брандмауэра (фаервола).
[NTU-RG-5XXX Ростелеком] Настройка проброса портов через NAT
Для осуществления настройки, необходимо подключиться к WEB-интерфейсу ONT по адресу 192.168.0.1. Имя пользователя и пароль для авторизации указаны на наклейке на корпусе устройства.
Далее необходимо перейти во вкладку Services и выбрать в левой части страницы раздел Firewall →Port Forwarding.
Для включения функционала перенаправления портов выберите Port Forwarding: Enable и примените изменения (Apply Changes):
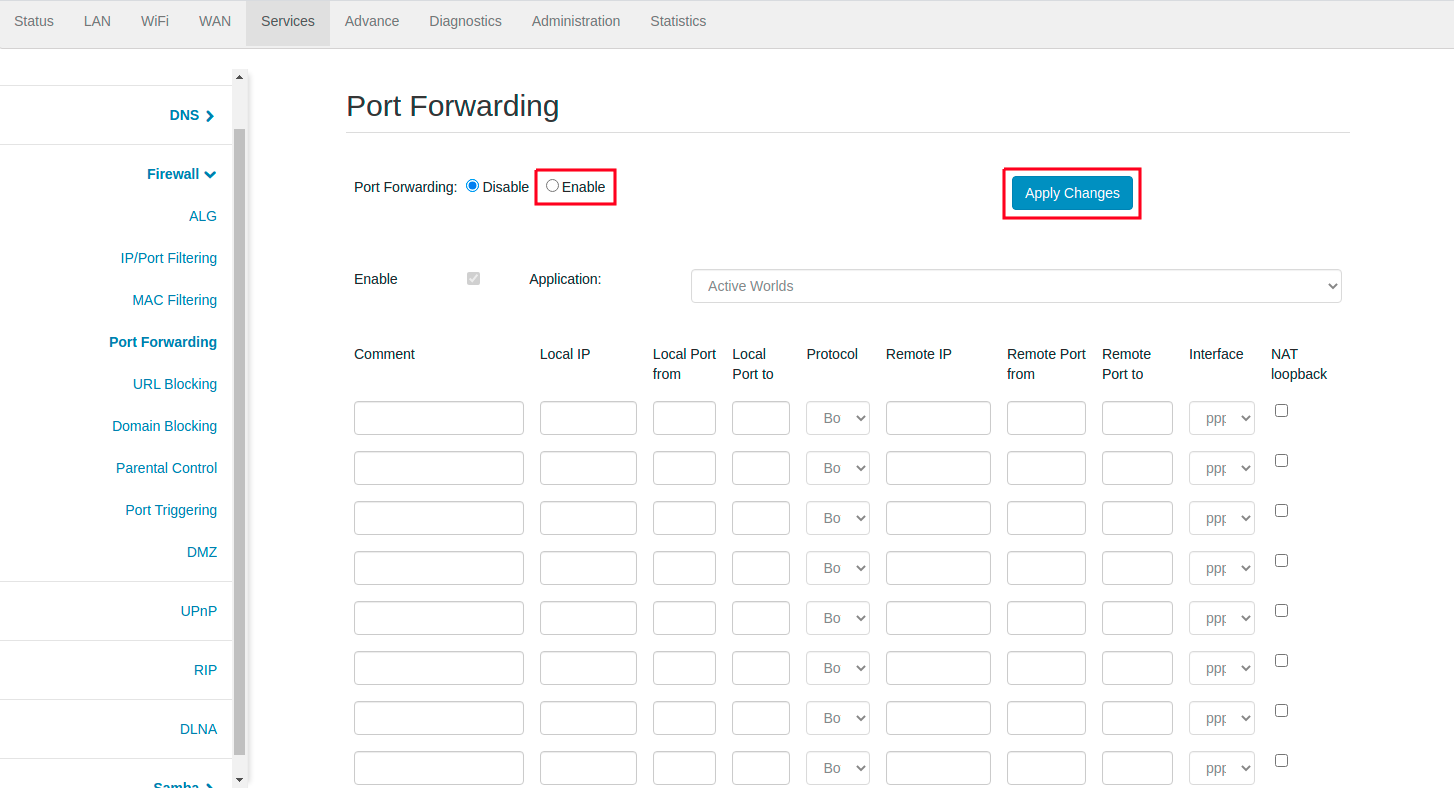
Для добавления записи в таблицу «Current Port Forwarding Table» установите флаг Enable и заполните соответствующие поля:

- Port Forwarding (Enable/Disable) – включение/выключение функции проброса портов;
- Application – предустановленные значения портов и протоколов для различных приложений;
- Comment – комментарий к правилу;
- Local IP – локальный IP-адрес, на который производится проброс;
- Local port from / to – укажите диапазон портов локального устройства для проброса;
- Protocol – выбор протокола (TCP, UDP или оба);
- Remote IP – опционально, определяет ip-адрес с которого будет разрешено подключение по данному правилу;
- Remote port from / to – укажите начальный порт входящего соединения. Поле Remote port to заполнится автоматически;
- Interface – выбор интерфейса;
- NAT-loopback – локальная петля NAT позволяет обращаться к устройствам из локальной сети по глобальному адресу.
После заполнения полей для добавления записи нажмите кнопку «Add» в нижней части страницы. Для удаления определённой позиции, выделите её и нажмите кнопку «Delete Selected», для удаления всей таблицы кнопку «Delete All».