Is there any way to execute commands from history?
I’m just wondering if there any way to execute the 636 command without typing it again, just type something plus the number, like history 636 or something.
5 Answers 5
In bash, just !636 will be ok.
In Linux — This has more to do with the shell (bash, zsh, etc) a person is running then the OS you are running it on. There are shells on linux without support for history.
If you’ve got a command that’s very similar to what you want to run, you can append :p to print the command without running it, !636:p for example. Which means that you can easily select it again from your history by pressing the up arrow and make the minor changes you want
Yes, it’s called «history expansion.» See
LESS='+/^HISTORY EXPANSION' man bash Using an exclamation point followed by a number is arguably the simplest use:
However, you can also run the last executed command directly without knowing its history number:
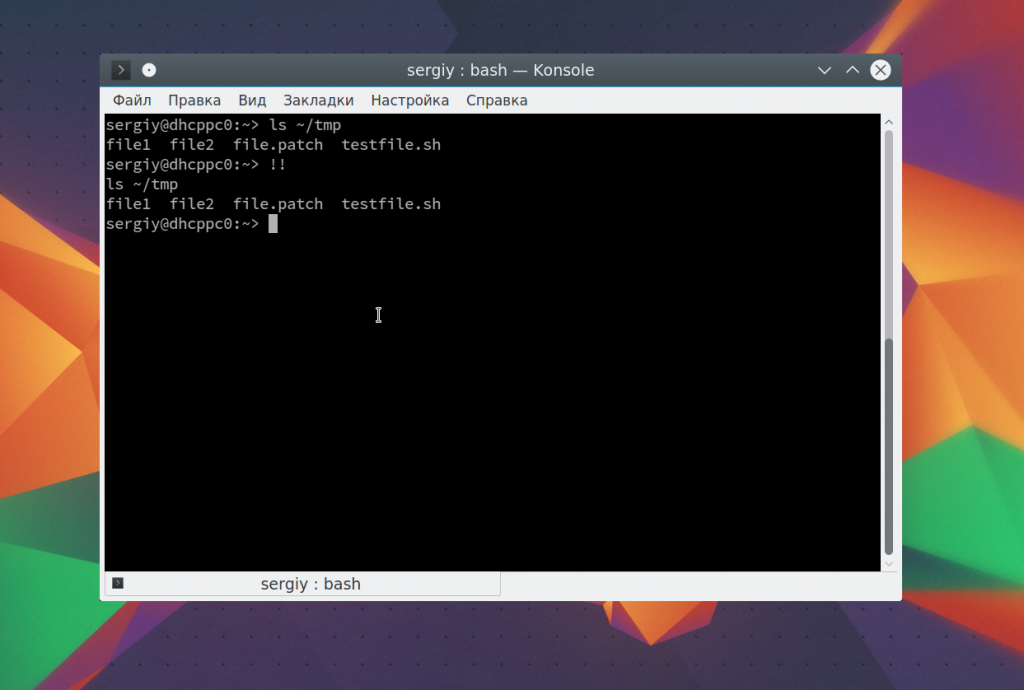
Or you can run two commands back:
The form I most often use, however, is to repeat the last argument of the last command:
echo this text goes into a file > /tmp/afile.txt cat !$ Or, let’s say I’m inspecting a file. Using tab completion, I might do the following:
ls -l /really/long/path/to/some/file less !$ Again, read the man page for more details:
LESS='+/^HISTORY EXPANSION' man bash Interactively, Alt-. can be more convenient than !$ . It inserts the last argument of the last command verbatim into the line.
@ulidtko Where are those special escapes documented (I knew about !$ , but never heard about Alt-. )? Will you post a link to it, please?
LESS=»+/DEFAULT KEY BINDINGS» man 3 readline , /etc/inputrc , ~/.inputrc . Many programs besides bash use libreadline; for those who do, you get the same features like Alt-. , Ctrl-X-U (undo), Ctrl-/ (describe shortcut), tab-completion, etc — for free. For example, with just three lines of PYTHONSTARTUP one can enable tab-completion and history in the stock python REPL. Which will work (mostly) the same as in bash, since it’s the GNU Readline library that does the work. The readline’s manpage describes the features in detail.
Also, Ctl-UpArrow (or AltUpArrow on bash) will scroll backwards through the history list. Typing a few characters then the UpArrow gets only the commands starting with that letter, e.g. «fr(Ctl-Up)» scrolls through all the «free. » commands in the OP’s list. This also works in things like gnuplot & gdb that use readline.
@Ajedi32, see the final bolded line in my answer. 🙂 Truthfully this answer is barely a taste of what history expansion can do. Keep in mind that this is at the level of the shell, not the command you are calling; hence echo followed by touch !$ will touch five files, not just one. So strictly speaking it’s not the last argument but the last shell word on that line. (Also try echo hello >temp followed by echo goodbye !$ .) If you can think of a way to put it more clearly feel free to suggest an edit.
A nice one, if you don’t want to first history, note the number, etc:
( ctrl-r = «reverse search interactively») ( something = a part of a previous command)
This will show you the latest history line containing something . To get the one before, do ctrl-r (alone) again, each time it gets a previous line.
to show the latest history line containing ’10’ (for exemple the line with $10 , in your exemple), and ctrl-r again until you retrieve the history line you were looking for
When the line you wanted appear, just Enter to run it (or you can also edit it, using the arrow keys , backspace , and ctrl-a to go to the beginning of the line, ctrl-e to get to the End, ctrl-k : to «kill» from cursor to end of line (=deletes+saves it in a buffer), ctrl-y : to restore, from the buffer, a previously killed bit, etc.)
If you want to search forward (ctrl-s), you first need to disable XON : see https://stackoverflow.com/a/791800/1841533 :
» just to disable XON/XOFF by running
» (and then you will be able to use ctrl-s, without having it freeze the terminal)
How to use the history command in Linux

As I spend more and more time in terminal sessions, it feels like I’m continually finding new commands that make my daily tasks more efficient. The GNU history command is one that really changed my work day.
The GNU history command keeps a list of all the other commands that have been run from that terminal session, then allows you to replay or reuse those commands instead of retyping them. If you are an experienced terminal user, you know about the power of history , but for us dabblers or new sysadmin folks, history is an immediate productivity gain.
First of all, the history command isn’t actually a command. You can see this for yourself by looking for the command on your system:
$ which history which: no history in (/usr/local/bin:/usr/bin:/bin:/usr/games:/usr/local/sbin)Your computer can’t find the history command because it’s a built-in keyword of your shell. Because it’s written into the shell you’re using, there can be some variation in how history behaves depending on whether you’re using Bash, tcsh, Zsh, dash, fish, ksh, and so on. This article is based upon the Bash implementation of history, so some functions may not work in other shells. However, most of the basic functions are the same.
History 101
To see history in action, open a terminal program on your Linux installation and type:
1 clear 2 ls -al 3 sudo dnf update -y 4 historyThe history command shows a list of the commands entered since you started the session. The joy of history is that now you can replay any of them by using a command such as:
The !3 command at the prompt tells the shell to rerun the command on line 3 of the history list. I could also access that command by entering:
This prompts history to search for the last command that matches the pattern you provided (in this case, that pattern is dnf) and run it.
Searching history
You can also use history to rerun the last command you entered by typing !! . By pairing it with grep , you can search for commands that match a text pattern or, by using it with tail , you can find the last few commands you executed. For example:
$ history | grep dnf 3 sudo dnf update -y 5 history | grep dnf $ history | tail -n 3 4 history 5 history | grep dnf 6 history | tail -n 3Another way to get to this search functionality is by typing Ctrl-R to invoke a recursive search of your command history. After typing this, the prompt changes to:
Now you can start typing a command, and matching commands will be displayed for you to execute by pressing Return or Enter.
Changing an executed command
You can also use history to rerun a command with different syntax. You can revise history with history . For example, if I want to change my previous command history | grep dnf to history | grep ssh , I can execute the following at the prompt:
The command is rerun, but with dnf replaced by ssh . In other words, this command is run:
Removing history
There may come a time that you want to remove some or all the commands in your history file. If you want to delete a particular command, enter history -d . To clear the entire contents of the history file, execute history -c .
The history file is stored in a file that you can modify, as well. Bash shell users find it in their home directory as .bash_history .
Next steps
There are a number of other things that you can do with history :
- Set the size of your history buffer to a certain number of commands
- Record the date and time for each line in history
- Prevent certain commands from being recorded in history
For more information about the history command and other interesting things you can do with it, take a look at Seth Kenlon’s articles about parsing history, history search modifiers, and the GNU Bash Manual.
This article was originally published in June 2018 and has been updated with additional information by the editor.
История команд Linux
В терминале Linux, кроме всего прочего, есть одна замечательная вещь. Это история команд Linux. Все команды, которые вы вводите во время работы сохраняются и вы можете найти и посмотреть их в любой момент. Также можете вернуться на несколько команд чтобы не набирать недавно выполненную команду заново.
В этой небольшой статье мы рассмотрим как пользоваться историей команд Linux, как ее настроить, а также рассмотрим полезные приемы, которые могут помочь вам в работе.
История команд Linux
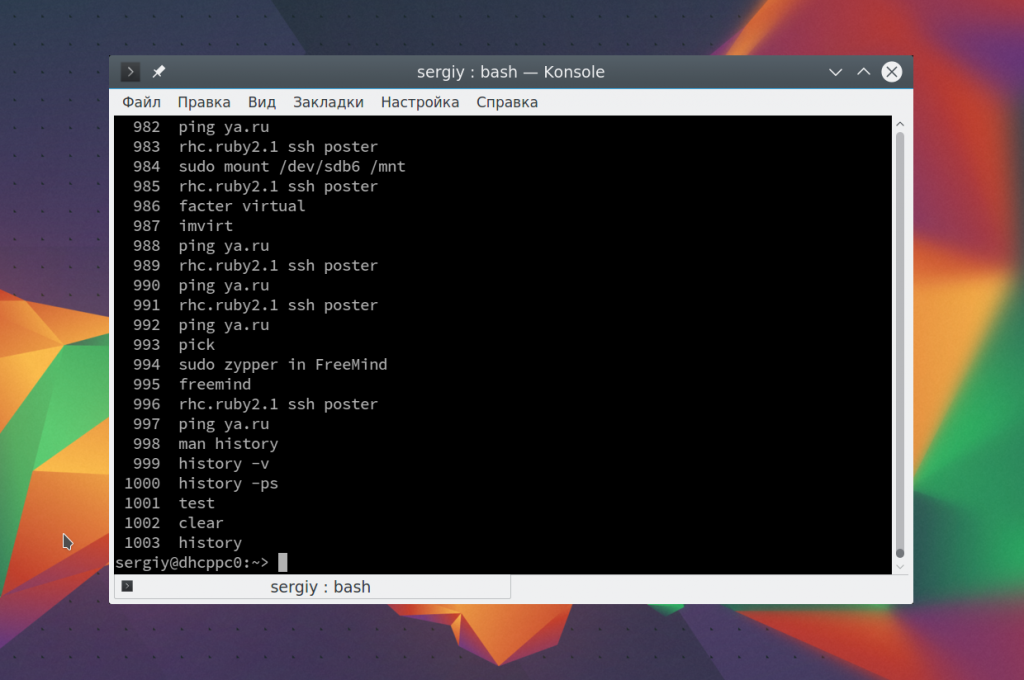
Большинство задач, связанных с историей команд, мы будем выполнять либо с помощью команды history, либо с помощью оболочки. В истории хранится последняя 1000 команд, которые вы выполняли. Чтобы посмотреть всю историю для этого терминала просто запустите команду history без параметров:
Для дополнительных действий с историей вам могут понадобиться опции. Команда history linux имеет очень простой синтаксис:
$ history опции файл
В качестве файла можно указать файл истории. По умолчанию история для текущего пользователя хранится в файле ~/.history, но вы можете задать, например, файл другого пользователя. А теперь рассмотрим опции:
- -c — очистить историю;
- -d — удалить определенную строку из истории;
- -a — добавить новую команду в историю;
- -n — скопировать команды из файла истории в текущий список;
- -w — перезаписать содержимое одного файла истории в другой, заменяя повторяющиеся вхождения.
Наиболее полезной для нас из всего этого будет опция -c, которая позволяет очистить историю команд linux:
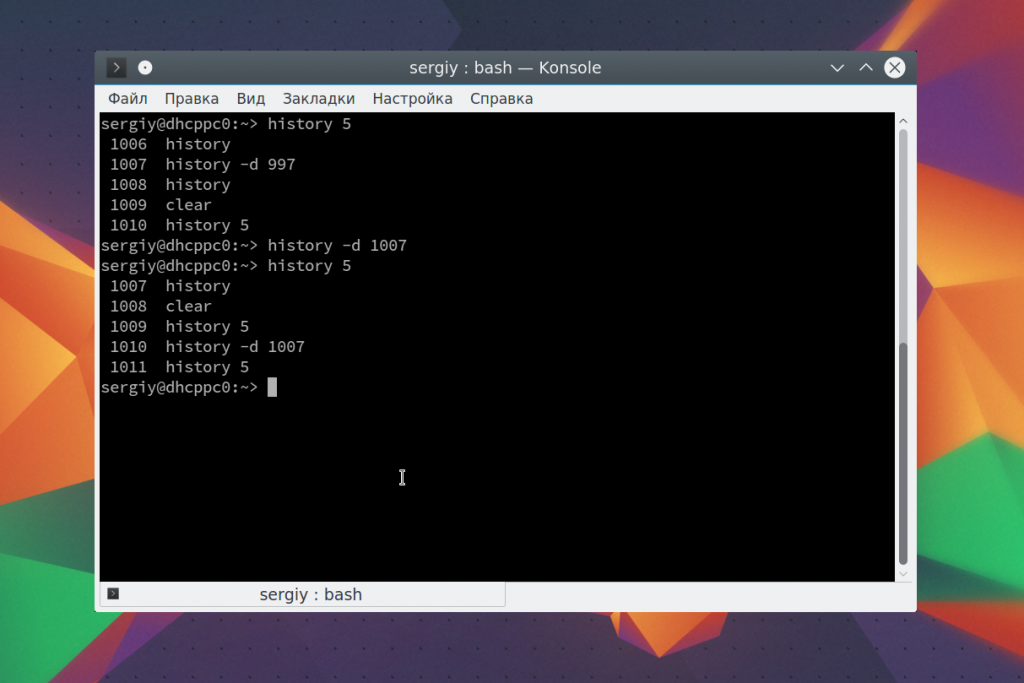
Так вы можете посмотреть только последние 10 команд:
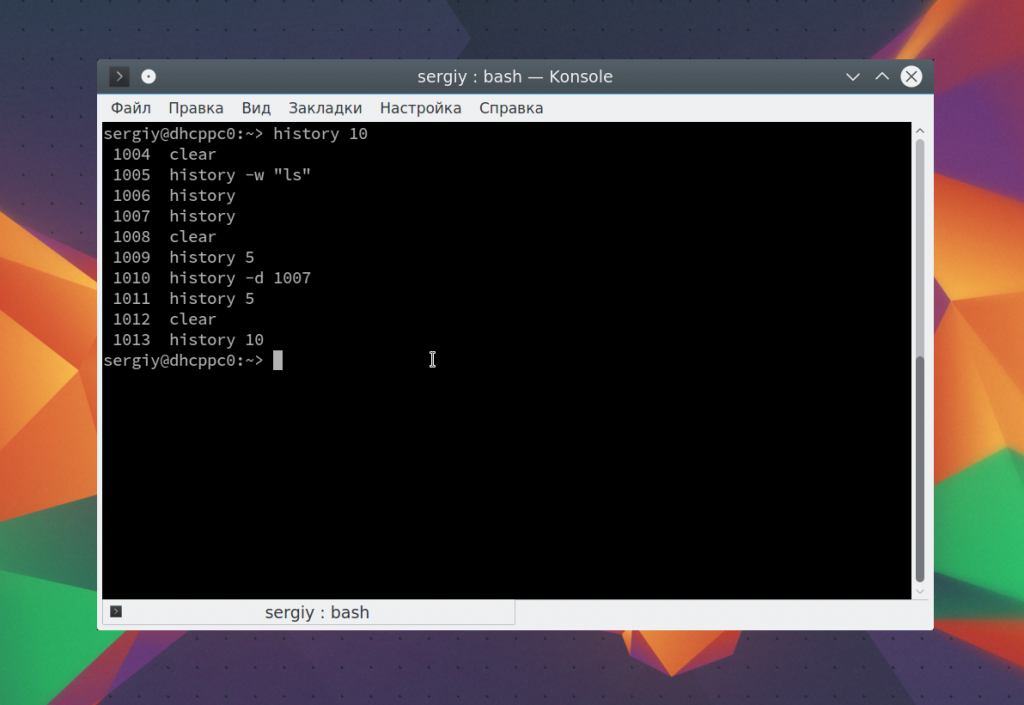
А с помощью опции -d удалить ненужное, например, удалить команду под номером 1007:
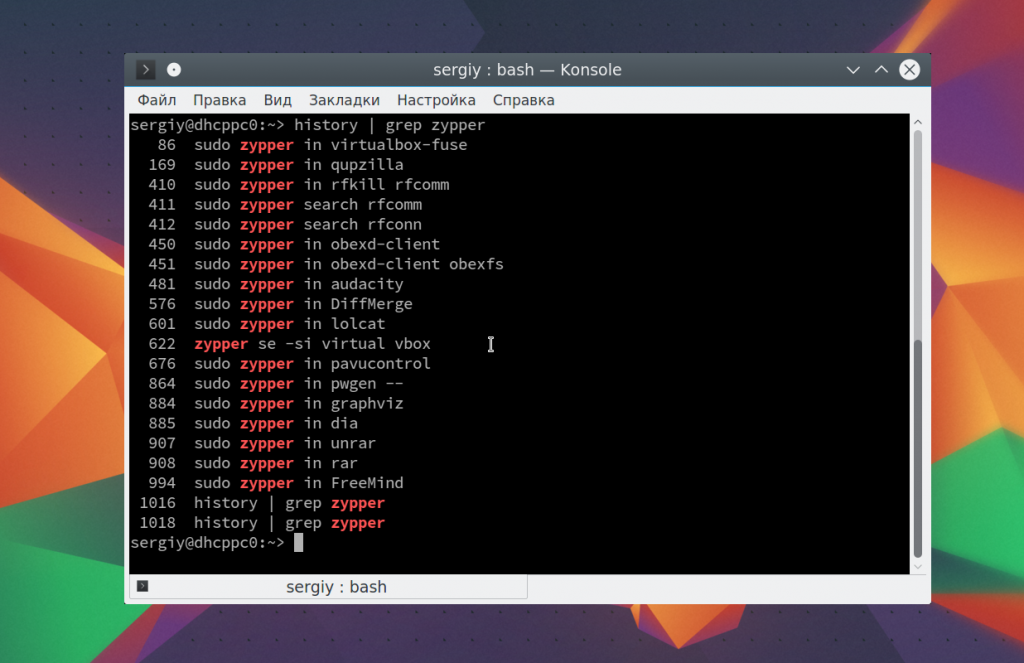
Если вы хотите выполнить поиск по истории bash, можно использовать фильтр grep. Например, найдем все команды zypper:
На самом деле работать с историей еще более просто с помощью оболочки, возможно, вы уже используете многие ее функции, но о некоторых точно не знаете. Рассмотрим их:
Чтобы показать предыдущую команду просто нажмите стрелку вверх, так можно просмотреть список раньше выполненных команд.
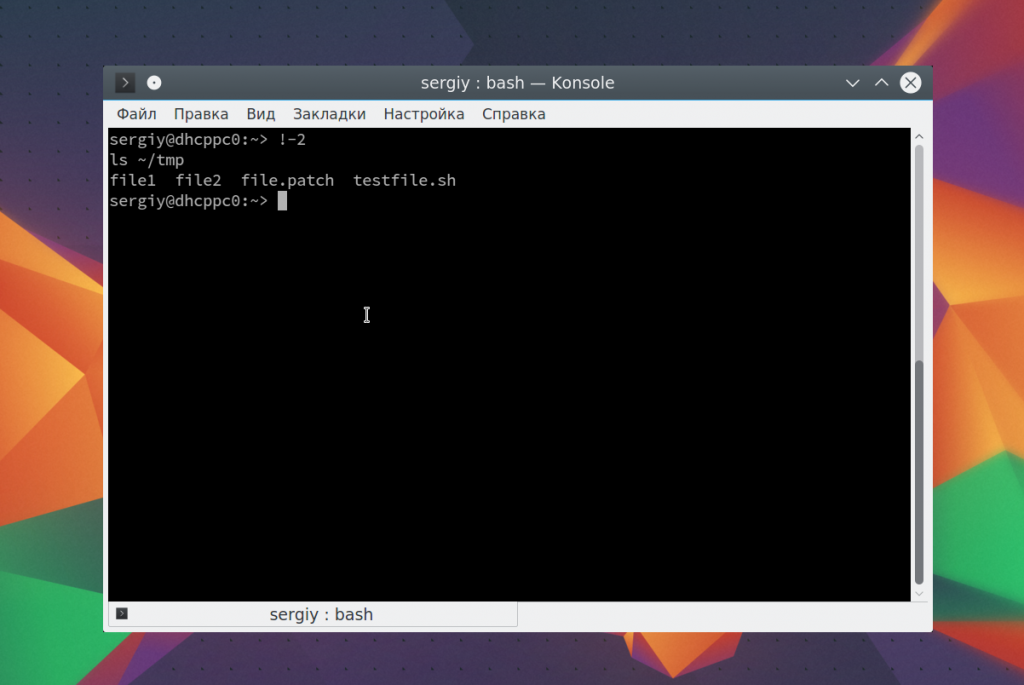
Вы можете выполнить последнюю команду просто набрав «!!». Также можно выполнить одну из предыдущих команд указав ее номер «!-2»
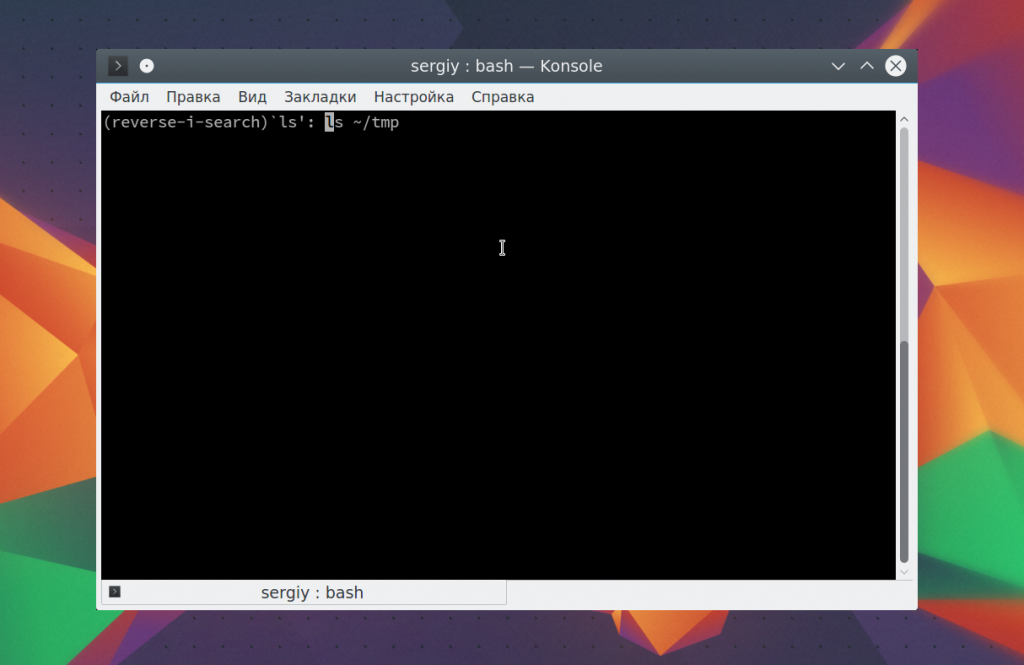
Чтобы выполнить поиск по истории прямо во время ввода нажмите Ctrl+R и начните вводить начало команды.
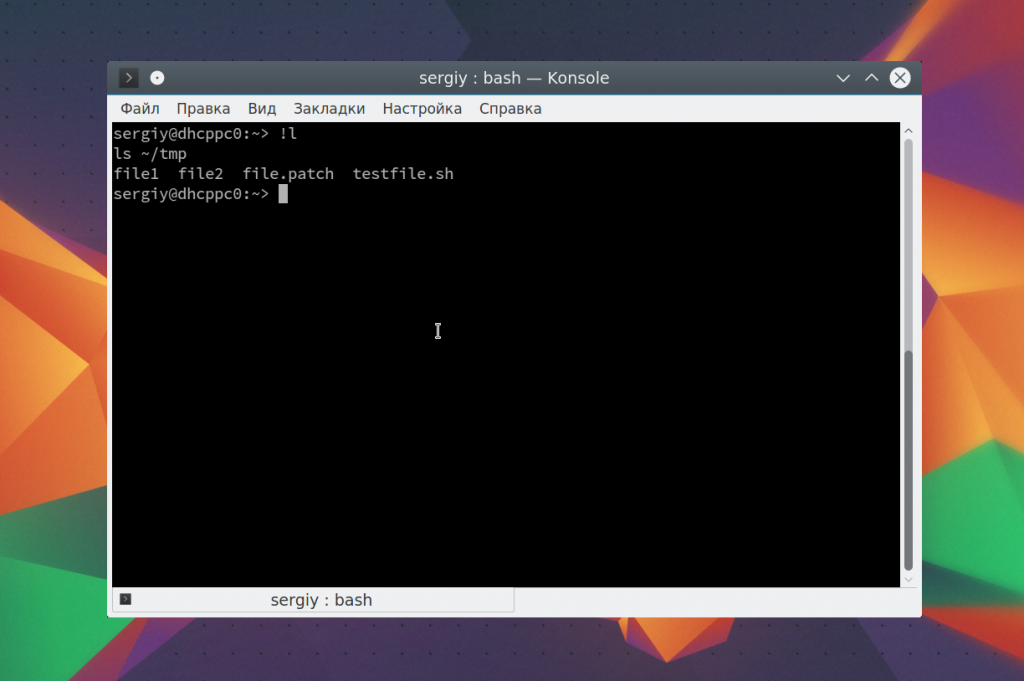
Если вы знаете, что нужная команда была последней, которая начиналась на определенные символы, например, l, то вы можете ее выполнить, дописав «!l»:
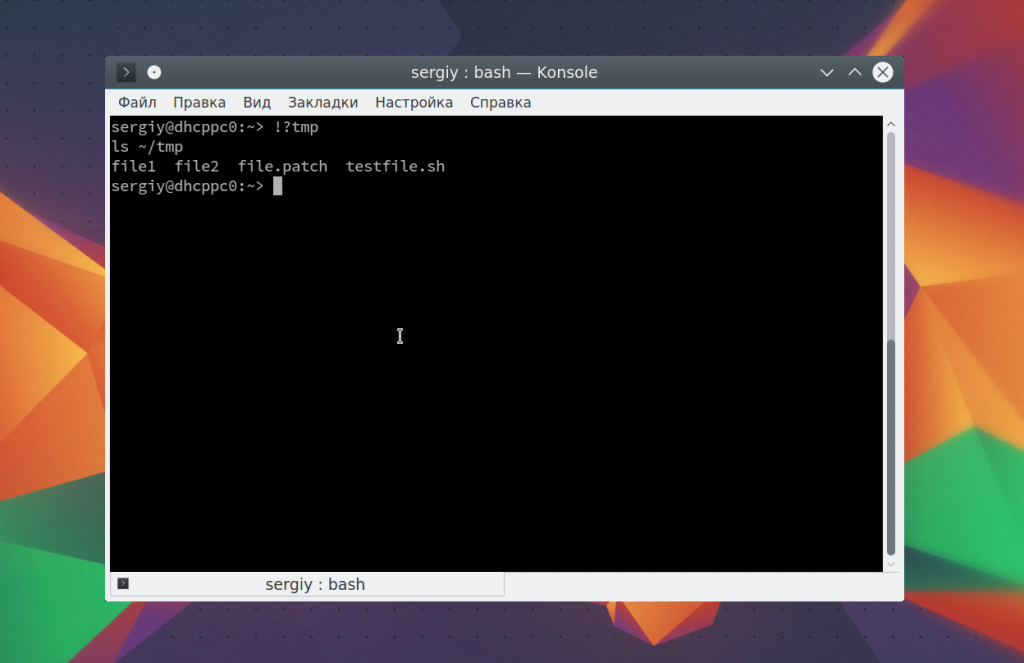
Если нужная команда последняя содержала определенное слово, например, tmp, то вы можете ее найти, использовав «!?tmp»:
Если вы не хотите, чтобы выполняемая команда сохранилась в истории просто поставьте перед ней пробел.
Таким образом, вы можете очень быстро отыскать нужную команду, если помните как она была написана. История команд bash хранит очень много команд и этого вполне достаточно для комфортной работы.
Настройка истории Linux
Linux — очень настраиваемая и гибкая система, поэтому настроить здесь можно все, в том числе и историю. По умолчанию выводится только номер команды, но вы можете выводить и ее дату. Для этого нужно экспортировать переменную HISTORYFORMAT вместе нужным форматом:
export HISTTIMEFORMAT=’%F %T ‘
$ history

Для форматирования можно использовать такие модификаторы:
Вы можете указать какие команды не стоит отображать, например, не будем выводить ls -l, pwd и date:
export HISTIGNORE=’ls -l:pwd:date:’
Также можно отключить вывод одинаковых команд:
Существует два флага, ignoredups и ignorespace. Второй указывает, что нужно игнорировать команды, начинающиеся с пробела. Если вы хотите установить оба значения, используйте флаг ignoreboth. Используйте переменную HISTSIZE, чтобы установить размер истории:
По умолчанию история сохраняется для каждого терминала отдельно. Но если вы хотите чтобы все ваши команды немедленно синхронизировались между всеми терминалами, то это очень просто настроить. Добавьте такую переменную:
export PROMPT_COMMAND=»$history -a; history -c; history -r;»
Для тестирования работы вы можете набирать эти команды прямо в терминале и сразу видеть результат, но для сохранения добавьте нужные строки в ваш ~/.bashrc. Например:
export PROMPT_COMMAND=»$history -a; history -c; history -r;»
$ export HISTCONTROL=ignoredups
$ export HISTTIMEFORMAT=’%F %T ‘
Готово, теперь осталось сохранить изменения и перезапустить ваши терминалы. Теперь ваша история будет выводить дату, игнорировать дубли и синхронизироваться между терминалами.
Выводы
В этой статье мы рассмотрели что такое история команд linux, как с ней работать, как применяется команда history linux и какие настройки можно использовать для более комфортной работы. Если у вас остались вопросы, спрашивайте в комментариях!
Обнаружили ошибку в тексте? Сообщите мне об этом. Выделите текст с ошибкой и нажмите Ctrl+Enter.