- Samba as a file server
- Install Samba
- Configure Samba as a file server
- Create the directory
- Enable the new configuration
- Further reading
- Share your personal files
- Security
- Networks
- More Information
- How to Share a Folder on the Local Network With Ubuntu
- Method to Share a Folder on the Local Network With Ubuntu 20.04 Linux System
- Conclusion
- About the author
- Kalsoom Bibi
- Install and Configure Samba
- What you’ll learn
- What you’ll need
- 2. Installing Samba
- 3. Setting up Samba
- What we’ve just added
- 4. Setting up User Accounts and Connecting to Share
- Connecting to Share
- If you’d like to take your configuration further…
Samba as a file server
One of the most common ways to network Ubuntu and Windows computers is to configure Samba as a file server. It can be set up to share files with Windows clients, as we’ll see in this section.
The server will be configured to share files with any client on the network without prompting for a password. If your environment requires stricter Access Controls see Share Access Control.
Install Samba
The first step is to install the samba package. From a terminal prompt enter:
That’s all there is to it; you are now ready to configure Samba to share files.
Configure Samba as a file server
The main Samba configuration file is located in /etc/samba/smb.conf . The default configuration file contains a significant number of comments, which document various configuration directives.
Note:
Not all available options are included in the default configuration file. See the smb.conf man page or the Samba HOWTO Collection for more details.
First, edit the workgroup parameter in the [global] section of /etc/samba/smb.conf and change it to better match your environment:
Create a new section at the bottom of the file, or uncomment one of the examples, for the directory you want to share:
[share] comment = Ubuntu File Server Share path = /srv/samba/share browsable = yes guest ok = yes read only = no create mask = 0755 - comment
A short description of the share. Adjust to fit your needs. - path
The path to the directory you want to share.
Note:
This example uses /srv/samba/sharename because, according to the Filesystem Hierarchy Standard (FHS), /srv is where site-specific data should be served. Technically, Samba shares can be placed anywhere on the filesystem as long as the permissions are correct, but adhering to standards is recommended.
Create the directory
Now that Samba is configured, the directory needs to be created and the permissions changed. From a terminal, run the following commands:
sudo mkdir -p /srv/samba/share sudo chown nobody:nogroup /srv/samba/share/ The -p switch tells mkdir to create the entire directory tree if it doesn’t already exist.
Enable the new configuration
Finally, restart the Samba services to enable the new configuration by running the following command:
sudo systemctl restart smbd.service nmbd.service Warning:
Once again, the above configuration gives full access to any client on the local network. For a more secure configuration see Share Access Control.
From a Windows client you should now be able to browse to the Ubuntu file server and see the shared directory. If your client doesn’t show your share automatically, try to access your server by its IP address, e.g. \\192.168.1.1 , in a Windows Explorer window. To check that everything is working try creating a directory from Windows.
To create additional shares simply create new [sharename] sections in /etc/samba/smb.conf , and restart Samba. Just make sure that the directory you want to share actually exists and the permissions are correct.
The file share named [share] and the path /srv/samba/share used in this example can be adjusted to fit your environment. It is a good idea to name a share after a directory on the file system. Another example would be a share name of [qa] with a path of /srv/samba/qa .
Further reading
- For in-depth Samba configurations see the Samba HOWTO Collection
- The guide is also available in printed format.
- O’Reilly’s Using Samba is another good reference.
- The Ubuntu Wiki Samba page.
Share your personal files
You can allow access to the Public folder in your Home folder from another computer on the network. Configure Personal File Sharing to allow others to access the contents of the folder.
You must have the gnome-user-share package installed for Personal File Sharing to be visible.
- Open the Activities overview and start typing Sharing .
- Click on Sharing to open the panel.
- If the Sharing switch in the top-right of the window is set to off, switch it to on.
If the text below Device Name allows you to edit it, you can change the name your computer displays on the network.
Security
To require other people to use a password when accessing your Public folder, switch the Require Password switch to on. If you do not use this option, anyone can attempt to view your Public folder.
This option is disabled by default, but you should enable it and set a secure password.
Networks
The Networks section lists the networks to which you are currently connected. Use the switch next to each to choose where your personal files can be shared.
More Information
- Sharing — Share your desktop, files, or media.
- Sharing Settings — Share your screen, or share media and other files over a local network or Bluetooth.
You can choose the displayed language by adding a language suffix to the web address so it ends with e.g. .html.en or .html.de.
If the web address has no language suffix, the preferred language specified in your web browser’s settings is used. For your convenience:
[ Change to English Language | Change to Browser’s Preferred Language ]
The material in this document is available under a free license, see Legal for details.
For information on contributing see the Ubuntu Documentation Team wiki page. To report errors in this documentation, file a bug.
How to Share a Folder on the Local Network With Ubuntu
![]()
It is not difficult to share a folder in Ubuntu 20.04 Linux system and access it over the network in other operating systems, such as Windows. The necessary packages are not enabled by default in Ubuntu 20.04 Linux system. However, you can use the Install Wizard to get the necessary software installed automatically to share a folder. For network sharing, Ubuntu 20.04 Linux system needs a network connection. Verify that your Ubuntu 20.04 Linux system is linked to the router and that it can communicate with other computers on the network. Other computers won’t be able to view or interact with the network shares you establish on Ubuntu if you don’t have a network connection.
Method to Share a Folder on the Local Network With Ubuntu 20.04 Linux System
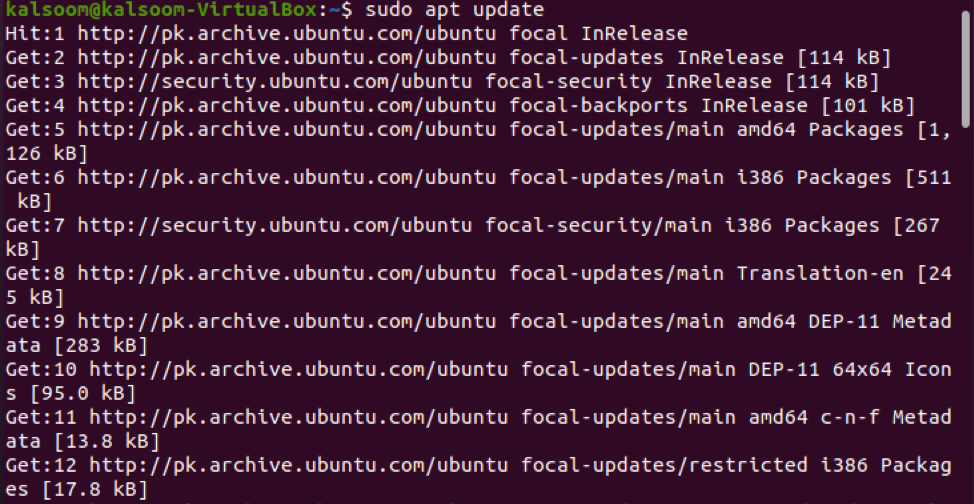
To share a folder on the local network with Ubuntu 20.04 Linux system, first, you have to install Samba on your system. You have to launch the command line shell in the Ubuntu 20.04 Linux system. Before downloading any new package or software, you need to update your system’s apt packages repository. To upgrade the apt repository, use the following affixed command:
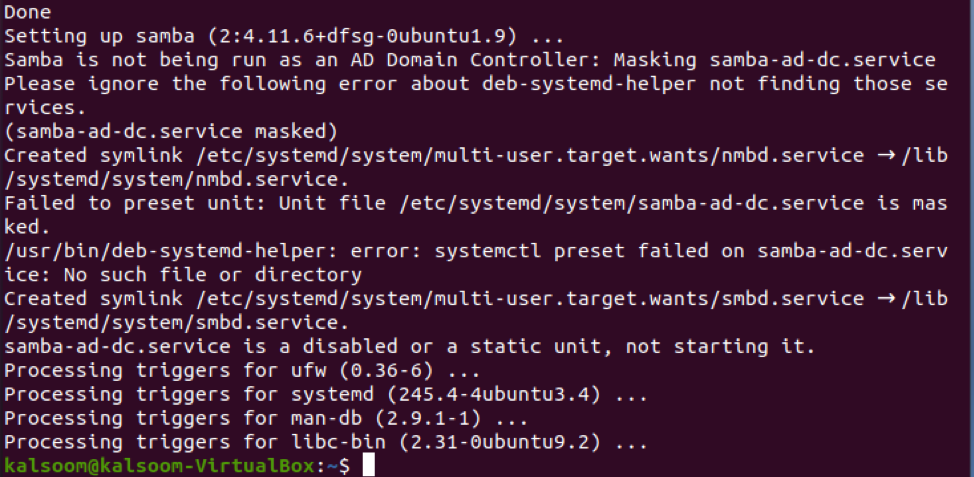
After the update, install Samba by running the following affixed command shown in the screenshot below:

Tap “y” and afterward hit “Enter” to continue with the installation process. The installation of Samba on your machine will take some time.
Once it is installed, type the following cited command to check the status of the Samba operating service:
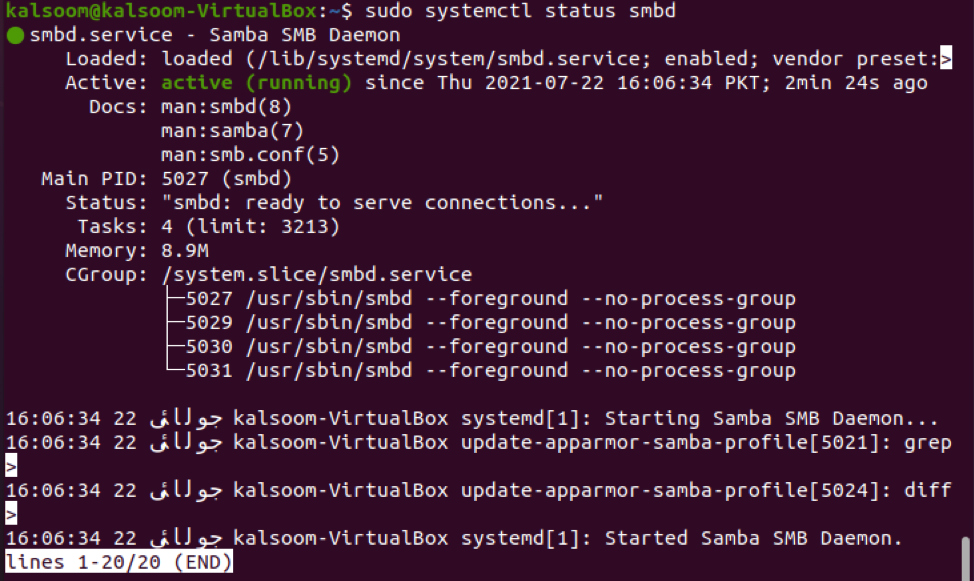
The output display indicates it is in “Active” (running) status. Now, we will change the firewall access guidelines to permit the “Samba” profile.

Rules will be updated after the execution of the command displayed above.
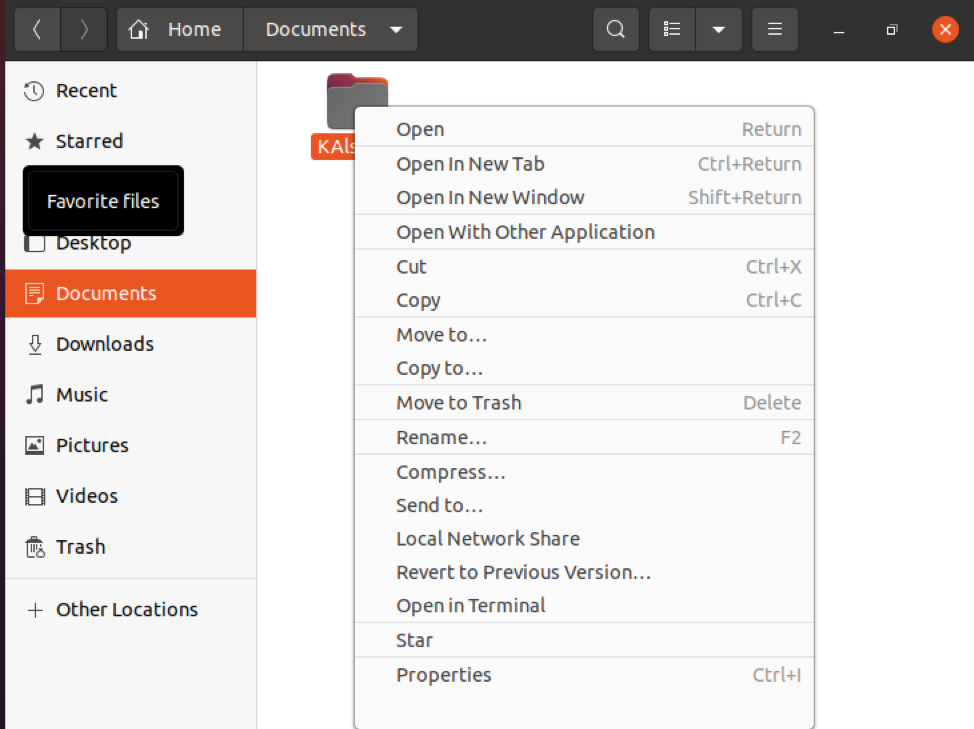
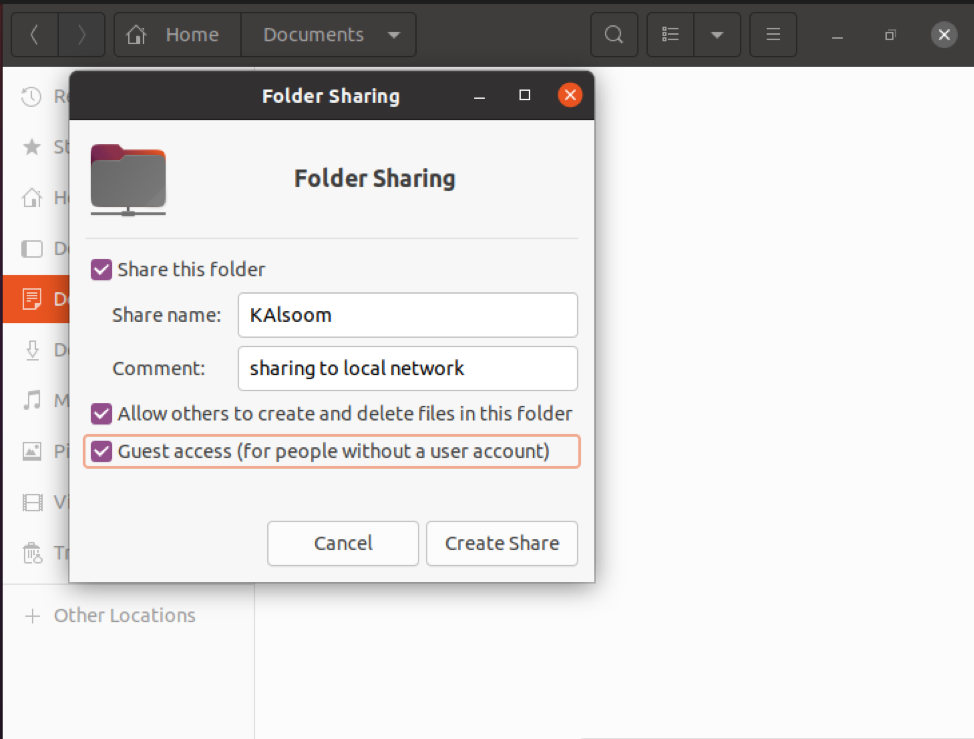
After installing Samba, we can now use the default Ubuntu file management application “Nautilus” to exchange folders or directories. Let’s take a look at how to use the Nautilus file manager to exchange directories. We have created a folder titled “kalsoom”. We will share this folder and use it in our complete guide. Navigate to the file manager and select a folder to share over your local network. Next, choose the “Local Network Share” selection from the displayed list items:
The screen shall show the following folder sharing dialogue. To share the folder, you must check the boxes displayed in the following attached screenshot and then click on the “Create Share” button:
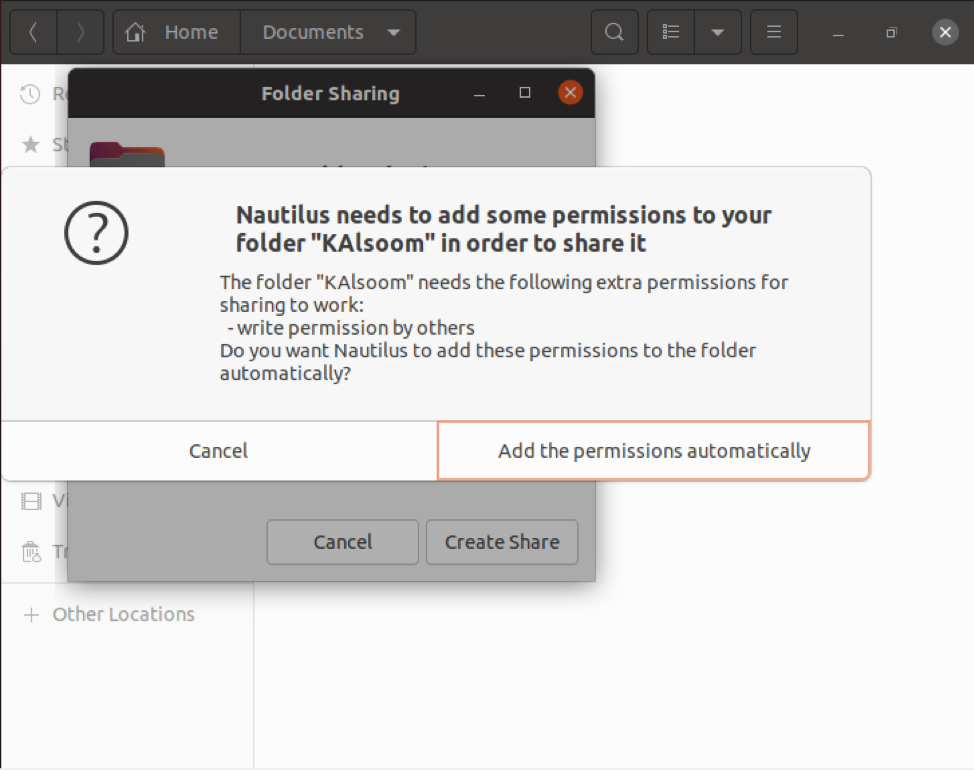
The following dialogue will appear on your system. After, tap the “Add the permissions automatically” button.
If you are a guest user, no user account authentication is required to access Samba shared folders. Everybody on the network can access the sharing folder by using guest shares. However, to grant permitted access to Samba shares, you will need a Samba user account. We have created a user titled “kalsoom”, as shown in the screenshot.
Tap “Enter” after entering a new password for a user. Rewrite the new password and press the “Enter” key once more. The new Samba user has been established successfully, and a new password has been set for the freshly created user, as shown in the attached image:

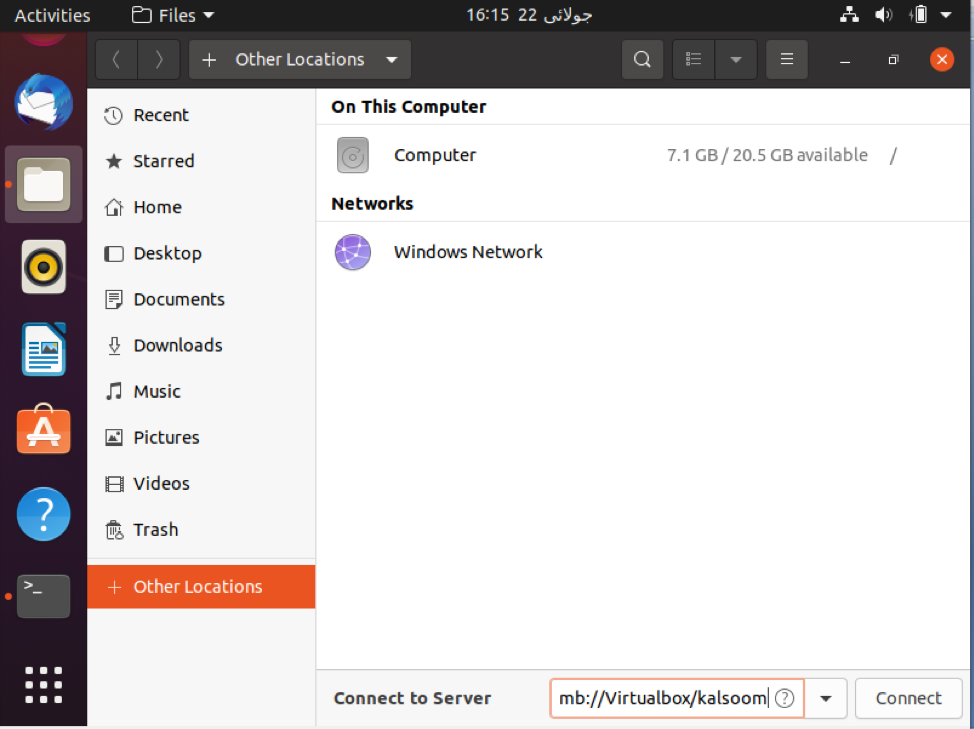
Now, it is time to access the Samba folder share on the Ubuntu 20.04 Linux system. In the other location section, type the address of Samba shares as seen in the following screenshot:
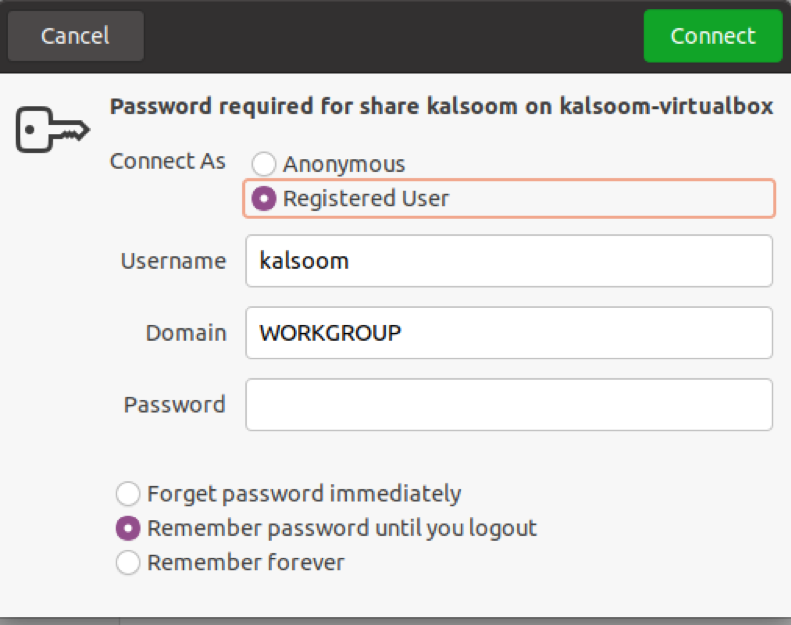
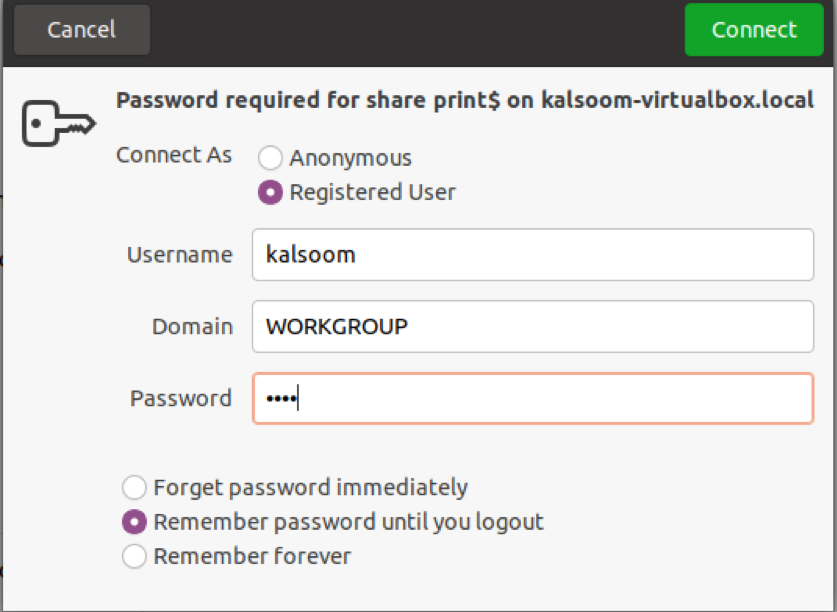
On your system, the following dialogue will appear, which is displayed in the screenshot below. You have the option of connecting as an “Anonymous” user or even as a “Registered user” in the image below. Type all the required fields, and tap on the “Connect” button.
Tap on the hostname or server. Again, you will be required to enter the following details displayed in the attached screenshot:
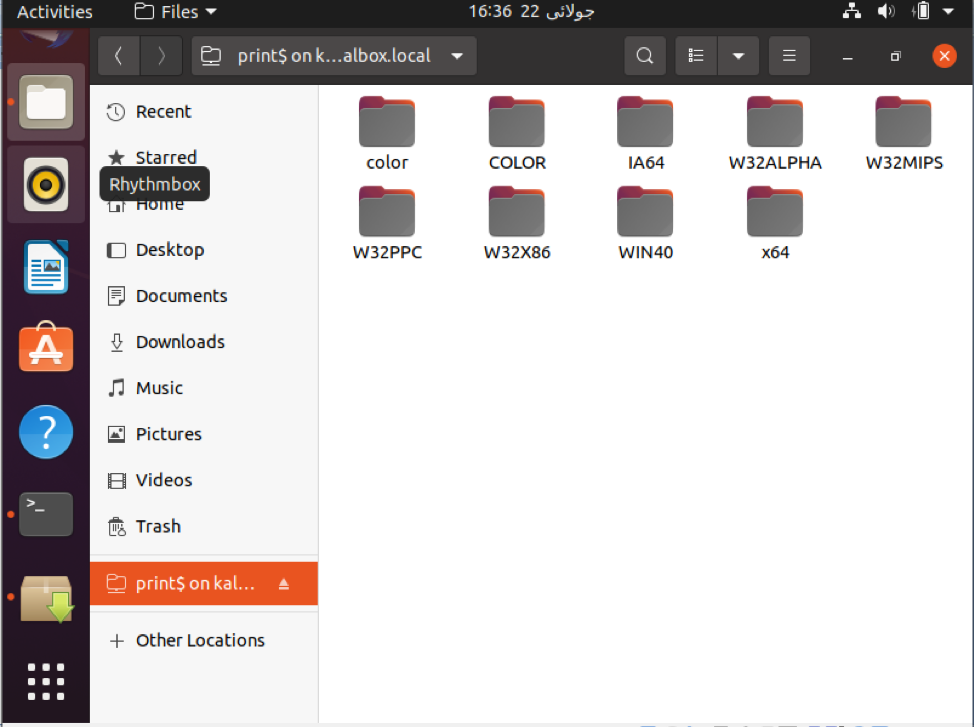
You could see that all of Samba’s folders are shared here in the attached screenshot:
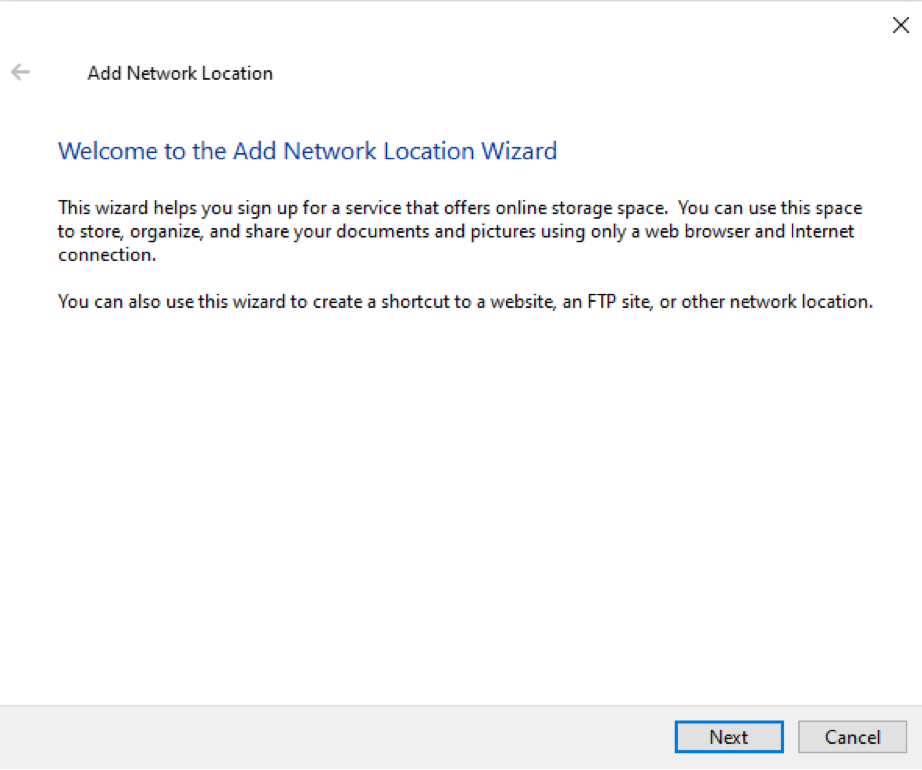
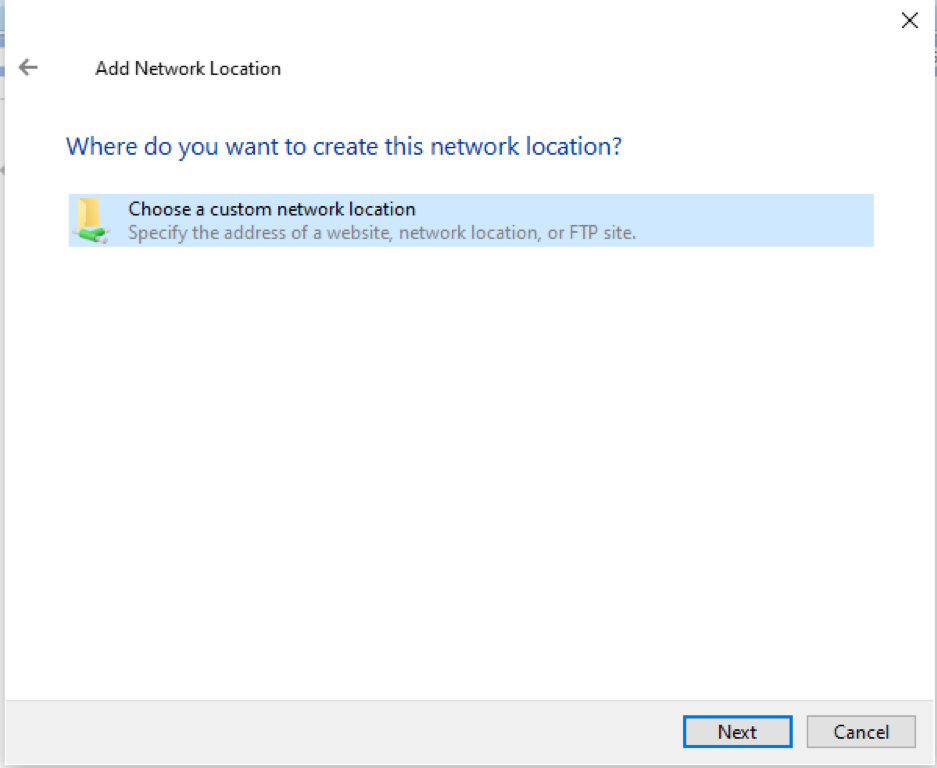
The basic method can be utilized by Windows users to connect to Samba shares. Right-click on the “This PC” option in the File Explorer and pick the “Add a Network Location” option from your Windows 10 system.
On the Windows 10 system, the following wizard will pop up. Hit the “Next” button to proceed further.
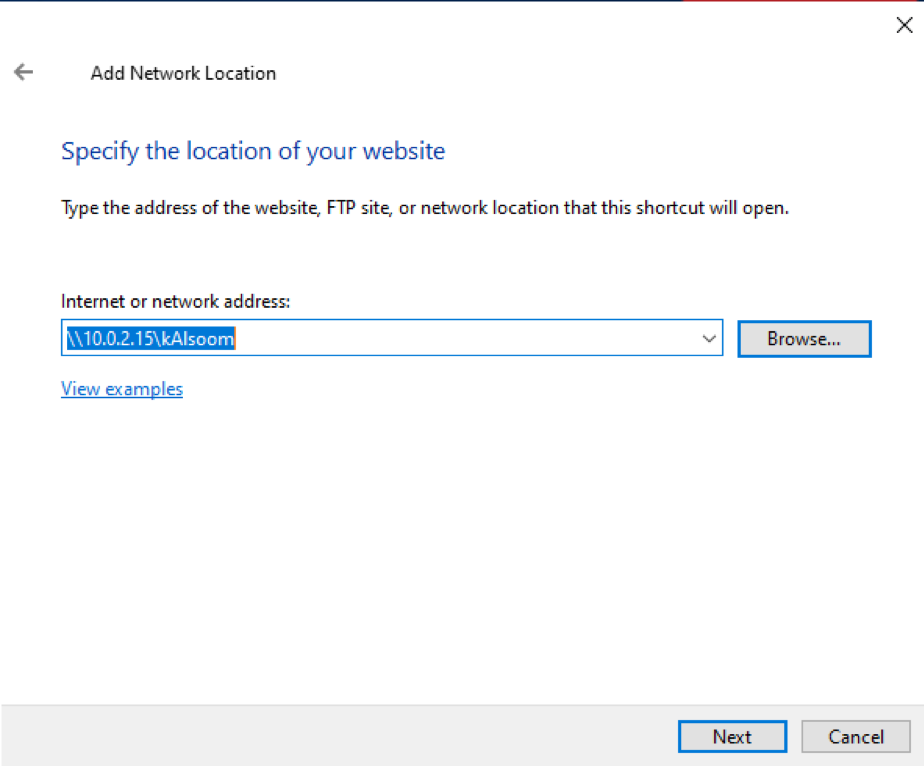
After that, another new window will pop up on Windows 10 system. Simply select the “Choose a custom network location” option.
Now, you have to write the IP and the user-created for Samba shares in the same pattern shown in the following image. That’s how you can view all shared folders.
Now, in Ubuntu 20.04 Linux system, you can also enable a user by executing the following affixed command displayed in the attached screenshot:

The user will be activated.
Conclusion
We learned how to install Samba on an Ubuntu 20.04 Linux system in this article. We have demonstrated how to use Samba shares to share folders over a local network. I hope you have gained insights from this article to assist in your relevant work.
About the author
Kalsoom Bibi
Hello, I am a freelance writer and usually write for Linux and other technology related content
Install and Configure Samba
A Samba file server enables file sharing across different operating systems over a network. It lets you access your desktop files from a laptop and share files with Windows and macOS users.
This guide covers the installation and configuration of Samba on Ubuntu.
What you’ll learn
What you’ll need
If you have everything ready, let’s dive straight into the installation process on the next step!
Originally authored by Aden Padilla.
2. Installing Samba
sudo apt update sudo apt install samba We can check if the installation was successful by running:
The following should be its output:
samba: /usr/sbin/samba /usr/lib/samba /etc/samba /usr/share/samba /usr/share/man/man7/samba.7.gz /usr/share/man/man8/samba.8.gz 3. Setting up Samba
Now that Samba is installed, we need to create a directory for it to share:
The command above creates a new folder sambashare in our home directory which we will share later.
The configuration file for Samba is located at /etc/samba/smb.conf . To add the new directory as a share, we edit the file by running:
sudo nano /etc/samba/smb.conf At the bottom of the file, add the following lines:
[sambashare] comment = Samba on Ubuntu path = /home/username/sambashare read only = no browsable = yes Then press Ctrl-O to save and Ctrl-X to exit from the nano text editor.
What we’ve just added
Now that we have our new share configured, save it and restart Samba for it to take effect:
sudo service smbd restart Update the firewall rules to allow Samba traffic:
4. Setting up User Accounts and Connecting to Share
Since Samba doesn’t use the system account password, we need to set up a Samba password for our user account:
sudo smbpasswd -a username Note
Username used must belong to a system account, else it won’t save.
Connecting to Share

On Ubuntu: Open up the default file manager and click Connect to Server then enter:

On macOS: In the Finder menu, click Go > Connect to Server then enter:
On Windows, open up File Manager and edit the file path to:
Note: ip-address is the Samba server IP address and sambashare is the name of the share.

You’ll be prompted for your credentials. Enter them to connect!