Why Doesn’t my Bootable USB Boot
@WinEunuuchs2Unix The reason why I added a flowchart to my answer was to give this question a suggestion to add more direction to it. I suppose this flowchart could be expanded and improved, for example by adding UEFI/BIOS and Syslinux groups to it.
@karel I was hoping that you would submit one of your flow charts. It might be a big chore putting every reason on it but it sure would be enlightening.
I’d consider most of this “question” being an answer actually (see What do we do with this question that is really an answer?). I think the complete list should rather be a (community-wiki) answer to a short, generic question than to be spread among the question and multiple answers.
@C.S.Cameron I think we should just reopen this and then you can move your list from the question into a new answer. The other answers can remain. (Or, honestly, it could even mostly stay as it is. You could ask, «Besides the following, what. » But moving your list into its own answer would probably be better.)
3 Answers 3
More reasons not on the original list:
- Bad USB flash drive. This could even be a new flash drive which I assume to be not corrupted. Ubuntu will boot after making the Ubuntu live USB on a different USB flash drive. It’s worth a try if you have two or more USB flash drives.
- Reformat the flash drive and reload the Ubuntu ISO from an application for making a live USB. If your hardware is very old try creating an Ubuntu Minimal USB for Ubuntu 20.04 and earlier.
- Check the Ubuntu ISO that you downloaded against its SHA256 checksum to verify that the checksums match.
- Voltage irregularities that affect the smooth amount of voltage delivered from the motherboard to the USB flash drive. Possible causes of this are motherboard, power supply and even irregular house current. A very old computer is more likely than a new computer to have issues with the motherboard or power supply that affect booting to a live USB session. Here are a few suggestions that worked when I tried them.
- Don’t plug in USB devices like mouse and keyboard next to each other. Plug in one USB device at the front and one at the back. Or unplug the mouse entirely. You can also save power by temporarily disconnecting unused hard drives.
- Disconnect unnecessary devices when booting the USB to reduce the power load, for example disconnect one HDD if there are two drives. If you have a 4-port USB splitter with switches on each port this is ideal, because you can turn the USB mouse off when you don’t need it and you don’t need to open the computer case to disconnect an internal drive in order to reduce the power load.
- The Ubuntu live USB will sometimes be able to boot if the same computer is moved to another location that has a more controlled source of current or connected to an uninterruptible power supply (UPS).
If this was part of a flowchart I would group all of the hardware reasons as child nodes branching out from the same parent hardware node. Similarly I would group the Casper nodes together and the grub nodes together, branching out from a Casper parent node and a grub parent node respectively.
You added a nice flowchart about possible problems with the UEFI/BIOS system, but the text is so small, that it is difficult to read. I have rather new glasses, but it is difficult anyway, even when I enlarge the picture in fullscreen with 1920×1080 resolution. Would it be possible to re-design it, so you can use larger font in each box?
Fullscreen won’t enlarge it as well as clicking anywhere on the image to show it in full size. Yes, it will be possible to redesign it, and it won’t take any extra time to do it because I’m planning on redrawing all the charts eventually anyway. Right now I just want to get some charts posted to illustrate the basic troubleshooting concept, and encourage other users to post more content that will help me to draw the branching and navigation.
@karel: Perhaps a heading for software might be ok to cover applications for making Ubuntu live USBs, Corrupt ISO/MD5SUMs, etc.
How to Repair Ubuntu 18.04 from USB
Sometimes you may face boot issues while using Ubuntu. In such cases, it is advisable to repair your Ubuntu installation, using free utility called Boot Repair. It does not come installed by default in Ubuntu. So you will need to install it separately. In this article, we will learn how to repair Ubuntu 18.04 from USB. You can use the same steps for other Ubuntu versions also.
How to Repair Ubuntu 18.04 from USB
Here are the steps to repair Ubuntu 18.04 from USB.
1. Load Ubuntu Bootable USB
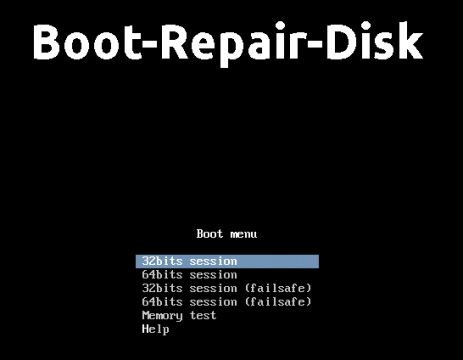
Boot your system using Ubuntu bootable CD or USB and select ‘Try Ubuntu’ when you see the option on Ubuntu Boot screen.
2. Launch Terminal
Once you have boot into Ubuntu, open terminal and run the following command. It will add the repository that contains setup files of boot-repair utility, to your system’s source list.
$ sudo add-apt-repository ppa:yannubuntu/boot-repair
You will be prompted for password to start installation. Enter your user’s password to continue.
Also, if you see any prompts, type ‘y’ or ‘yes’, or hit enter key to continue, as per the instructions on the screen.
3. Install boot repair
Run the following commands to update Ubuntu system, and install boot-repair.
$ sudo apt-get update $ sudo apt-get install boot-repair
4. Launch boot repair
Launch boot repair with the following command.
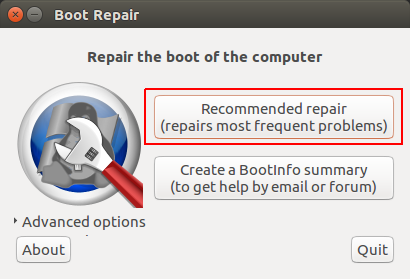
You will see a window of various options. Select ‘Recommended’ option and proceed further.
It will automatically detect the problem and show you a dialog box, asking for confirmation before fixing it. Click Yes to proceed.
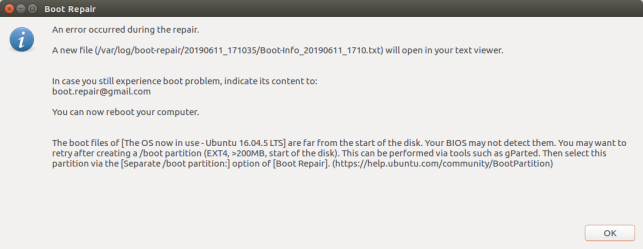
After that it will display a summary of the error and also the log file for it.
5. Reboot System
Reboot the system, without the Live CD or USB drive. This time it should start properly.
In this article, we have learnt how to repair Ubuntu using USB drive. You can use these steps on other Linux systems also.


