- Introduction to Cura
- Installation and first start
- Printer configuration
- 3D принтер FlyingBear GHOST 5 [update 5.8.7]
- МОИ ВИДЕО С ЭТИМ ПРИНТЕРОМ
- ДОРАБОТКИ И НАСТРОЙКИ (на примере Ghost 4S)
- Профиль FlyingBear
- Настройки от AlexGyver
- Качество:
- Ограждение:
- Заполнение:
- Материал:
- Скорость:
- Охлаждение:
- Поддержки:
- Переделка механики под CoreXY
- Натяжитель ремня
- Кожух обдува
- Печатная каретка
- Direct Drive
- Замена вентиляторов
- Ремень
- Носок на термоблок
- Драйверы TMC
- Подшипники Х У
- Подшипники Z
- Муфта оси Z
- Пружины стола
- Утеплитель стола
- Saved searches
- Use saved searches to filter your results more quickly
- FLYING BEAR GHOST 5 WiFi #10070
- FLYING BEAR GHOST 5 WiFi #10070
- Comments
- Application Version
- Platform
- Printer
- Reproduction steps
- Actual results
- Expected results
- Checklist of files to include
- Additional information & file uploads
Introduction to Cura
Cura is the most popular slicer amongst the Community member, mostly because it is the recommended one from Flyingbear in its videos and becuase it includes already some profiles for the Flyingbear Ghost (from version 4.6.0 for the Ghost 4s, from version 4.8.0 for the Ghost 5)
In addition to this, cura has a plugin to control the printer via Wifi (we’ll talk about it later. ) when connected to the your home Wifi
This plugin might not be as powerful as Octoprint, but it lets you make some basic operations, like: sending gcode files (which are then saved on the SD) and start printing as soon as file transfer is completed; visualize the content of the SD card; delete files directly from the SD while still plugged into the printer; send gcode commands; check the actual temperatures of the hotend and the build plate; move the axis
This plugin is called MKS WiFi Plugin and it can be downloaded from the Cura Marketplace (the plugin store that can be accessed from within Cura itself)
Flyingbear has some youtube videos to configure this plugin (the version in the video is quite old, but procedure is pretty much the same)
In the following links, you can find some of the best Cura plugins and settings videos
Installation and first start
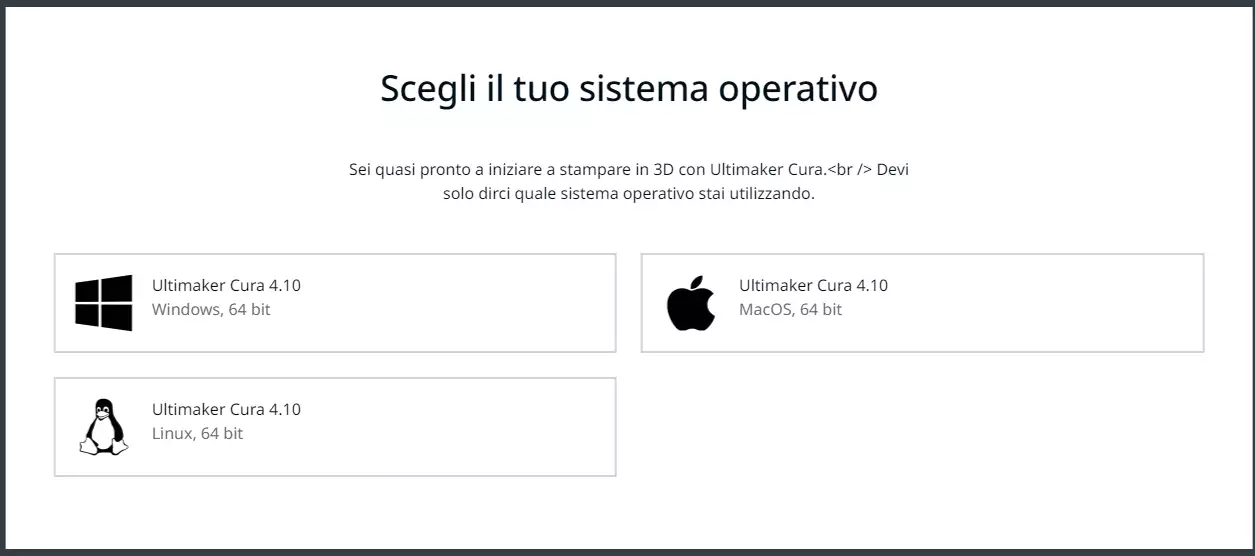
First of all, go on the website of the Cura creators, Ultimaker, following this link, then click on Download for free
A new window will open, then you can choose which version you want to download, according to your operating system. Click on the link you chose, then wait patiently for download to complete
If you already have an old version of Cura installed, it will be removed and, if you don’t have a backup, you might lose your settings. Always make a backup of the settings
In order to do this, you must have an Ultimaker account, then, from there, in your Cloud profile, you can upload your backup or restore the settings you’ve already saved
From here, you can backup your settings before installing a new version, then restore your data once you’ve installed the new version
Now start installing Cura and just use all the standard settings
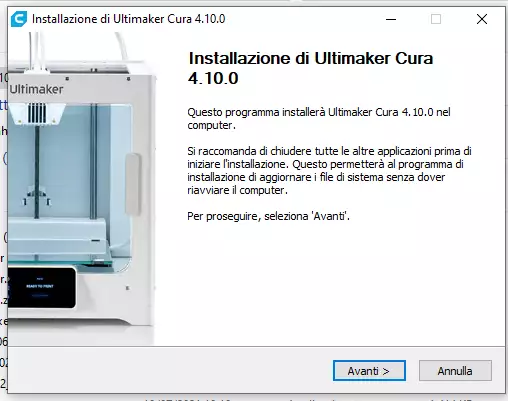
Read and accept the User Agreement, then continue, still using all the default settings, until the end of the installation process
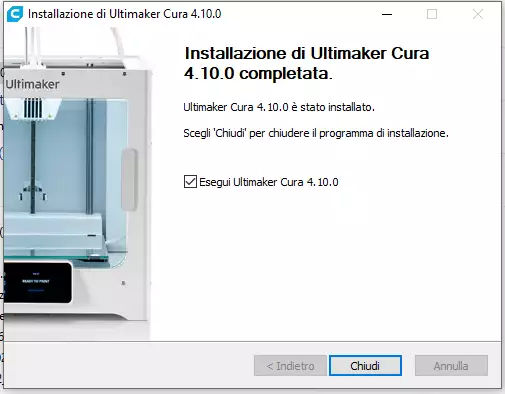
After pressing the Close button, the application will start immediately (well. depending on your computer. ) and, after loading, we’ll see the Cura initial screen
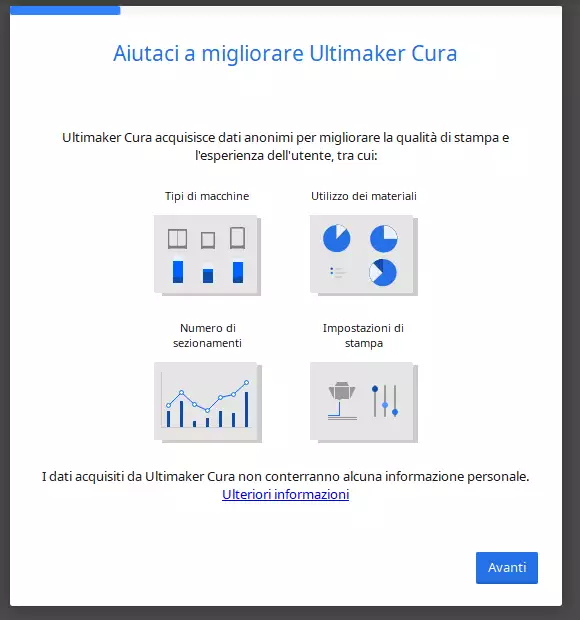
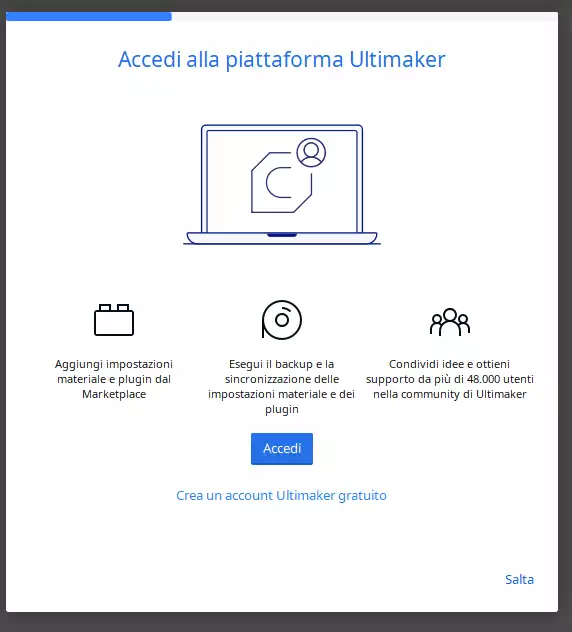
Now let’s press the Get Started button. The User Agreement will show up, plus some additional authorizations regarding materials and/or printer, plus some anonymous parameters useful for the Ultimaker statistics and marketing (at the end of the day, they must bring home the dough too, don’t they. ). We need to accept all these terms, if we want to use their application
Now we’re at a very important part: registering our account
In my opinion, this is really useful, considering it lets you backup and synchronize your settings if you have multiple PCs, therefore you can choose either to access you account (if already have one), or you can create a new one
If you are not interested, you can Skip this process, although it is still recommended
Anyway, you can do it at a later moment, so it’s not strictly necessary
Printer configuration
Now it’s time to configure the printer
The Ghost does have a wifi module, however, you must add it as a non network printer, because this functionality is dedicated to the Ultimaker printers
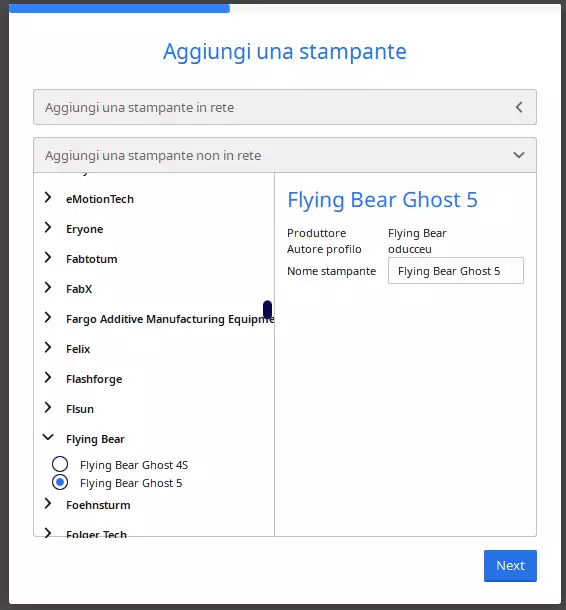
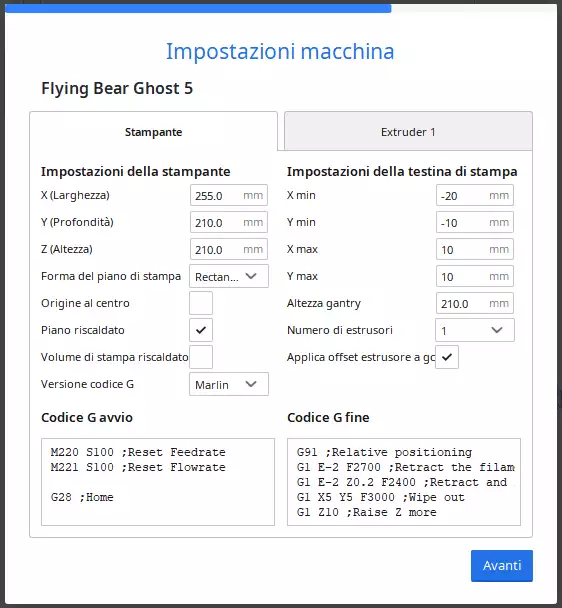
The next screen is about the machine settings, I strongly advise to leave them as they are, for the time being
We finally got to the end!
Now there will be a screen with all the new functionalities: you can read them all, clicking on Next, or you can Skip them, then click on Finish to complete your first configuration
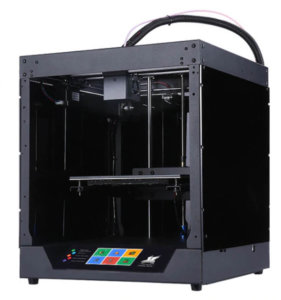
3D принтер FlyingBear GHOST 5 [update 5.8.7]

Почему на дисплее не отображается картинка модели? Картинка появится только при загрузке файла по Wi-Fi через программу (Ghost 4) или плагин для Куры (Ghost 4S), потому что программа/плагин добавляет картинку к файлу.
МОИ ВИДЕО С ЭТИМ ПРИНТЕРОМ
ДОРАБОТКИ И НАСТРОЙКИ (на примере Ghost 4S)
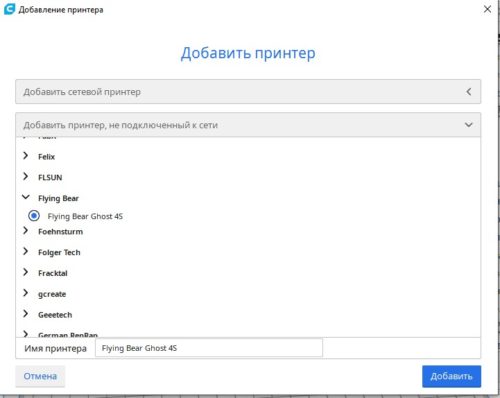
Профиль FlyingBear
Для принтера модели 4S в слайсере Cura версии выше 4.6 добавлен встроенный профиль (спасибо oducceu). Просто добавляем новый принтер и из списка выбираем FlyingBear/FlyingBear Ghost 4S
Настройки от AlexGyver
Рассмотрим самые критически важные настройки:
ДЛЯ СОПЛА 0.4 мм
Качество:
- Высота первого слоя: 0.3 мм (хз, наверное многовато, но прилипает отлично)
- Ширина линии: 0.36 мм (плотнее будет класть слои, без щелей)
Ограждение:
- Выравнивание шва по оси Z: острейший угол (более-менее красиво прячет шов, но зависит от модели)
Заполнение:
Материал:
- Поток: 100-101% (щели мы скомпенсировали в “Ширина линии”)
- Величина отката: 4.5 мм (для PLA), 6-6.5 (для PETG)
Скорость:
- Скорость печати: PLA 50 мм/с (штатный обдув), PETG 70 мм/с (штатный обдув). С нормальным обдувом можно до 130 мм/с
- Ускорение печати: 800-1000 мм/с2 (со штатной головой)
- Рывок печати: 12-15 мм/с (со штатной головой)
Охлаждение:
- Скорость вентилятора: 100% (PLA, высокотемпературным пластикам можно меньше)
- Минимальное время слоя: 15-20 с (PLA, высокотемпературным пластикам можно меньше)
- Минимальная скорость: 10 мм/с
Поддержки:
- Разрешить кайму (чтобы не отвалились)
- Угол нависания поддержек: 45-55 град
- Зазор поддержки по оси Z: 0.2 мм
Скачать мой профиль можно с Яндекс диска
Переделка механики под CoreXY
Натяжитель ремня
Если у вас установлен пружинный натяжитель ремня – лучше заменить его на жёсткий натяжитель, например вот такой (ссылка на thingiverse). Печатать модели tensioner_big_2.7mm_standard.stl и tensioner_small_part.stl. Понадобится винтик М3.

Кожух обдува
Для 4S есть альтернативный обдув под штатную турбину, рекомендуется напечатать и поставить сразу же. Ссылка на thingiverse
Печатная каретка
Родная каретка очень тяжёлая, что не позволяет добиться качественной печати на больших скоростях и ускорениях. Можно напечатать каретку, желательно из высокотемпературного пластика (ABS, или хотя бы PETG). Модели:
- Ghost 4/4Sновая версия!
- Ghost 4/4S: тип 1 (лучшая, под 4020 и 4010 турбины). Есть ещё тип 2, тип 3
- Ghost 3: тип 0 (лучший вариант). Есть ещё тип 1, тип 2, тип 3
- Ghost 1/2: каретка (плату придётся закрепить стяжками)
Direct Drive
Позволяет избавиться от трубки боудена и ретрактов, повысить качество печати. Модель и инструкции на Thingiverse.
Замена вентиляторов
Если вы собираетесь печатать каретку как выше, вам понадобятся турбины 4010 или 4020 (в зависимости от модели каретки)
Также можно заменить другие вентиляторы на более качественные:
- 3010 (термобарьер) 24V Ball XH2.54 https://ali.ski/1V7rK1
- 6010 (драйверы) 24V Ball XH2.54 https://ali.ski/_BZYg
- 6015 (внутри БП) https://ali.ski/CZe0ve
Более качественные вентиляторы тише работают и дольше прослужат!
Ремень
Если менять каретку, то придётся заменить ремень. Нужен ремень GT2 6mm с неметаллическим кордом, желательно от производителя Gates или POWGE.
Носок на термоблок
На 4S уже стоит носок, можно поставить и на 4 версию принтера вот такой: https://ali.ski/Ixn5_Q выбирать V6 (синенький)
Драйверы TMC
Рекомендуется заменить драйверы моторов на тихие и более точные TMC, например TMC2208. БРАТЬ НЕ UART ВЕРСИЮ. Берите DIY. Версия UART отличается от DIY запаянной перемычкой, на фотках по второй ссылке видно, где она запаяна. Перемычку можно “спаять” паяльником, если вы случайно взяли UART версию.
Купить https://ali.ski/n6ihUE или https://ali.ski/vALAqG. С этими драйверами принтер будет работать гораздо тише, возможно улучшится качество печати.
Напряжение на драйверах осей нужно выставить 1.2V, на драйвере экструдера 1.4V. Драйверы полностью поддерживаются платой принтера, нужно только изменить направление вращения моторов. Настройки в прошивке:
Подшипники Х У
Шариковые подшипники осей X и Y можно заменить на пластиковые. Качество печати может увеличиться за счёт отсутствия люфтов. Внутренний диаметр 8мм, внешний – 15мм
Подшипники Z
Линейные шариковые подшипники оси Z можно заменить на точные и надёжные бронзовые с графитовыми вставками. Качество печати может увеличиться за счёт отсутствия люфтов. Муфты продаются по одной, берите две https://ali.ski/uRwu4u ПОДШИПНИКИ ОКАЗАЛИСЬ НИЗКОГО КАЧЕСТВА, НЕ БЕРИТЕ ИХ. 11
Муфта оси Z
В принтерах моделей 4 и 4S китайцы ставят обычную жёсткую муфту на ось Z, лучше поставить компенсационную, размер 5×8, ссылка https://ali.ski/l5kO-8 как в первых моделях принтера.
Пружины стола
Есть смысл заменить пружины стола на более жёсткие в поперечном направлении, тогда стол не будет гулять в сторону, размер 8×20 https://ali.ski/OkEskc
Утеплитель стола
Можно доутеплить стол, если нужно. Для полного покрытия новым утеплителем берём 310х310
Saved searches
Use saved searches to filter your results more quickly
You signed in with another tab or window. Reload to refresh your session. You signed out in another tab or window. Reload to refresh your session. You switched accounts on another tab or window. Reload to refresh your session.
Have a question about this project? Sign up for a free GitHub account to open an issue and contact its maintainers and the community.
By clicking “Sign up for GitHub”, you agree to our terms of service and privacy statement. We’ll occasionally send you account related emails.
Already on GitHub? Sign in to your account
FLYING BEAR GHOST 5 WiFi #10070
FLYING BEAR GHOST 5 WiFi #10070
Status: Won’t Fix/Do Not an issue, or an issue that we cannot fix or can live with. Type: Bug The code does not produce the intended behavior.
Comments
Application Version
Platform
Printer
Reproduction steps
Установил плагин MKS WiFi. Плагин установился.
Actual results
В настройках принтера не отображается кнопка настройки WiFi. Пробовал устанавливать-удалять. Ничего не помогает. В предыдущей версии всё работало без проблем.
Expected results
Хотелось бы нормальной работы по WiFi
Checklist of files to include
Additional information & file uploads


The text was updated successfully, but these errors were encountered:
fvrmr added the Status: Needs Info Needs more information before action can be taken. label Jul 2, 2021
Good afternoon.1. Wi-fi is working on the printer-it sees the router and gets the address.2. What does the printer have to do with it, if after installing the plugin, the Wi-fi settings button does not appear in the printer settings ?Everything worked fine on the previous version of Cura.Thanks