- Tech Monger
- File transfer between ubuntu and windows using VSFTP
- Setup
- How to install VFTP on Ubuntu
- How to configure VSFTP for Uploads
- How to configure Ubuntu firewall for FTP
- Configure Windows Firewall
- Initiate FTP session using Windows command line
- Initiate FTP connection usign ftp client on windows
- FTP Security Aspects — Firewall and Services
- Как подключиться к FTP-серверу
- Данные для доступа к FTP-серверу
- Как подключится к FTP через Проводник Windows
Tech Monger
File transfer between ubuntu and windows using VSFTP
In this tutorial we will learn how to use vsftpd on Linux to make Ubuntu machine run as ftp server and transfer files over wifi on local network.
On many occasion you need to copy and backup files locally from one computer to other. Using physical disk like flash drive or external hard drive is not always feasible due to many constraints such large file size, external drive availability.
Setup
We can take advantage of machines being on same network to achieve file transfer.
To follow this guide you should have access to following
- Ubuntu Machine
- Windows Machine
- Both machines connected over same network using ethernet or wifi
How to install VFTP on Ubuntu
Open Terminal to get and install vsftp demon from official ubuntu repository.
sudo apt-get install vsftpd
Above command will install vsftp demon which means it will always be running in background upon machine startup using init .
Use following commands to check vsftp service
sudo service vsftpd status
If service is running then above command will output status of service with all spawned vsftp process ids.
Alternatively you can also check vsftp process with grep
How to configure VSFTP for Uploads
This step is optional but if you want to allow uploads from remote machine to your ubuntu server then follow below configuration.
After installation vsftp will create configuration file at path /etc/vsftpd.conf . This file should be owned by root and should have default vsftp configuration. By default VSFTP will not allow ftp uploads; to enable it uncomment line write_enable=YES
# Uncomment this to enable any form of FTP write command. write_enable=YES Note that /etc/vsftpd.conf would be owned by root , to make any changes in configuration do. sudo vim /etc/vsftpd.conf or sudo gedit /etc/vsftpd.conf
Restart vsftpd demon once configuration is completed.
sudo service vsftpd restart
Check status after restart.
sudo service vsftpd status
How to configure Ubuntu firewall for FTP
By default ubuntu shall be running firewall known as uncomplicated firewall ( ufw ). Default firewall rules will not allow any outside connection.
To open ftp port on this firewall use following commands.
Check firewall status using
Firewall should be active and running. If it’s not active then enable the same using following command to make your machine secure.
You can keep it disable if you have such requirement, however it’s recommended to keep it on. sudo ufw enable
To open ftp port 21 use following command
sudo ufw allow ftp or sudo ufw allow 21
This will add firewall rule to accept ftp connections from other machine on network. After adding ftp rule you should have following entries in your firewall. sudo ufw status
Status: active To Action From -- ------ ---- 21/tcp ALLOW Anywhere 21/tcp (v6) ALLOW Anywhere (v6) Configure Windows Firewall
Firewall should permit you to initiate ftp session from windows machine. Search for Windows Firewall in start menu to open firewall configuration window.
Since we are going to use one time ftp we will disable firewall and reenable it once ftp is done. Depending upon which network you are connected to Home or Public you can disable firewall like below.
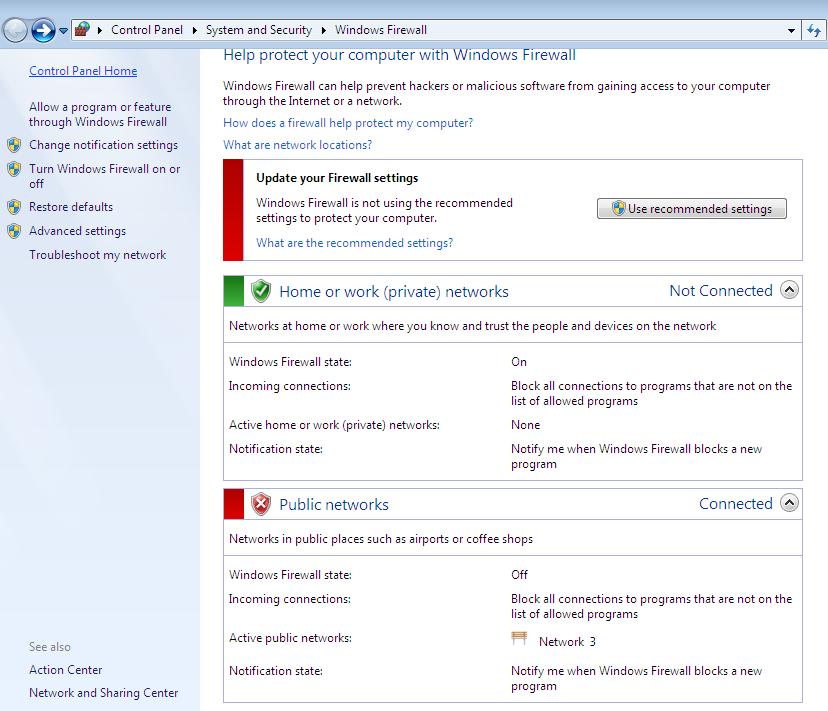
Note that disabling complete firewall is not recommended. If you are going to use ftp server regularly from windows machine then please create firewall rules under Windows Firewall with Advanced Security on Port 21
Initiate FTP session using Windows command line
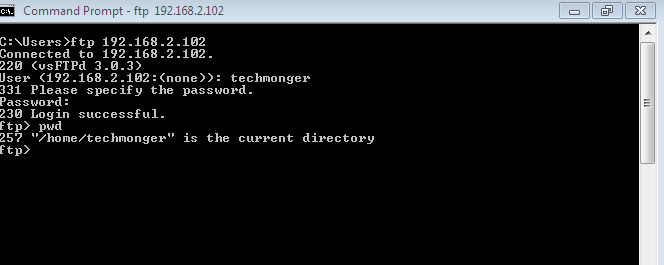
Once we are done with required configurations we can initiate first ftp connection from windows command line. First get IP address of machine hosting FTP server using command ifconfig on ubuntu machine. Use eth0 inet address if you are connected with ethernet cable. For wireless connection use inet address of wlan0 interface. My ubuntu machine have following local IP 192.168.2.102 .
eth0 Link encap:Ethernet UP BROADCAST MULTICAST MTU:1500 Metric:1 RX packets:0 errors:0 dropped:0 overruns:0 frame:0 TX packets:0 errors:0 dropped:0 overruns:0 carrier:0 collisions:0 txqueuelen:1000 RX bytes:0 (0.0 B) TX bytes:0 (0.0 B) wlan0 Link encap:Ethernet inet addr:192.168.2.102 Bcast:192.168.2.255 Mask:255.255.255.0 UP BROADCAST RUNNING MULTICAST MTU:1500 Metric:1 RX packets:24006 errors:0 dropped:0 overruns:0 frame:0 TX packets:8312 errors:0 dropped:0 overruns:0 carrier:0 collisions:0 txqueuelen:1000 RX bytes:12996852 (12.9 MB) TX bytes:1224374 (1.2 MB) To initiate connection open command prompt on windows and use following command. ftp 192.168.2.102
It will ask for username and password. Username will be same name as the ubuntu user (techmonger in my case) and password will the ubuntu’s system password of user.
To get file from ubuntu ftp server, navigate to directory and use get command like below.
To upload file from windows machine to ftp server, put command like below.
To terminate ftp session use bye.
Initiate FTP connection usign ftp client on windows
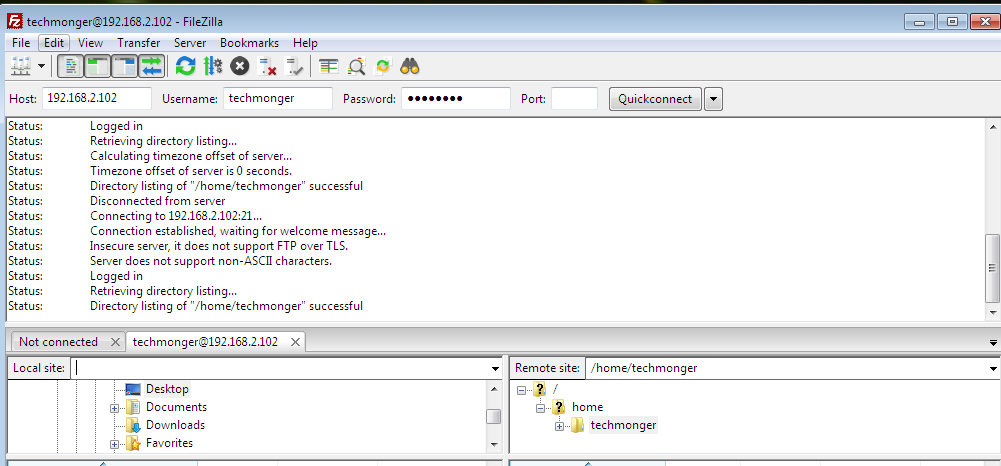
By now you would agree that doing ftp from windows command prompt is bit tedious. We can use ftp client such as winscp or filezilla to get GUI for ftp operations.
Use hostname as IP address of ftp server (192.168.2.102 in my case) and same credentials as those of ubuntu user.
Like below you can initiate connection from filezilla. You can use drag and drop to download and upload files from windows machine.
FTP Security Aspects — Firewall and Services
- Remove firewall rule from ubuntu once ftp requirement is over. sudo ufw deny ftp or sudo ufw deny 21
- Enable Winows firewall once ftp requirement is over.
- Stop vsftp demon if ftp is no longer needed to save system resources. It will also make your system less vulnerable. sudo service vsftpd stop
Conclusion : You can make your ubuntu machine to run as ftp server and can transfer files locally. You do not need SMB (server message block) for file transfer between linux machine and windows machine over network.
Как подключиться к FTP-серверу

FTP (File Transfer Protocol) представляет собой протокол удаленной передачи файлов. С его помощью можно загрузить на сервер и скачивать с него же данные любого типа и размера, создавать или удалять файлы и папки.
В Windows, Linux и macOS подключиться к FTP-серверу можно с помощью встроенных средств и сторонних программ разного назначения. Полноценная работа со всеми средствами возможна только через специальные приложения, называемые FTP-клиентами. Теперь подробнее расскажем обо всех этих способах.
Данные для доступа к FTP-серверу
При подключении к FTP-серверу очень важно вводить правильные данные. Возьмем в качестве примера Timeweb. После регистрации на почту приходят два письма. Письмо с данными выглядит вот так:
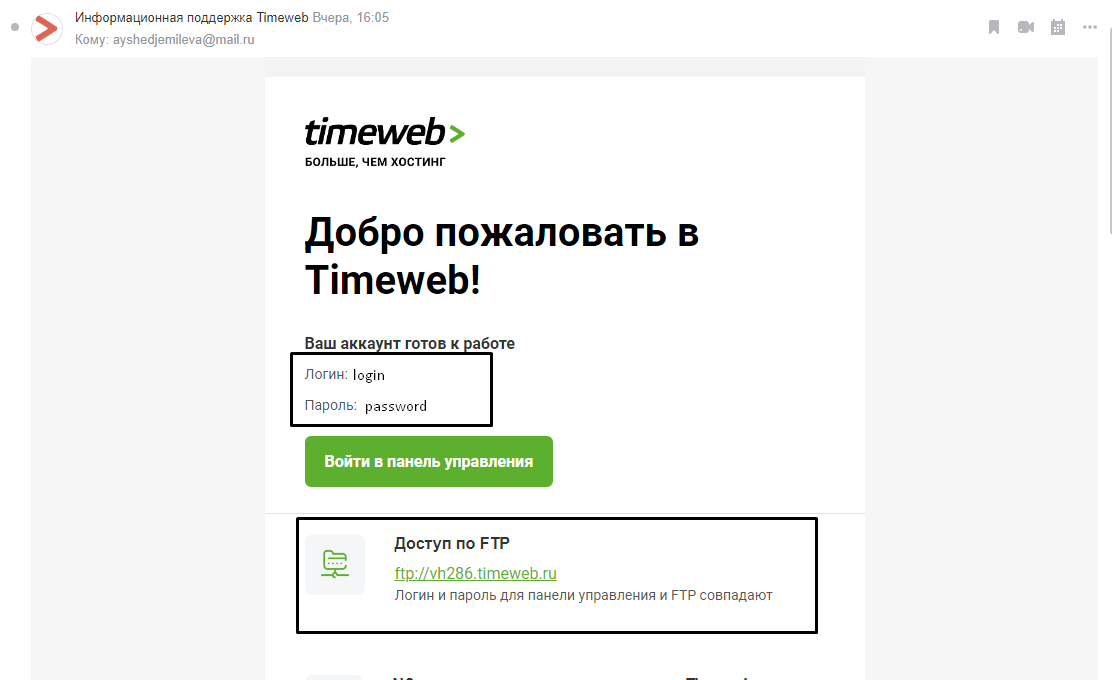
Теперь о том, какие данные необходимо иметь под рукой:
- логин,
- пароль,
- ссылка на FTP-сервер (указывается в том же письме),
- порт (по умолчанию устанавливается значение 21).

Как подключится к FTP через Проводник Windows
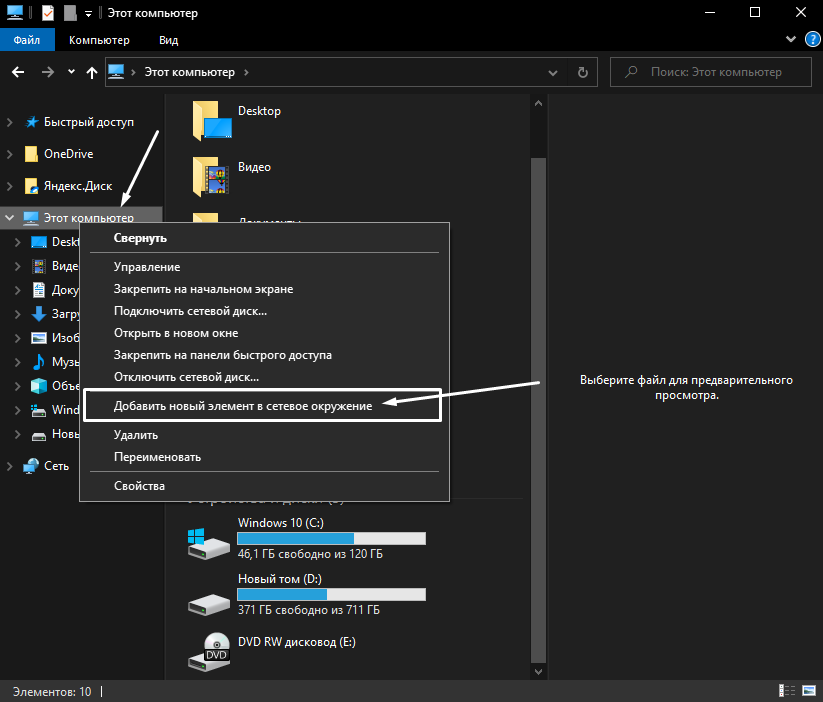
Сначала рассмотрим, как подключиться к FTP-серверу через программу «Проводник» в Windows 10. Здесь ничего дополнительно устанавливать не надо, просто открываем системный файловый менеджер. В левой панели находим значок «Этот компьютер» и жмем по нему правой кнопкой мыши для вывода контекстного меню. В списке выбираем элемент «Добавить новый элемент в сетевое окружение».
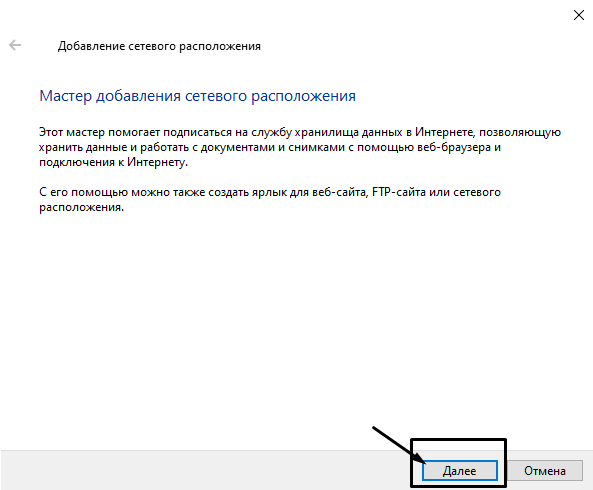
В результате откроется окно мастера добавления сетевого расположения. В начальном окне просто нажимаем «Далее».
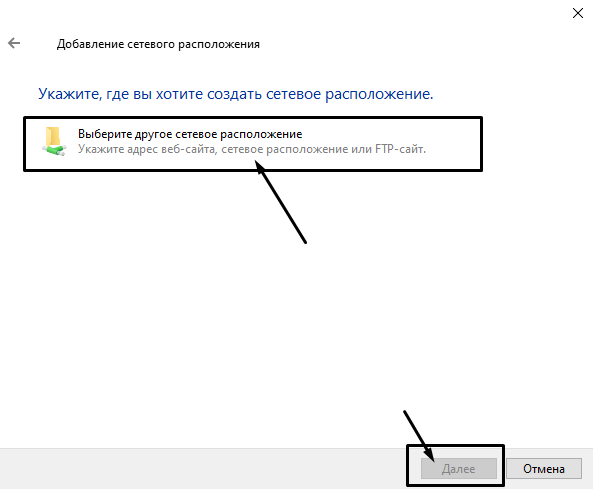
Следом надо выбрать его дальнейшее местоположение, но в этом окне нам доступен только один вариант. Для продолжения снова нажимаем на кнопку «Далее».
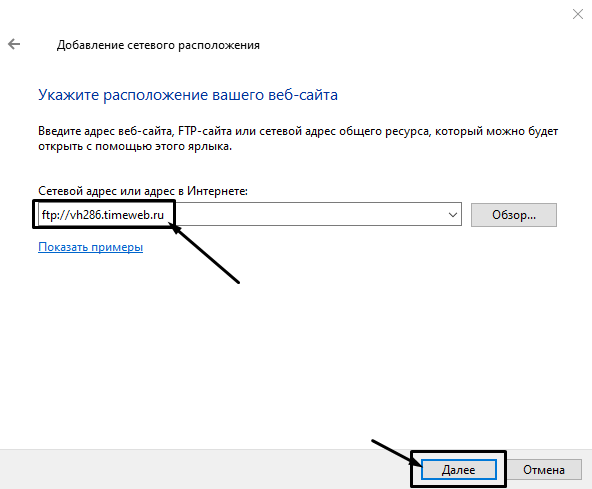
В этом окне понадобится указать ссылку на сетевой ресурс, к которому планируется провести подсоединение. Важно соблюдать предписанный формат (чуть ниже есть несколько примеров). В поле вводим адрес/ссылку и вновь идем дальше.
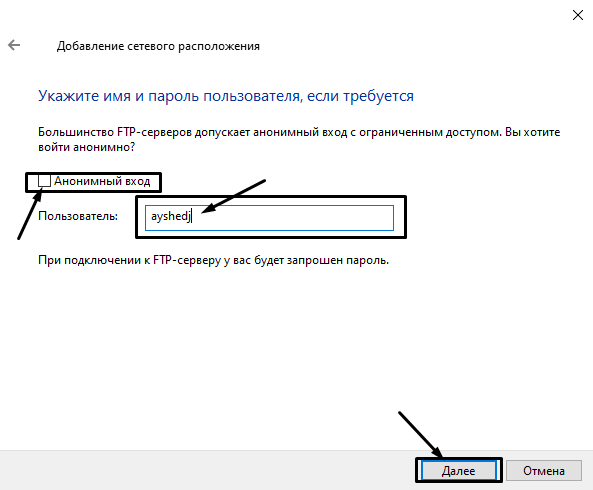
Теперь понадобится ввести в поле имя пользователя. Пароль заранее вводить не нужно, он будет запрашиваться только при подключении. Если на вашем хосте есть такая возможность, вход можно осуществить анонимно, отметив соответствующую галочку.
В самом конце даем название новому сетевому окружению.
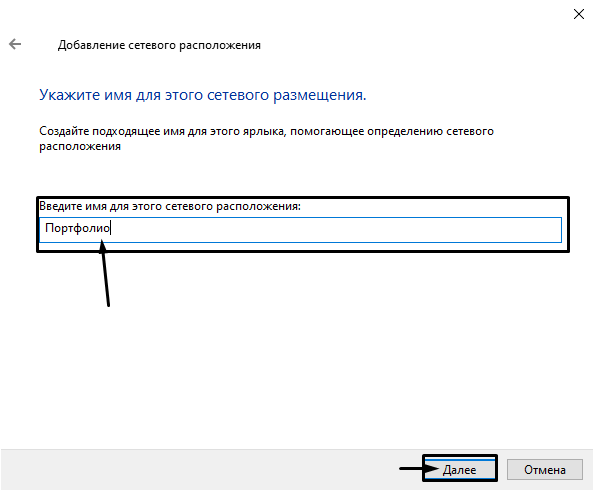
На этом настройка завершена. При необходимости можно поставить галочку, чтобы сразу после нажатия на кнопку «Готово» открыть указанный сервер и приступить к работе.

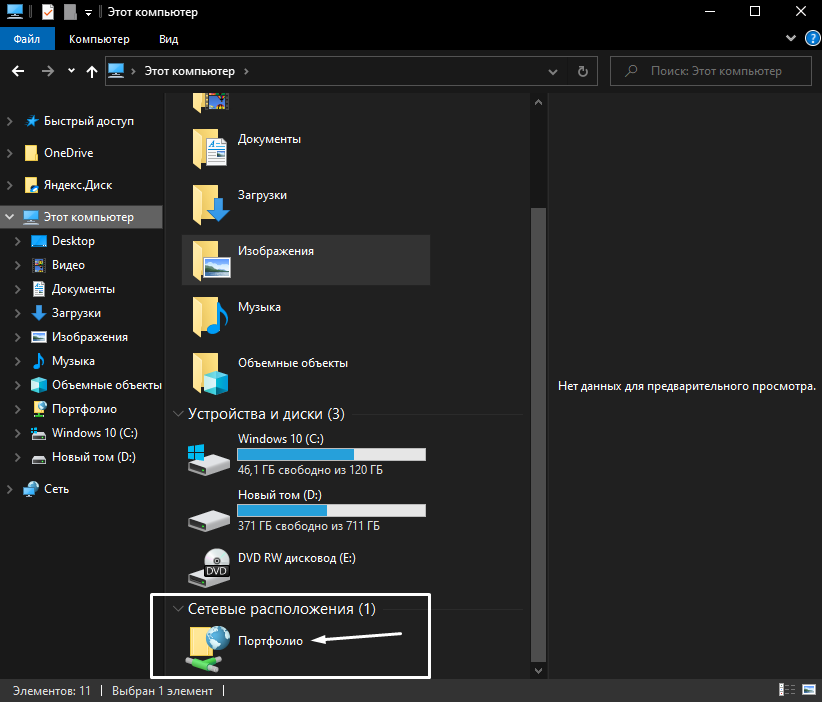
Новое подключение теперь находится в «Сетевых расположениях» в разделе «Этот компьютер».
Теперь подключаемся – открываем только что созданное соединение. Открывается маленькое окошко, где мы вводим пароль, затем жмем на кнопку «Вход».
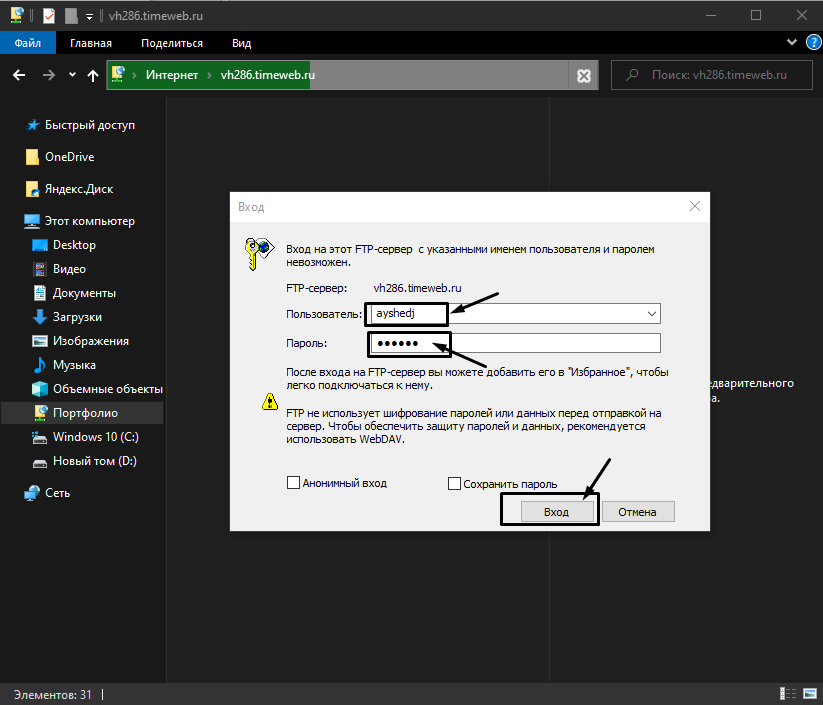
Если все данные введены успешно, откроется папка сервера. Можно приступать к работе.