- Как настроить FTP на Ubuntu 20.04 LTS
- Установка FTP-сервера
- Защита передачи данных при помощи SSL/TLS
- Настройка учётной записи FTP-пользователя
- Настройка брандмауэра
- Проверка подключения к FTP-серверу
- Setting Up a Secure FTP Server using SSL/TLS on Ubuntu
- Requirements
- Step 1: Generating SSL/TLS Certificate for FTP on Ubuntu
- Step 2: Configuring VSFTPD to Use SSL/TLS on Ubuntu
- Step 3: Verify FTP with SSL/TLS Connections on Ubuntu
- Step 4:Install FileZilla On Clients to Connect FTP Securely
Как настроить FTP на Ubuntu 20.04 LTS
FTP – это протокол, который позволяет передавать файлы по сети от одного узла другому. Данный протокол является самым старым протоколом прикладного уровня, который появился намного раньше, чем HTTP или TCP/IP. С помощью протокола FTP могут быть организованы соединения с удаленными серверами для просмотра и передачи необходимых данных. При подключении к серверам и рабочим станциям при помощи протокола FTP необходимо использовать специальные приложения, которые именуются FTP-клиентами. Далее о том, как настроить работу с протоколом FTP на сервере, работающем под управлением Ubuntu 20.04 LTS.
Для того чтобы развернуть свой FTP-сервер на Ubuntu 20.04 LTS, необходимо:
- установить FTP-сервер с поддержкой SSL для безопасного подключения;
- настроить учетную запись FTP-пользователя;
- проверить подключение к FTP-серверу.
Установка FTP-сервера
Как всегда при работе с Ubuntu необходимо произвести первоначальную настройку сервера в соответствии с посвящённой данной процедуре статье. Далее следует обновить списки пакетов:
После чего необходимо установить программу vsftpd :
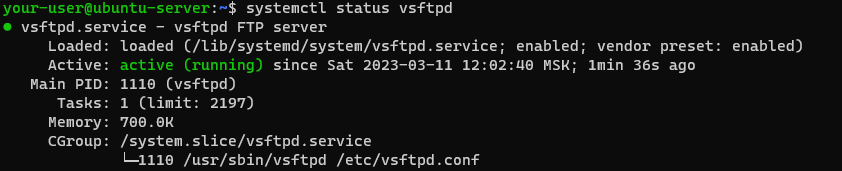
По окончании установки можно убедиться, что сервис vsftpd уже успешно работает:
Далее необходимо произвести некоторые настройки в конфигурационном файле. Для этого откройте при помощи текстового редактора файл vsftpd.conf :
Вот те основные изменения, которые необходимо внести для корректной работы FTP-сервера:
listen=YES listen_ipv6=NO anonymous_enable=NO local_enable=YES write_enable=YES dirmessage_enable=YES use_localtime=YES xferlog_enable=YES connect_from_port_20=YES xferlog_std_format=YES chroot_local_user=YES secure_chroot_dir=/var/run/vsftpd/empty pam_service_name=vsftpd allow_writeable_chroot=YESПосле внесения изменений в файл настроек необходимо сохранить их и перезапустить службу vsftpd :
$ sudo systemctl restart vsftpdЗащита передачи данных при помощи SSL/TLS
Для защиты передачи ваших данных между FTP-клиентом и FTP-сервером в данной инструкции мы будем использовать генерацию самозаверяющего SSL-сертификата. Закрытый ключ и сертификат будут сохранены в одном файле, для чего следует применить команду:
$ sudo openssl req -x509 -nodes -days 3650 -newkey rsa:2048 -keyout /etc/ssl/private/vsftpd.pem -out /etc/ssl/private/vsftpd.pemПосле установки SSL-сертификата необходимо внести изменения в конфигурационный файл:
А именно, внесите изменения в следующие строки данного файла:
rsa_cert_file=/etc/ssl/private/vsftpd.pem rsa_private_key_file=/etc/ssl/private/vsftpd.pem ssl_enable=YESНастройка учётной записи FTP-пользователя
Для авторизации на FTP-сервере необходимо создать учетную запись пользователя. Изначально, подключаться к серверу можно и под локальным пользователем. Но более целесообразно для этих целей использовать специальную учётную запись. Для её создания используйте следующую команду:
Таким образом, у нас теперь есть пользователь ftpuser . Следующей командой нужно создать для него домашний каталог:
$ sudo mkhomedir_helper ftpuserПосле этого для него необходимо создать пароль на вход:
Настройка брандмауэра
Если вы производили работы по первоначальной настройке виртуального сервера, то на нём должен быть запущен межсетевой экран UFW. Соответственно, для того, чтобы брандмауэр вашего VPS позволял осуществлять подключения, необходимо внести небольшие изменения в настройки UFW. Проще говоря, нужно будет добавить в брандмауэр исключения для TCP-портов 20 и 21. Делается это следующими командами:
$ sudo ufw allow 20/tcp $ sudo ufw allow 21/tcpПосле чего брандмауэр следует перезапустить:
$ sudo ufw disable $ sudo ufw enableИ убедиться, что служба работает без ошибок:
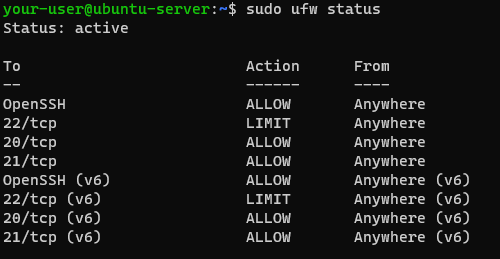
Проверка подключения к FTP-серверу
Корректность произведённых настроек можно проверить через осуществление подключения к FTP-серверу. Для этой цели можно воспользоваться бесплатным FTP-клиентом FileZilla. После запуска приложения в FileZilla следует заполнить поля Хост и Имя пользователя . После нажатия кнопки Быстрое соединение система попросит ввести пароль учётной записи, под именем которой происходит подключение к FTP-серверу.

Подключение к серверу осуществлено успешно, значит произведенные настройки в конфигурационном файле корректны. В статусе подключения видно, что в данной сессии TLS соединение установлено , значит передача данных между клиентом и сервером шифруются.
Setting Up a Secure FTP Server using SSL/TLS on Ubuntu
In this tutorial, we will describe how to secure a FTP server (VSFTPD stands for “Very Secure FTP Daemon”) using SSL/TLS in Ubuntu 16.04/16.10.
If you’re looking to setup a secure FTP server for CentOS based distributions, you can read – Secure an FTP Server Using SSL/TLS on CentOS
After following the various steps in this guide, we will have learned the fundamentals of enabling encryption services in a FTP server for secure data transfers is crucial.
Requirements
Before we move further, make sure that all commands in this article will be run as root or sudo privileged account.
Step 1: Generating SSL/TLS Certificate for FTP on Ubuntu
1. We will begin by creating a subdirectory under: /etc/ssl/ to store the SSL/TLS certificate and key files if it doesn’t exist:
2. Now let’s generate the certificate and key in a single file, by running the command below.
$ sudo openssl req -x509 -nodes -keyout /etc/ssl/private/vsftpd.pem -out /etc/ssl/private/vsftpd.pem -days 365 -newkey rsa:2048
The above command will prompt you to answer the questions below, don’t forget to enter values that applicable to your scenario.
Step 2: Configuring VSFTPD to Use SSL/TLS on Ubuntu
3. Before we perform any VSFTPD configurations, for those who have UFW firewall enabled, you have to open the ports 990 and 40000-50000 to allow TLS connections and the port range of passive ports to set in the VSFTPD configuration file respectively:
$ sudo ufw allow 990/tcp $ sudo ufw allow 40000:50000/tcp $ sudo ufw status
4. Now, open the VSFTPD config file and define the SSL details in it:
$ sudo vi /etc/vsftpd/vsftpd.conf OR $ sudo nano /etc/vsftpd/vsftpd.conf
Then, add or locate the option ssl_enable and set its value to YES to activate the use of SSL, again, because TLS is more secure than SSL, we will restrict VSFTPD to use TLS instead, by enabling the ssl_tlsv1 option:
ssl_enable=YES ssl_tlsv1=YES ssl_sslv2=NO ssl_sslv3=NO
5. Next, comment out the lines below using the # character as follows:
#rsa_cert_file=/etc/ssl/private/ssl-cert-snakeoil.pem #rsa_private_key_file=/etc/ssl/private/ssl-cert-snakeoil.key
Afterwards, add the lines below to define the location of the SSL certificate and key file:
rsa_cert_file=/etc/ssl/private/vsftpd.pem rsa_private_key_file=/etc/ssl/private/vsftpd.pem
6. Now, we also have to prevent anonymous users from using SSL, then force all non-anonymous logins to use a secure SSL connection for data transfer and to send the password during login:
allow_anon_ssl=NO force_local_data_ssl=YES force_local_logins_ssl=YES
7. Furthermore, we can use the options below to add more security features in the FTP server. With option require_ssl_reuse=YES , all SSL data connections are required to exhibit SSL session reuse; proving that they know the same master secret as the control channel. So, we should disable it.
In addition, we can set which SSL ciphers VSFTPD will permit for encrypted SSL connections with the ssl_ciphers option. This will help frustrate any efforts by attackers who try to force a specific cipher which they possibly discovered vulnerabilities in:
8. Then, let’s define the port range (min and max port) of passive ports.
pasv_min_port=40000 pasv_max_port=50000
9. To enable SSL debugging, meaning openSSL connection diagnostics are recorded to the VSFTPD log file, we can use the debug_ssl option:
Finally save the file and close it. Then restart VSFTPD service:
Step 3: Verify FTP with SSL/TLS Connections on Ubuntu
10. After performing all the above configurations, test if VSFTPD is now using SSL/TLS connections by trying to use FTP from the command line as below.
From the output below, there is an error message telling us VSFTPD can only permit users (non-anonymous) to login from secure clients which support encryption services.
$ ftp 192.168.56.10 Connected to 192.168.56.10 (192.168.56.10). 220 Welcome to TecMint.com FTP service. Name (192.168.56.10:root) : ravi 530 Non-anonymous sessions must use encryption. Login failed. 421 Service not available, remote server has closed connection ftp>
The command line doesn’t support encryption services thus resulting to the error above. Therefore, to securely connect to a FTP server with encryption services enabled, we need a FTP client that supports SSL/TLS connections by default, such as FileZilla.
Step 4:Install FileZilla On Clients to Connect FTP Securely
FileZilla is a powerful, widely used cross-platform FTP client which supports FTP over SSL/TLS and more. To install FileZilla on a Linux client machine, use the following command.
--------- On Debian/Ubuntu --------- $ sudo apt-get install filezilla --------- On CentOS/RHEL/Fedora --------- # yum install epel-release filezilla --------- On Fedora 22+ --------- $ sudo dnf install filezilla
12. Once the installation completes, open it and go to File=>Sites Manager or (press Ctrl+S) to get the Site Manager interface below.
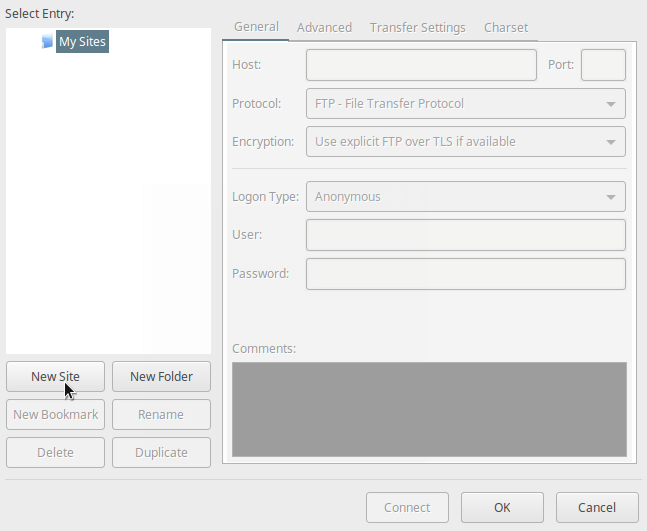
13. Now, define the host/site name, add the IP address, define the protocol to use, encryption and logon type as in the screen shot below (use values that apply to your scenario):
Click on New Site button to configure a new site/host connection.
Host: 192.168.56.10 Protocol: FTP – File Transfer Protocol Encryption: Require explicit FTP over #recommended Logon Type: Ask for password #recommended User: username

14. Then click on Connect from the interface above to enter the password, and then verify the certificate being used for the SSL/TLS connection, and click OK once more to connect to the FTP server:

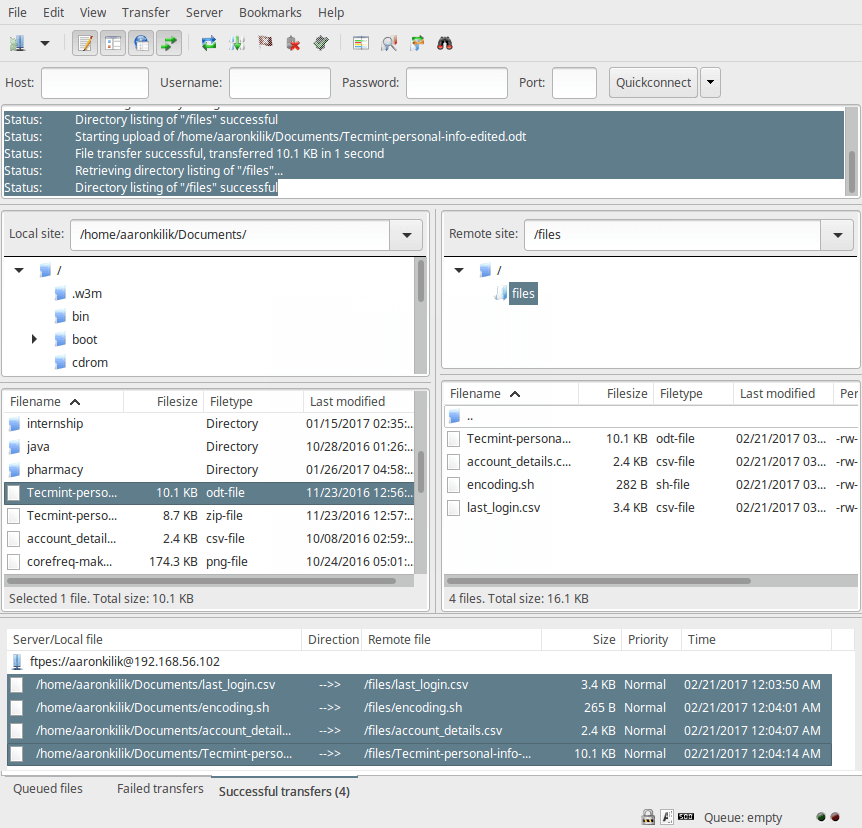
15. Now, you should have logged successfully into the FTP server over a TLS connection, check the connection status section for more information from the interface below.

16. Lastly, let’s transfer files from the local machine to the FTP sever in the files folder, take a look at the lower end of the FileZilla interface to view reports concerning file transfers.
That’s all! Always remember that installing a FTP server without enabling encryption services has certain security implications. As we explained in this tutorial, you can configure a FTP server to use SSL/TLS connections to implement security in Ubuntu 16.04/16.10.
If you face any issues in setting up SSL/TLS on FTP server, do use the comment form below to share your problems or thoughts concerning this tutorial/topic.