- Как установить компилятор GCC на CentOS 7
- Подготовка
- Установка GCC на CentOS
- Компиляция примера Hello World
- Установка нескольких версий GCC
- Выводы
- Installing GCC and C/C++ Build Tools on CentOS 8
- Installing GCC and C/C++ Build Tools:
- Writing Your First C and C++ Program:
- About the author
- Shahriar Shovon
- How to Install GNU GCC (C and C++ Compiler) and Development Tools in RHEL/CentOS and Fedora
- What is Compiler?
- Installing GCC (C++ Compiler and Development Tools
- Speeding up C and C++ Compilations in Linux
- Testing GNU C Compiler with a simple C++ Program
- Summary
Как установить компилятор GCC на CentOS 7
Коллекция компиляторов GNU (GCC) — это набор компиляторов и библиотек для языков программирования C, C ++, Objective-C, Fortran, Ada, Go и D. Многие проекты с открытым исходным кодом, включая инструменты GNU и ядро Linux, скомпилированы с помощью GCC.
В этом руководстве объясняется, как установить компилятор GCC в CentOS 7. Мы объясним, как установить стабильную версию дистрибутива и более новую версию GCC, доступную из репозитория SCL.
Подготовка
Чтобы добавить новые репозитории и установить пакеты в вашей системе CentOS, вы должны войти в систему как пользователь root или пользователь с привилегиями sudo .
Установка GCC на CentOS
Репозитории CentOS по умолчанию содержат группу пакетов с именем « Development Tools которая содержит компилятор GCC и множество библиотек и других утилит, необходимых для компиляции программного обеспечения.
Чтобы установить средства разработки, включая компилятор GCC, запустите:
sudo yum group install "Development Tools"Команда устанавливает несколько новых пакетов, включая gcc , g++ и make .
Вы также можете установить справочные страницы об использовании GNU / Linux для разработки:
sudo yum install man-pagesУбедитесь, что компилятор GCC успешно установлен с помощью команды gcc —version которая выводит версию GCC:
Версия GCC по умолчанию, доступная в репозиториях CentOS 7, — 4.8.5 :
gcc (GCC) 4.8.5 20150623 (Red Hat 4.8.5-36) Copyright (C) 2015 Free Software Foundation, Inc. This is free software; see the source for copying conditions. There is NO warranty; not even for MERCHANTABILITY or FITNESS FOR A PARTICULAR PURPOSE. Вот и все. GCC теперь установлен в вашей системе, и вы можете начать его использовать.
Компиляция примера Hello World
Компиляция базовой программы на C или C ++ с использованием GCC — простая задача. Откройте текстовый редактор и создайте следующий файл:
#include int main() printf ("Hello World!n"); return 0; > Сохраните файл и скомпилируйте его в исполняемый файл, выполнив следующую команду:
Это создаст двоичный файл с именем hello в том же каталоге, где вы запускаете команду.
Запустите программу hello с помощью:
Программа должна отображать:
Установка нескольких версий GCC
В этом разделе мы предоставим инструкции о том, как установить и использовать несколько версий GCC на CentOS 7. Новые версии компилятора GCC включают поддержку новых языков, лучшую производительность и расширенные функции.
Коллекции программного обеспечения , также известные как SCL, — это проект сообщества, который позволяет создавать, устанавливать и использовать несколько версий программного обеспечения в одной системе, не затрагивая системные пакеты по умолчанию. Включив коллекции программного обеспечения, вы получите доступ к новым версиям языков программирования и службам, которые недоступны в основных репозиториях.
Репозитории SCL предоставляют пакет с именем Developer Toolset, который включает более новые версии GNU Compiler Collection и другие инструменты разработки и отладки.
Сначала установите файл выпуска CentOS SCL. Он является частью репозитория дополнительных компонентов CentOS и может быть установлен с помощью следующей команды:
sudo yum install centos-release-sclВ настоящее время доступны следующие коллекции Developer Toolset:
В этом примере мы установим Developer Toolset версии 7. Для этого введите следующую команду на своем терминале CentOS 7:
sudo yum install devtoolset-7Чтобы получить доступ к GCC версии 7, вам необходимо запустить новый экземпляр оболочки с помощью инструмента Software Collection scl :
scl enable devtoolset-7 bashТеперь, если вы проверите версию GCC, вы заметите, что GCC 7 является версией по умолчанию в вашей текущей оболочке:
gcc (GCC) 7.3.1 20180303 (Red Hat 7.3.1-5) Copyright (C) 2017 Free Software Foundation, Inc. This is free software; see the source for copying conditions. There is NO warranty; not even for MERCHANTABILITY or FITNESS FOR A PARTICULAR PURPOSE. На этом этапе вы можете использовать более новую версию GCC, как и любой другой обычный инструмент.
Выводы
Вы успешно установили GCC на свой CentOS 7. Теперь вы можете посетить официальную страницу документации GCC и узнать, как использовать GCC и G ++ для компиляции программ на C и C ++.
Если вы столкнулись с проблемой или хотите оставить отзыв, оставьте комментарий ниже.
Installing GCC and C/C++ Build Tools on CentOS 8
![]()
In this article, I am going to show you how to install GCC and all the required C/C++ build tools on CentOS 8 for developing C/C++ programs. So, let’s get started.
Installing GCC and C/C++ Build Tools:
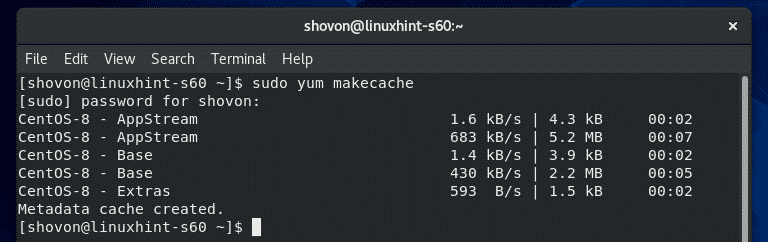
First, update the YUM package repository cache with the following command:

The YUM package repository cache should be updated.
On CentOS 8, all the C/C++ development tools can be installed very easily by installing the Development Tools group.
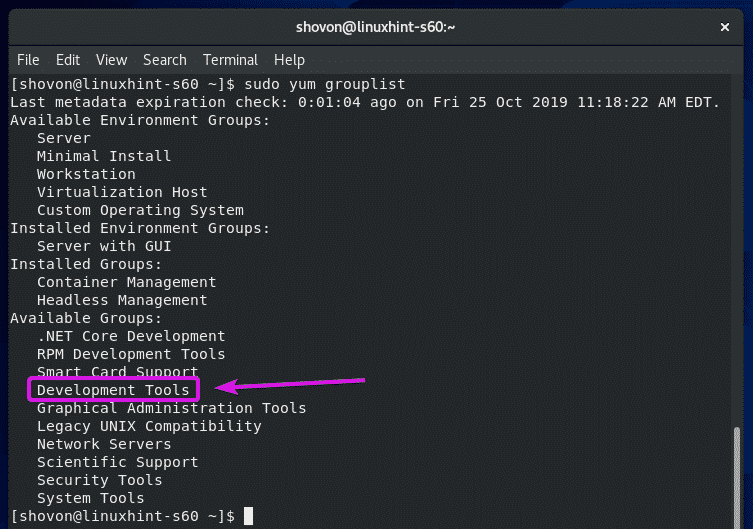
To install the Development Tools group of packages, run the following command:

To confirm the installation, press Y and then press .

YUM package manager should download all the packages from the internet and install them on your CentOS 8 machine.

At this point, GCC and all the required C/C++ build tools should be installed.

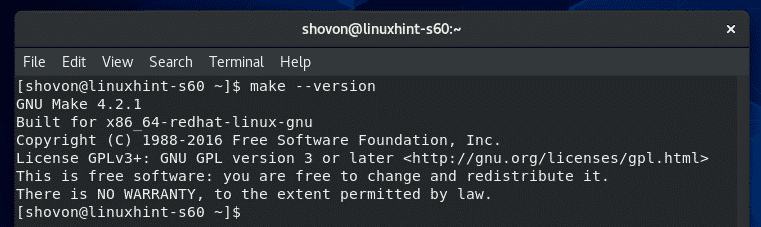
To confirm whether GCC is working correctly, run the following command:

As you can see, GCC is working correctly.

Now, to check whether G++ is working correctly, run the following command:

As you can see, G++ is working correctly.

To check whether make tool is working correctly, run the following command:

As you can see, make is working correctly.
Writing Your First C and C++ Program:
In this section, I am going to show you how to write your first C and C++ program, compile them using GCC and run them. So, let’s continue,
NOTE: A C program source file must end with the extension .c and C++ program source file must end with the extension .cpp. You must always remember that.
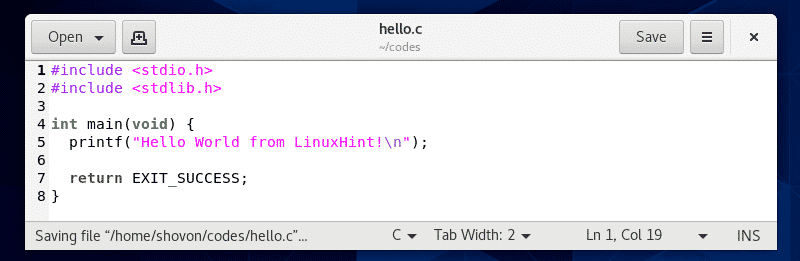
First, create a C program source file hello.c and type in the following lines of codes.
int main ( void ) {
printf ( «Hello world from LinuxHint! \n » ) ;
The final source code file should look like this.
Once you’ve written your C program, navigate to the directory (in my case ~/codes directory) where you saved the hello.c C source file as follows:

As you can see, the hello.c C source file is in this directory.

Now, to compile the C source file hello.c, run the following command:

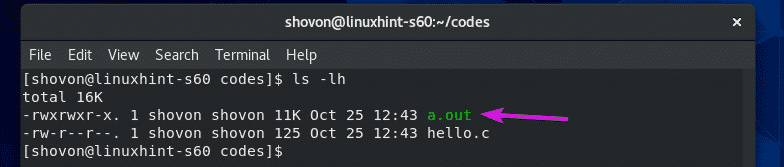
If you don’t specify a name for the compiled binary/executable file, a.out will be the default name for the compile binary/executable file.
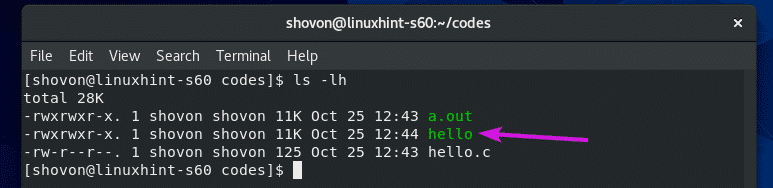
If you want to give your compiled binary/executable file a name i.e. hello, compile the C source file hello.c with the following command:
NOTE: Here, -o option defines the output file or compiled binary/executable file name.

Once the C source file hello.c is compiled, a new compiled binary/executable file hello should be generated as you can see in the screenshot below.
Now, run the compiled binary/executable file hello as follows:

As you can see, the desired output is printed on the screen.

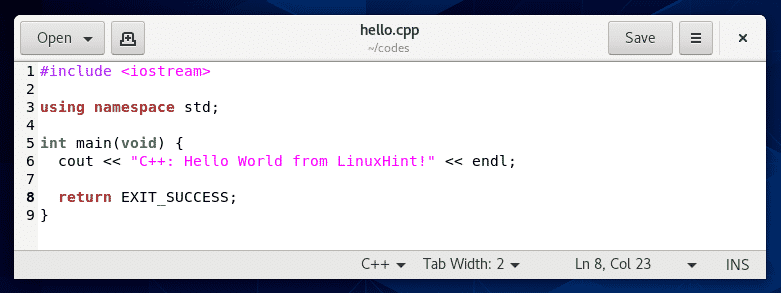
Now, create a new C++ source file hello.cpp and type in the following lines of codes.
The final source code file should look like this.
As you can see, the hello.cpp C++ source file is in the ~/codes directory.

Now, compile the C++ source file hello.cpp and give the compiled binary/executable file a name hello-cpp with the following command:

Once the C++ source file hello.cpp is compiled, a new compiled binary/executable file hello-cpp should be created as you can see in the screenshot below.

Now, run the hello-cpp compiled binary/executable file as follows:

As you can see, the desired output is printed on the screen.

So, that’s how you install GCC and C/C++ build tools on CentOS 8 and write your first C/C++ programs. Thanks for reading this article.
About the author
Shahriar Shovon
Freelancer & Linux System Administrator. Also loves Web API development with Node.js and JavaScript. I was born in Bangladesh. I am currently studying Electronics and Communication Engineering at Khulna University of Engineering & Technology (KUET), one of the demanding public engineering universities of Bangladesh.
How to Install GNU GCC (C and C++ Compiler) and Development Tools in RHEL/CentOS and Fedora
Nowadays, as a system administrator or engineer you can’t feel satisfied by knowing how to use the CLI and troubleshoot GNU/Linux servers, but will need to go one step further into the development area as well to stay at the top of your game. If you’re considering a career in kernel development or applications for Linux, then C or C++ is the best place to start.

In this article we will explain how to install Gnu C and C++ compilers and it’s related Development tools such as automake, autoconf, flex, bison, etc. in Fedora and CentOS / RHEL systems.
What is Compiler?
In simple words, a compiler is a software program that transforms statements written in a source language into a target language that the machine’s CPU can understand and execute.
In Fedora and derivatives (actually, that is true for the entire Linux distro ecosystem as well), the most well-known C and C++ compilers are gcc and g++, respectively, both developed and supported actively by the Free Software Foundation as part of the GNU project.
Installing GCC (C++ Compiler and Development Tools
If gcc and / or g++ and it’s related Development Tools are not installed in your system by default, you can install the latest available from the repositories as follows:
# yum groupinstall 'Development Tools' [on CentOS/RHEL 7/6] # dnf groupinstall 'Development Tools' [on Fedora 22+ Versions]
Before we dive into writing C or C++ code, there’s another tool to boost your development toolset that we want to show you.
Speeding up C and C++ Compilations in Linux
When you as part of the development process, have to recompile several times after making changes to the source code it’s great to have a compiler cache to speed up future recompilations.
In Linux, there’s an utility called ccache, which speeds up recompilation by caching previous compilations and detecting when the same compilation is being done again. Besides C and C++, it also supports Objective-C and Objective-C++.
Ccache has only a few limitations: it’s only useful while recompiling a single file. For other types of compilations, the process will end up running the actual compiler. The same thing happens if a compiler flag is not supported. The bright side is that in any event it will not interfere with the actual compilation and will not throw an error – just fall back to the actual compiler.
and see how it works with an example.
Testing GNU C Compiler with a simple C++ Program
As an example, let’s use a simple C++ program that calculates the area of a rectangle after its length and width have been provided as inputs.
Open your favorite text editor and enter the following code, then save as area.cpp :
#include using namespace std; int main() < float length, width, area; cout > length; cout > width; area = length*width; cout
To compile the above code into an executable named area in the current working directory use the -o switch with g++:
If you want to take advantage of ccache, just prepend the above command with ccache, as follows:
Sample Output
Enter the length of the rectangle: 2.5 Now enter the width: 3.7 The area of the rectangle is: 9.25
Don’t let this simple example make you think that ccache is not useful. You will come to know what a great tool ccache is when recompiling a large source code file. The same principle applies for C programs as well.
Summary
In this article we have explained how to install and use the GNU compilers for C and C++ in Fedora-based distributions.
In addition, we showed how to use a compiler cache to speed up recompilations of the same code. While you can refer to the online man pages for gcc and g++ for further options and examples, we look forward to hearing from you if you have any questions or comments.