Install Single Window Mode GIMP On Arch Linux With Gimp 2.7.3 you can now enable single window mode. This allows new users that are use to Adobe Photoshop feel at home. In this tutorial we will install the newest release of GIMP in Arch Linux with two quick commands. Let’s Get started!
You can see here this has been the tradistional look of gimp with three windows. If you have been using gimp for a while you may have come across the tab button to hide the two side windows and maximize your screen space.
To install GIMP 2.7.3 with the single window mode in Arch we will need to open a terminal.
The first thing we will want to do is make sure the pacman mirrors are synced and see if the newest version is available to install Issue the following commands in a terminal:
pacman -Ss gimp-devel
You will notice that that this is not the version we need. (2.7.3) Looks like we will need to sync pacman repositories.
Now that we have synced lets do another search to see if the newest version is available to install.
pacman -Ss gimp-devel
You can see that 2.7.3 is now available to install. If you still see an older version you may want to change to a more up to date repository mirror. Take a look at the links below to help find one and generate your /etc/pacman.d/mirrorlist file http://www.archlinux.org/mirrors/status/
Now to install it as simple as entering one command.
pacman -S gimp-devel
Note: if you had to sync your mirror you may need to update pacman first.
Since I already have gimp installed it will prompt me asking if I want to upgrade / unstall the old one and replace it with the new version.
You will be asked f you want to download it.
Now that we have the newest version installed lets fire it up.
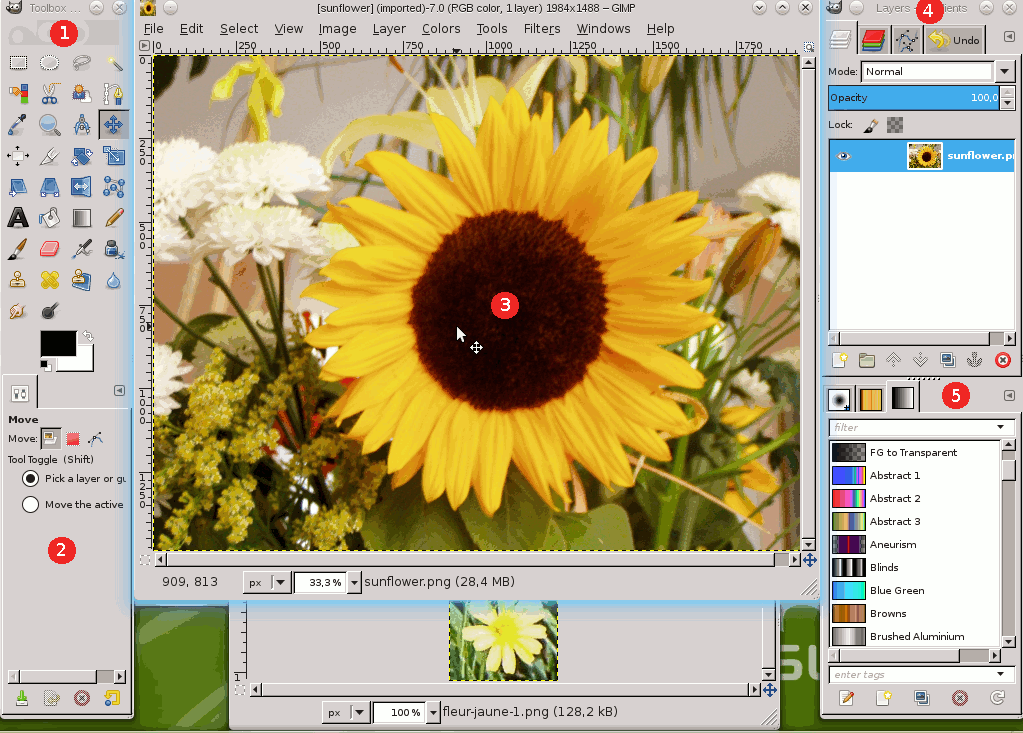
If you notice by default it still is displayed in multi window mode.
We will need to make one setting change
Click on Window > put a check mark next to single-window mode
Mastering Photoshop Image Manipulation Like a Pro
Источник
Gimp допилил однооконный режим Установить гимп с однооконным интерфейсом можно было ещё несколько месяцев назад, но только совсем недавно этот режим посчитали полностью законченным.
Установить однооконный гипм в ubuntu можно следующими командами:
Скачать gimp для остальных систем можно с официального сайта http://www.gimp.org/
Хотя и они и прикрутили однооконный режим, но он не включён по умолчанию. Активировать его можно нажав Окна>однооконный режим.
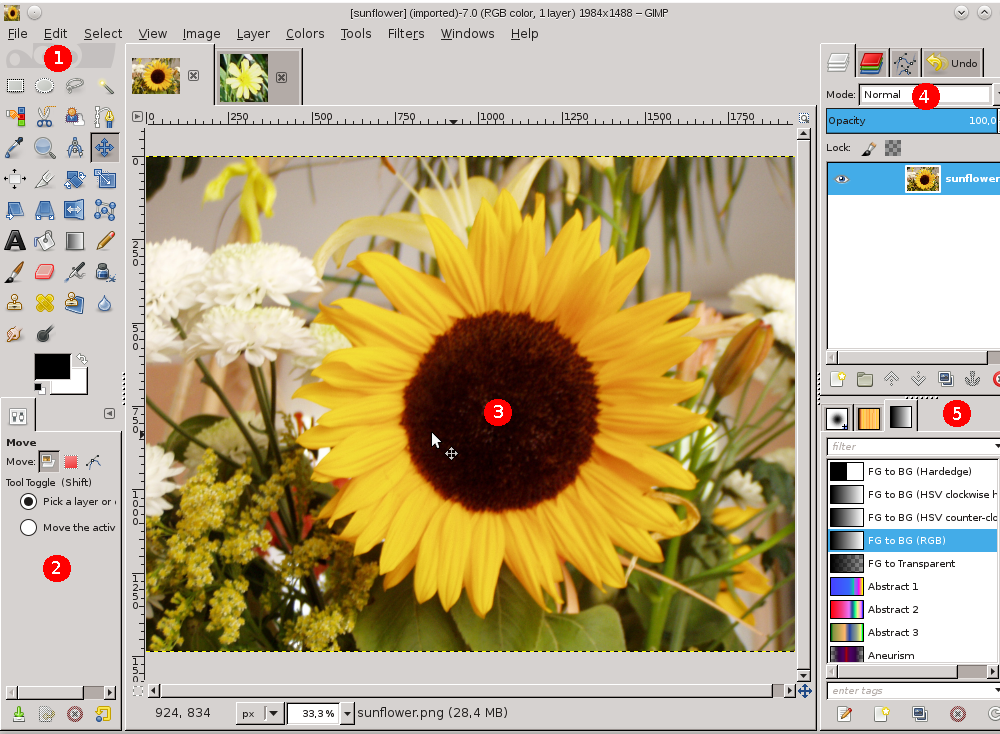
Сам gimp в режиме одного окна выглядит так:
Gimp в одноокнном интерфейсе
Кроме нового интерфейса gimp 2.7.3 принёс улучшенное редактирование текста, поддержку групп слоёв, новая картинка при загрузке и многое другое. Полный список изменений можно почитать здесь (английский язык).
Новая тонировка картинки при загрузке gimp
И вроде редактор стал быстрее загружаться. Скриншот с загрузкой получилось сделать только с 5-го раза 🙂
Кстати, если вы читаете эту статью, то значит вас не устраивает, когда окно разбито на множество мелких. Если у вас есть автомобиль и в нём такой же дефект, как и в гипмпе, то командами это не исправишь. Лучше приобрести лобовое стекло ока. Благо в этом магазине есть все стёкла в наличии.
Похожие статьи: Источник
Gimp one window linux The GIMP user interface is now available in two modes:
When you open GIMP for the first time, it opens in multi-window mode by default. You can enable single-window mode through Windows → >Single-Window Mode ) in the image menu bar. After quitting GIMP with this option enabled, GIMP will start in single-window mode next time.
Figure 3.2. A screenshot illustrating the multi-window mode.
The screenshot above shows the most basic arrangement of GIMP windows that can be used effectively.
You can notice two panels, left and right, and an image window in middle. A second image is partially masked. The left panel collects Toolbox and Tool Options dialog together. The right panel collects layers, channels, paths, undo history dialogs together in a multi-tab dock, brushes, patterns and gradients dialogs together in another dock below. You can move these panels on screen. You can also mask them using the Tab key.
The Main Toolbox: Contains a set of icon buttons used to select tools. By default, it also contains the foreground and background colors. You can add brush, pattern, gradient and active image icons. Use Edit → Preferences → Toolbox to enable, or disable the extra items.Tool options: Docked below the main Toolbox is a Tool Options dialog, showing options for the currently selected tool (in this case, the Move tool).Image windows: Each image open in GIMP is displayed in a separate window. Many images can be open at the same time, limited by only the system resources. Before you can do anything useful in GIMP , you need to have at least one image window open. The image window holds the Menu of the main commands of GIMP (File, Edit, Select. ), which you can also get by right-clicking on the window. An image can be bigger than the image window. In that case, GIMP displays the image in a reduced zoom level which allows to see the full image in the image window. If you turn to the 100% zoom level, scroll bars appear, allowing you to pan across the image.The Layers, Channels, Paths, Undo History dock — note that the dialogs in the dock are tabs. The Layers tab is open : it shows the layer structure of the currently active image, and allows it to be manipulated in a variety of ways. It is possible to do a few very basic things without using the Layers dialog, but even moderately sophisticated GIMP users find it indispensable to have the Layers dialog available at all times. Brushes/Patterns/Gradients: The docked dialog below the layer dialog shows the dialogs (tabs) for managing brushes, patterns and gradients. Dialog and dock managing is described in Section 2.3, “Dialogs and Docking”.
Figure 3.3. A screenshot illustrating the single-window mode.
You find the same elements, with differences in their management:
Left and right panels are fixed; you can’t move them. But you can decrease or increase their width by dragging the moving pointer that appears when the mouse pointer overflies the right border of the left pane. If you want to keep the left pane narrow, please use the slider at the bottom of the tool options to pan across the options display. If you reduce the width of a multi-tab dock, there may be not enough place for all tabs;then arrow-heads appear allowing you to scroll through tabs.
This is a minimal setup. There are over a dozen other types of dialogs used by GIMP for various purposes, but users typically open them when they need them and close them when they are done. Knowledgeable users generally keep the Toolbox (with Tool Options) and Layers dialog open at all times. The Toolbox is essential to many GIMP operations. The Tool Options section is actually a separate dialog, shown docked to the Main Toolbox in the screenshot. Knowledgeable users almost always have it set up this way: it is very difficult to use tools effectively without being able to see how their options are set. The Layers dialog comes into play when you work with an image with multiple layers: after you advance beyond the most basic stages of GIMP expertise, this means almost always . And of course it helps to display the images you’re editing on the screen; if you close the image window before saving your work, GIMP will ask you whether you want to close the file.
If your GIMP layout is lost, your arrangement is easy to recover using Windows → Recently Closed Docks ; the Windows menu command is only available while an image is open. To add, close, or detach a tab from a dock, click in the upper right corner of a dialog. This opens the Tab menu. Select Add Tab , Close Tab , or Detach Tab .
The following sections walk you through the components of each of the windows shown in the screenshot, explaining what they are and how they work. Once you have read them, plus the section describing the basic structure of GIMP images, you should have learned enough to use GIMP for a wide variety of basic image manipulations. You can then look through the rest of the manual at your leisure (or just experiment) to learn the almost limitless number of more subtle and specialized things that are possible. Have fun!
Figure 3.4. Screenshot of the Toolbox
The Toolbox is the heart of GIMP . Here is a quick tour of what you will find there.
In the Toolbox, as in most parts of GIMP , moving the mouse over something and letting it rest for a moment, usually displays a “ tooltip ” that describes the thing. Short cut keys are also frequently shown in the tooltip. In many cases, you can hover the mouse over an item and press the F1 key to get help about the thing that is underneath the mouse.
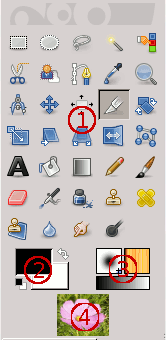
By default, only the Foreground-background icon is visible. You can add Brush-Pattern-Gradient icons and Active Image icon through Edit → Preferences → Toolbox : Tools configuration.
Tool icons: These icons are buttons which activate tools for a wide variety of purposes: selecting parts of images, painting an image, transforming an image, etc. Section 1, “The Toolbox” gives an overview of how to work with tools, and each tool is described systematically in the Tools chapter.Foreground/Background colors: The color areas here show you GIMP ‘s current foreground and background colors, which come into play in many operations. Clicking on either one of them brings up a color selector dialog that allows you to change to a different color. Clicking on the double-headed arrow swaps the two colors, and clicking on the small symbol in the lower left corner resets them to black and white.Brush/Pattern/Gradient: The symbols here show you GIMP ‘s current selections for: the Paintbrush, used by all tools that allow you to paint on the image ( “ painting ” includes operations like erasing and smudging, by the way); for the Pattern, which is used in filling selected areas of an image; and for the Gradient, which comes into play whenever an operation requires a smoothly varying range of colors. Clicking on any of these symbols brings up a dialog window that allows you to change it.Active Image: In GIMP , you can work with many images at once, but at any given moment, only one image is the “ active image ” . Here you find a small iconic representation of the active image. Click the icon to display a dialog with a list of the currently open images, click an image in the dialog to make it active. Usually, you click an image window in multi-window mode, or an image tab in single-window mode, to make it the active image. You can “ Drop to an XDS file manager to save the image ” . XDS is an acronym for “ X Direct Save Protocol ” : an additional feature for the X Window System graphical user interface for Unix-like operating systems. At every start, GIMP selects a tool (the brush), a color, a brush and a pattern by default, always the same. If you want GIMP to select the last tool, color, brush and pattern you used when quitting your previous session, check the Save input device settings on exit in Preferences/Input Devices.
The Toolbox window displays “ Wilber’s eyes ” along the top of the dialog. You can get rid of the “ Wilber’s eyes ” by adding the following line to your gimprc file: (toolbox-wilber no) . It only affects the toolbox. The eyes in the Image window are only visible when you do not have an open image.
Drag and drop an image from a file browser into the Toolbox window to open the image in its own Image window or tab.
Источник