- cham11ng / git-ssh-configuration.md
- 4.4 Git on the Server — Setting Up the Server
- Configure Git Server with SSH on Ubuntu
- Configuring Git Server:
- Adding Client Public Key to the Git Server:
- Creating Git Repositories on the Server:
- Cloning Git Repository from the Server:
- Making Changes and Pushing Changes to Git Server:
cham11ng / git-ssh-configuration.md
We can check if Git is installed by typing git —version in your Terminal or Git Bash (Windows) respectively.
Download Git for Windows from this link https://git-scm.com/downloads
Configuration
Open your Terminal or Git Bash(Windows).
$ ssh -v usage: ssh [-1246AaCfGgKkMNnqsTtVvXxYy] [-b bind_address] [-c cipher_spec] [-D [bind_address:]port] [-E log_file] [-e escape_char] [-F configfile] [-I pkcs11] [-i identity_file] [-L address] [-l login_name] [-m mac_spec] [-O ctl_cmd] [-o option] [-p port] [-Q query_option] [-R address] [-S ctl_path] [-W host:port] [-w local_tun[:remote_tun]] [user@]hostname [command]
List the contents of your ~/.ssh directory.
If we have already setup default identity, we can see two id_ files
$ ls -a ~/.ssh . .. id_rsa id_rsa.pub known_hosts
The system adds keys for all identities to the /home//.ssh (Linux) or /c/Users//.ssh (Windows) directory. The following procedure creates a default identity.
Hit ssh-keygen command on Terminal or Git Bash.
$ ssh-keygen Generating public/private rsa key pair. Enter file in which to save the key (/c/Users/yourname>/.ssh/id_rsa):
Press enter to accept the default key and location or we can set somewhere else.
We enter and re-enter a passphrase when prompted. Unless you need a key for a process such as script, you should always provide a passphrase. The command creates your default identity with its public and private keys
$ ssh-keygen Generating public/private rsa key pair. Enter file in which to save the key (/c/Users/yourname>/.ssh/id_rsa): Created directory '/c///.ssh'. Enter passphrase (empty for no passphrase): Enter same passphrase again: Your identification has been saved in /c/Users/yourname>/.ssh/id_rsa. Your public key has been saved in /c/Users/yourname>/.ssh/id_rsa.pub. The key fingerprint is: SHA256:+V6cLhFWngIFC+TdHwQHxJP39lsZUWnP6TDj1/7hBVA yourname>@yourname> The key's randomart image is: +---[RSA 2048]----+ | .o .==+o E +| | . o.o+oo. + | | . o..=oo..+| | .+.o*ooo| | S. oo.*.+| | . o =+| | ..+ .o+| | ..o ..+| | . .o| +----[SHA256]-----+
List the contents of your ~/.ssh directory.
$ ls ~/.ssh . .. id_rsa id_rsa.pub known_hosts
Ensure ssh-agent is enabled:
$ eval "$(ssh-agent -s)" # Agent pid 59566
Add your SSH key to the ssh-agent
- Find and take a note of your public key fingerprint. If you’re using OpenSSH 6.7 or older:
$ ssh-add -l # 2048 a0:dd:42:3c:5a:9d:e4:2a:21:52:4e:78:07:6e:c8:4d /Users//.ssh/id_rsa (RSA) If you are using OpenSSH 6.8 or newer: $ ssh-add -l -E md5 # 2048 MD5:a0:dd:42:3c:5a:9d:e4:2a:21:52:4e:78:07:6e:c8:4d /Users//.ssh/id_rsa (RSA)
$ cat ~/.ssh/id_rsa.pub ssh-rsa AAAAB3NzaC1yc2EAAAADAQABAAABAQC2zeZVIph1tP0UZJ007AC1OWqThpYjDlao1PlQnZbrSMeS8LXkU/nMxuZdAv+2JeqhezOtb6/e8e50NOTWB9Z2O8thCMwc29cp6C+vHL2oWQYMcCOuT34/R2yDEOMQ5nkIZ1fVFJNCTIZUaKjyaHX89w0v2p9cMsZ1q36w9lEdKXs8N5fuN/6rAy3JQgMcbD+dDd0cWpP8CLiUyNCq32xwqhX+nS1P43AgOQdLpX74uljwr7rE2CmrJQkvh/m+h68tv8+mLMGJtg5cJ+doZ+9r9yPhKJYGEsW4bL+8sSRQn3gJWUib8xhOgaWrMfXj+94o1KbcI12lK772GNyP74rX yourname>@yourname>
Copy this output to respective SSH keys setting.
You have now successfully configured SSH for Git in Windows/Linux/Mac OS.
4.4 Git on the Server — Setting Up the Server
Let’s walk through setting up SSH access on the server side. In this example, you’ll use the authorized_keys method for authenticating your users. We also assume you’re running a standard Linux distribution like Ubuntu.
A good deal of what is described here can be automated by using the ssh-copy-id command, rather than manually copying and installing public keys.
First, you create a git user account and a .ssh directory for that user.
$ sudo adduser git $ su git $ cd $ mkdir .ssh && chmod 700 .ssh $ touch .ssh/authorized_keys && chmod 600 .ssh/authorized_keysNext, you need to add some developer SSH public keys to the authorized_keys file for the git user. Let’s assume you have some trusted public keys and have saved them to temporary files. Again, the public keys look something like this:
$ cat /tmp/id_rsa.john.pub ssh-rsa AAAAB3NzaC1yc2EAAAADAQABAAABAQCB007n/ww+ouN4gSLKssMxXnBOvf9LGt4L ojG6rs6hPB09j9R/T17/x4lhJA0F3FR1rP6kYBRsWj2aThGw6HXLm9/5zytK6Ztg3RPKK+4k Yjh6541NYsnEAZuXz0jTTyAUfrtU3Z5E003C4oxOj6H0rfIF1kKI9MAQLMdpGW1GYEIgS9Ez Sdfd8AcCIicTDWbqLAcU4UpkaX8KyGlLwsNuuGztobF8m72ALC/nLF6JLtPofwFBlgc+myiv O7TCUSBdLQlgMVOFq1I2uPWQOkOWQAHukEOmfjy2jctxSDBQ220ymjaNsHT4kgtZg2AYYgPq dAv8JggJICUvax2T9va5 gsg-keypairYou just append them to the git user’s authorized_keys file in its .ssh directory:
$ cat /tmp/id_rsa.john.pub >> ~/.ssh/authorized_keys $ cat /tmp/id_rsa.josie.pub >> ~/.ssh/authorized_keys $ cat /tmp/id_rsa.jessica.pub >> ~/.ssh/authorized_keysNow, you can set up an empty repository for them by running git init with the —bare option, which initializes the repository without a working directory:
$ cd /srv/git $ mkdir project.git $ cd project.git $ git init --bare Initialized empty Git repository in /srv/git/project.git/Then, John, Josie, or Jessica can push the first version of their project into that repository by adding it as a remote and pushing up a branch. Note that someone must shell onto the machine and create a bare repository every time you want to add a project. Let’s use gitserver as the hostname of the server on which you’ve set up your git user and repository. If you’re running it internally, and you set up DNS for gitserver to point to that server, then you can use the commands pretty much as is (assuming that myproject is an existing project with files in it):
# on John's computer $ cd myproject $ git init $ git add . $ git commit -m 'Initial commit' $ git remote add origin git@gitserver:/srv/git/project.git $ git push origin masterAt this point, the others can clone it down and push changes back up just as easily:
$ git clone git@gitserver:/srv/git/project.git $ cd project $ vim README $ git commit -am 'Fix for README file' $ git push origin masterWith this method, you can quickly get a read/write Git server up and running for a handful of developers.
You should note that currently all these users can also log into the server and get a shell as the git user. If you want to restrict that, you will have to change the shell to something else in the /etc/passwd file.
You can easily restrict the git user account to only Git-related activities with a limited shell tool called git-shell that comes with Git. If you set this as the git user account’s login shell, then that account can’t have normal shell access to your server. To use this, specify git-shell instead of bash or csh for that account’s login shell. To do so, you must first add the full pathname of the git-shell command to /etc/shells if it’s not already there:
$ cat /etc/shells # see if git-shell is already in there. If not. $ which git-shell # make sure git-shell is installed on your system. $ sudo -e /etc/shells # and add the path to git-shell from last commandNow you can edit the shell for a user using chsh -s :
$ sudo chsh git -s $(which git-shell)Now, the git user can still use the SSH connection to push and pull Git repositories but can’t shell onto the machine. If you try, you’ll see a login rejection like this:
$ ssh git@gitserver fatal: Interactive git shell is not enabled. hint: ~/git-shell-commands should exist and have read and execute access. Connection to gitserver closed.At this point, users are still able to use SSH port forwarding to access any host the git server is able to reach. If you want to prevent that, you can edit the authorized_keys file and prepend the following options to each key you’d like to restrict:
no-port-forwarding,no-X11-forwarding,no-agent-forwarding,no-ptyThe result should look like this:
$ cat ~/.ssh/authorized_keys no-port-forwarding,no-X11-forwarding,no-agent-forwarding,no-pty ssh-rsa AAAAB3NzaC1yc2EAAAADAQABAAABAQCB007n/ww+ouN4gSLKssMxXnBOvf9LGt4LojG6rs6h PB09j9R/T17/x4lhJA0F3FR1rP6kYBRsWj2aThGw6HXLm9/5zytK6Ztg3RPKK+4kYjh6541N YsnEAZuXz0jTTyAUfrtU3Z5E003C4oxOj6H0rfIF1kKI9MAQLMdpGW1GYEIgS9EzSdfd8AcC IicTDWbqLAcU4UpkaX8KyGlLwsNuuGztobF8m72ALC/nLF6JLtPofwFBlgc+myivO7TCUSBd LQlgMVOFq1I2uPWQOkOWQAHukEOmfjy2jctxSDBQ220ymjaNsHT4kgtZg2AYYgPqdAv8JggJ ICUvax2T9va5 gsg-keypair no-port-forwarding,no-X11-forwarding,no-agent-forwarding,no-pty ssh-rsa AAAAB3NzaC1yc2EAAAADAQABAAABAQDEwENNMomTboYI+LJieaAY16qiXiH3wuvENhBG. Now Git network commands will still work just fine but the users won’t be able to get a shell. As the output states, you can also set up a directory in the git user’s home directory that customizes the git-shell command a bit. For instance, you can restrict the Git commands that the server will accept or you can customize the message that users see if they try to SSH in like that. Run git help shell for more information on customizing the shell.
Configure Git Server with SSH on Ubuntu
![]()
If you have a small number of team members working on some projects, then you can setup a Git server via SSH on your office and work on projects as a team very easily. You don’t have to use GitHub or any other services in that case. SSH based Git server is really easy to setup and use. In this article, I am going to show you how to configure a Git server with SSH on Ubuntu and how to use it. So, let’s get started.
Configuring Git Server:
In this section, I am going to show you how to configure an Ubuntu server as a SSH accessible Git server.
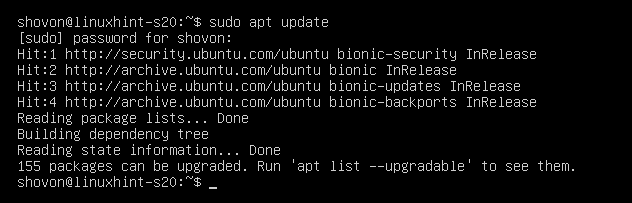
First, update the APT package repository cache with the following command:

The APT package repository cache should be updated.
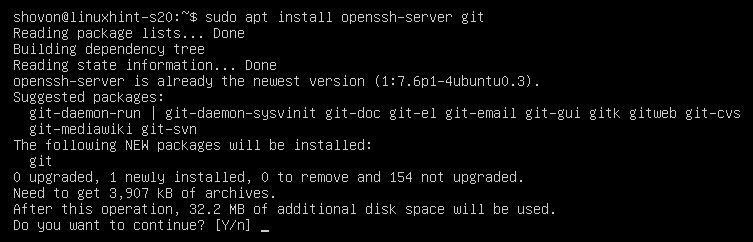
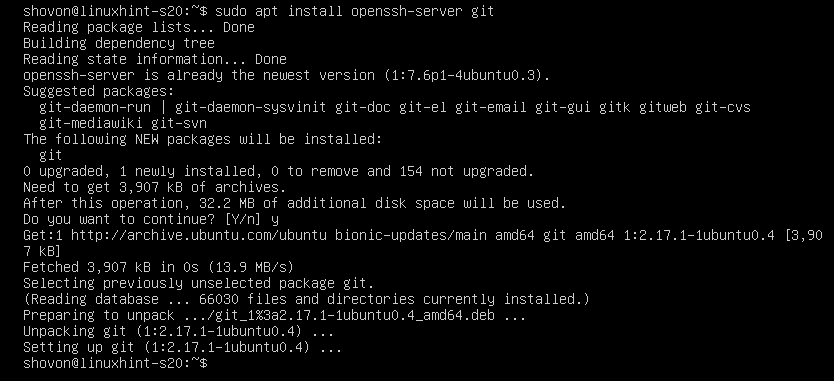
Now, install OpenSSH server and Git with the following command:

Now, press Y and then press to confirm the installation.
OpenSSH server and Git should be installed.
Now, create a new user git with the following command:

All the Git repositories will be saved in the home directory of the git user /home/git.
Now, login as the git user with the following command:

Now, create a new directory .ssh with the following command:

Now, allow only git user to have read, write, exec permissions on the directory .ssh/ as follows:

As you can see, the git user only has read (r), write (w), execute (x) permissions on the .ssh/ directory.

Now, create a new empty file .ssh/authorized_keys as follows:

Only allow read and write to the file from the git user as follows:

As you can see, only the git user has read (r) and write (w) permissions to the file .ssh/authorized_keys.

In the .ssh/authorized_keys file, you have to add the public key of the users whom you want to access the Git repositories on the Git server.
Adding Client Public Key to the Git Server:
To access the Git repositories on the Git server, the client must add his/her public key to the Git server.
The client can generate a public-private key pair as follows:


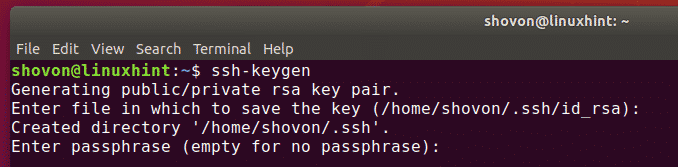

Now, the client can find his/her public key as follows:

Client’s public key should be printed. Now, the client can send this public key to the manager (who manages the Git server). The manager can then add the public key to the Git server. Then the client can access the Git server.
Let’s say, the client sent his/her public key to the Git server manager. The manager uploaded the public key to /tmp/shovon-key.pub file on the Git server.

Now, the Git server manager can add the public key of the client as follows:

Now, the .ssh/authorized_keys file should have the public key of the client.

Creating Git Repositories on the Server:
The clients can’t create new Git repositories on the server. The Git server manager must create a repository on the server. Then, the clients can clone, push/pull from the repository.
Now, create a new empty Git repository testrepo on the Git server as follows:

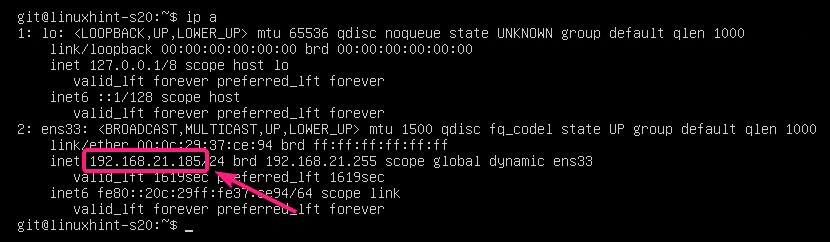
Now, the client only needs to know the IP address of the Git server in order to access the testrepo Git repository.
The Git server manager can find this information as follows:
As you can see, the IP address of the Git server is 192.168.21.185. Now, the server manager can tell it to the clients who will be working on the project.
Cloning Git Repository from the Server:
Once the client knows the IP address and the Git repository name, he/she can clone it to his/her computer as follows:

Now, type in yes and press . You will need to do this once, only the first time.

The testrepo Git repository should be cloned from the server.
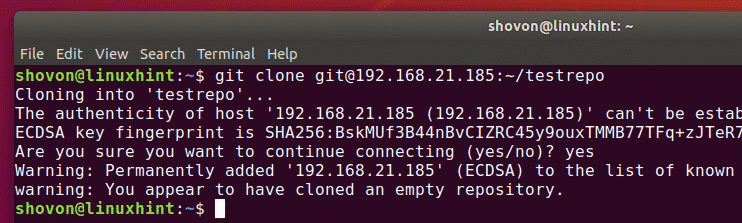
A new directory testrepo should be created.

Making Changes and Pushing Changes to Git Server:
Now, the client can add commits to the testrepo/ repository and push the changes to the Git server.