- GPS Logger + WiFi
- viofo
- Frenky Tan
- estore009
- jokiin
- abarth
- GPS Logger with WiFi Connection
- Wifi Gps Logger
- 2G GPS Tracker GPS303F For Vehicle Cut Off Engine Stop Car Function PC APP Online Tracking System GPS Tracker
- Sigmawit TUYA WiFi Hygrometer Thermometer Wireless Temperature And Humidity Sensor With Notification Alert Data Export Logger
- CDH-TEA Wireless 4g Wifi Color Lcd Data Logger Recorder For Wind/radiation/rain Weather Station Accessories
- RIKA RK600-07A Environmental Weather Station Sensor Data Logger Recorder With Wifi 4G GPRS
- 18 Channels Handheld WIFI GPS GSM CDMA LTE Cell Phone Signal 3G 4G 5G Lojack
- Global Positioning Intelligent Anti-lost Device IOS Android Universal GPS Pet Tracker
- TK20 20000mAh Magnetic Drop Alert GPS Tracker Offline Data Logger 2G gsm WIFI Monitoring Vehicle GPS Tracking System
- T20 4G Gps Gsm Sms Gprs Wifi Temperature Humidity Data Logger With Free Iot Cloud Sevice APP
- Out for a walk with my IOT “Thing” – GPS Location Logger
- WiFi Data Logger
GPS Logger + WiFi
I just wondering if Viofo can make GPS logger build-in WiFi for this model A119, that will be great for transferring files.
viofo
Well-Known Member
Joined Sep 29, 2015 Messages 1,328 Reaction score 2,841 Location Shenzhen Country China Dash Cam A129 Pro / A129 Duo / A119 V3 / A119S / G1W-S / WR1/
We do have a upgrade version for A119, but didn’t add Wi-Fi support.
Wi-Fi support will be available on our future models.
Frenky Tan
Active Member
Joined Jan 19, 2017 Messages 136 Reaction score 26 Country Malaysia Dash Cam Viofo A129 Duo, 119 Pro, 119S, Yi DashCam
We do have a upgrade version for A119, but didn’t add Wi-Fi support.
Wi-Fi support will be available on our future models.
I wish adding WiFi for A119 on current models, that will be great!
I would think Viofo can make separately more better accessories and upgraded GPS Logger built in WiFi capabilities.
(Not sure if the hardware can be embedded into the GPS logger).
Most users are using A119 now, I wish A119 can much more easier transferring files.
estore009
Well-Known Member
Joined Nov 25, 2013 Messages 3,064 Reaction score 1,460 Location Shenzhen Country China Dash Cam B1W/B2W/B2K/B4K/DV688/DV988/B1M/B2M
jokiin
Well-Known Member
Joined Jan 27, 2013 Messages 52,476 Reaction score 30,339 Location Sydney, Australia ~ Shenzhen, China Country Australia Dash Cam Too many ¯\_(ツ)_/¯
abarth
Well-Known Member
Joined Apr 20, 2014 Messages 678 Reaction score 445 Location SF bay area, California Country United States Dash Cam SGZC12RC░░ mini0805░░ viofoA119░░B1W
i have a standard sized wifi SD card but i do no think there are any available wifi micro SD cards, yet.
GPS Logger with WiFi Connection
i need a gps tracker that works with wifi connection. the idea is simple, the gps trakcer keep the data stored on the device, and when it have internet connection, send the logged data to the traccar server.
is there some raspberrypi project for something like this?
Thanks!
You can use any smartphone with Traccar Client installed on it.
I’m using that now, but it’s not accurate and there are big gaps.
It probably means that there is some problem with your phone. If you are using a recent version of Android, doze mode might be interfering with the app. Also remember that GPS needs clear sky visibility. It doesn’t work if you are indoors, near tall buildings or there’s something else is blocking the view.
My question is the same. I’m looking for a client for Linux. The tralnx works well but only with SIM. But I’m looking for a SIM card-free version. When the device comes home it uploads the data to wifi. Tracker (raspberry / orangepi) logs to a file during the day. Is this possible?
Hi there. Is there a ready to use hardware with GPS and WiFi which can be mounted onto trucks? I need it for agriculture to get reports automatically created in the end.
I actually found some reports about UlboTech T365 gps tracker would be OBD2 with GPS and Wifi for sync. But do not know if it support buffering.
Is there any ideas or help on this topic?
Actually any 12V powered device which collects GPS data and syncs once Wifi is available would be great!
Traccar
Traccar is a free and open source modern GPS tracking system.
Wifi Gps Logger
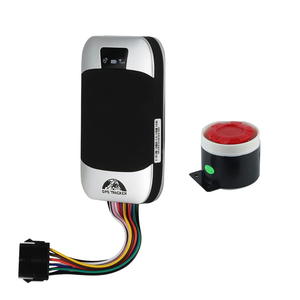

2G GPS Tracker GPS303F For Vehicle Cut Off Engine Stop Car Function PC APP Online Tracking System GPS Tracker

Sigmawit TUYA WiFi Hygrometer Thermometer Wireless Temperature And Humidity Sensor With Notification Alert Data Export Logger


CDH-TEA Wireless 4g Wifi Color Lcd Data Logger Recorder For Wind/radiation/rain Weather Station Accessories

RIKA RK600-07A Environmental Weather Station Sensor Data Logger Recorder With Wifi 4G GPRS
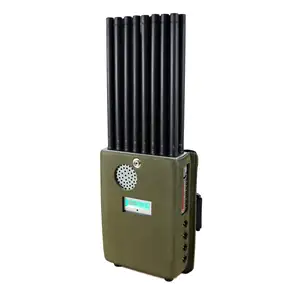
18 Channels Handheld WIFI GPS GSM CDMA LTE Cell Phone Signal 3G 4G 5G Lojack
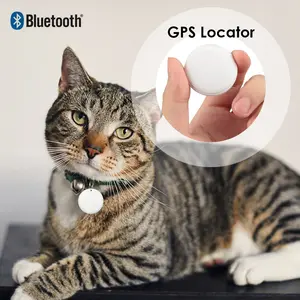
Global Positioning Intelligent Anti-lost Device IOS Android Universal GPS Pet Tracker
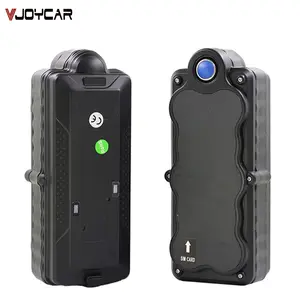
TK20 20000mAh Magnetic Drop Alert GPS Tracker Offline Data Logger 2G gsm WIFI Monitoring Vehicle GPS Tracking System

T20 4G Gps Gsm Sms Gprs Wifi Temperature Humidity Data Logger With Free Iot Cloud Sevice APP
For a safe, convenient and time-friendly vehicular commute, it is important to understand the viability of purchasing wifi gps logger. At Alibaba.com, we house a variety of wholesale wifi gps logger for improving our customer’s vehicular travel needs.
Amongst the most popular and in demands category of wifi gps logger is the GPS navigation system. We stock a wide range of GPS systems for the purpose of easing the commute restraints of our customers. They usually come with a suction mount cup, a USB cable as well as a vehicle power cable. We not only stock GPS navigation systems for cars but also do so for motorcycles as well as trucks. The GPS system offers driver convenience in the sense that it shares road situations and tells what is the right path to choose for the commute. It also gives off driver alerts in case of speed changes, roadblocks, school zones, sharp curves etc.
GPS also offers Bluetooth connectivity. This helps you stay connected without taking your hands off the steering wheel. Some of our models also allow you to make wireless phone calls, text messages without having to physically reach for the phone while driving. The maps of locations come to be updated regularly. Some of the GPS also has a micro SD card slot, allowing you to save locations and maps by yourself.
Out for a walk with my IOT “Thing” – GPS Location Logger
This project builds on the WiFi Data Logger project I published a few weeks back. While that project focused on the hardware and firmware for the data logger, this one looks at the Internet of Things platform where data is stored, processed and displayed. I plan on all sorts of applications for this device but, as a first use case, I wanted to build a GPS location logger that would only transmit data when its accelerometer sensed movement. Once it did, it would relay its location to Ubidots (my IOT platform of choice) where I could plot the path of the logger. Tonight, I brought my new “Thing” with me on my evening walk – using my iPhone WiFi hotspot to provide connectivity along the way. Here are the steps you would take to create your own route map: First, you will need to sign up for a Ubidots account, it is free and easy to do. Next, you will need to generate a token for your account. Once you log in, click on your user name in the top right corner of the home page, and select “My Profile”. Then, select the “API Keys” option under settings on the right and press the create tokens (level or paranoia sets whether you go for the short key option). This is how Ubidots will know it is you or your “Thing” adding or deleting data in your account. I created a “Source” called Teensy 3.1 for my WiFi logger as that is the micro controller powering the device.
You can see my sources here as well as the friendly button to add one if you need. Next, I had to tell Ubidots what type of variable to expect from my “Source” so, I created a “Variable” called samples.
This «Variable» was assigned a unique URL endpoint with a unique key. This key along with the authorization token for our user account to tell Ubidots where to store the data. The sketch provided in the project documentation takes care of this, all you need to do is insert your account and «Variable» identifiers at the top of the sketch. When the data logger sends its updates, the samples count will be displayed in both graphical and tabular form on the «Variables» page for Samples. The data points can be exported to Excel using a drop down menu under the gear in the upper right hand side of the graph. Also, since each data point is date and time stamped, you don’t need a real time clock on your device.
Notice, that each data point has a “context” with the GPS coordinates collected when the sample count was sent. Don’t worry about the formatting too much, the sketch takes the GPS coordinates in the format Adafruit’s library reports them and converts them to a format Ubidots understands. If you are interested, I went here when I was trying to figure this out.
The cool thing is that Ubidots will store this values and can display them in a number of ways on the “Dashboard” using widgets. And they are adding more and more widgets over time.
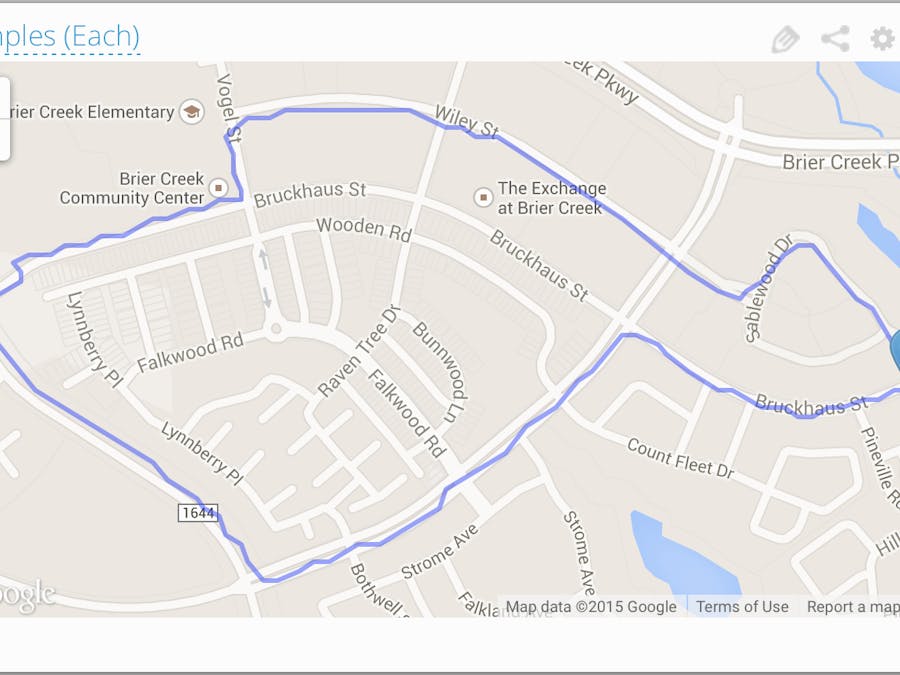
For this project, I selected the “GPS Trace”. As you can see below, this created a very accurate and complete record of my walk over 83 samples sent to Ubidots. You can very quickly experiment with other widgets to track the number of data points sent or to derive a value based on your variable.
WiFi Data Logger
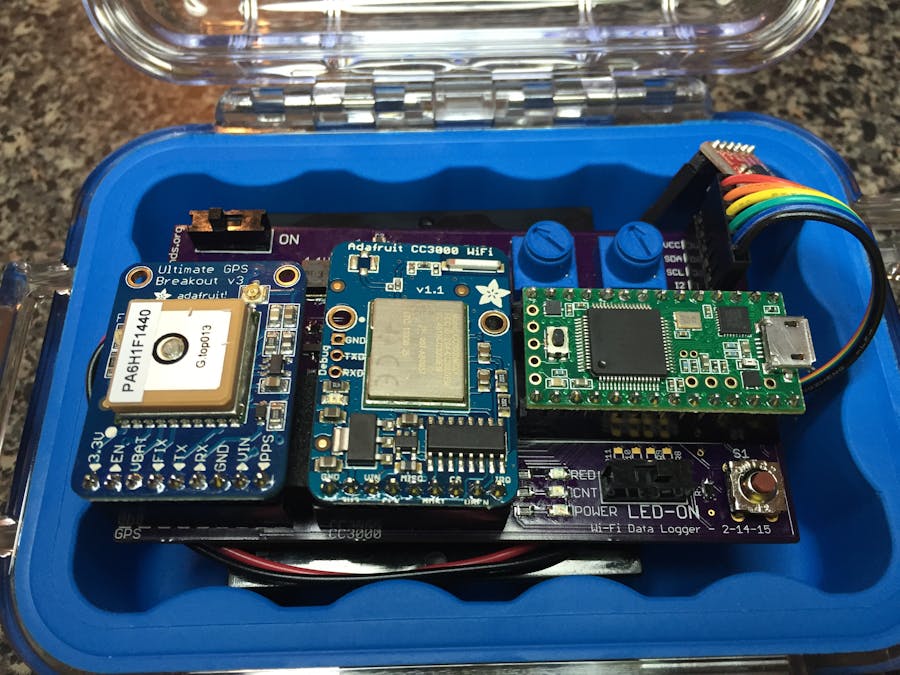
The basic idea is that this board will connect to GPS, obtain a GPS fix and report its location to Ubidots. Ubidots can then display this information in a number of ways including showing the location and the number of times the sensor had been moved that day as the dashboard below shows:
Here is the carrier board in detail:
Here is what the basic board looks like:
And here it is inside its protective Pelican case:
I have posted the firmware sketch and the carrier board Design files to my Github repository.
- I wanted to use a variety of power sources (including Solar) so I went with the TI TPS63002 Buck-boost switching DC-DC converter. It can be a pain to solder (see tutorial here) but I have yet to find a more versatile power supply.
- I incorporated a very cool battery monitoring approach using a P-MOSFET to allow the data logger to monitor battery voltage and report it to Ubidots. While not as good as true fuel gauge, it should be easy to implement across various power sources. Thanks to Shane Trent for sharing this circuit on his excellent FET Tricks Blog. I have yet to implement this in the firmware but will leave that you to.
- I have put some potentiometers and a momentary contact switch (held high) on the board for future use. One plan I have for the switch is to test for a button press at startup to select the WiFi network to use. The potentiometers are intended to adjust the sensitivity and reporting interval for the logger.
- I added extra connections for power management – you should be able to turn off the WiFi and GPS modules to save power between reporting. The Teensy can be put to sleep as well and the accelerometer can wake it with the provided interrupt connection.
- I also included the battery holder and header pin for using the Teensy’s integrated real time clock. You only need to add the battery and solder a crystal on the underside of the Teensy. This would enable you to set a regular reporting interval even if no movement is detected. Full instructions are provided here.

I hope this information is helpful. Please leave comments or contact me if you have questions. Also, you can follow me on Twitter @chipmc86 to hear about more over time.