How to Rescue, Repair and Reinstall GRUB Boot Loader in Ubuntu
This tutorial will guide you on how to rescue, repair or reinstall a damaged Ubuntu machine which cannot be booted due to the fact that the Grub2 boot loader has been compromised and cannot load the boot loader which transfers the control further to the Linux kernel. In all modern Linux operating systems GRUB is the default boot loader.
This procedure has been successfully tested on an Ubuntu 16.04 server edition with the Grub boot loader damaged. However, this tutorial will only cover Ubuntu server GRUB rescue procedure, although the same procedure can be successfully applied on any Ubuntu system or on the majority of Debian-based distributions.
Requirements
You try to boot your Ubuntu server machine and you see that the operating systems no longer starts-up and you discover that the boot loader program no longer works?
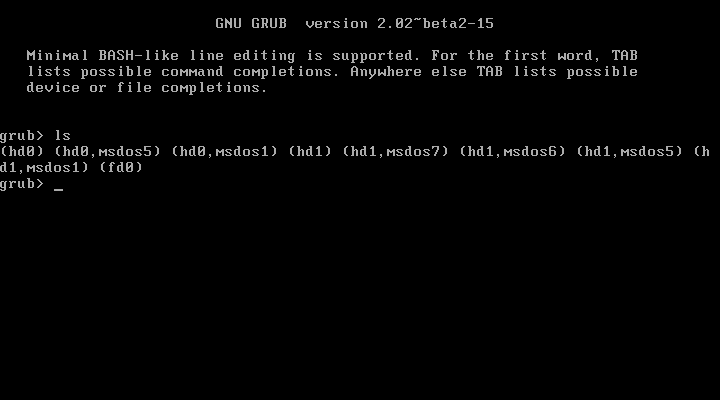
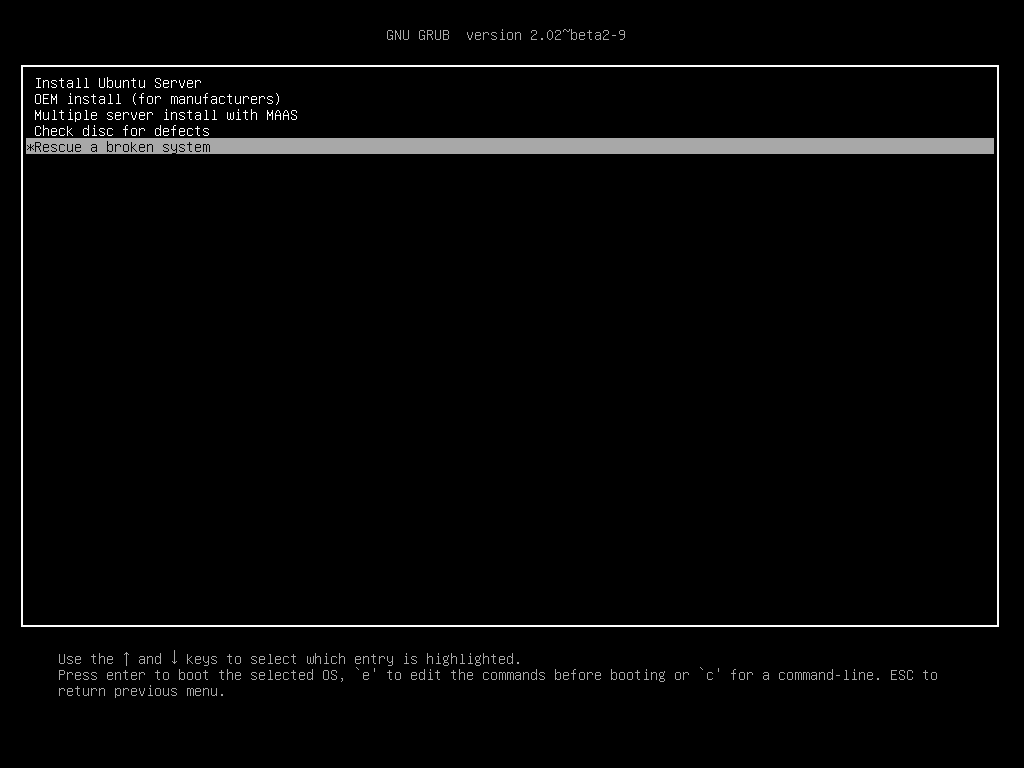
Typically, the GNU GRUB minimal console appears on your screen, as illustrated on the below screenshot. How can you restore the Grub in Ubuntu?
There are a lot of methods in Linux that can be used to re-install a broken grub, some can involve the ability to work and restore the boot loader by using the Linux command line and others are fairly simple and implies booting the hardware with a Linux live CD and using the GUI indications to repair the damaged boot loader.
Among the simplest methods, that can be used in Debian based distributions, especially on Ubuntu systems, is the method presented in this tutorial, which involves only booting the machine into the Ubuntu live DVD ISO image.
The ISO image can be downloaded from the following link: http://releases.ubuntu.com/
Reinstall Ubuntu GRUB Boot Loader
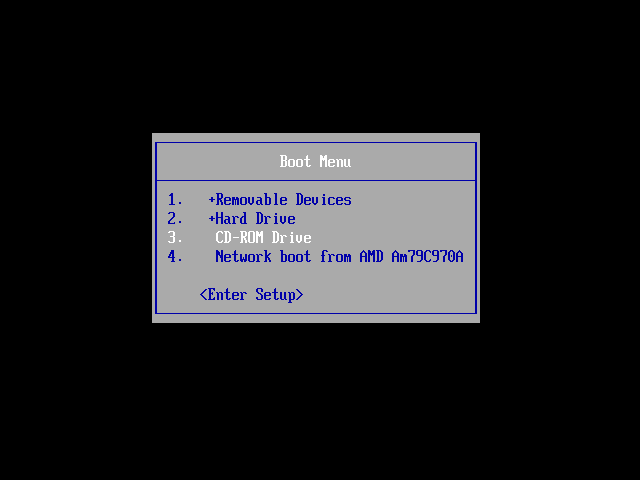
1. After you’ve downloaded and burned the Ubuntu ISO image, or created a bootable USB stick, place the bootable media into your appropriate machine drive, reboot the machine and instruct the BIOS to boot into Ubuntu live image.
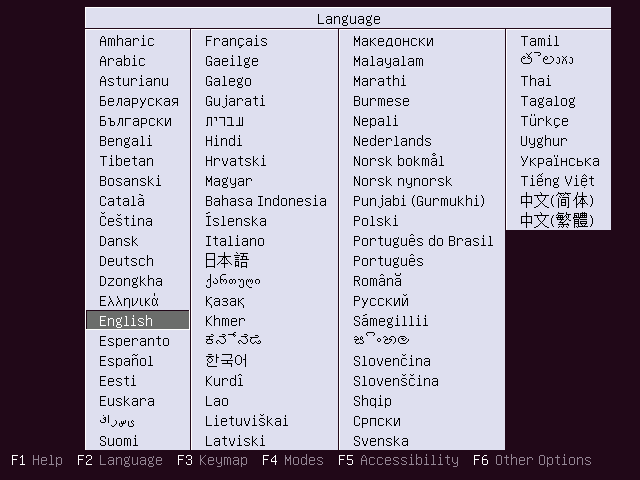
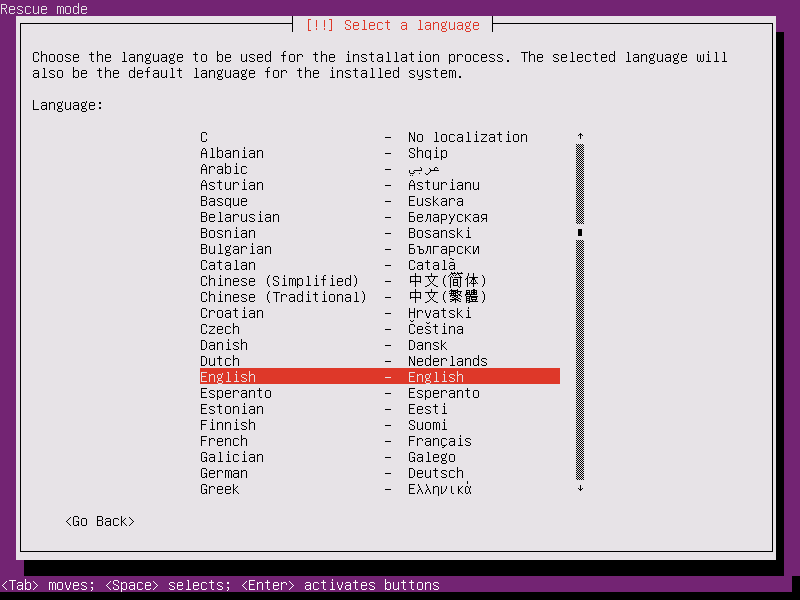
2. On the first screen, choose the language and press [Enter] key to continue.
3. On the next screen, press F6 function key in order to open the other options menu and select Expert mode option. Then, hit Escape key to return to Boot Options line in editing mode, as illustrated in the below screenshots.

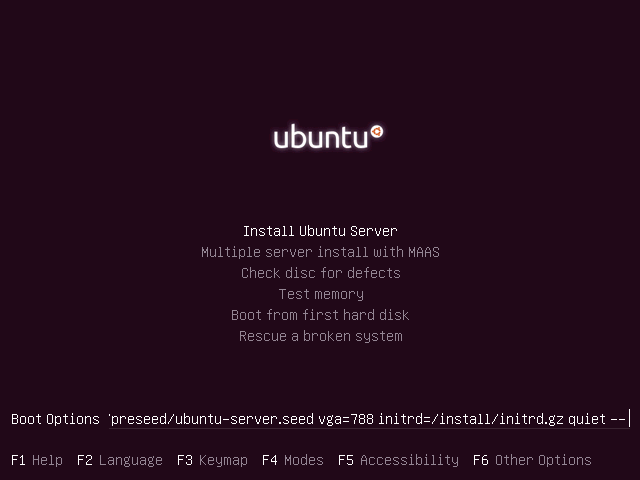
4. Next, edit Ubuntu live image boot options by using the keyboard arrows to move the cursor just before the quiet string and write the following sequence as illustrated in the below screenshot.

5. After you’ve wrote the above statement, press [Enter] key to instruct the live ISO image to boot into rescue mode in order to Rescue a broken system.
6. On the next screen select the language you want to perform the system rescue and press [enter] key to continue.
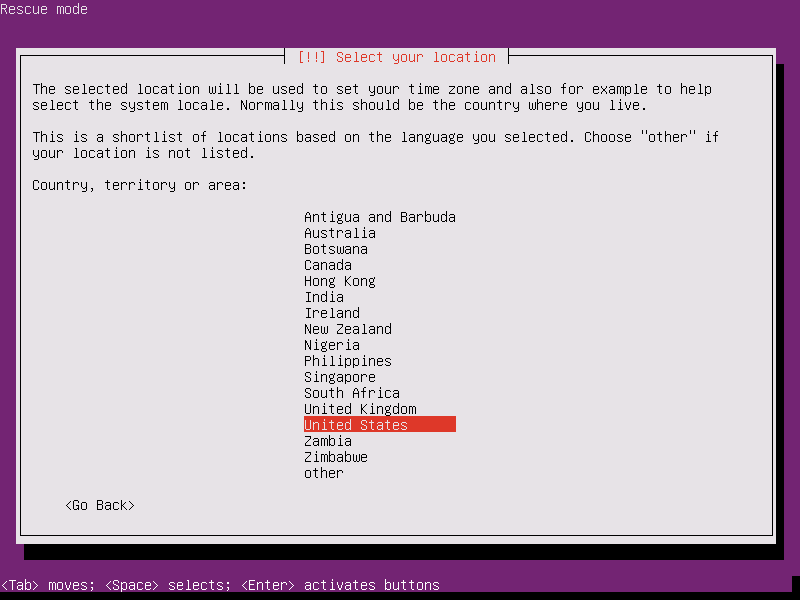
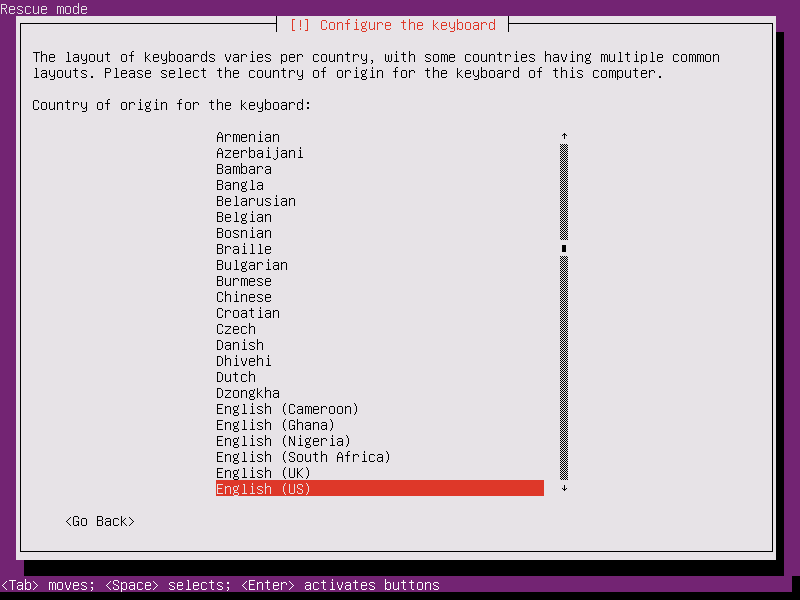
7. Next, select your appropriate location from the presented list and press [enter] key to move further.
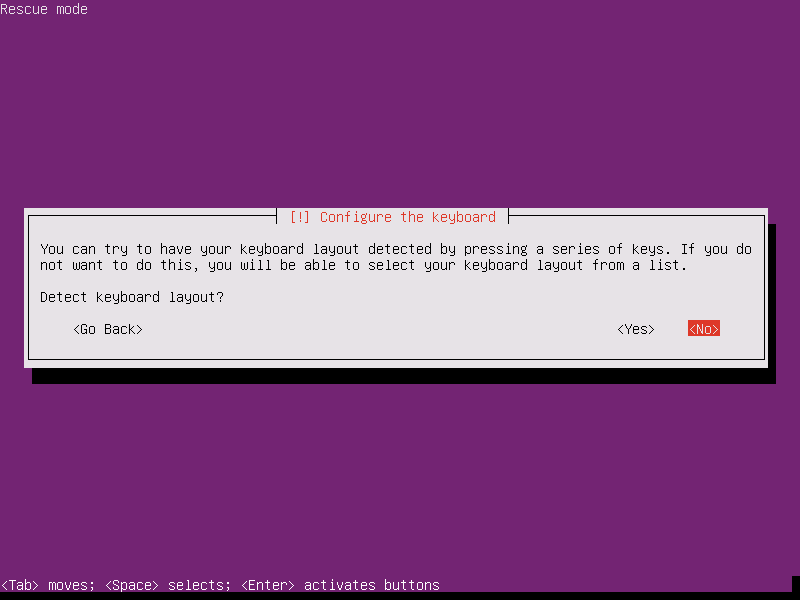
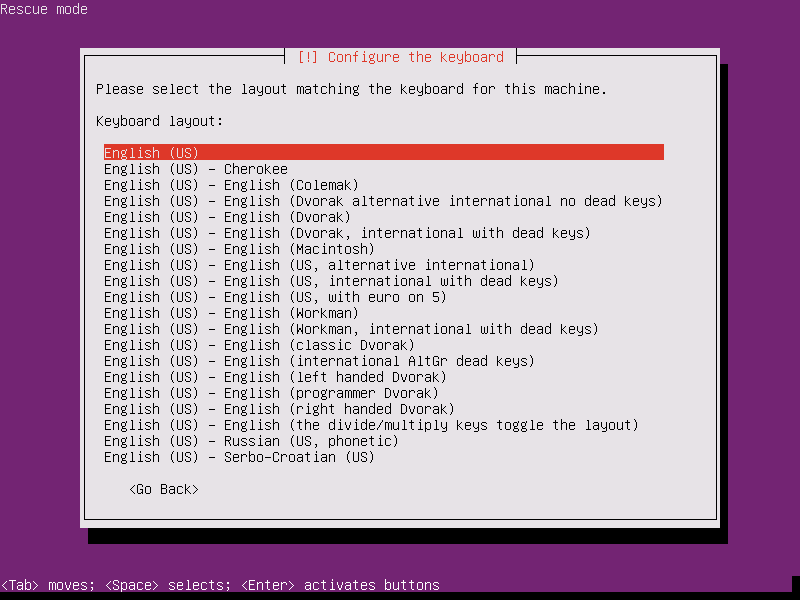
8. On the next series of screens, select your keyboard layout as illustrated in the below screenshots
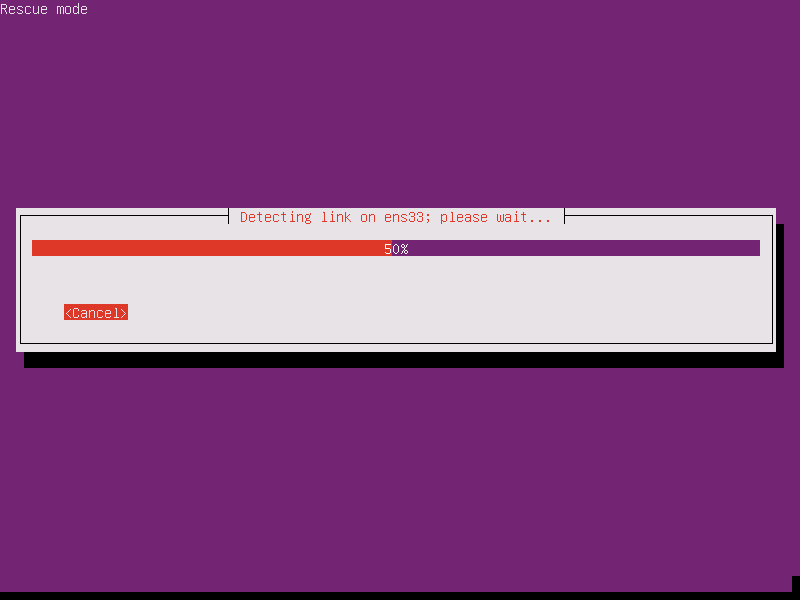
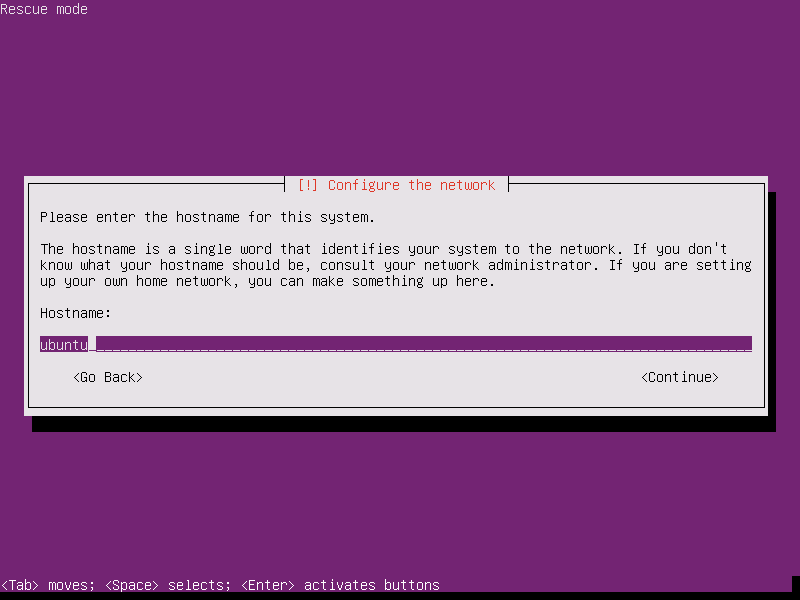
9. After detecting your machine hardware, loading some additional components and configuring the network you will be asked to setup your machine hostname. Because you’re not installing the system, just leave the system hostname as default and press [enter] to continue.
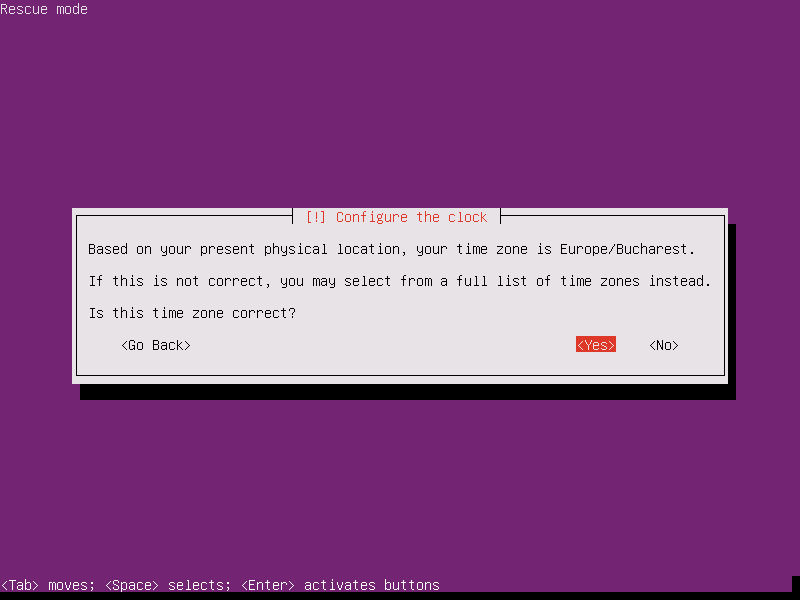
10. Next, based on the supplied physical location the installer image will detect your time zone. This setup will accurately work only if your machine is connected to internet.
However, it’s unimportant if your time zone is not correctly detected, because you are not performing a system installation. Just press Yes to continue further.
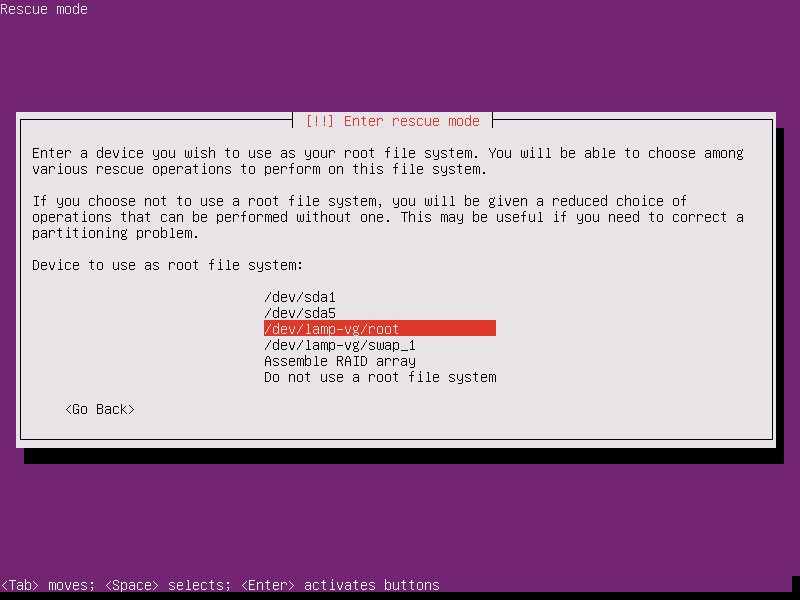
11. On the next screen you’ll be directly transferred into rescue mode. Here, you should choose your machine root file system from the provided list. In case your installed system uses a logical volume manager to delimit partitions, it should be easy to detect your root partition from the list by reviewing volume group names as illustrated in the below screenshot.
Otherwise, in case you’re not sure which partition is used for the /(root) file system, you should try to probe each partition until you detect the root file system. After selecting the root partition press [Enter] key to continue.
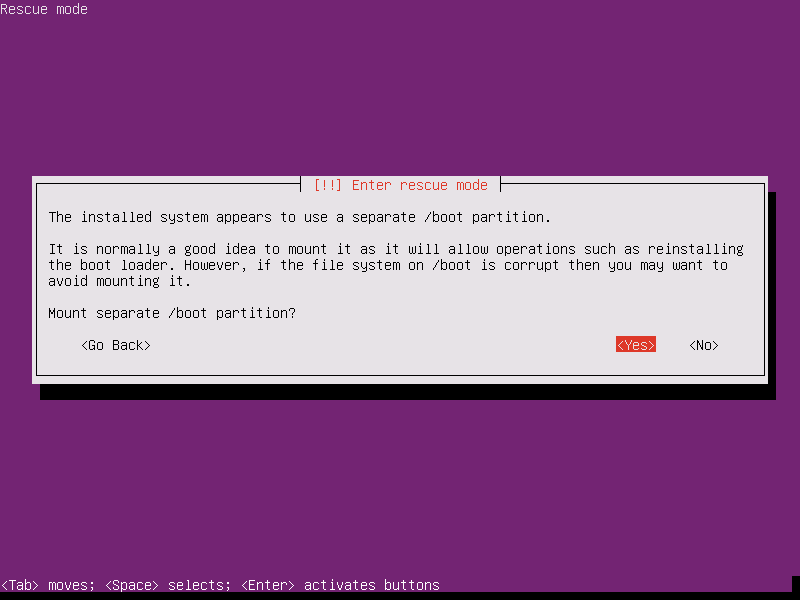
12. In case your system has been installed with a separate /boot partition, the installer will ask you whether you want to mount the separate /boot partition. Select Yes and press [Enter] key to continue.
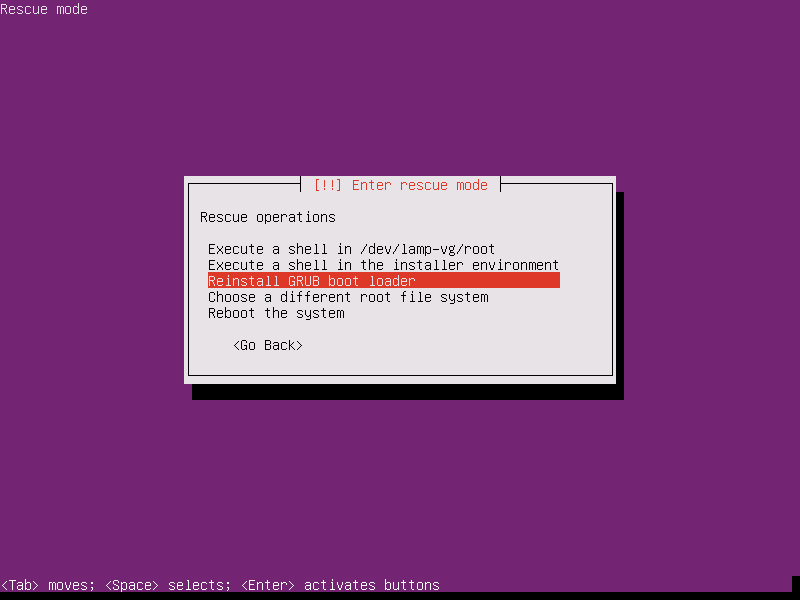
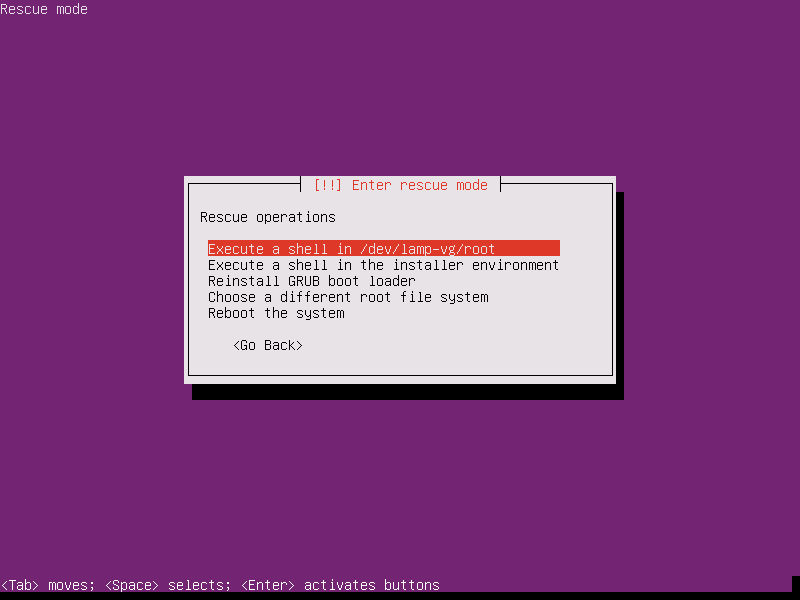
13. Next, you will be provided with Rescue operations menu. Here, select the option to Reinstall the GRUB boot loader and press [enter] key to continue.
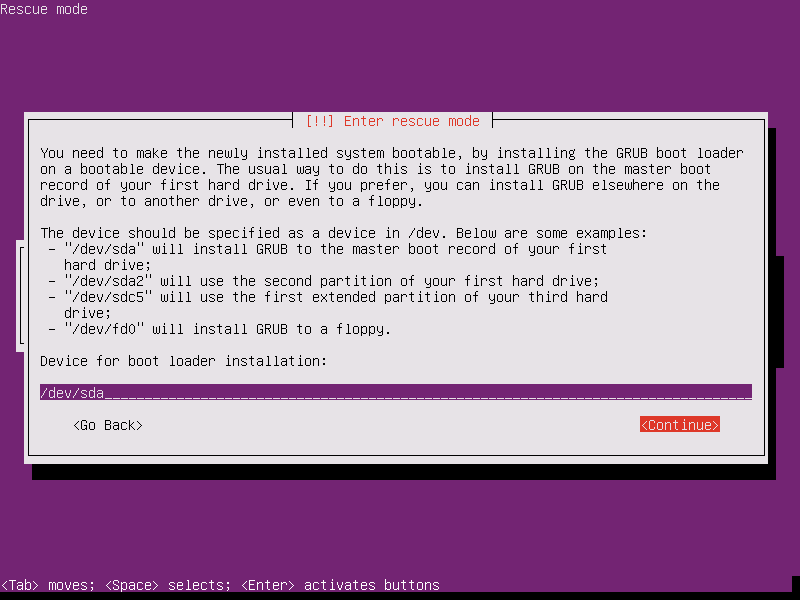
14. On the next screen, type your machine disk device where the GRUB will be installed and press [Enter] to continue, as shown in the below image.
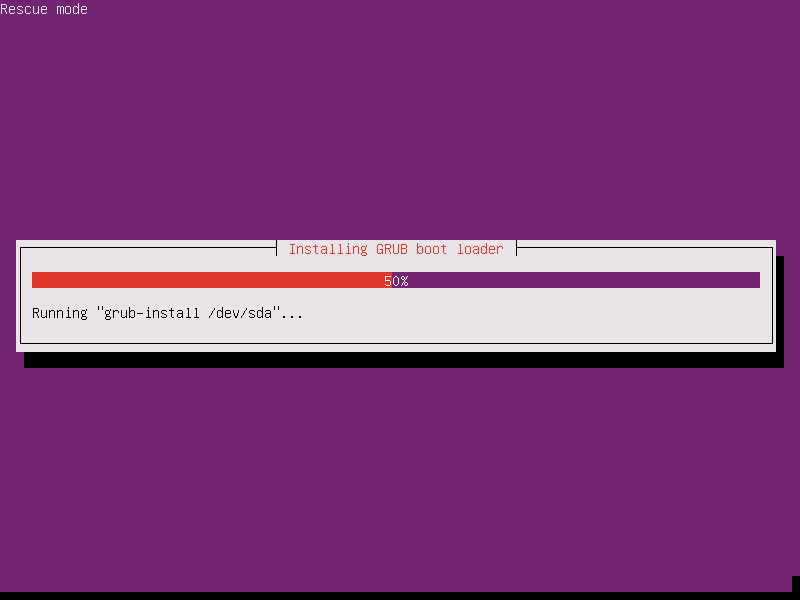
Usually, you should install the boot loader on your first machine hard disk MBR, which is / dev/sda in most cases. The installation process of GRUB will start as soon as you hit the Enter key.
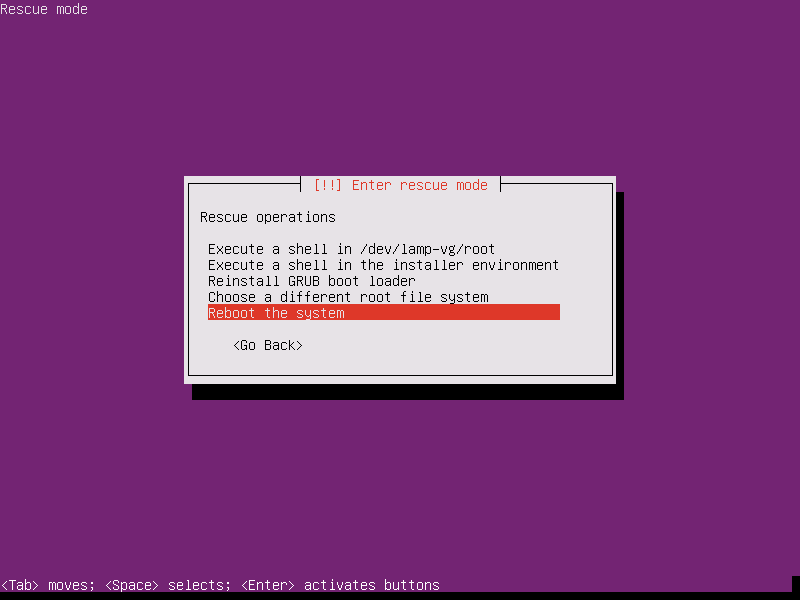
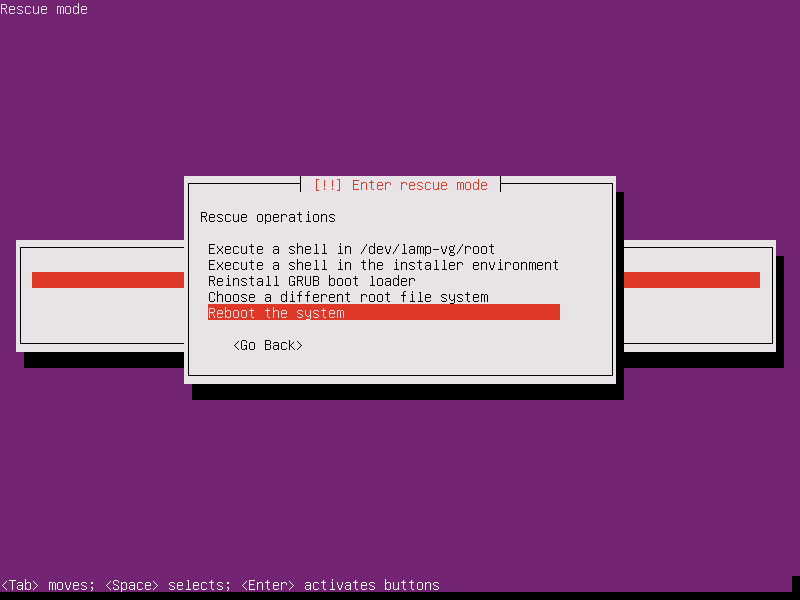
15. After the live system installs the GRUB boot loader you will be directed back to main rescue mode menu. The only thing left now, after you’ve successfully repaired your GRUB, is to reboot the machine as shown in the below images.
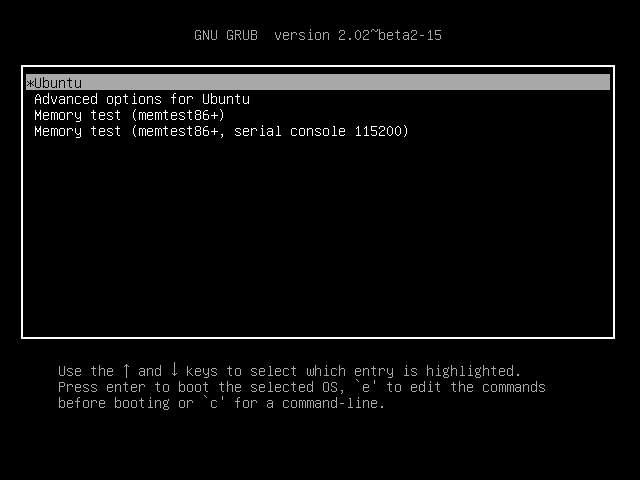
Finally, eject the live bootable media from the appropriate drive, reboot the machine and you should be able to boot into the installed operating system. The first screen to appear should be installed operating system GRUB menu, as illustrated in the below screenshot.
Manually Reinstall Ubuntu Grub Boot Loader
14. However, if you like to manually reinstall the GRUB boot loader from Rescue operations menu, follow all the steps presented in this tutorial until you reach point 13, where you make the following changes: instead of choosing the option to reinstall GRUB boot loader, select the option which says Execute a shell in /dev/(your_chosen_root_partition and press [Enter] key to continue.
15. On the next screen hit Continue by pressing [enter] key in order to open a shell in your root file system partition.

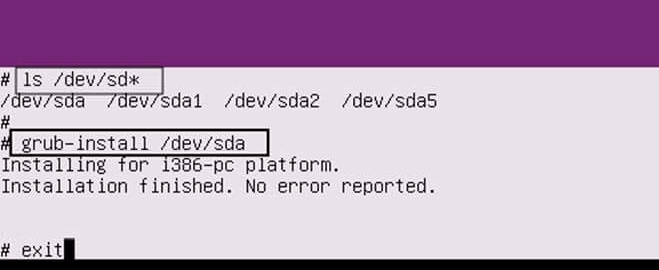
16. After the shell has been opened in the root file system, execute ls command as presented below in order to identify your machine hard disk devices.
After you’ve identified the correct hard disk device (usually the first disk should be /dev/sda ), issue the following command to install the GRUB boot loader on the identified hard disk MBR.
After GRUB has been successfully installed leave the shell prompt by typing exit.
17. After you’ve exited the shell prompt, you will be returned to main rescue mode menu. Here, choose the option to reboot the system, eject the live bootable ISO image and your installed operating system should be booted without any issue.
That’s all! With a minimal effort you’ve successfully rendered your Ubuntu machine the ability to boot the installed operating system.
Восстановление GRUB
GRUB — это основной загрузчик Ubuntu начиная с версии 9.10. Ранее он был известен как GRUB2 и пришёл он на смену старой версии GRUB, известной теперь как GRUB Legacy. Если вам необходимо восстановить GRUB Legacy, например поскольку у Вас стоит версия Ubuntu старше 9.10, то вам необходимо прочитать соответствующую статью.
Несмотря на то, что это фактически две версии одного приложения с названием GRUB, они не имеют ничего общего и являются совершенно разными программами.
На любом загрузочном винчестере есть так называемая Главная загрузочная запись (англ. master boot record, MBR), к которой обращается BIOS при загрузке компьютера. В эту область загрузчик системы и должен записать информацию об основных файлах, которые хранятся уже на разделах винчестера.
Каждый раз при установке или восстановлении систем от Microsoft загрузчики Linux заменяются и их необходимо заново устанавливать.
Восстановление с помощью LiveCD/USB
Первый способ
Запустите систему с LiveCD/USB и откройте терминал. Для этого можно нажать Alt + F2 и ввести команду:
Далее необходимо узнать Вашу таблицу разделов. Используйте команду:
На экран должна быть выведена примерно такая таблица:
/dev/sda3 239616 233392328 233152713 111,2G Microsoft basic data /dev/sda4 233394176 234438655 1044480 510M Windows recovery environment . Disk identifier: 0x7d6fe43d Device Boot Start End Sectors Size Id Type /dev/sdc1 * 2048 29304782 29302735 14G 83 Linux /dev/sdc2 29304832 1953523711 1924218880 917,6G 83 Linux
Из таблицы видим, что Linux (загрузочный /-корень отмечен звёздочкой) стоит, в нашем случае, на разделе /dev/sdc1.
Теперь подключим этот раздел в /mnt следующей командой (следим за пропусками между кодами и порядковыми номерами разделов):
Затем, для записи grub в MBR, вводите следующую команду:
sudo grub-install --root-directory=/mnt /dev/sdc
В случае, если нужно только восстановить MBR диска (например, после переустановки Windows), то этого достаточно, закрываем терминал и перезагружаем.
Если нужно обновить и меню grub (например, после установки Windows), то нужно сделать:
sudo update-grub --output=/mnt/boot/grub/grub.cfg
Восстановление используя chroot
Запустите систему с LiveCD/USB и откройте терминал. Для этого можно нажать Alt + F2 и ввести команду:
Далее необходимо узнать Вашу таблицу разделов. Используйте команду:
На экран должна быть выведена примерно такая таблица:
/dev/sda1 29 8369 66999082+ 83 Linux /dev/sda2 * 8370 13995 45190845 7 HPFS/NTFS /dev/sda3 13996 14593 4803435 5 Extended
Теперь нужно примонтировать Ваш Linux раздел (здесь это sda1) и еще несколько важных директорий:
sudo mount /dev/sda1 /mnt sudo mount --bind /dev /mnt/dev sudo mount --bind /proc /mnt/proc sudo mount --bind /sys /mnt/sys
Если раздел /boot или /var находится отдельно, то Вам необходимо примонтировать их в /mnt/boot и /mnt/var
Теперь перейдем в окружающую среду chroot:
Теперь необходимо установить GRUB, используя команду:
grub-install --recheck /dev/sda
Также в некоторых случаях может помочь вариант:
grub-install --recheck --no-floppy /dev/sda
Если все прошло успешно, выходим из chroot командой:
Теперь необходимо отмонтировать разделы:
sudo umount /mnt/dev sudo umount /mnt/proc sudo umount /mnt/sys sudo umount /mnt
Если Вы монтировали раздел /boot воспользуйтесь командой:
Затем перезагрузим Ваш компьютер командой:
При необходимости Вы можете обновить меню загрузчика командой:
Восстановление в rescue mode
При отсутствии загрузочного диска, можно восстановить Grub из его консоли. Восстановление происходит следующим образом: сначала нужно подгрузить все модули, чтобы стала доступна вся функциональность Grub, а затем уже запуститься с нужного раздела. Как известно, Grub состоит из двух частей. Первая часть записана в MBR диска. Она содержит базовую функциональность, то есть в ней есть консоль в rescue mode и ничего больше. Вначале нужно определить, на каком разделе находится вторая часть груба (она лежит в каталоге /boot/grub), подгрузить недостающие модули. И только потом можно будет дать команду запуска с нужного раздела. В rescue mode доступно всего четыре команды:
Вначале следует дать команду:
В ответ она выведет, например, следующее:
(hd0) (hd0,msdos3) (hd0,msdos2) (hd0,msdos1) (hd1) (hd1,msdos2) (hd1,msdos1)
Иногда Grub может неправильно опеределить, какие файловые системы находятся на разделах дисков. В данном случае определяет их как msdos. Нам нужно постараться угадать, какие диски мы видим. В данном случае видно два диска. Диск с индексом 0 содержит три раздела, диск с индексом 1 содержит два раздела. Зная структуру своих дисков несложно определить нужный диск.
Grub называет разделы в обратном порядке. И становится непонятно, что имеется в виду под (hd0,msdos3) — первый раздел или третий? Тут можно выкрутиться, использовав синтаксис (hd0,1). Нужно помнить, что в Grub счет дисков начинается с 0, а счет разделов — с 1. Предположим, что Линукс установлен на первый диск в первый раздел, то есть (hd0,1). Даем команду:
set prefix=(hd0,1)/boot/grub set root=(hd0,1)
Этими командами мы указываем использовать диск (hd0,1) для дальнейших команд. После чего нужно проверить, действительно ли на этом разделе есть то, что нам нужно. Даем команду:
если в ответ получаем список всех файлов в этой директории, то диск и раздел выбраны правильно. Подгружаем модули:
insmod ext2 insmod normal normal
set prefix=(hd0,1)/@/boot/grub set root=(hd0,1)
insmod btrfs insmod normal
После чего Grub перейдёт в полнофункциональный режим. Он автоматически найдет все операционки, которые можно подгружать, и покажет своё Grub-меню.
Дальнейшее восстановление сводится к тому, чтобы загрузить нужный нам Linux, и в нем от рута дать команду:
Где sdX, диск, на который нужно установить Grub.