- How to install the MPEG-4 AAC decoder and the H.264 decoder in Ubuntu?
- Problem:
- Solution:
- Step-by-step instructions:
- Conclusion:
- How to Install h.264 decoder on Ubuntu Linux
- Getting h264 decoder in Ubuntu Linux
- Method 1: Install only the required codec (not recommended)
- Method 2: Install all multimedia codecs (recommended)
- Method 3: Install a better video player (recommended)
- Did it work for you?
How to install the MPEG-4 AAC decoder and the H.264 decoder in Ubuntu?
A digital audio encoding format called MPEG-4 Advanced Audio Coding (AAC) is used to compress audio files while preserving their high audio quality. It is a widely used audio compression format that adheres to the ISO/IEC MPEG-4 standard and is specified for use in a variety of audio and video applications, such as mobile devices, digital television, and internet streaming.
AAC is a lossy audio format, which means that in order to reduce the file size, some of the original audio data is lost during the encoding process. However, the quantity of data lost may be managed, and the audio quality that results, especially at higher bitrates, can be excellent.
Digital television, online streaming, and video conferencing are just a few of the applications that use the H.264 video encoding standard. It uses a lossy compression method, which means that some of the original video data are lost during encoding in order to reduce the file size.
Problem:
When we newly install the Ubuntu operating system, we can immediately take advantage of its many features, such as its easy-to-use user interface and access to thousands of applications. However, you may encounter a problem in which video or multimedia is not playable. If you install the VLC media player but still you will get the problem because of the absence of the MPEG-4 AAC decoder and H.264 decoder.

Solution:
To solve this issue, you must install two packages, namely libavcodec-extra and ubuntu-restricted-extras. Alternatively, you can install it from the Ubuntu software center. Installing these packages will add the necessary libraries and allow you to play various video formats. With libavcodec-extra and ubuntu-restricted-extras installed, VLC should be able to play any media format it encounters. The process of installing the packages is fairly straightforward.
(1)(1).jpg)
Step-by-step instructions:
Step 1: Open the Terminal on your ubuntu system

Step 2: Next, run the following Command:
sudo apt-get install ubuntu-restricted-extras
The Ubuntu Linux operating system comes with a set of software called Ubuntu Restricted Extras. It includes a selection of well-known programs and media codecs that, for reasons of legal or technological propriety, are not present in the standard Ubuntu installation.
Software like the Adobe Flash Player plugin, Microsoft TrueType fonts, and numerous media codecs like MP3 and H.264 are all part of the package. Due to licensing concerns, some codecs which are necessary to play specific types of audio and video files are not part of the standard Ubuntu installation.

Step 3: Enter the password and hit enter for authentication

Step 4: Try another command
sudo apt-get install libavcodec54 libav-tools ffmpeg
libavcodec54, libav-tools, and ffmpeg are all software libraries and tools that are used for working with audio and video data. They are open-source projects that provide a variety of functions for encoding, decoding, transcoding, and manipulating audio and video streams. libavcodec54 is a library of audio and video codecs that is part of the libav project. It includes a wide range of codecs for encoding and decoding various audio and video formats, such as H.264, MP3, and many others. libav-tools is a package of command-line tools that are part of the libav project. It includes a variety of tools for working with audio and video data, such as avconv, which is a command-line tool for transcoding audio and video streams. ffmpeg is also a command-line tool for working with audio and video data. It is a separate project from libav, but it includes many of the same codecs and features. ffmpeg is widely used for a variety of tasks, such as converting audio and video files from one format to another, creating video from still images, and much more.
Conclusion:
In summary, these tools and libraries are useful for working with audio and video data and are often used for tasks such as transcoding, converting, and manipulating audio and video files. By installing the proper audio and video codecs, we are able to access multimedia content on our computers.
How to Install h.264 decoder on Ubuntu Linux
When you start using a fresh installed Ubuntu system and try to open an MP4 file to play videos, it may show you an error that reads:
H.264 (High Profile) decoder is required to play the file, but is not installed.
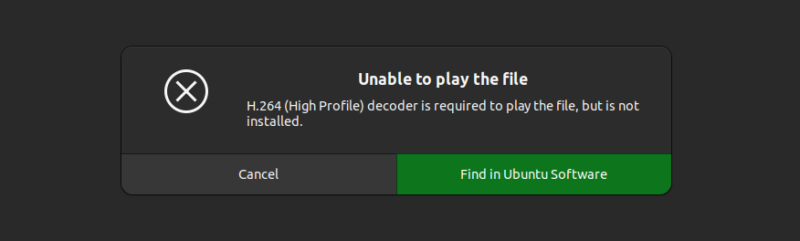
You can perhaps guess what’s going on here. Your system doesn’t have the required media codecs installed and hence the video player cannot play that video file.
So, what’s the solution here? You install the required codec. But how?
I’ll discuss three ways about fixing this issue:
- Install just the required codec: It could work for the given file but some other video files will still complain about missing codecs.
- Install a wide variety of multimedia codecs at once: It installs codecs as well as some other packages that you might not need like Microsoft Fonts.
- Install a different video player: Applications like VLC and MPV have better support for codecs by default. You don’t need to install them separately for most common video files.
If you take my advice, I suggest going for the second as well as the third method. Why? You’ll see in a moment.
Getting h264 decoder in Ubuntu Linux
I am using Ubuntu Linux here. The first and the third methods should work for other distributions but not the second one as the package mentioned is (usually) exclusive to Ubuntu.
Method 1: Install only the required codec (not recommended)
When you see the error, it gives you the option to “Find in Ubuntu Software”. Clicking on that option opens the Software Center and it may (or may not) show some packages that will install the h264 decoder on your system.
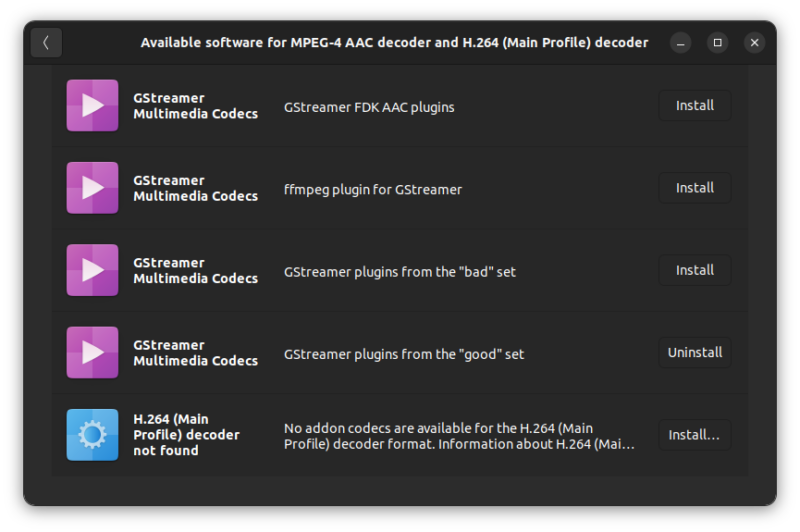
The package names may sound similar but you need the GStreamer Multimedia Codecs from the “bad” set. Check the description of the packages.
Alternatively, you can install the package in the terminal using this command:
sudo apt install gstreamer1.0-plugins-badIf you are new to the terminal, please note that it will ask for your account password. Nothing is displayed on the screen while you type the password. That’s the Linux way. You type the password blindly and press enter.
Once this package is installed, open the file again and see if it works now.
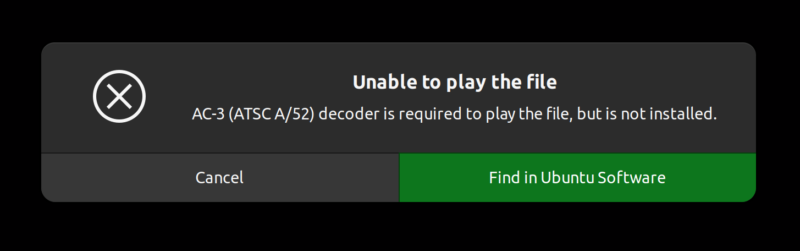
It may work for you but the story doesn’t end here. You may have other video files that require some other h264 decoder or some other decoder.
You can try and install more decoders like this:
sudo apt install libavcodec-extra gstreamer1.0-plugins-ugly gstreamer1.0-libavHowever, there is a much more convenient way of installing media codecs in Ubuntu and I’ll show it to you in the next section.
Method 2: Install all multimedia codecs (recommended)
Ubuntu provides a meta-package named ubuntu-restricted-extras that consists of most of the common audio and video codecs along with some other packages like the Microsoft fonts.
Install this package and you won’t have to worry about the media codecs anymore.
Open the terminal in Ubuntu and type the following command:
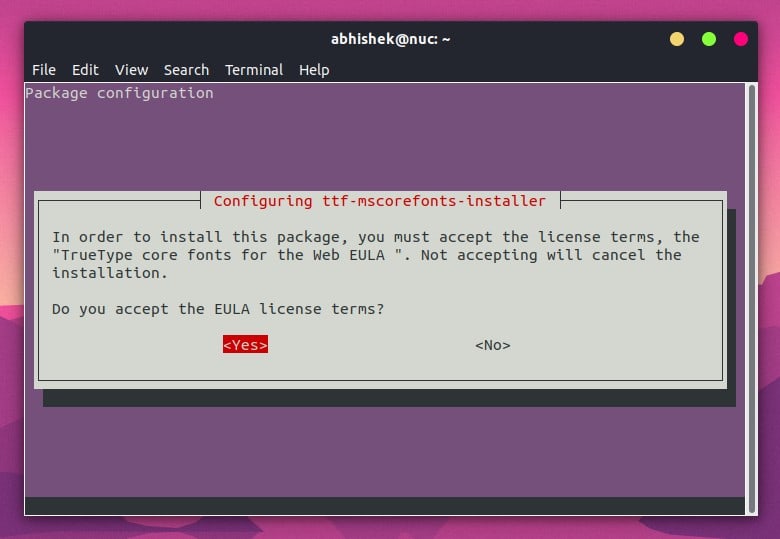
sudo apt install ubuntu-restricted-extrasSince this meta-package contains software from Microsoft, you’ll have to accept the End User License Agreement (EULA).
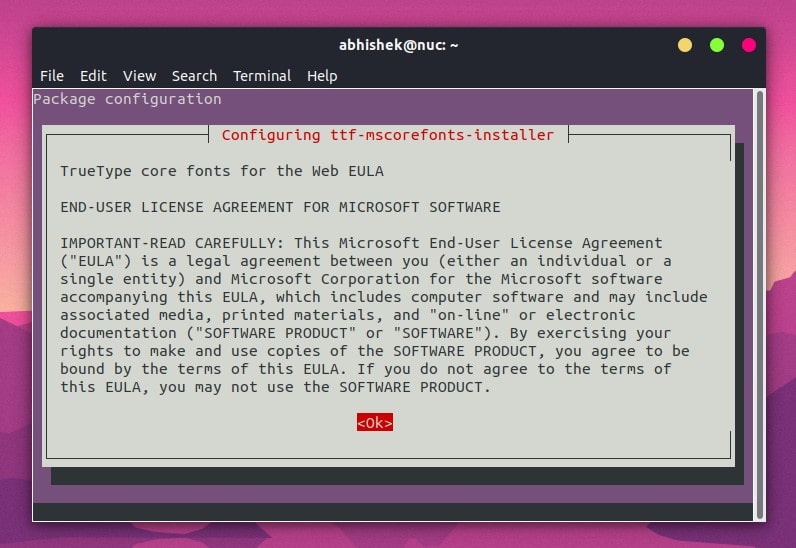
The next screen may look like the one below. Just press tab and it will highlight the options. When the correct options are highlighted, press enter to confirm your selection.
With the multimedia codecs installed, you should be able to play (almost) all kinds of media files. Your music player can play MP3 files and your video player should be able to play MP4, MKV, and whatnot.
However, this too is not the end of the story, at least for some people.
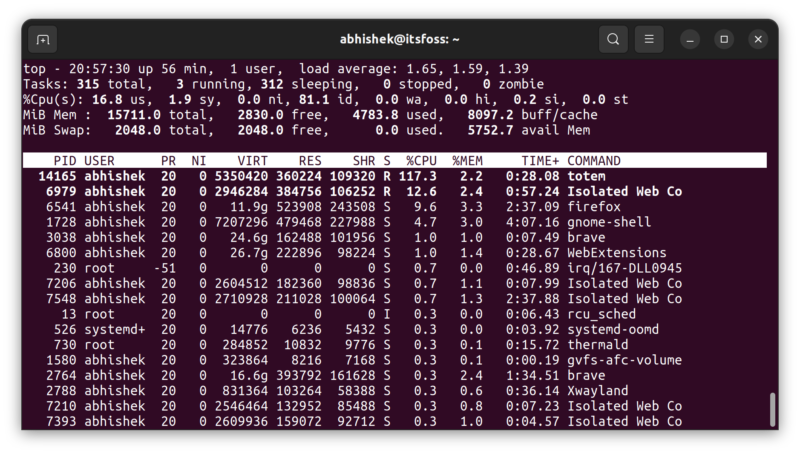
Why do I say that? Because I have noticed that the default video player in Ubuntu, Totem, often struggles while playing certain kinds of video files. You’ll notice that suddenly your system heats up, the fans start blowing and your mouse cursor stop functioning smoothly.
Why? Because Totem is struggling in decoding the video and taking too much processing power.
You can test it by running the top command while playing the video. Look for the process named totem (that’s the name of the default video player).
What can you do now? Your trouble seems to be never ending. Fret not. There are better video players in Linux and they will help you solve the issue.
Method 3: Install a better video player (recommended)
There are many good video players in Linux. I find them better than the default Totem video player.
Personally, I prefer two of the lot: VLC and MPV.
VLC is a versatile and hugely popular video player. Chances are that you have already used VLC.
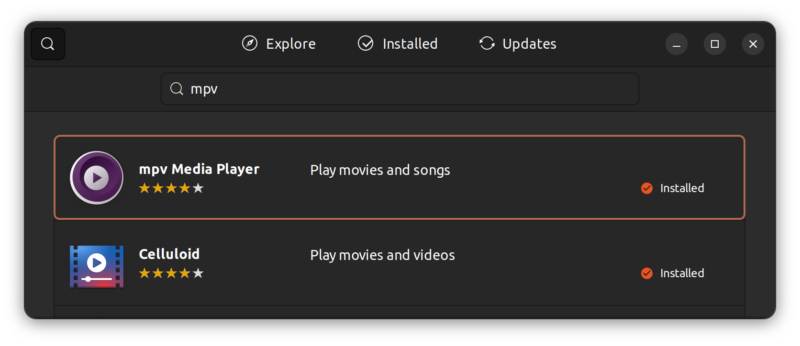
MPV Media Player is not that popular but this lightweight application is quite good for playing video files.
Both VLC and MPV players are good at handling media codecs. You don’t even need to install media codecs separately with them. Just install VLC or MPV and you should be able to play various kinds of video files.
Either look for it in the software center:
Or install MPV on Ubuntu using the command line:
Now that you have another video player, you should right click on the video files and choose to open with the new video player.
Alternatively, you can make it the default application for playing video files and use double clicks.
Did it work for you?
I hope I didn’t go into too much detail here. I wanted to explain the various methods and the pros and cons associated with each of them.
Did you manage to get rid of the h264 decoder problem in Ubuntu? Which method did you go for?