- How to Set Up LogMeIn (Hamachi) VPN on Linux
- Step 1: Install Required Packages
- Step 2: Download LogMeIn and Install
- On RHEL-based Systems
- On Debian-based Systems
- Step 3: Set Up LogMeIn Network
- Step 4: Join LogMeIn Existing Network
- Step 5: Check Hamachi Status and Details
- Conclusion
- How to Install and Configure Hamachi on Linux
- Installing Hamachi on Linux
- Using Hamachi on Linux
- Conclusion
- About the author
- Aaliyan Javaid
- Установка Hamachi в Ubuntu
- Установка Hamachi в Ubuntu
- Настройка программы
- Установка Hamachi в Кали-linux
- 1 ответ
- Ваш ответ
- Опубликуйте как Гость или авторизуйтесь
- Похожие вопросы про тегам:
How to Set Up LogMeIn (Hamachi) VPN on Linux
Hamachi is used or set up VPN and connect systems over a VPN network. This provides a quick and easier way to create a VPN network and attach a system. You can create a free account on logmein.com and create networks. You can add up to 5 systems in each network with a free account. To add more than 5 systems is required to upgrade the network to the paid version.
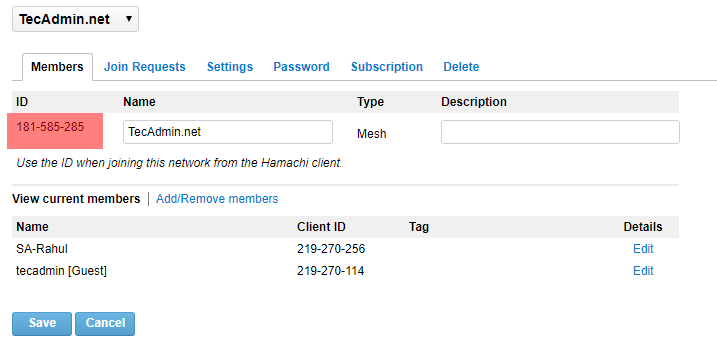
For this tutorial, I have already created a hamachi network from its web interface and get a network id and connected a windows system with this network. This tutorial will help you set up the LogMeIn VPN network and add Linux machines to this network. Also, attach a Windows system to communicate with each host over VPN.
- Network ID: 181-585-285
Windows Client IP: 25.70.100.134
Linux Client IP: Will get after Install
Step 1: Install Required Packages
For installing hamachi on CentOS, and RedHat systems, you must have installed the redhat-lsb package. If you don’t already install it use the following command.
sudo yum install redhat-lsb Step 2: Download LogMeIn and Install
Visit LogMeIn official download webpage to download the latest LogMeIn-hamachi packages for your Ubuntu, Debian, Redhat, Fedora, Rocky Linux, Alma Linux or Windows systems. You may also use the below commands to install the LogMeIn hamachi client on your system.
On RHEL-based Systems
The RPM packages can be installed on RHEL/CentOS 7.2 and newer versions.
wget https://vpn.net/installers/logmein-hamachi-2.1.0.203-1.x86_64.rpmsudo rpm -ivh logmein-hamachi-2.1.0.203-1.x86_64.rpm
On Debian-based Systems
The DEB packages can be installed on Ubuntu 16.04 LTS and newer versions.
wget https://vpn.net/installers/logmein-hamachi_2.1.0.203-1_amd64.debsudo dpkg -i logmein-hamachi_2.1.0.203-1_amd64.deb
Once you have successfully installed the package, you need to start the Hamachi service using the following command.
sudo service logmein-hamachi start Step 3: Set Up LogMeIn Network
You can also create the network using the command line. But I prefer to log in to the LogMeIn hamachi dashboard and create a Network under Networks >> My Networks section. For security, purpose assigns a password for your network. On creation of the network, you will get a network id. Use this network id and password to attach remote systems to this network.
Step 4: Join LogMeIn Existing Network
After installing hamachi, let’s join the existing network. But it required being logged in first. There is no need for any login credentials for it, just use the following command.
hamachi login Logging in . okNow use the command to join the network.
hamachi join 181-585-285 Password: Joining 181-585-285 .. okReplace 181-585-285 with your LogMeIn network id.
Now you have successfully joined the existing network.
Step 5: Check Hamachi Status and Details
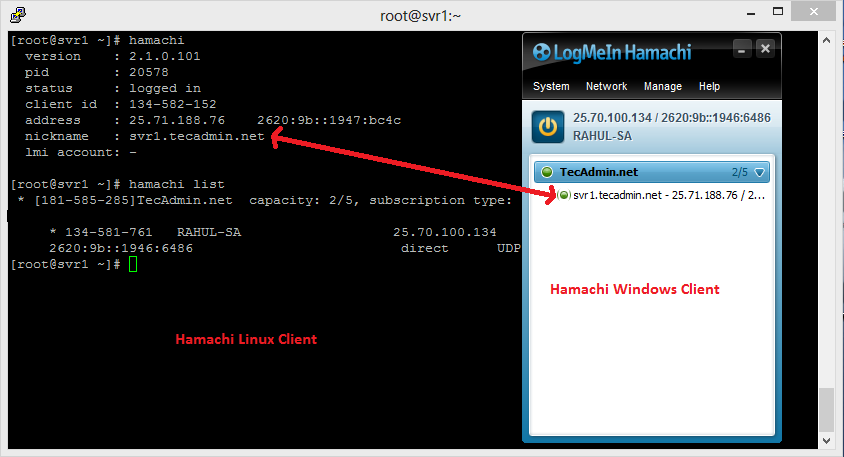
To check the IP address, hamachi client id, and other details about your system just type the command ‘ hamachi ‘ and press enter.
Outputversion : 2.1.0.174 pid : 20578 status : logged in client id : 219-270-114 address : 25.71.188.76 2620:9b::1947:bc4c nickname : svr1.tecadmin.net lmi account: -
To check the current joined to the network and other details about that network just use the following command
Let’s try to ping to windows client.
OutputPING 25.70.100.134 (25.70.100.134) 56(84) bytes of data. 64 bytes from 25.70.100.134: icmp_seq=1 ttl=128 time=1.88 ms 64 bytes from 25.70.100.134: icmp_seq=2 ttl=128 time=2.15 ms 64 bytes from 25.70.100.134: icmp_seq=3 ttl=128 time=1.56 ms 64 bytes from 25.70.100.134: icmp_seq=4 ttl=128 time=1.63 ms --- 25.70.100.134 ping statistics --- 4 packets transmitted, 4 received, 0% packet loss, time 3010ms rtt min/avg/max/mdev = 1.563/1.806/2.150/0.237 ms
The above output showing that system is successfully communicating with the windows clients using the hamachi network.
Conclusion
Congratulations! You have successfully installed and configured LogMeIn Hamachi on your Linux system. Your systems are now connected over a VPN network. The Hamachi provides you hassle free VPN network, without any configuration. You just need to install Hamachi client and connect to the VPN network.
How to Install and Configure Hamachi on Linux
![]()
Looking for an easy-to-use virtual private network over the LAN connection then certainly Hamachi is one of best options one can get. Though officially this VPN does not come with GUI for Linux, users use the command line interface to configure and operate the application. So, if you’re interested in installing the Hamachi on your Linux system then this guide is for you.
Installing Hamachi on Linux
Hamachi is a virtual private network provider that is free for up to 5 users and can also be used to extend a LAN network. Not only that it is also a best fit for the gamers to create servers as it does not require port forwarding so below are some steps one need to follow to install Hamachi on Linux:
Step1: Before beginning the process of installation first update the packages list of your Linux system using:

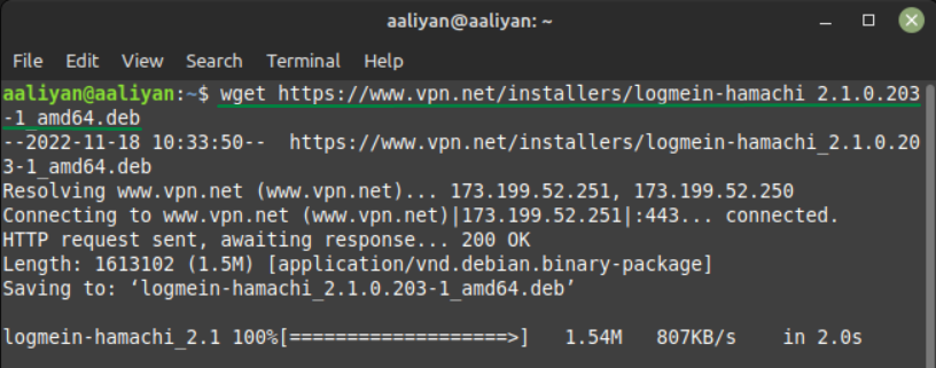
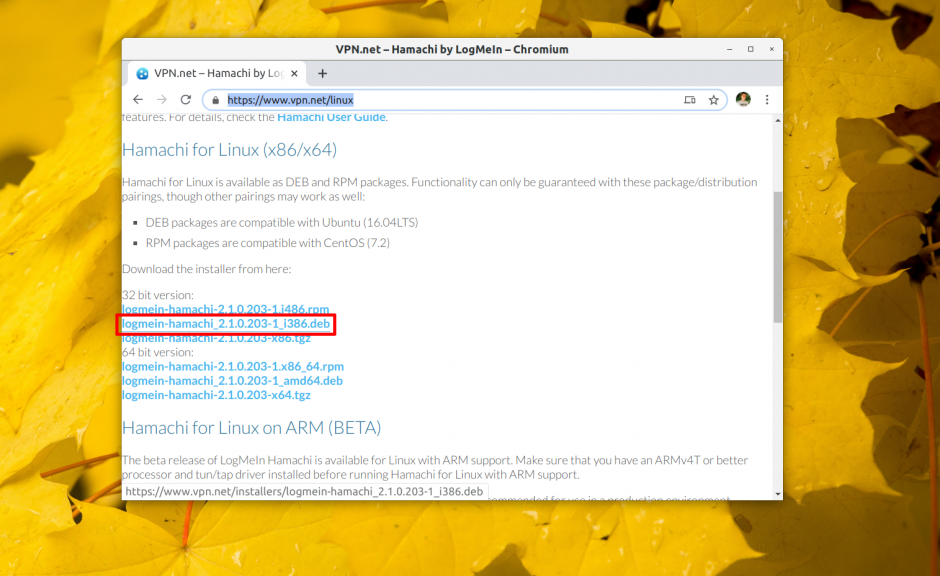
Step2: Next download the Hamachi .deb file by getting the download link or by directly downloading it from official site:
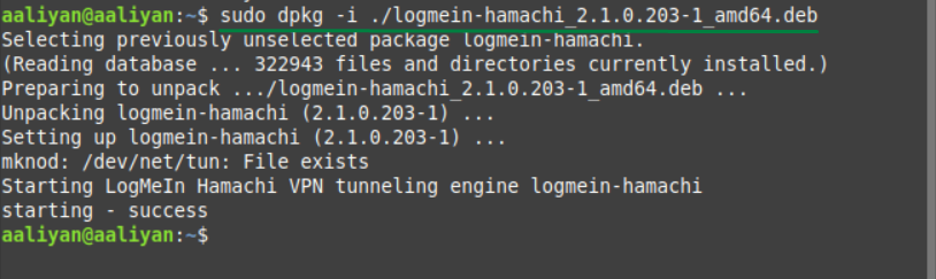
Step 3: Now install Hamachi application using dpkg application using:
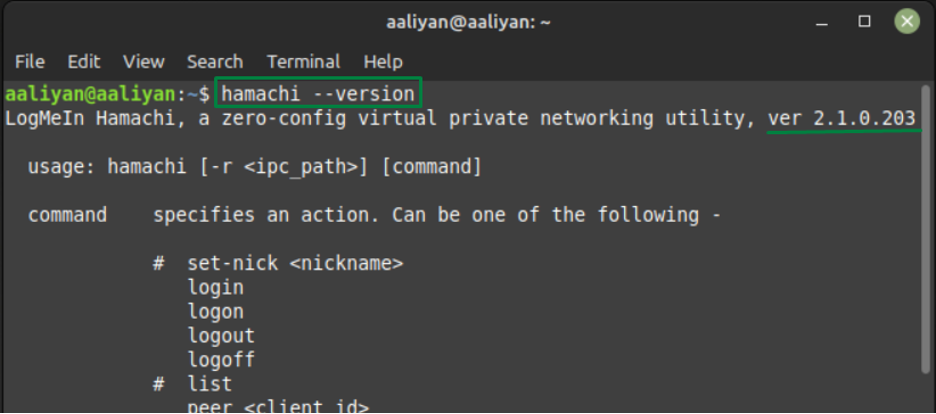
Step 4: Just to be sure that if the application is installed successfully check the version of Hamachi using:
So, this is how one can install Hamachi on Linux so now let’s move towards configuring the application
Using Hamachi on Linux
To begin will using this virtual private network provider one needs to go through the steps mentioned below one by one:
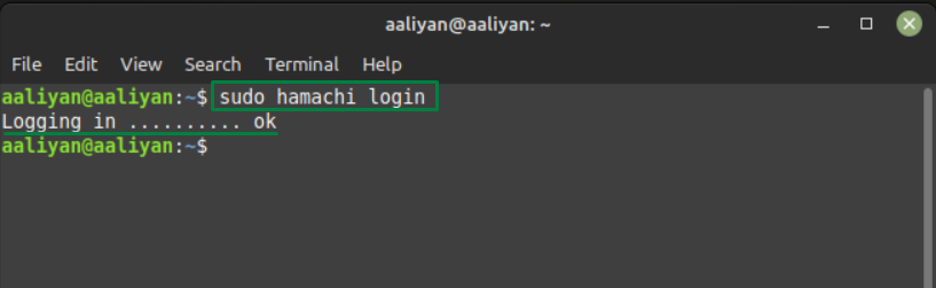
Step 1: First login to the Hamachi using:
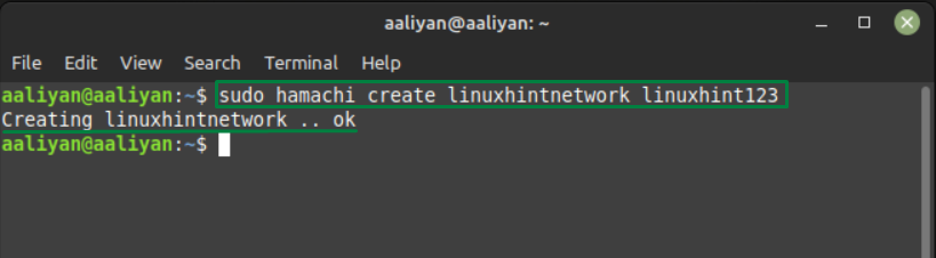
Step 2: Now it’s time to create a network and for that follow the syntax given below:
For further illustration, an example that is done for you:
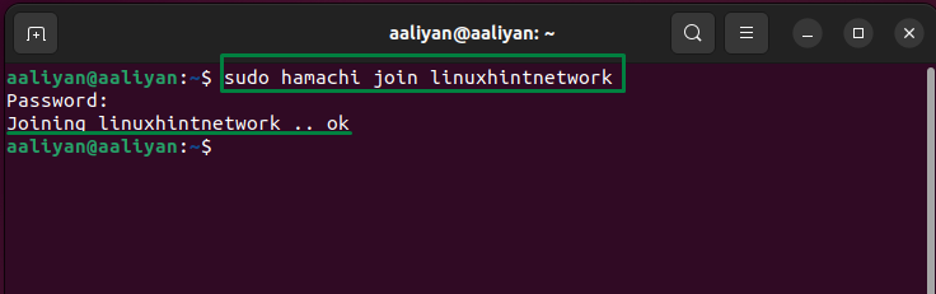
Step 3: Now you or other users can join network with the network ID and the password for the created network, using the following syntax:
For example, if you want to join the network as Linux user (Ubuntu) then:
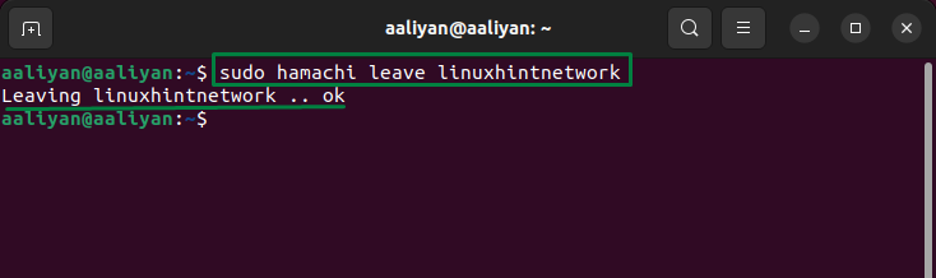
Step 4: Next, if any user wants to leave the network, then use the given syntax:
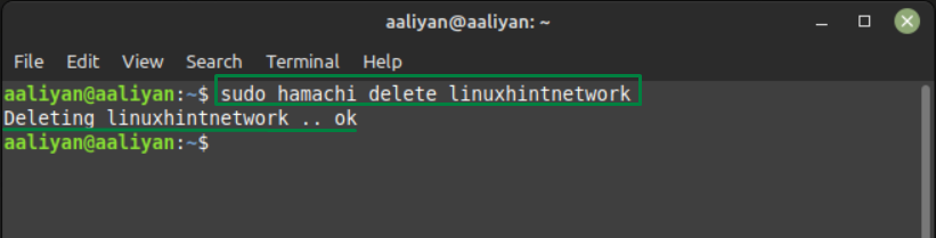
Step 5: Now if you want to delete the network then use the following syntax:
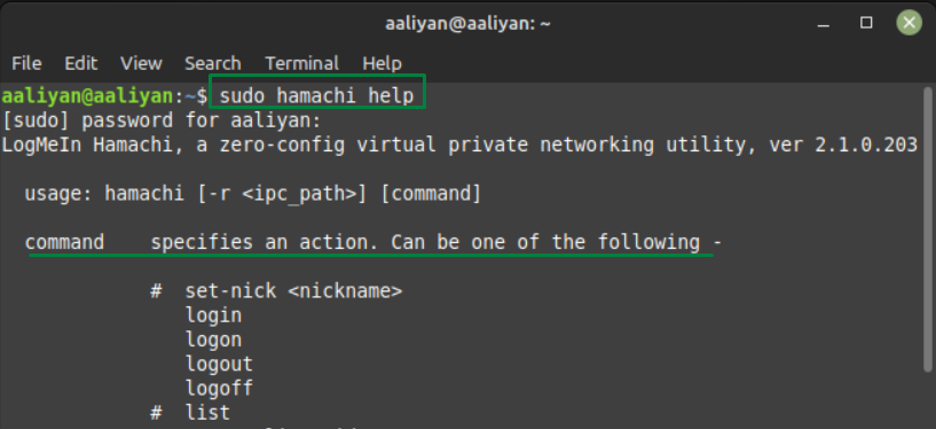
Further if you need more information about different commands used for Hamachi then execute:
Conclusion
Hamachi is one of the most secure virtual private network providers that is quite easy to operate and use. For the Linux system just download it from its official website and afterwards install it using the dpkg package manager.
About the author
Aaliyan Javaid
I am an electrical engineer and a technical blogger. My keen interest in embedded systems has led me to write and share my knowledge about them.
Установка Hamachi в Ubuntu
Наверное все слышали о популярной программе для создания VPN сетей под Windows Hamachi. Программа зарекомендовала себя среди геймеров как позволяющая играть множество игр через интернет как по локальной сети.
Но возможности в этой программы намного шире, поскольку она создает виртуальную локальную сеть между несколькими компьютерами в интернет, с ее помощью можно настроить SSH, VNC, NFC или другой доступ к компьютеру через интернет даже в обход NAT. Есть у Hamachi и версия для Linux, правда она только консольная но работать можно.
Установка Hamachi в Ubuntu
Зайдите на официальный сайт утилиты Hamachi и загрузите последнюю версию. Для Ubuntu вам понадобится deb пакет:
Для установки полученного пакета можно использовать команду dpkg:
sudo dpkg -i ~/Загрузки/logmein-hamachi_2.1.0.203-1_i386.deb
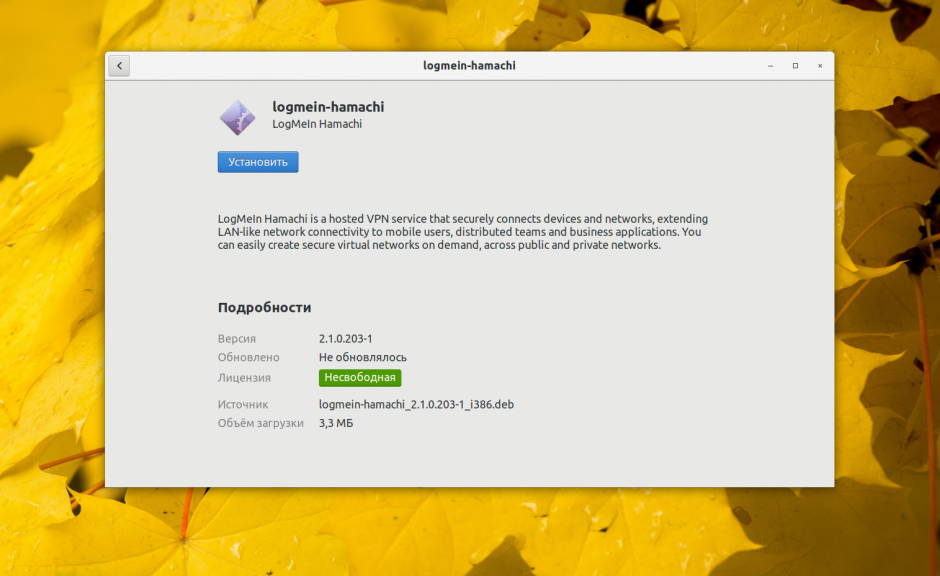
Или центр приложений Ubuntu. Для этого просто откройте deb пакет двойным кликом в файловом менеджере и нажмите Установить:
Все утилита Hamachi установлена.
Настройка программы
Для запуска сервиса наберите в терминале:
sudo systemctl start logmein-hamachi
Так как программа консольная управлять всеми ее функциями придется с помощью консольной утилиты и конфигурационных файлов. Список доступных команд можно посмотреть выполнив:
Вот небольшой список опций утилиты:
- set-nick — установить ваш никнейм;
- login — автоматизироваться и подключиться к настроенным сетям;
- logout — выйти из всех сетей;
- list — список настроенных сетей;
- create [] — создать новую сеть;
- set-pass [] — установить пароль сети;
- set-access [lock|unlock] [manual|auto] — установить режим подключения новых пользователей [запрещено/разрешено][вручную/автоматически];
- delete — удалить сеть;
- reject — удалить пользователя;
- join [] — войти в сеть;
- leave — покинуть сеть;
- go-online — установить статус онлайн в сети;
- go-offline — установить статус оффлайн в сети;
- attach — подключить аккаунт Logmein к программе.
Настройки Hamachi можно изменить редактированием файлов в папке /var/lib/logmein-hamachi. Здесь hamachi-engine.cfg — текущие настройки программы, в этом файле их изменять бессмысленно, так как он всего лишь отображает текущее значение параметров. Чтобы что либо изменить создайте файл h2-engine-override.cfg и в нем уже укажите нужное значение. Вот некоторые интересные настройки:
- Sock.TcpPort — tcp порт программы;
- Sock.UdpPort — udp порт программы;
- Login.OnLaunch, Core.AutoLogin — установите 1 чтобы программа автоматически авторизовалась и подключалась ко всем настроенным сетям при старте сервиса.
И напоследок чтобы добавить сервис в автозагрузку наберите:
sudo systemctl enable logmein-hamachi
Вот и все, теперь установка Hamachi в Ubuntu не вызовет у вас проблем.
Обнаружили ошибку в тексте? Сообщите мне об этом. Выделите текст с ошибкой и нажмите Ctrl+Enter.
Установка Hamachi в Кали-linux
Как установить Hamachi в Кали-linux? Я не могу найти учебник в сети. Используя чиновника .пакет deb выдает ошибку.


03.01.2023 20:37 2692

1 ответ
- на Hamachi веб-страница
- прокрутите вниз, чтобы LogMeIn Hamachi для Linux (бета) версия командной строки
- нажать на кнопку узнать больше
- нажмите на файл debian .расширением deb для вашей архитектуры
- использование:


Постоянная ссылка на данную страницу: [ Скопировать ссылку | Сгенерировать QR-код ]
Ваш ответ


Опубликуйте как Гость или авторизуйтесь
Похожие вопросы про тегам:
- 7 Какое максимальное количество разделов можно создать на жестком диске?
- 3 Таблица прилипает к верхней части страницы, как ее удалить?
- 6 При двусторонней печати как исправить, что задняя страница печатается вверх ногами?
- 4 Как превратить оглавление в простой форматированный текст?
- 5 Что значит 1Rx8 и 2Rx8 для оперативной памяти и совместимы ли они?
- 10 Копирование и вставка в Windows PowerShell
- 13 Сочетание клавиш для сворачивания удаленного рабочего стола
- 1 Как включить фон рабочего стола на удаленном компьютере?
- 5 Как сделать ярлык на рабочем столе доступным для всех пользователей в Windows 10
- 1 Зачем Windows 10 нужна служба очереди сообщений и почему она установлена по умолчанию?
 Наушники Wireless и True Wireless: чем они отличаются?
- Не включается iPad: причины и решения проблемы
- Как ускорить передачу данных по Bluetooth
- Как правильно приобрести подержанный iPhone?
- Каковы преимущества фотоэлектрической системы?
- 5 лучших USB–пылесосов для клавиатуры
- Как выбрать чехол-аккумулятор для смартфона
- Мобильный телефон Razr: новая складная раскладушка от Motorola стоит 1200 евро
- Компания Nothing: смартфон Phone 2 должен быть «более премиальным» и выйти в этом году
- UMTS — История технологии сотовой связи
- Выбор домена
- 3D-печать: будущее массового производства
- Искусственный интеллект в малом бизнесе: как улучшить эффективность и конкурентоспособность
- Ошибки, которых стоит избегать при продвижении сайта
- Высокие технологии в Windows: что это такое и как их использовать в своих приложениях
- Кредитный онлайн калькулятор: надежный помощник в финансовом планировании
- Кредитные карты банков
 Наушники Wireless и True Wireless: чем они отличаются?
| Apple | $173,24 | +0,81% |  |
| Amazon | $114,49 | -1,94% |  |
| Microsoft | $325,19 | +3,61% | |
| $123,44 | +2,11% | | |
| Netflix | $364,74 | -0,03% | |
| Intel | $27,45 | -5,34% | |
| $254,49 | +2,11% | | |
| Tesla | $185,54 | +1,44% | |
| Tencent | $322,40 | -3,01% | |

Надеюсь, что в конце своих дней, когда я предстану перед Богом, у меня не останется ни капли таланта, чтобы я могла сказать ему: Я использовала все, что ты дал мне.