- Samba as a file server
- Install Samba
- Configure Samba as a file server
- Create the directory
- Enable the new configuration
- Further reading
- How to create a personal file server with SSH on Linux
- Set up SSHD on the remote system
- Do you have an account?
- Optional: Share your SSH public key
- Make a file manager shortcut
- Make the initial connection
- Create a shortcut so you can easily connect to the server later
- That’s it!
- Tools for SSH key management
- How to use Ansible to set up a Git server over SSH
- Learn advanced SSH commands with this cheat sheet
Samba as a file server
One of the most common ways to network Ubuntu and Windows computers is to configure Samba as a file server. It can be set up to share files with Windows clients, as we’ll see in this section.
The server will be configured to share files with any client on the network without prompting for a password. If your environment requires stricter Access Controls see Share Access Control.
Install Samba
The first step is to install the samba package. From a terminal prompt enter:
That’s all there is to it; you are now ready to configure Samba to share files.
Configure Samba as a file server
The main Samba configuration file is located in /etc/samba/smb.conf . The default configuration file contains a significant number of comments, which document various configuration directives.
Note:
Not all available options are included in the default configuration file. See the smb.conf man page or the Samba HOWTO Collection for more details.
First, edit the workgroup parameter in the [global] section of /etc/samba/smb.conf and change it to better match your environment:
Create a new section at the bottom of the file, or uncomment one of the examples, for the directory you want to share:
[share] comment = Ubuntu File Server Share path = /srv/samba/share browsable = yes guest ok = yes read only = no create mask = 0755 - comment
A short description of the share. Adjust to fit your needs. - path
The path to the directory you want to share.
Note:
This example uses /srv/samba/sharename because, according to the Filesystem Hierarchy Standard (FHS), /srv is where site-specific data should be served. Technically, Samba shares can be placed anywhere on the filesystem as long as the permissions are correct, but adhering to standards is recommended.
Create the directory
Now that Samba is configured, the directory needs to be created and the permissions changed. From a terminal, run the following commands:
sudo mkdir -p /srv/samba/share sudo chown nobody:nogroup /srv/samba/share/ The -p switch tells mkdir to create the entire directory tree if it doesn’t already exist.
Enable the new configuration
Finally, restart the Samba services to enable the new configuration by running the following command:
sudo systemctl restart smbd.service nmbd.service Warning:
Once again, the above configuration gives full access to any client on the local network. For a more secure configuration see Share Access Control.
From a Windows client you should now be able to browse to the Ubuntu file server and see the shared directory. If your client doesn’t show your share automatically, try to access your server by its IP address, e.g. \\192.168.1.1 , in a Windows Explorer window. To check that everything is working try creating a directory from Windows.
To create additional shares simply create new [sharename] sections in /etc/samba/smb.conf , and restart Samba. Just make sure that the directory you want to share actually exists and the permissions are correct.
The file share named [share] and the path /srv/samba/share used in this example can be adjusted to fit your environment. It is a good idea to name a share after a directory on the file system. Another example would be a share name of [qa] with a path of /srv/samba/qa .
Further reading
- For in-depth Samba configurations see the Samba HOWTO Collection
- The guide is also available in printed format.
- O’Reilly’s Using Samba is another good reference.
- The Ubuntu Wiki Samba page.
How to create a personal file server with SSH on Linux
The Raspberry Pi makes for a useful and inexpensive home server for lots of things. I most often use the Raspberry Pi as a print server to share a laser printer with other devices in our home or as a personal file server to store copies of projects and other data.
I use this file server in various ways. Let’s say I’m working on a project, such as a new book, and I want to make a snapshot copy of my work and all my associated files. In that case, I simply copy my BookProject folder to a BookBackup folder on the file server.
Or if I’m cleaning up my local files, and I discover some files that I don’t really need but I’m not yet ready to delete, I’ll copy them to a KeepForLater folder on the file server. That’s a convenient way to remove clutter from my everyday Linux system and offload infrequently used files to my personal file server.
Setting up a Raspberry Pi—or any Linux system—as a personal file server doesn’t require configuring Network File System (NFS) or Common Internet File System (CIFS) or tinkering with other file-sharing systems such as WebDAV. You can easily set up a remote file server using SSH. And here’s how.
Set up SSHD on the remote system
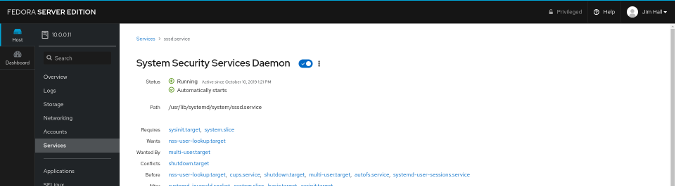
Your Linux system probably has the SSH daemon (sshd) installed. It may even be running by default. If not, you can easily set up SSH through whatever control panel you prefer on your Linux distribution. I run Fedora ARM on my Raspberry Pi, and I can access the control panel remotely by pointing my Pi’s web browser to port 9090. (On my home network, the Raspberry Pi’s IP address is 10.0.0.11, so I connect to 10.0.0.11:9090.) If the SSH daemon isn’t running by default, you can set it to start automatically in Services in the control panel.
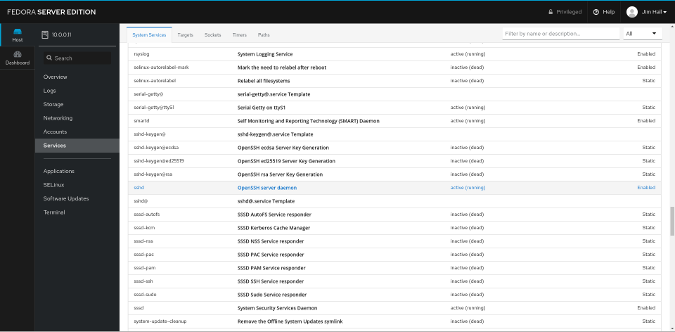
You can find sshd in the list of system services.
Click the slider to activate sshd if it isn’t already
Do you have an account?
Make sure you have an account on the remote system. It might be the same as the username you use on your local system, or it could be something different.
On the popular Raspbian distribution, the default account username is pi. But other Linux distributions may require you to set up a unique new user when you install it. If you don’t know your username, you can use your distribution’s control panel to create one. On my Raspberry Pi, I set up a jhall account that matches the username on my everyday Linux desktop machine.
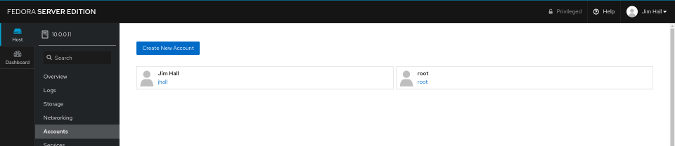
If you use Fedora Server, click the Create new user button to set up a new account.
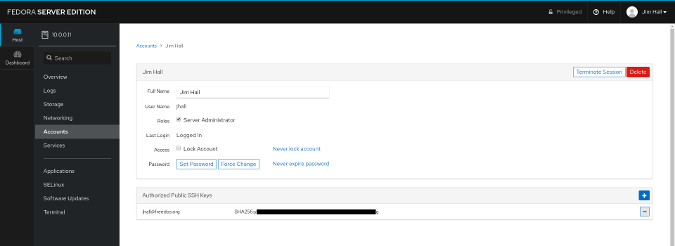
If you use Fedora Server, click the Create new user button to set up a new account
Optional: Share your SSH public key
If you exchange your public SSH key with the remote Linux system, you can log in without having to enter a password. This step is optional; you can use a password if you prefer.
You can learn more about SSH keys in these Opensource.com articles:
Make a file manager shortcut
Since you’ve started the SSH daemon on the remote system and set up your account username and password, all that’s left is to map a shortcut to the other Linux system from your file manager. I use GNOME as my desktop, but the steps are basically the same for any Linux desktop.
Make the initial connection
In the GNOME file manager, look for the +Other Locations button in the left-hand navigation. Click that to open a Connect to Server prompt. Enter the address of the remote Linux server here, starting with the SSH connection protocol.
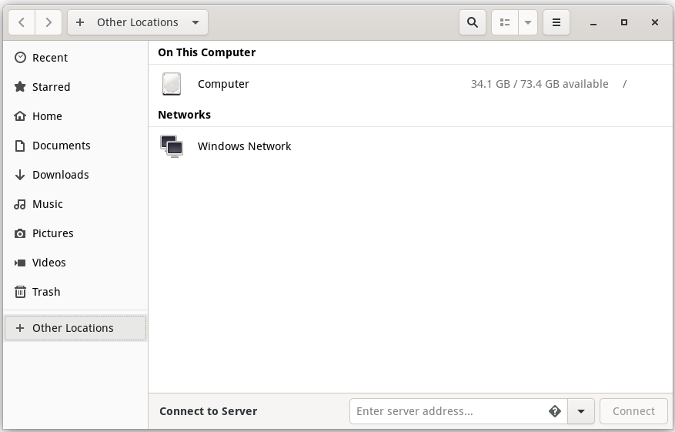
The GNOME file manager supports a variety of connection protocols. To make a connection over SSH, start your server address with sftp:// or ssh://.
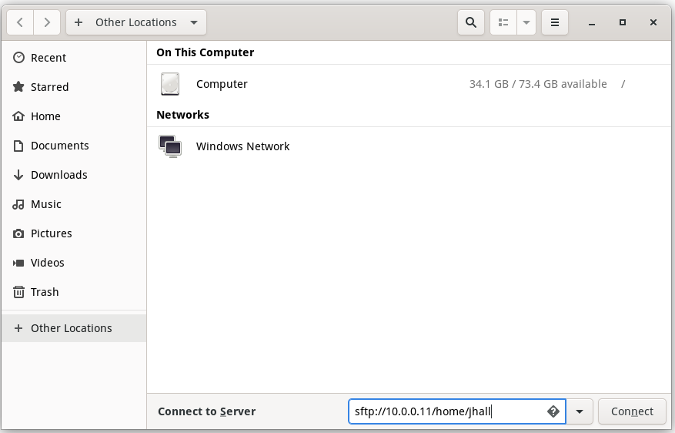
If your username is the same on your local Linux system and your remote Linux system, you can just enter the server’s address and the folder location. To make my connection to the /home/jhall directory on my Raspberry Pi, I use:
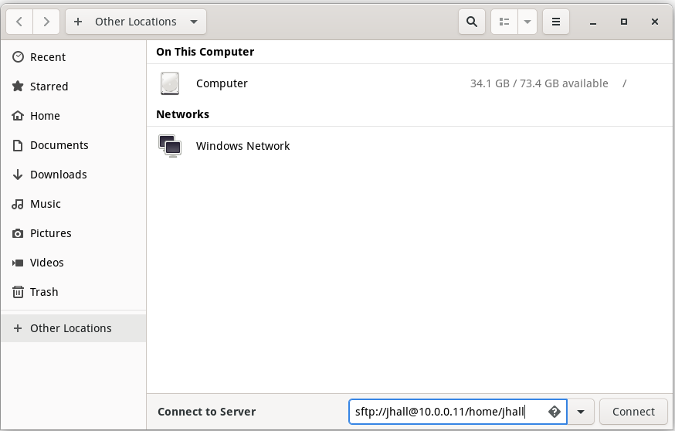
If your username is different, you can specify your remote system’s username with an @ sign before the remote system’s address. To connect to a Raspbian system on the other end, you might use:
If you didn’t share your public SSH key, you may need to enter a password. Otherwise, the GNOME file manager should automatically open the folder on the remote system and let you navigate.
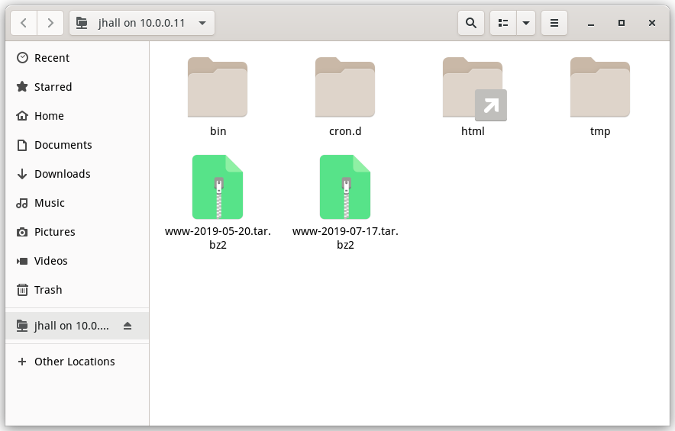
Create a shortcut so you can easily connect to the server later
This is easy in the GNOME file manager. Right-click on the remote system’s name in the navigation list, and select Add Bookmark. This creates a shortcut to the remote location.
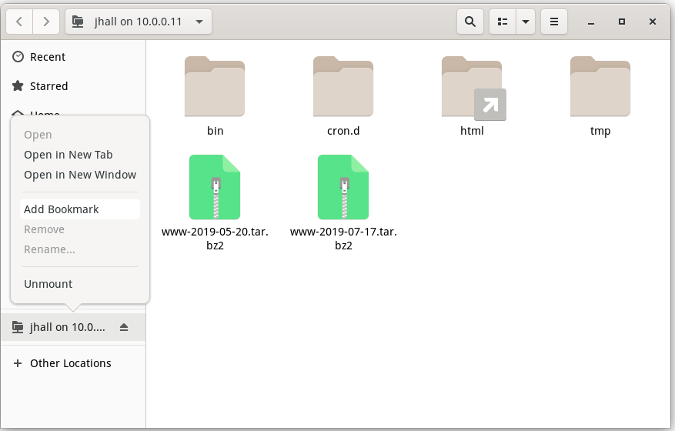
If you want to give the bookmark a more memorable name, you can right-click on the shortcut and choose Rename.
That’s it!
Connecting to a remote Linux system over SSH is just plain easy. And you can use the same method to connect to systems other than home file servers. I also have a shortcut that allows me to instantly access files on my provider’s web server and another that lets me open a folder on my project server. SSH makes it a secure connection; all of my traffic is encrypted. Once I’ve opened the remote system over SSH, I can use the GNOME file manager to manage my remote files as easily as I’d manage my local folders.

Tools for SSH key management
Time-saving shortcuts for a commonly used open source tool.

How to use Ansible to set up a Git server over SSH
Git is the most widely deployed version-control system in the open source community. Part 2 of this series looks at using Ansible to set up Git on your LAN.

Learn advanced SSH commands with this cheat sheet
We round up handy SSH commands to help you connect to remote servers.