A Basic Guide to Linux Boot Process
Every time you power on your Linux PC, it goes through a series of stages before finally displaying a login screen that prompts for your username or password. There are 4 distinct stages that every Linux distribution goes through in a typical boot-up process.
In this guide, we will highlight the various steps taken by the Linux OS from the time it is powered on to the time you log in. Kindly note that this guide only takes into consideration the GRUB2 bootloader and systemd init as they are currently in use by a vast majority of modern Linux distributions.
The booting process takes the following 4 steps that we will discuss in greater detail:
- BIOS Integrity check (POST)
- Loading of the Boot loader (GRUB2)
- Kernel initialization
- Starting systemd, the parent of all processes
1. The BIOS Integrity Check (POST)
The boot process is usually initialized when a user presses the power-on button – if the PC was already shut down – or reboots the system using either the GUI or on the command line.
When the Linux system powers up, the BIOS (Basic Input Output System) kicks in and performs a Power On Self Test (POST). This is an integrity check that performs a plethora of diagnostic checks.
The POST probes the hardware operability of components such as the HDD or SSD, Keyboard, RAM, USB ports, and any other piece of hardware. If some hardware device is not detected, or if there’s a malfunction in any of the devices such as a corrupt HDD or SSD, an error message is splashed on the screen prompting your intervention.
In some cases, a beeping sound will go off especially in the event of a missing RAM module. However, if the expected hardware is present and functioning as expected, the booting process proceeds to the next stage.
2. The Bootloader (GRUB2)
Once the POST is complete and the coast is clear, the BIOS probes the MBR (Master Boot Record) for the bootloader and disk partitioning information.
The MBR is a 512-byte code that is located on the first sector of the hard drive which is usually /dev/sda or /dev/hda depending on your hard drive architecture. Note, however, that sometimes the MBR can be located on a Live USB or DVD installation of Linux.
There are 3 main types of bootloaders in Linux: LILO, GRUB, and GRUB2. The GRUB2 bootloader is the latest and primary bootloader in modern Linux distributions and informs our decision to leave out the other two which have become antiquated with the passage of time.
GRUB2 stands for GRand Unified Bootloader version 2. Once the BIOS locates the grub2 bootloader, it executes and loads it onto the main memory (RAM).
The grub2 menu allows you to do a couple of things. It allows you to select the Linux kernel version that you’d want to use. If you have been upgrading your system a couple of times, you might see different kernel versions listed. Additionally, it gives you the ability to edit some kernel parameters by pressing a combination of keyboard keys.
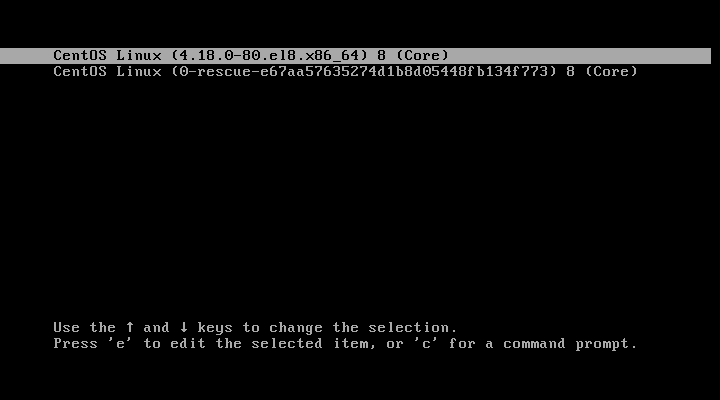
Also, in a dual-boot setup where you have multiple OS installations, the grub menu allows you to select which OS to boot into. The grub2 configuration file is the /boot/grub2/grub2.cfg file. GRUB’s main objective is to load the Linux kernel onto the main memory.
3. Kernel Initialization
The kernel is the core of any Linux system. It interfaces the PC’s hardware with the underlying processes. The kernel controls all the processes on your Linux system. Once the selected Linux kernel is loaded by the bootloader, it must self extract from its compressed version before undertaking any task. Upon self-extracting, the selected kernel mounts the root file system and initializes the /sbin/init program commonly referred to as init.
Init is always the first program to be executed and is assigned the process ID or PID of 1. It’s the init process that spawns various daemons & mounts all partitions that are specified in the /etc/fstab file.
The kernel then mounts the initial RAM disk (initrd) which is a temporary root filesystem until the real root filesystem is mounted. All kernels are located in the /boot directory together with the initial RAM disk image.
4.Starting Systemd
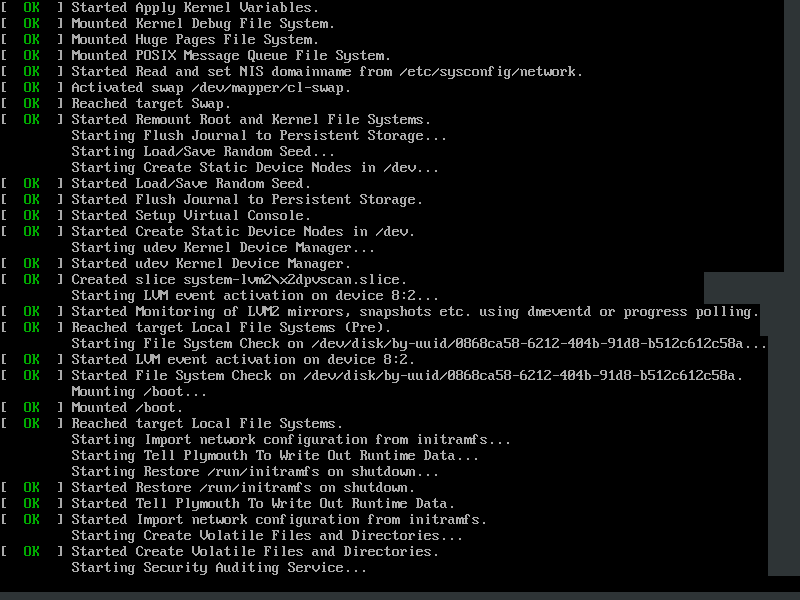
The kernel finally loads Systemd, which is the replacement of the old SysV init. Systemd is the mother of all Linux processes and manages among other things mounting of file systems, starting and stopping services to mention just a few.
Systemd uses the /etc/systemd/system/default.target file to determine the state or target that the Linux system should boot into.
- For a desktop workstation (with a GUI) the default target value is 5 which is the equivalent of run level 5 for the old SystemV init.
- For a server, the default target is multi-user.target which corresponds to run level 3 in SysV init.
Here’s a breakdown of the systemd targets:
- poweroff.target (runlevel 0): Poweroff or Shutdown the system.
- rescue.target (runlevel 1): launches a rescue shell session.
- multi-user.target (runlevel 2,3,4): Configures the system to a non-graphical (console) multi-user system.
- graphical.target (runlevel 5): Set the system to use a graphical multi-user interface with network services.
- reboot.target (runlevel 6): reboots the system.
To check the current target on your system, run the command:
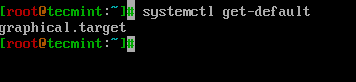
You can switch from one target to another by running the following command on the terminal:
For example, init 3 configures the system to a non-graphical state.
The init 6 command reboots your system and init 0 powers off the system. Be sure to invoke sudo command when you want to switch to these two targets.
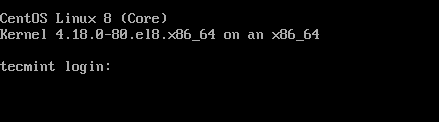
The booting process ends once systemd loads all the daemons and sets the target or run level value. It’s at this point you are prompted for your username and password upon which you gain entry to your Linux system.
6 шагов загрузки Linux на пальцах
Нажмите кнопку включения питания на вашем системнике, и спустя несколько секунд вы увидите окно входа в систему.
Посмею предположить, что каждого интересовало хоть когда-либо то, что происходит за занавесом заставок и загрузочных экранов с момента включения питания компьютера к моменту, когда предлагается войти в систему.
Я предлагаю вам познакомиться со следующими уровнями типичной загрузки Linux:
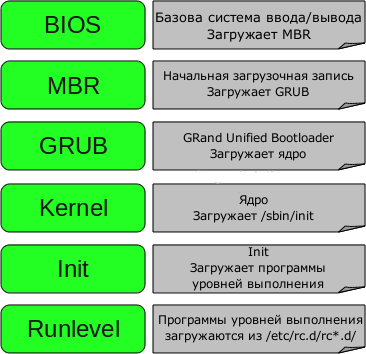
1. BIOS
- BIOS отвечает за базовый ввод/вывод данных с устройств/на устройства.
- Делает некоторые проверки целостности устройств. К тому же, за тестирование работоспособности электроники отвечает POST (Power-on self-test, он же «тест на адекватность себя самого», выполняющийся как этап пре-загрузки), который управляется BIOS
- Ищет, загружает и выполняет программу-загрузчик ОС
- Берет загрузчик из флопика, сидюка или жесткого диска. Во время загрузки BIOS’а вы можете нажать на кнопку (обычно это F12 или F2 или Del, зависит от платформы), если вам требуется внести некоторые изменения касательно настройки железа.
- Как только загрузчик был обнаружен и загружен в память, BIOS передает управление ему.
- Короче говоря, BIOS загружает и выполняет загрузочную запись (MBR).
2. MBR
- MBR — это главная загрузочная запись, хранящаяся на жестком диске
- Она размещена в 1-м секторе загрузочного диска, например /dev/hda или /dev/sda
- MBR занимает меньше, чем 512 байтов. Она состоит из трех компонентов: 1) главная загрузочная информация, «живущая» в первых 446 байтах; 2) информация о таблице разделов — в следующих 64 байтах; 3) и последние 2 байта нужны для проверки корректности mbr.
- Она содержит информацию о GRUB’е (или LILO).
- Простыми словами — MBR загружает и выполняет загрузчик GRUB.
3. GRUB
- GRUB — Grand Unified Bootloader.
- Если в вашей системе установлено более, чем одно ядро, у вас есть возможность выбирать, которое из них должен выполняться
- GRUB отображает
красивую анимацию plymouthзаставку, и, подождав несколько секунд интерактивного воздействия пользователя, если он не нажал ни одной клавиши, он загружает ядро, установленное по умолчанию в файле конфигурации grub. - GRUB понимает, что такое файловая система (древние загрузчики Linux’а, например, LILO этого не понимают).
- Конфигурационный файл Grub обычно лежит по пути /boot/grub/grub.conf (так же /etc/grub.conf может быть символьной ссылкой на него). Вот пример файла конфигурации для CentOS:
#boot=/dev/sda
default=0
timeout=5
splashimage=(hd0,0)/boot/grub/splash.xpm.gz
hiddenmenu
title CentOS (2.6.18-194.el5PAE)
root (hd0,0)
kernel /boot/vmlinuz-2.6.18-194.el5PAE ro root=LABEL=/
initrd /boot/initrd-2.6.18-194.el5PAE.img
4. Ядро или Kernel
- Ядро монтирует файловую систему в соответствии с настройкой «root=» в фале grub.conf
- Выполняет программу /sbin/init
- Поскольку init — это первый процесс, запущенный ядром Linux, поэтому она имеет идентификатор процесса (PID) №1. Можете выполнить «ps -ef | grep init» и убедиться в этом.
- initrd — это Initial RAM Disk, он же временный диск в оперативной памяти
- initrd используется самим ядром в качестве временной корневой файловой системы, пока kernel не загрузится в реальную примонтированную файловую систему. Этот временный диск также содержит необходимые для загрузки драйверы, позволяющие получить доступ к разделам дисков и другому оборудованию
5. Init
- Смотрит в файл /etc/inittab для того, чтобы определить уровень выполнения (run level).
- Есть следующие уровни выполнения:
- 0 – прервать выполнение
- 1 – Однопользовательский режим, так называемый «Single user mode», или иными словами, консоль восстановления
- 2 – Многопользовательский режим без поддержки NFS
- 3 – Полноценный многопользовательский режим
- 4 – не используется
- 5 – X11
- 6 – перезагрузка
6. Уровень выполнения программ (Runlevel)
- Когда Линукс выполняет свою загрузку, вы можете наблюдать загрузку различных служб. К примеру, это могут быть сообщения типа «starting Postfix … OK» (запускается Postfix). Эти службы — и называются программами уровня выполнения, выполняемые из директории, которая соответствует нужному уровню выполнения.
- Исходя из настроек по умолчанию, система будет выполнять файлы в соответствии с нижеприведенными директориями.
- Выполнение уровня 0 – /etc/rc.d/rc0.d/
- Выполнение уровня 1 – /etc/rc.d/rc1.d/
- Выполнение уровня 2 – /etc/rc.d/rc2.d/
- Выполнение уровня 3 – /etc/rc.d/rc3.d/
- Выполнение уровня 4 – /etc/rc.d/rc4.d/
- Выполнение уровня 5 – /etc/rc.d/rc5.d/
- Выполнение уровня 6 – /etc/rc.d/rc6.d/
Вот и все. Возможно, некоторым из вас это не ново и особого интереса не было при чтении статью, поскольку она более ориентирована на начально-средний уровень знакомства з Линуксом.
В таком случае могу лишь сказать, что «повторение — мать учения» (с).Дополнения, исправления, уточнения
- artemlight:: «Ну скажем прямо — так грузятся далеко не все дистры». С ним согласилось большинство, отмечая и bsd-style init, u-boot, и хоть initrd в статье пропущен, стоить заметить, что он нужен ядру не во всех дистрибутивах. Также отмечено, что в slackware поддержка rc.d осуществляется только в качестве совместимости, а встраиваемые системы грузятся иначе. На декстопах иногда бывает EFI, а кроме того Linux популярен в мире embedded и там ещё куча разных платформ. Линукс в телефоне вообще иначе грузится.
- soomrack, ссылая на википедию: Еще хочется сделать замечание по поводу MBR, первого сектора и пр. Все несколько усложнилось за последние годы. Сейчас уместней говорить о EFI.