- How to Make Linux Look Like Windows 11
- Make Linux Look Like Windows 11
- Step 1: Install KDE Plasma on Linux
- Step 2: Install KDE Windows 11 Theme
- Step 3: Create Windows 11 Taskbar on Linux (KDE Plasma)
- Step 4: Create Windows 11 Tray Icons on Linux
- Step 5: Get Windows 11 Start Menu on Linux (KDE Plasma)
- How to Make Ubuntu Look Like macOS in 5 Easy Steps
- How to give your Ubuntu Linux a macOS makeover
- Step 2: Install macOS like icons
- Step 3: Add macOS like dock
- Step 4: Use macOS wallpaper
- Step 5: Change system fonts
- Bonus Tip: Spotlight like app launcher (if you want to go the extra mile)
How to Make Linux Look Like Windows 11
Windows 11 is making headlines out there and you might want to try out its look and feel without leaving Linux. You can theme Linux to look like Windows 11, rather than run Windows 11 on top of Linux. If you’re looking to make Linux look like Windows 11, you’re in the right place.
Make Linux Look Like Windows 11
If you want your Linux PC or the Ubuntu system to look and feel like Windows 11, there are some tools you need. KDE Plasma is one of such tools and that is what we are using here today. Let’s begin with the step-by-step guide to convert Linux into Windows 11.
Step 1: Install KDE Plasma on Linux
While most Linux desktop environments are pretty customizable, some are more customizable than others. KDE Plasma gives you the freedom to customize the look and feel of your computer, especially if you are a Linux user.
For this tutorial, we’ll be using the Plasma desktop. Plasma desktop is available on all Linux distros. Ubuntu even has an official flavor called Kubuntu, which ships with KDE Plasma desktop instead of GNOME.
If you’re not familiar with KDE Plasma, you can follow the link below to learn more about it and how to install it on Ubuntu.
Step 2: Install KDE Windows 11 Theme
KDE Plasma is not just about some themes. You can get complete control over the look and feel of the operating system the way you want. However, it does also give you the option to simply install a KDE theme that takes care of everything.
The global theme changes your desktop shell’s theme, layout, font, cursor, icons, etc. Let’s see how you can install Windows 11 theme in KDE.
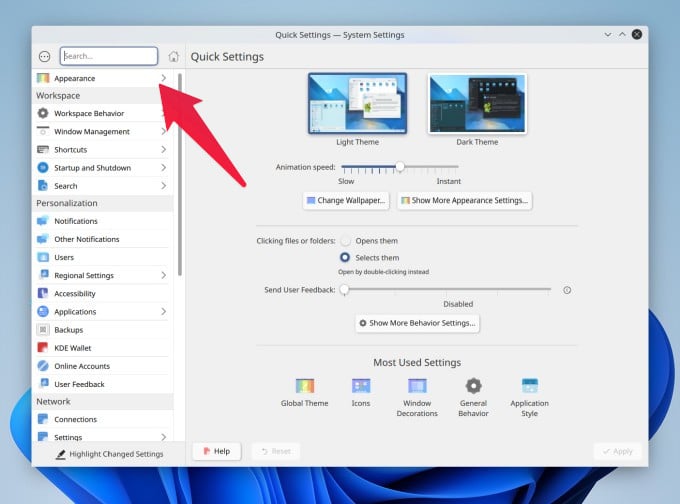
- Open the SystemSettings app.

- Click Appearance from the left column.
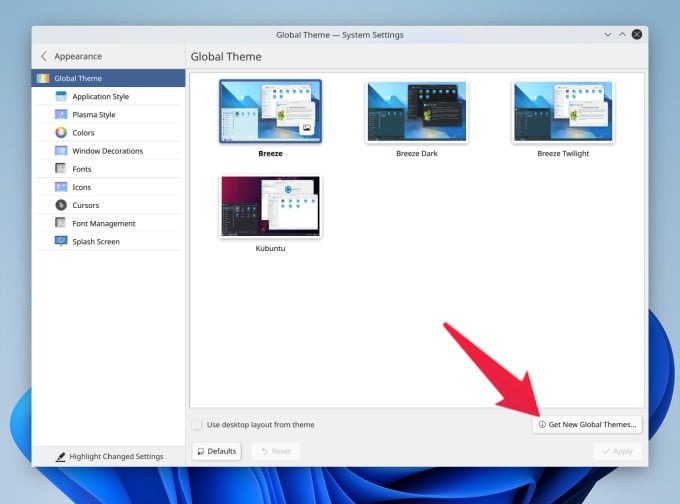
- On the bottom right, click on the button that says Get New Global Themes…
- Use the search bar at the top to look for the Fluent round theme.

- Click on the Install button that appears when you bring the cursor over the search result.
- Select from Dark or Light theme options.
- During installation, enter your password when asked.
- Once the theme is installed, click on the Use button on the theme.

As soon as you click the button, you’ll notice your entire desktop will change its looks and layout to mimic Windows 10. To make it look like Windows 11, we simply need to bring the taskbar icons to the center and make sure the only visible system tray icons are Wi-Fi, Battery, and Sound.
The Fluent round Global theme is a great choice to create a Windows 11 theme, but it uses its own fluent design-inspired icons. They are, in my opinion, much better than even the original Windows 11 icons. However, if you like the yellow folders and more Windows-like icons, they’re also easy to get.
You can find the Cursors and Icons section on the left column. Once you select any, you can download new cursors or Icons by clicking the button in the bottom right.
![]()
There are quite a few options to choose from, but the PlasmaXLight icon theme and Win 10 cursor theme come closest to mimicking Windows 11.
Step 3: Create Windows 11 Taskbar on Linux (KDE Plasma)
Now that your system has the Windows theme and icons, all that remains is to recreate the Windows 11 taskbar on Linux. Well, technically, we will only be recreating the look and feel of the Windows 11 Taskbar.
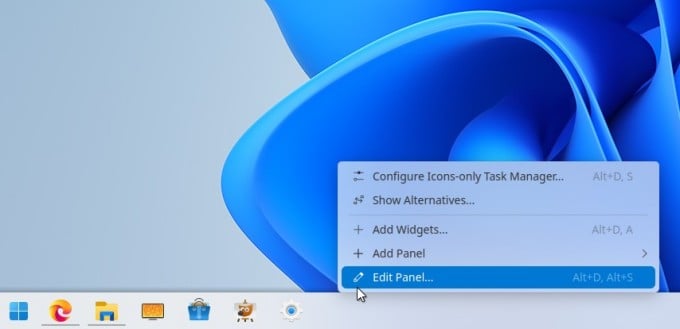
- Right-click on the KDE Panel at the bottom of the desktop.

- Select Edit panel… from the context menu.

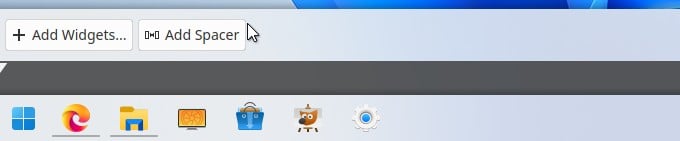
- Next, click on the Addspacer button twice.
- Click and drag the spacers to each side of the icons.
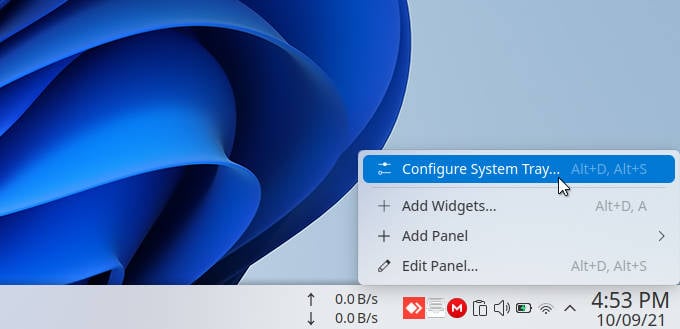
Step 4: Create Windows 11 Tray Icons on Linux
As you’ll notice, the above step brings the icons to the center of the taskbar. Next, we need to take care of the System tray.
- Right-click on the chevron (up) icon at the start of the system tray.
- Select Configure System tray…
- Select Entries on the left.

- On the right, click on the drop-down menu next to each system tray icon that you want to hide and select Alwayshidden.
- Click OK when done.
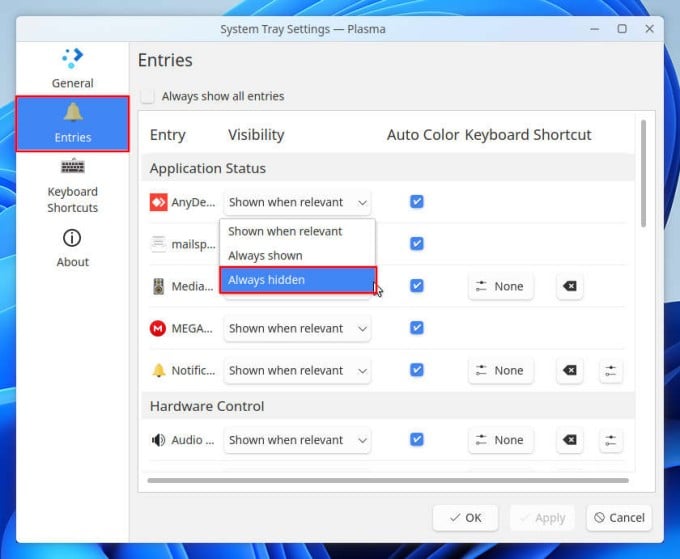

When you’re done, you should have a Windows 11 Taskbar look-alike, that is in fact a lot more customizable than anything on Windows will ever be. I like to keep the clipboard icon always visible for easy access, apart from the Wi-Fi, Battery, and Sound icons. You can access all hidden icons by clicking on the chevron (up) icon on the System tray.
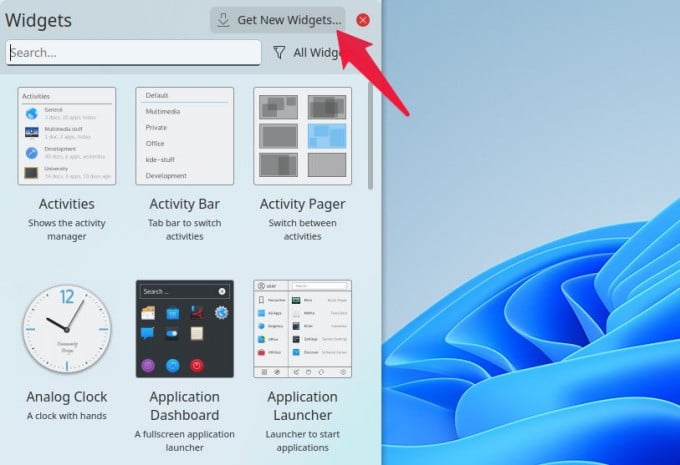
Step 5: Get Windows 11 Start Menu on Linux (KDE Plasma)
The Taskbar is complete, but Windows is also known for the Start menu. While the Start menu has undergone many changes, it has been there for a very long time. Windows 11 brings a new Start menu as well. Getting it on KDE Plasma is rather easy.
- Right-click anywhere on the desktop.

- Select + Add widgets…

- On the Widgets panel, click Get new widgets.
- Search for OnzeMenu or Menu 11.
- Install either of the two by clicking on the Install button on them.
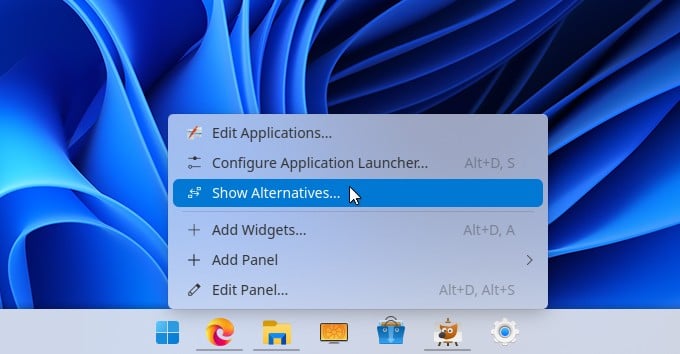
- Once installed, you now have to place the widget.

- Right-click on the Start menu button on the Taskbar.
- Select Show alternatives.

- From the alternatives list, select the widget you installed.
- Click on the Switch button.

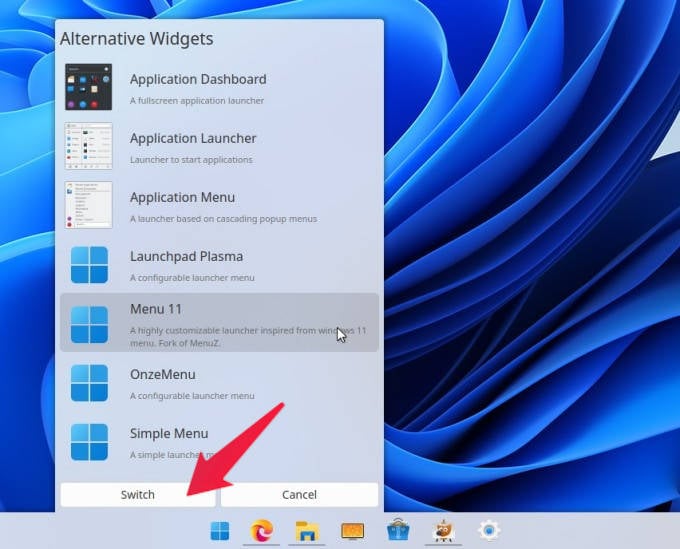
If you’re wondering about the differences between the two widgets, there aren’t many obvious ones. Menu 11 has smaller app icons but is more customizable, while Onzemenu gives you bigger icons and a better out-of-the-box experience.
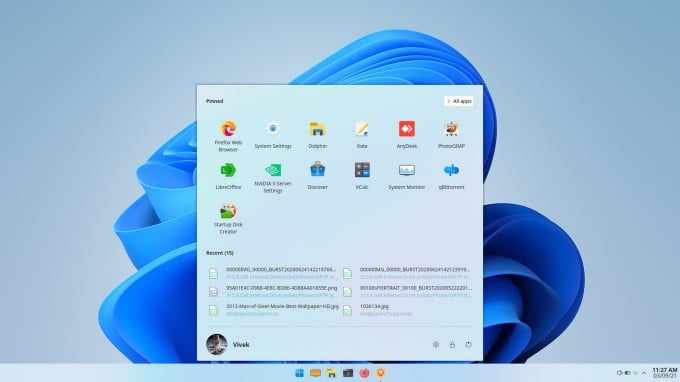
The Taskbar and Start Menu are basically all there is on a Windows 11 Desktop. So, now that you have a Windows 11 Taskbar on Linux and the Start Menu, your Windows 11 desktop setup is complete. Just put up the default Windows 11 wallpaper, and you can make Linux look like Windows 11 even more.
If you are new to KDE Plasma, it might be a good idea to explore the Appearance section of the Settings more, and you can further enhance this KDE Windows 11 theme. You can get such Windows 11 like the look and feel in your Linux computer with KDE Plasma.
Disclosure: Mashtips is supported by its audience. As an Amazon Associate I earn from qualifying purchases.
How to Make Ubuntu Look Like macOS in 5 Easy Steps
Customization is one of the main reasons why I use Linux. There is no end to the kind of customization you can do to your desktop Linux. You can change icons, themes, change fonts, change terminals, add screenlets, indicator applets, extensions and what not.
We have covered numerous desktop customization tips and tricks on It’s FOSS. In this one, I’ll show you how to make Ubuntu look like macOS.
Many people use macOS because of its simplistic and elegant look. You may disagree with it but it remains a popular opinion. Even there are Linux distributions that have macOS like look and feel.
One of the readers requested us to show how to make Ubuntu look like macOS and hence we’ve created this tutorial. In fact, this is a good example to show the customization capability of desktop Linux.
No, you don’t have to install a new distribution just for customizing the looks. You can do some tweaking on your own and give your system mac-like looks.
How to give your Ubuntu Linux a macOS makeover
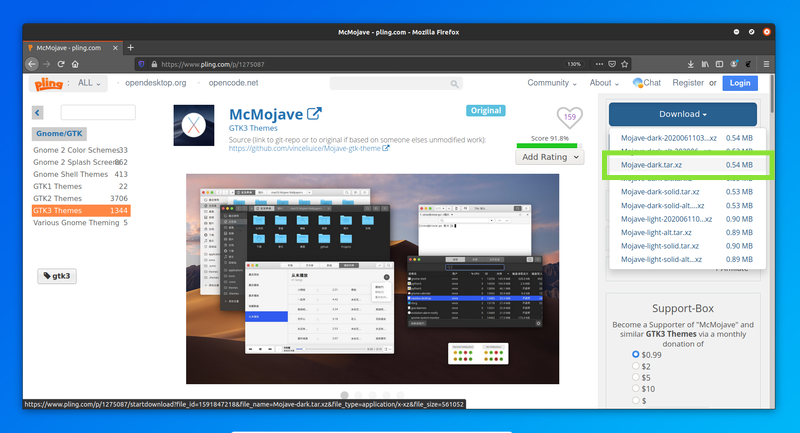
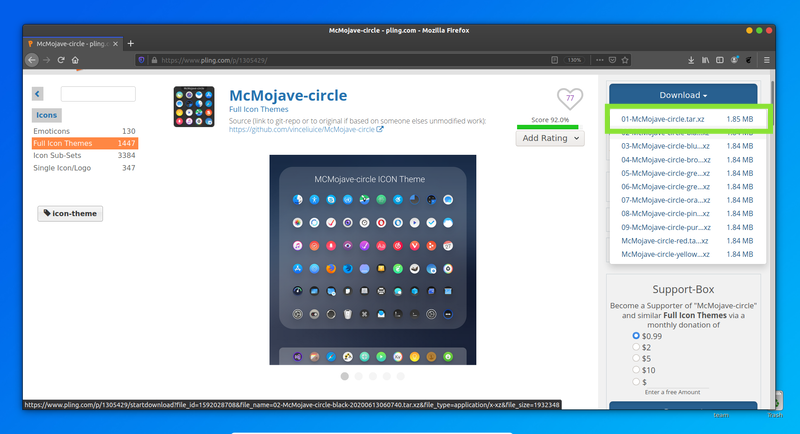
Here you may find various “.tar.xz” files. These different files contain same theme with small differences. Like in “McMojave” we have variations like dark and light theme. You can try them all, or just pick anyone you like from the carousel given in middle.
Set downloaded theme
Extract the downloaded theme and copy this extracted theme folder to .local/share/themes folder.
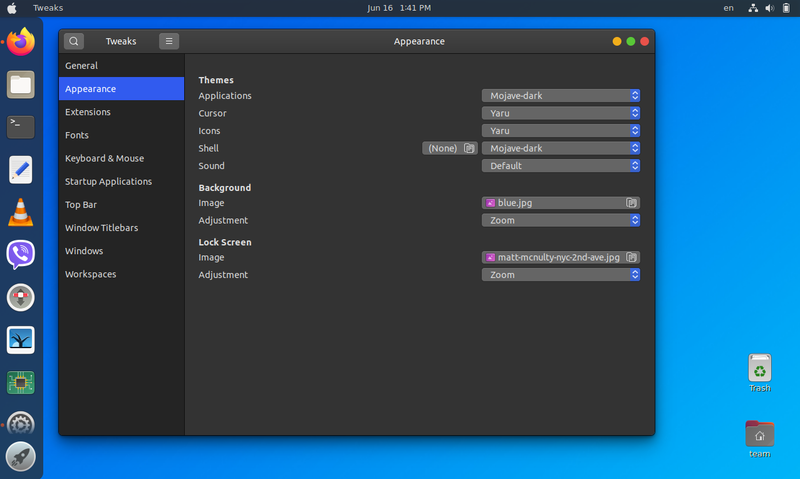
Open GNOME Tweak tool and change the Application and Shell theme. As soon as you change the themes, you can see those three yellow, green and red buttons, and that Apple logo on upper left corner. You can also notice come changes on panel items.
Step 2: Install macOS like icons
The next step in this macOS makeover is to use macOS like icons.
Download icon set
Here are some icon sets I suggest that you can download from Gnome-look website:
I shall be using “McMojave-circle” in this article, feel free to use any icons you like.
Just like the theme, you can download it from “download” dropdown button from right side. Here you may also find various different versions of same icons.
Now set the downloaded icon. For that extarct the download folder and copy it to .icons folder in your home directory. See this article on installing icon themes in Ubuntu.
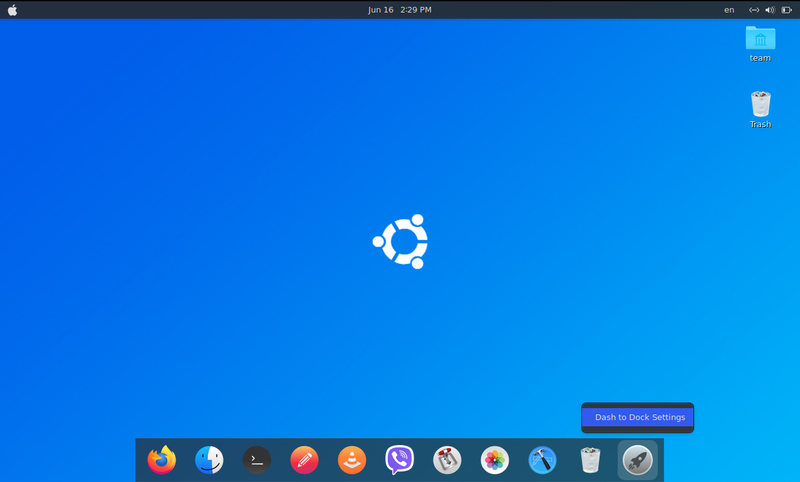
This is what this icon looks like:
![]()
Step 3: Add macOS like dock
Without macOS like dock, your Ubuntu will not look like macOS. There are various docks available for Linux. I like Dash to Dock and I am going to use it here.
Dash to Dock is a GNOME extension. By now you are familar with GNOME Extensions. Just go to this link and click on toggle button to install it. Your native dock will be automatically replaced with dash-to-dock.
You can change settings by right clicking on “show applications” button (rightmost menu button), and selecting “Dash to dock settings”.
Step 4: Use macOS wallpaper
Most of the complicated stuff are done. Now it’s time to set macOS wallpaper. You can download macOS default wallpapers from the link below:
Change the desktop background
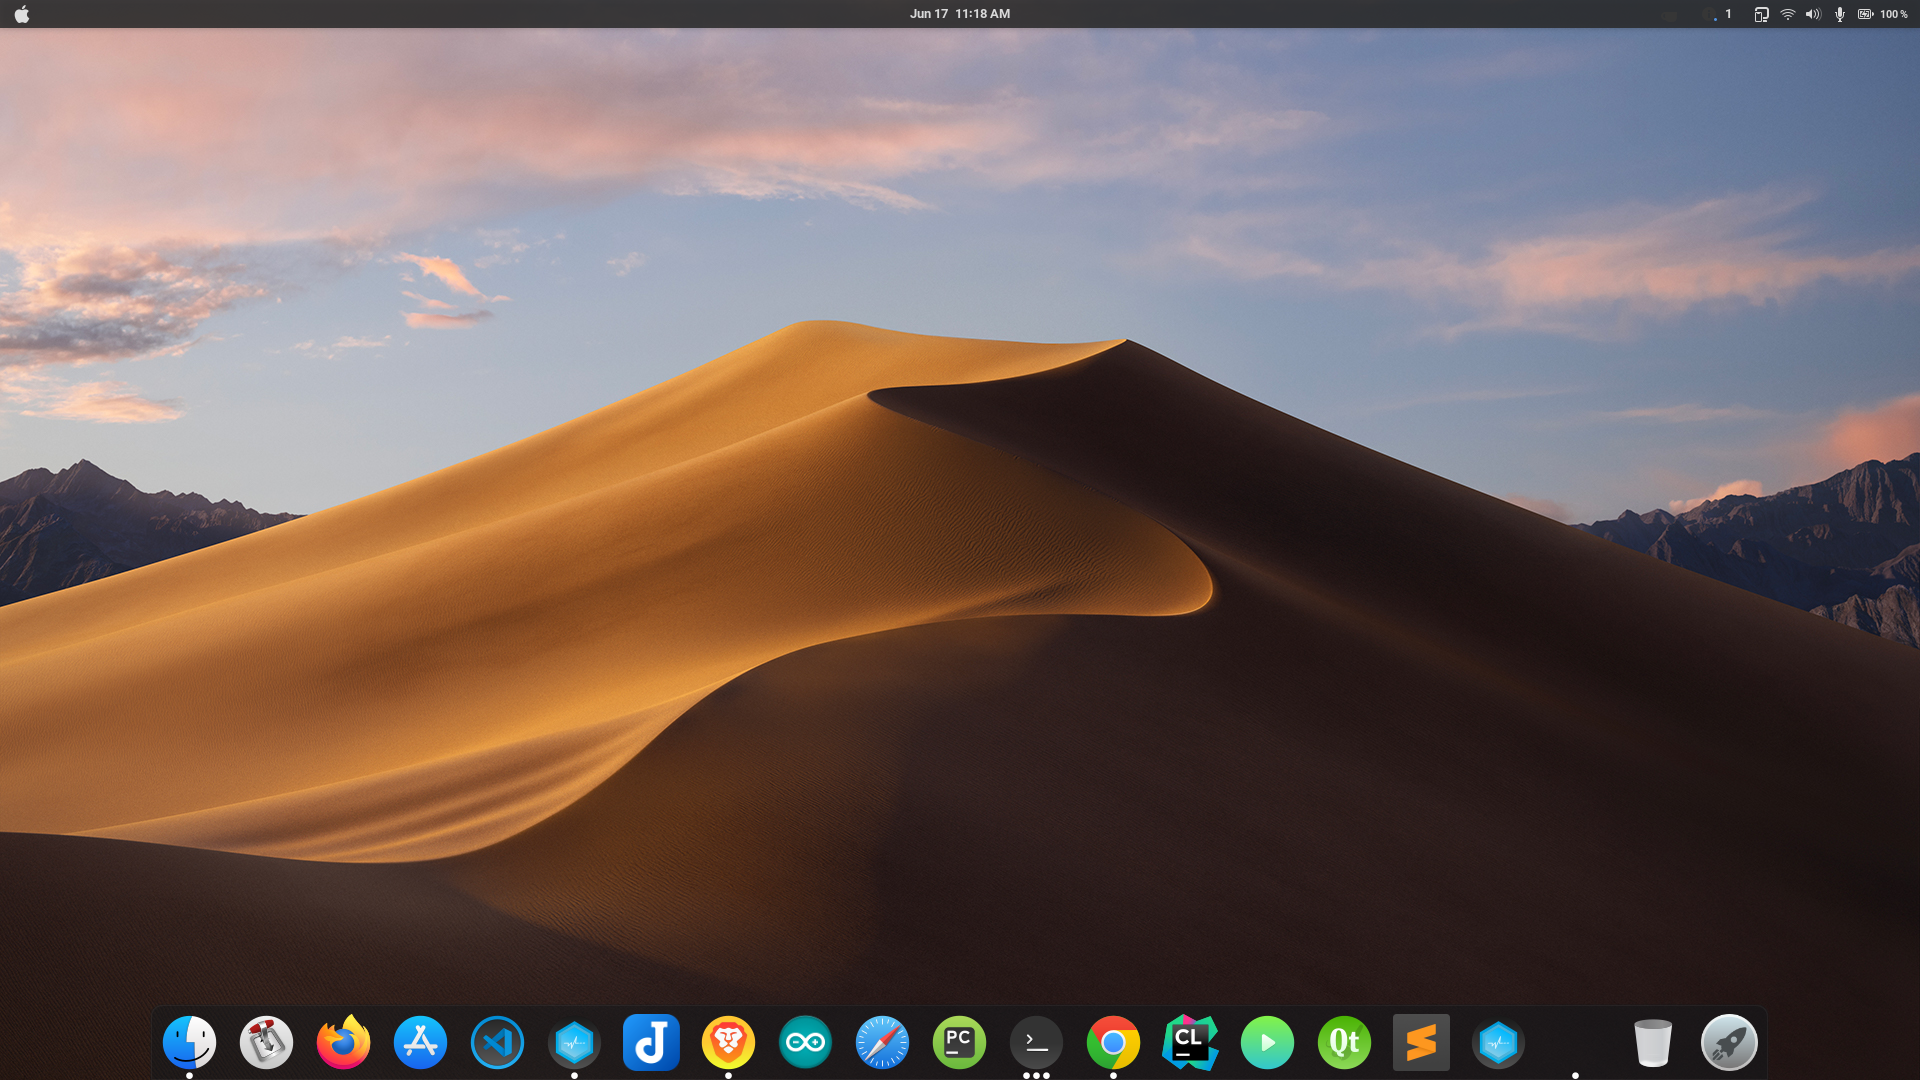
I shall be using “Mojave Day” wallpaper. Right click on the downloaded image and select ‘Set As Wallpaper’ option to change the wallpaper.
After setting this wallpaper, this is how my system looks like:
Change the lock screen Wallpaper
The lock screen background option is removed from the settings of Ubuntu 20.04. Now it uses blurred desktop wallpaper as the background of lock screen.
To set a custom lock screen wallpaper, you can use “Lock screen background” extension.
Open “Lock screen background” extension setting, and set lock screen wallpaper.
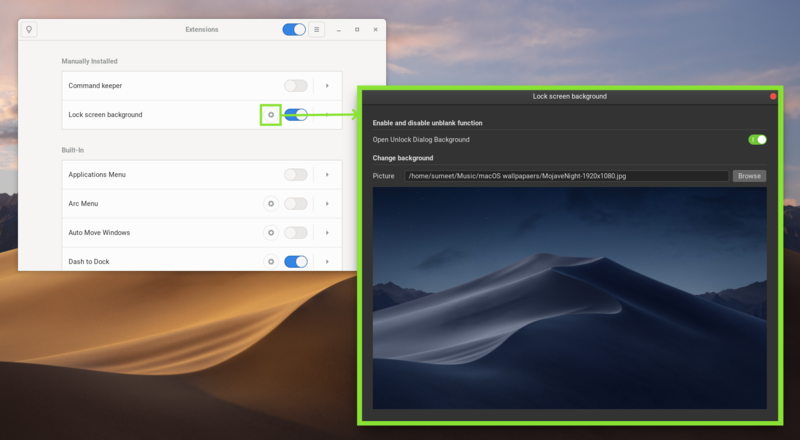
This is how the lockscreen looks now. If you are wondering, here’s how to take screenshot of lockscreen in Ubuntu.

Step 5: Change system fonts
For several years, the primary system font in macOS is ‘San Francisco’. But this San Francisco font is not public domain but proprietary like so many other things in the Apple ecosystem. For this reason, you cannot use this font.
What you can do is to use an open source font that looks similar to the San Francisco fonts. I recommend using Roboto font by Google or Source Sans Pro by Adobe.
Installing fonts is straightforward in Ubuntu. Download the zip files of the fonts and just double-click on the ttf files in the extracted folder. It will give you the option to install the fonts one by one.
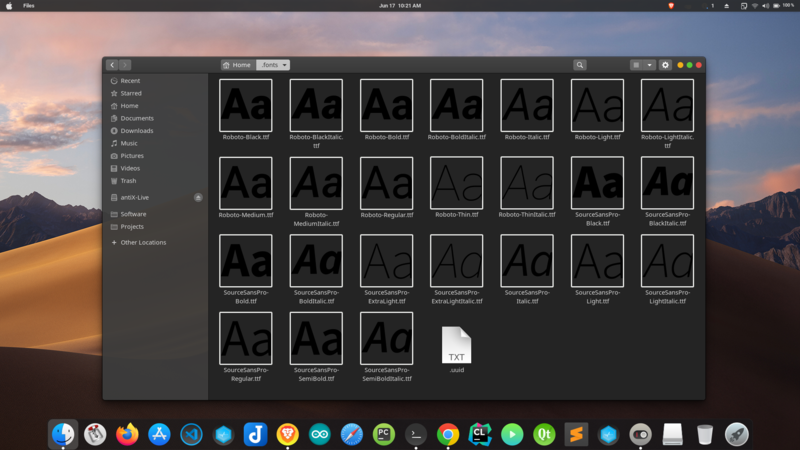
If you want to save time and install all the fonts at once, extract all fonts in it to the “.fonts” directory in your home folder (~/.fonts).
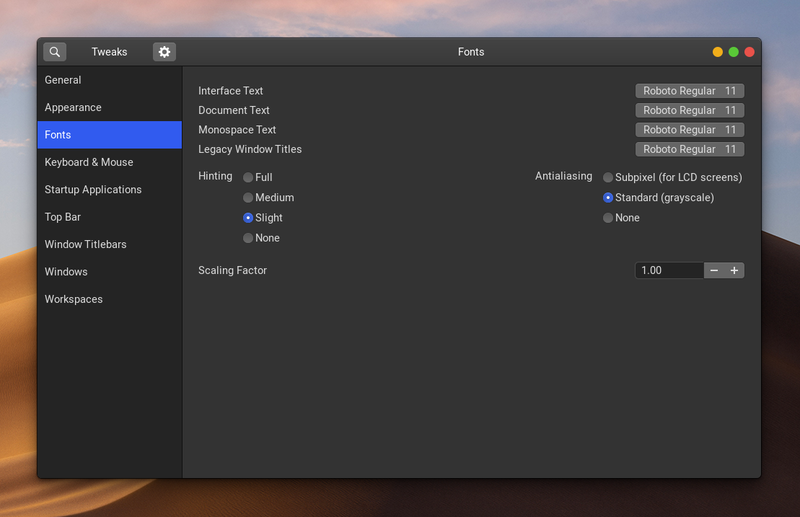
Once you have installed the fonts, you can change the system wide font using GNOME Tweaks tool.
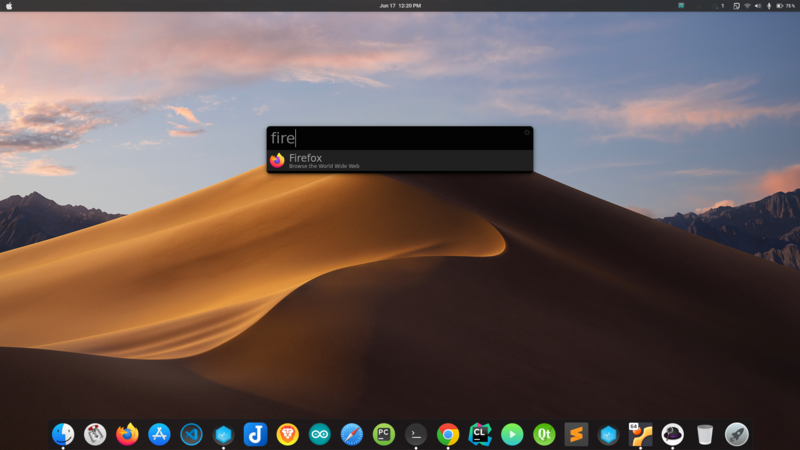
Bonus Tip: Spotlight like app launcher (if you want to go the extra mile)
If you are a fan of macOS Spotlight launcher, you may have something similar on Linux also. My favorite package for getting this kind of launcher is “Albert“.
After installing; open “Albert” and set hotkey (key combination you want for opening launcher) and you are good to go. I think in macOS, the Command+Space is to launch Spotlight. You may set Super+Space keyboard shortcut in Ubuntu.
You will get many themes in built, in picture below I’ve used “Spotlight dark”.
Albert won’t be able to launch apps directly, you have to give it permissions for where it can look for search results.
After setting up, this is how it looks:
This is how my Ubuntu 20.04 looks like after making all the customizations. Does it look like macOS? You be the judge.

So, this is how you can make your GNOME desktop look like macOS. As I said in the beginning, this is a good example of Linux desktop’s customization capability.
If you have any new ideas or have any queries; the comment section is all yours.
Written by Sumeet with additional inputs from Abhishek Prakash.