- How to Check IP Address on Linux using Command Line
- Understanding IP Addresses
- The ifconfig Command
- The ip Command
- The hostname Command
- Getting the Public IP Address
- Using dig with OpenDNS
- Using wget or curl with ifconfig.me service
- Conclusion
- How to Check Your IP Address in Ubuntu [Beginner’s Tip]
- What is an IP Address?
- Checking your IP Address in Ubuntu [Terminal Method]
- Just get the IP address
- Checking IP address in Ubuntu [GUI Method]
- Bonus Tip: Checking your public IP address (for desktop computers)
- Summary
- Hidden Features! 25 Fun Things You Can Do With DuckDuckGo Search Engine
- What is TTY in Linux?
- Beautifully Monitor CPU Utilization in Linux Terminal With Stress Terminal UI
- FOSS Weekly #23.28: China’s Linux OS, Linux Exit Codes, Btrfs Origins and More
- Using cp Command in Linux
- Bash Basics Series #5: Using Arrays in Bash
- Become a Better Linux User
How to Check IP Address on Linux using Command Line
As a Linux user, it’s often necessary to check your computer’s IP address, either for system troubleshooting or network configuration. The IP address, or Internet Protocol address, is a numerical label assigned to each device participating in a computer network. It serves two main functions: identifying the host or network interface and providing the location of the host in the network.
In Linux, there are various methods to retrieve this information, but this article will focus on using the command line interface (CLI), the most powerful and versatile tool at your disposal. By the end of this article, you’ll have learned how to use commands like ifconfig, ip, and hostname to reveal your computer’s IP address.
Understanding IP Addresses
Before we delve into the practical aspect, let’s understand what an IP address is. There are two versions of IP addresses in use today – IPv4 and IPv6. IPv4 is a numerical address like 192.168.0.1, and IPv6 is a more complex alphanumeric address like 2001:0db8:85a3:0000:0000:8a2e:0370:7334. Both serve the same purpose, to uniquely identify a device on a network, but IPv6 was introduced to deal with the long-anticipated problem of IPv4 address exhaustion.
The ifconfig Command
The ifconfig (interface configuration) command in Linux is used to display or configure a network interface. Although this command has been deprecated in favor of the ip command, it is still widely used and you’ll find it present in most systems.
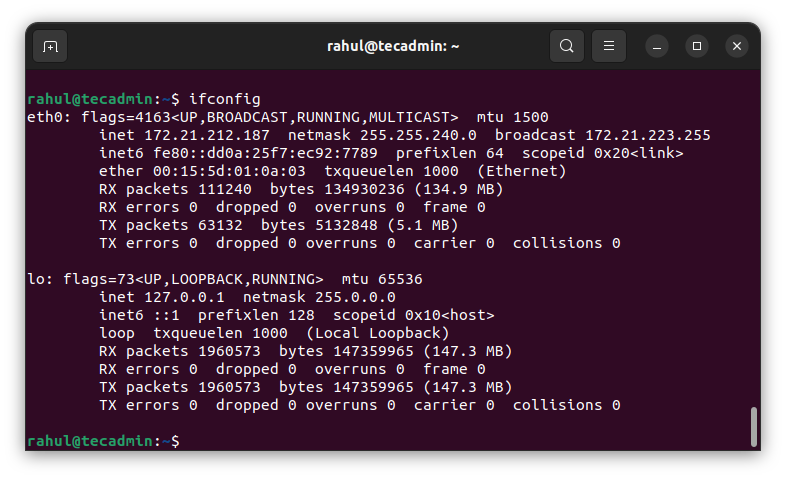
To display your IP address using ifconfig, open your terminal and type the following:
This command will display the details of all network interfaces on your system. The ‘inet’ entry refers to your IPv4 address, and ‘inet6’ refers to your IPv6 address.
- Read: bash ifconfig: command not found on CentOS/RHEL 7
The ip Command
The ip command is a more powerful and modern replacement for ifconfig. It can perform several other tasks that ifconfig can’t.
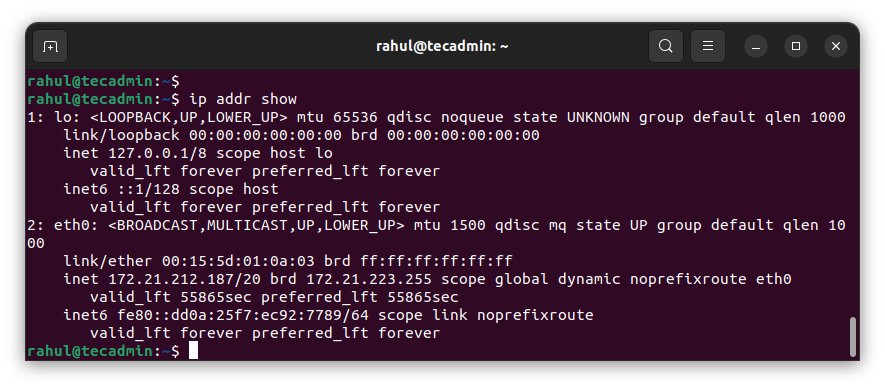
To display your IP address using the ip command, type the following in your terminal:
Again, ‘inet’ refers to the IPv4 address and ‘inet6’ to the IPv6 address.
The hostname Command
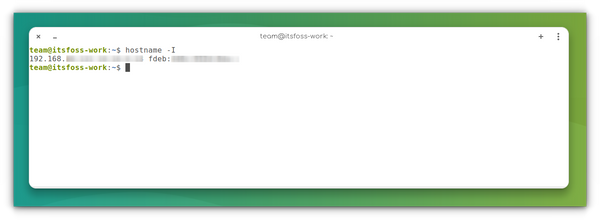
The hostname command is used to display the system’s DNS name, and the -I option will display the IP address of your network interfaces.
To use this command, type the following in your terminal:
This command will display all the network IP addresses assigned to your system.
Getting the Public IP Address
While the aforementioned commands provide information about your private IP address, which is used within your local network, there may be occasions where you need to know your public IP address. This is the address that your Internet Service Provider (ISP) assigns to you, and it’s what the outside world sees when you’re connecting to websites and services on the internet.
In Linux, there’s no built-in command to retrieve the public IP address directly from the command line interface, but you can leverage some external services like dig command with OpenDNS, wget or curl with ifconfig.me service.
Using dig with OpenDNS
The dig command is a tool for querying DNS nameservers for information about host addresses, mail exchanges, nameservers, and related information. To use dig to find your public IP address, type the following in your terminal:
dig +short myip.opendns.com @resolver1.opendns.com This command tells dig to query the special address myip.opendns.com on the DNS server resolver1.opendns.com. The DNS server will return your public IP address.
Using wget or curl with ifconfig.me service
ifconfig.me is a web service that returns your public IP address. You can access it using either wget or curl.
Both commands will retrieve your public IP address from the ifconfig.me web service.
Conclusion
Understanding how to find your IP address in Linux is a crucial skill for managing and troubleshooting your system and network. Whether you’re a system administrator, a developer, or an enthusiastic Linux user, the command line offers powerful tools for you to unlock the full potential of your Linux system.
Remember, the Linux command line is a powerful tool, but with great power comes great responsibility. Always ensure you understand the commands you are running and the potential impact they may have on your system.
These are just a few of the commands available in Linux for working with IP addresses. As you delve deeper into the world of Linux, you’ll discover many more commands and options that can help you master your system and network.
How to Check Your IP Address in Ubuntu [Beginner’s Tip]
Wonder what’s your IP address? Here are several ways to check IP address in Ubuntu and other Linux distributions.
Wonder what’s your IP address? Here are several ways to check IP addresses in Ubuntu and other Linux distributions. Want to know your Linux system’s IP address? You can use the ip command with the option a like this:
The output is extensive and it shows all the internet interfaces available, including loopback. Identifying the IP address could seem challenging if you are new to it.
1: lo: mtu 65536 qdisc noqueue state UNKNOWN group default qlen 1000 link/loopback 00:00:00:00:00:00 brd 00:00:00:00:00:00 inet 127.0.0.1/8 scope host lo valid_lft forever preferred_lft forever inet6 ::1/128 scope host valid_lft forever preferred_lft forever 2: enx747827c86d70: mtu 1500 qdisc pfifo_fast state DOWN group default qlen 1000 link/ether 74:78:27:c8:6d:70 brd ff:ff:ff:ff:ff:ff 3: wlp0s20f3: mtu 1500 qdisc noqueue state UP group default qlen 1000 link/ether dc:41:a9:fb:7a:c0 brd ff:ff:ff:ff:ff:ff inet 192.168.1.53/24 brd 192.168.1.255 scope global dynamic noprefixroute wlp0s20f3 valid_lft 82827sec preferred_lft 82827sec inet6 fe80::e1d:d71b:c507:5cc8/64 scope link noprefixroute valid_lft forever preferred_lft forever It really is not, actually. And there are other ways to find the IP address. I’ll discuss all this in detail. But first, let’s brush up the basics.
What is an IP Address?
An Internet Protocol address (commonly referred to as the IP address) is a numerical label assigned to each device connected to a computer network (using the Internet Protocol). An IP address serves both the purpose of identification and localisation of a machine.
The IP address is unique within the network, allowing communication between all connected devices.
You should also know that there are two types of IP addresses: public and private. The public IP address is used to communicate over the Internet, the same way your physical address is used for postal mail. However, in the context of a local network (such as a home where a router is used), each device is assigned a unique private IP address within this sub-network. This is used inside this local network without directly exposing the public IP (which the router uses to communicate with the Internet).
Another distinction can be made between IPv4 and IPv6 protocols. IPv4 is the classic IP format, consisting of a basic 4-part structure, with four bytes separated by dots (e.g., 127.0.0.1). However, with the growing number of devices, IPv4 will soon be unable to offer enough addresses. This is why IPv6 was invented, a format that uses 128-bit addresses (compared to the 32-bit IPv4).
Checking your IP Address in Ubuntu [Terminal Method]
The fastest and simplest way to check your IP address is by using the ip command. You can use this command in the following fashion:
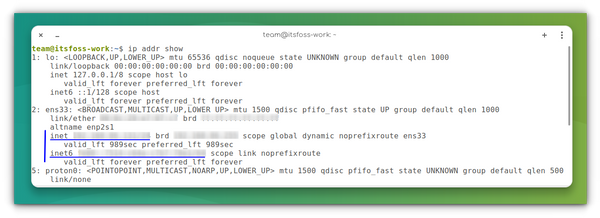
Both commands show the same output. They will show you both IPv4 and IPv6 addresses: You should identify the correct interface and then look beside inet for IPv4 and inet6 for IPv6. For example, inet 192.168.1.53/24 means the IPv4 address is 192.168.1.53.
Just get the IP address
It will just give the IP address of the system. Nothing else. There are other ways to check IP addresses in Linux but these two commands are more than enough to serve the purpose.
Long-time users might be tempted to use ifconfig (part of net-tools), but that command is deprecated. Some newer Linux distributions don’t include this package anymore and if you try running it, you’ll see the ifconfig command not found error.
Checking IP address in Ubuntu [GUI Method]
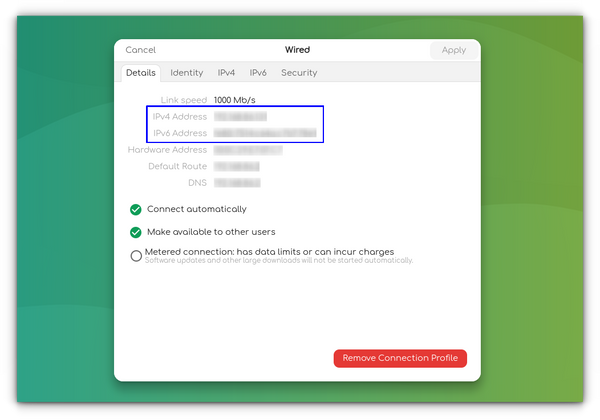
If you are not comfortable with the command line, you can also check the IP address graphically. Open up the Ubuntu Applications Menu (Show Applications in the bottom-left corner of the screen) and search for Settings and click on the icon: 
Pressing on the gear icon next to your connection should open up a window with more settings and information about your link to the network, including your IP address:
Bonus Tip: Checking your public IP address (for desktop computers)
First of all, to check your public IP address (used for communicating with servers etc.) you can use the curl command. Open up a terminal and enter the following command:
This should simply return your IP address with no additional bulk information. I would recommend being careful when sharing this address since it is equivalent to giving out your personal address.
If curl isn’t installed on your system, simply use sudo apt install curl -y to install curl on Ubuntu-based Linux distributions.
Another simple way you can see your public IP address is by searching for the IP address on Google.
Summary
Here’s a summary of the commands you learned:
| Description | Command |
|---|---|
| Show both IPv4 and IPv6 addresses with ip command | ip a or ip addr show |
| Print only IP address using hostname command | hostname -I |
| To check your public IP address (Need curl installed) | curl ifconfig.me |
| Display IP Address with Network Manager tool | nmcli -p device show |
| Use the ifconfig command to display the IP address (Need net-tools installed ) | ifconfig -a |
Now that you know your system’s IP address, how about getting the gateway IP? Boost your Linux networking skills with these essential commands! In this article, I went through the different ways you can find your IP address in Ubuntu Linux, as well as gave you a basic overview of what IP addresses are used for and why they are so important to us. I also discussed IPv4 and IPv6 briefly. By the way, have you ever wondered why there is no IPv5? I hope you enjoyed this quick guide. Let us know if you found this explanation helpful in the comments section!
Hidden Features! 25 Fun Things You Can Do With DuckDuckGo Search Engine
What is TTY in Linux?
Beautifully Monitor CPU Utilization in Linux Terminal With Stress Terminal UI
FOSS Weekly #23.28: China’s Linux OS, Linux Exit Codes, Btrfs Origins and More
Using cp Command in Linux
Bash Basics Series #5: Using Arrays in Bash
Become a Better Linux User
With the FOSS Weekly Newsletter, you learn useful Linux tips, discover applications, explore new distros and stay updated with the latest from Linux world
