- How to Clone and Restore Linux Partition Using dd Command
- dd Command
- How to List Linux Storage Device Info
- How to Install LSSCSI Tool in Linux
- How to Check Linux Disk Information
- How to Clone/Backup Partition in Linux
- How to Restore Clone Image in Linux
- How to Clone your Hard Drive on Linux
- Cloning Hard Drive using the dd tool
- Cloning Hard Drive using Partimage
- Cloning Hard Drive using Clonezilla
- Conclusion
- About the author
- Talha Saif Malik
- How to Clone a Partition or Hard drive in Linux
- How to Clone Linux Partition
- How to Clone Linux Hard Drive
- How to Backup MBR in Linux
How to Clone and Restore Linux Partition Using dd Command
The legacy and standards that drive the Linux operating system make it impeccable and unique among other operating system distributions in terms of achieving certain user-critical functionalities.
Most of these functionalities like backing up, restoring, and wiping out system files and user data might require the download, installation, and configuration, of certain application packages.
On the other hand, achieving these same user and system objectives only requires the mastery of certain OS-bound commands. The advantage of referencing such commands is that they often apply to all Linux distributions so that you do not have to worry about finding a package or command configuration that is compatible with your current Linux distribution.
dd Command
The dd command helps Linux users to clone, backup, and restore system hard disks and their associated data. This command also extends to other user and system-critical functionalities but this article seeks to explore its applicability in creating and restoring system hard disk images.
How to List Linux Storage Device Info
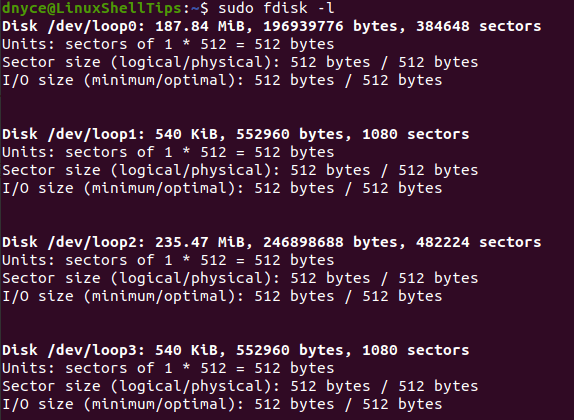
We need the lsscsi utility installed to flexibly help us list all viable storage devices on our Linux system. We could resort to other internal commands like:
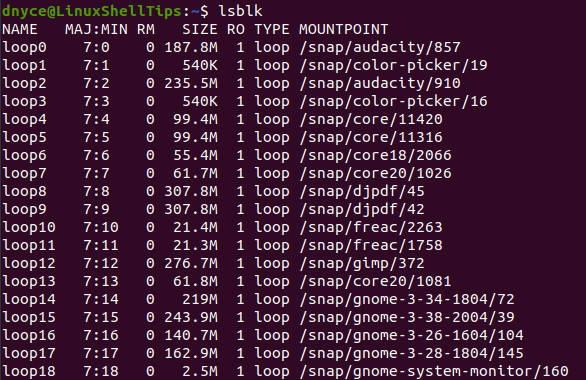
Another alternative OS-bound command to consider is the lsblk command.
How to Install LSSCSI Tool in Linux
Now let us install the lsscsi utility and note the difference in using it instead of fdisk and lsblk to list the storage devices attached to our Linux system.
$ sudo apt-get install lsscsi [On Debian/Ubuntu & Mint] $ sudo dnf install lsscsi [On CentOS/RHEL/Fedora and Rocky Linux/AlmaLinux] $ pacman -S lsscsi [On Arch Linux] $ emerge sys-apps/lsscsi [On Gentoo] $ sudo dnf install lsscsi [On Fedora] $ sudo zypper install lsscsi [On openSUSE]
Now try using this lsscsi utility to list active storage devices on your Linux system.
As you can see, this utility produces a more organized output compared to the latter system-bound device-listing utilities.
How to Check Linux Disk Information
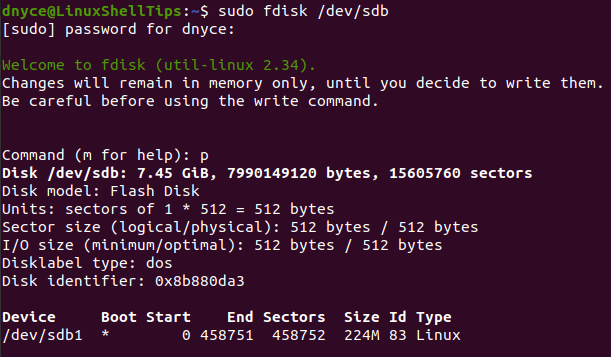
From the above lsscsi output, the disk drive we will be cloning is “/dev/sdb” . The OS-bound fdisk command should give us more detailed information regarding this flash disk drive. You will need Sudo privileges to execute this command.
Key in «p» to retrieve this disk’s detailed information.
We now know everything we need to know regarding our targeted disk drive. Exit the fdisk window by keying in «q» .
How to Clone/Backup Partition in Linux
It is from this point that we will witness the power of the OS-bound dd command. The above-listed and detailed “/dev/sdb” flash disk has one partition (/dev/sdb1) .
We are going to image or clone this single partition (sdb1) using the following dd imaging/cloning command:
$ sudo dd if=/dev/sdb1 of=/home/dnyce/LinuxShellTips/sdb1.img bs=1k conv=noerror
- if – points to the targeted device for cloning.
- of – points to the destination storage location and assigned file name for the created device clone/image.
- bs – depicts the needed block size configuration.
- conv=noerror – ensures that the original data for cloning is preserved.
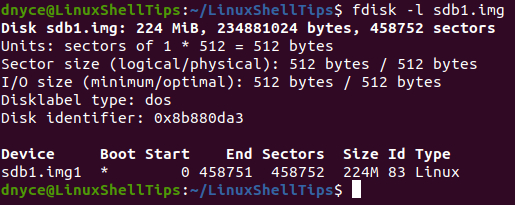
We can confirm the creation of our image/clone (sdb1.img) by navigating to its “of” location as per the dd command specifications.
$ cd /home/dnyce/LinuxShellTips && ls
A more detailed output can be achieved through the fdisk utility.
How to Restore Clone Image in Linux
We will also make use of the dd command, as we used earlier to imaging/cloning but this time swipes the input path (if) and the output path (of) entries.
$ sudo dd if=/home/dnyce/LinuxShellTips/sdb1.img of=/dev/sdb1 bs=1k conv=noerror
With the above output, we have achieved complete restoration of backup files to their original destination.
Final Note
You should now embrace this image creation and cloning skill set to make sure you never lose any data on your machine. The dd command is very effective and easy to master. With a one-line command, you have an image backup of your data and with another one-line command, you have successfully retrieved that same data.
How to Clone your Hard Drive on Linux
To secure your important data, it would be a great practice to frequently backup. In this modern technology world, protecting your sensitive data is extremely important to maintain its integrity. As a result, necessary precautions must be made to hold the data’s security and integrity. Linux provides a lot of software for cloning your hard drive. In the Linux operating system, cloning is copying hard drive data to any image file or drive. You can use a pretty good range of hard drive cloning software, for which we thank a thriving Linux open-source community.
There are several methods for cloning a hard drive in a Linux system. Cloning the hard drive or compressing its contents into a single file is the best solution for backing up its data. In this article, we will show you how to clone your hard drive on Linux using three different tools, so let’s begin!
Cloning Hard Drive using the dd tool
By default, most Linux systems have this incredibly effective disk cloning tool. The “dd” command-line tool was initially designed to copy and convert massive volumes of data to and from hard disk drives. It can be used to create system backups to clone the entire storage space. Have a look at below given some other features of the “dd” tool:
- In Linux-based systems, it is a command-line utility that is utilized for converting and copying files.
- You can mount your backup disk drives by using the dd tool which is much more readily than compared to other Linux disk cloning tools.
- dd is a freely available, standalone hard drive cloning tool that runs flawlessly on Linux systems.
- dd is considered a de-facto utility when creating new CD/DVD or Live USB distributions from their respective ISO images.
- dd permits you to copy your hard drive data to any external storage devices such as USB flash drives or SSDs.
- To use this utility, you must execute a single “dd” command. That’s how it provides a simple method for mounting your backup disk drive or cloning your hard drive compared to the other software that follows a series of steps of the same purpose.
In your Linux terminal, execute the below-given command to clone a hard drive:
- sdb is the destination
- sda is the source hard drive
- bs is the block size command which corresponds to 64K
- conv=no error, sync will sync I/O, and in case of error, it will not stop.
The default value for the 64K settings is 512 bytes, which is relatively small. As a condition, it is better to include 64K or 128K. On the other hand, the transfer of a small block is more reliable.
Cloning Hard Drive using Partimage
The “Partimage” is another utility that many Linux users utilize for cloning their hard drives. It is a powerful disk cloning tool with many useful capabilities like large-scale operating system deployment, imaging disc partitions, and software provisioning. Partimage is an open-source software which means that anyone can use and modify it according to their preference. Check below-given features of Partimage software:
- It has a simple GUI
- Partimage permits its users to compress and encrypt their disk image data
- HPFS, FAT, JFS, Xfs, Ext2, UFS, Ext3 HFS, NTFS, ReiserFS, all filesystems are supported by Partimage
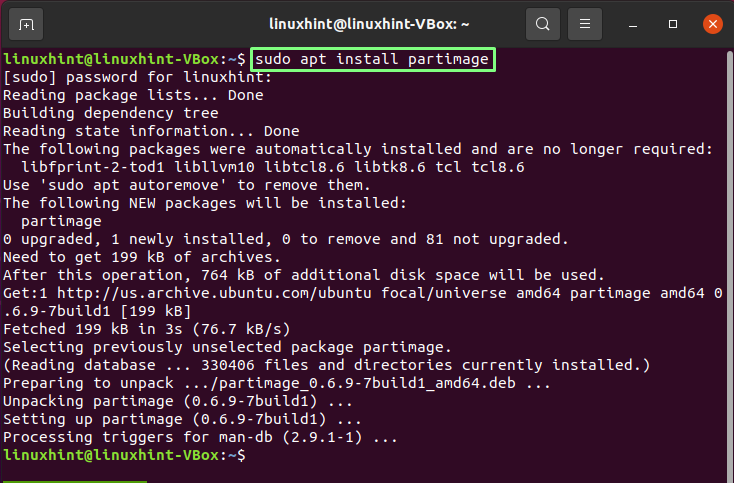
On your Linux system, install Partimage using the following command:
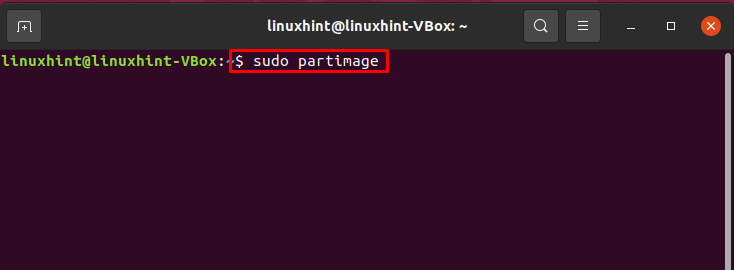
After completing the installation procedure, open up Partimage on your system:
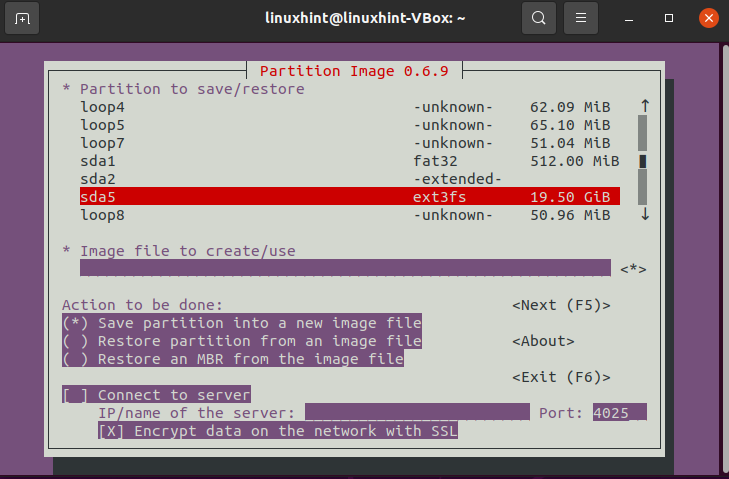
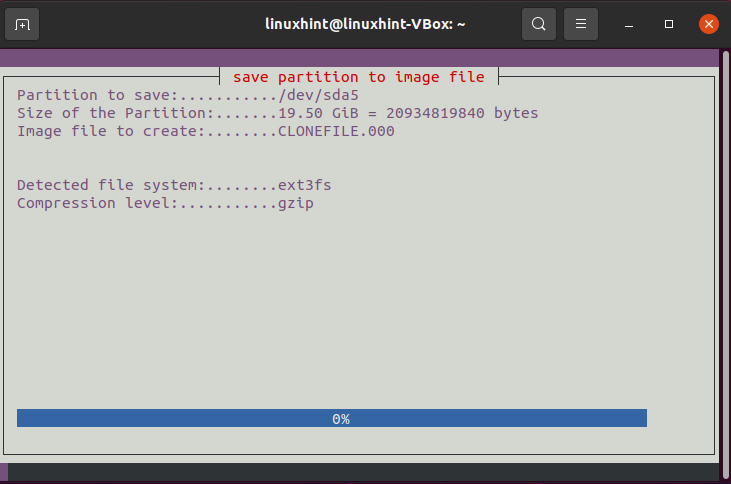
Using this tool, you can back up any partition. I’m going to backup “sda5”:
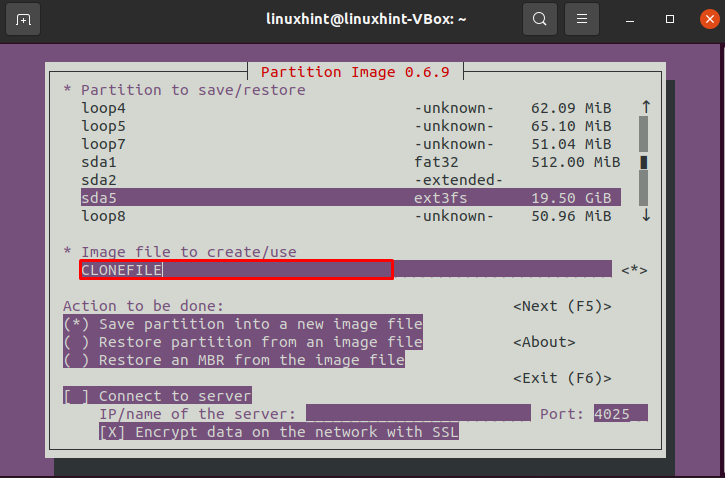
Write out the name of the new image file, if which you are going to clone your hard drive data:
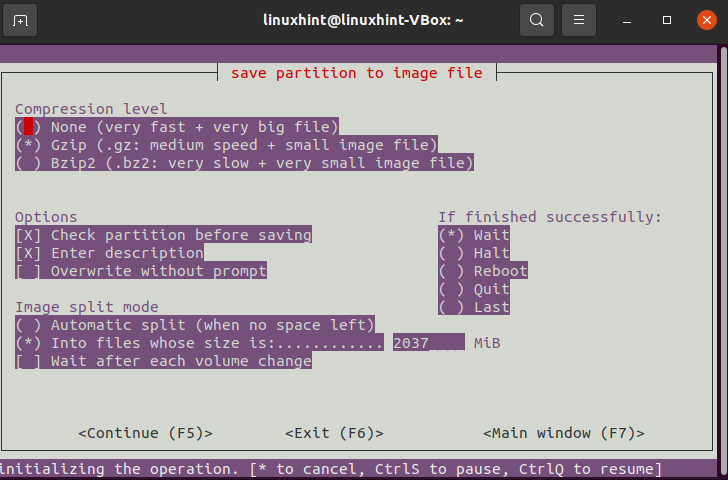
Select a compression level according to the size of your hard drive:
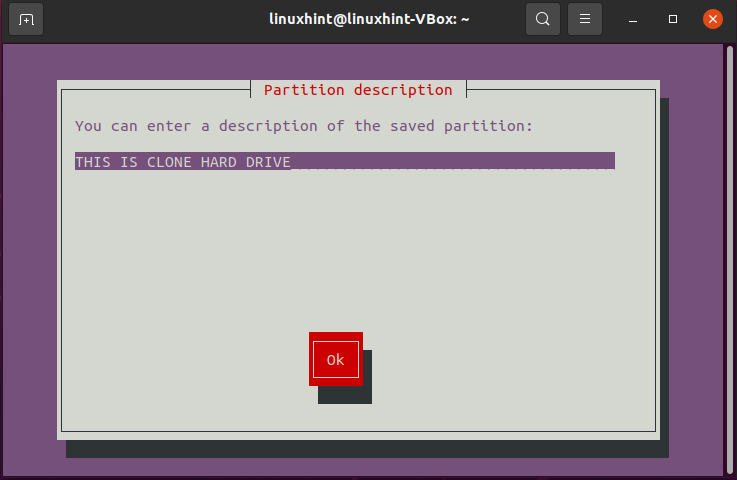
Enter a description of your clone drive:
The system will show you some information related to your hard drive. Check it out and Press Enter:
Cloning Hard Drive using Clonezilla
Clonezilla has several cloning features to ensure that your important data is protected in the case of any security failure. Clonezilla is a disk cloning program based on a console, which borrows features from other hard drive cloning software such as Partimage. It is available in two versions: Server and Live. It also permits its users to back up a single hard drive while simultaneously cloning up to 30 computers. Now, check out the below-given features to know more about this software:
- This hard disk cloning software is distributed under the GNU GPL license, which means anybody can use and add changes.
- Linux users can utilize Clonezilla for cloning only specified partitions of their hard drives.
- Users have the option of saving their Hard Disk Drives (HDDs) to local or external HDDs.
- Clonezilla supports ext2, reiserfs, ext3, xfs, FAT, JFS, and NTFS file systems.
- It also can share photos over a network which boosts productivity and allows enterprises to use Clonezilla for bulk cloning.
Want to use Clonezilla for cloning your hard drive? Follow the below-given procedure!
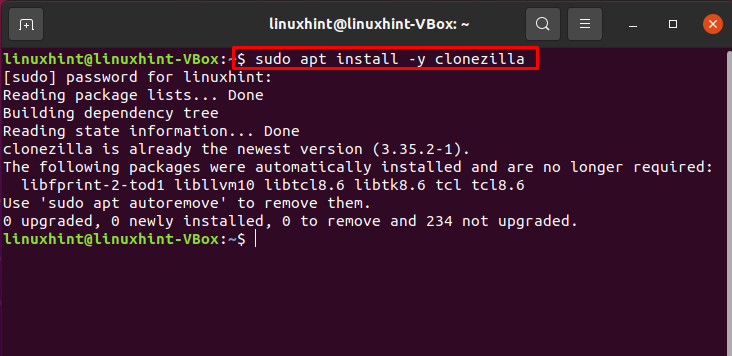
First, we will utilize this command or installing Clonezilla on Linux:
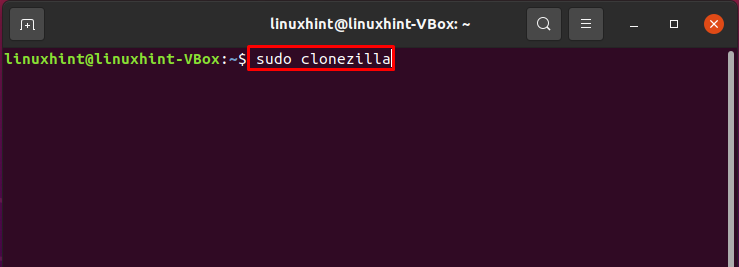
Now, open it up in your Linux terminal using the following command:
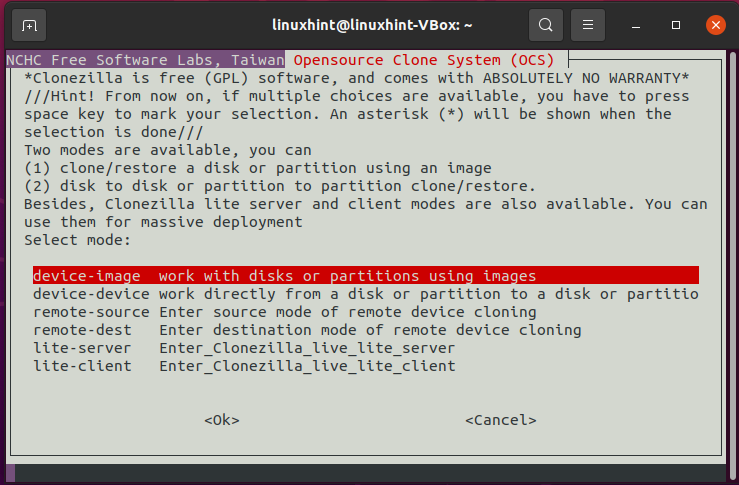
We have selected “device-image” as Clonezilla mode for cloning our hard drive:
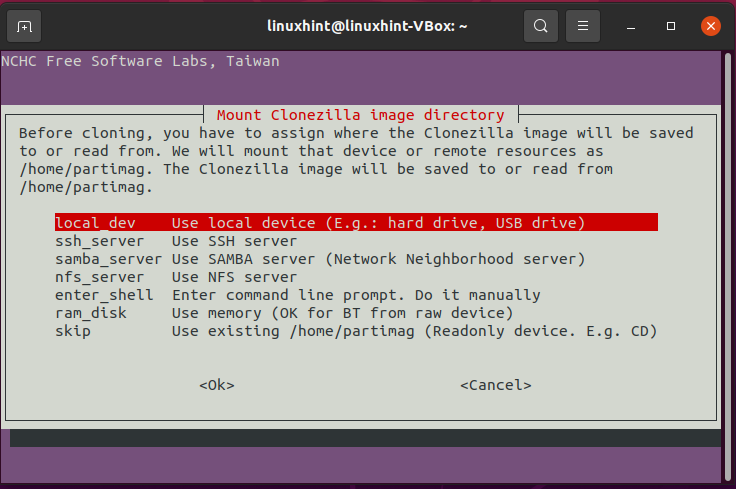
Now select your cloning medium, which is the hard drive in our case:
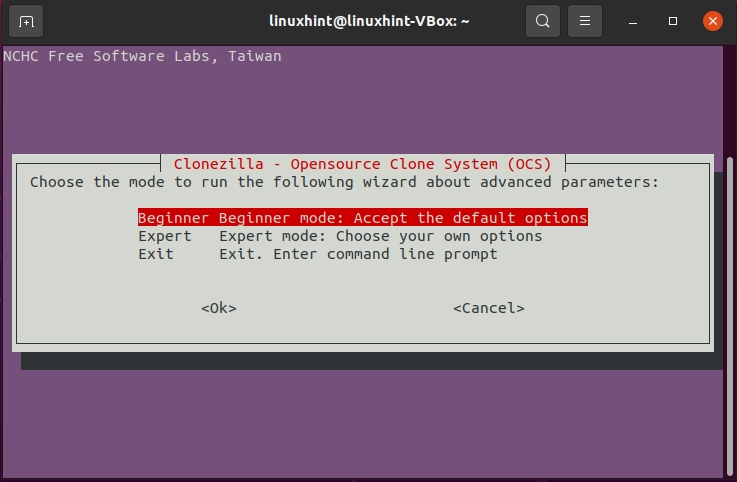
Press “Enter” to continue the cloning procedure. To get into the advanced parameters of Clonezilla, choose the “Beginner mode”:
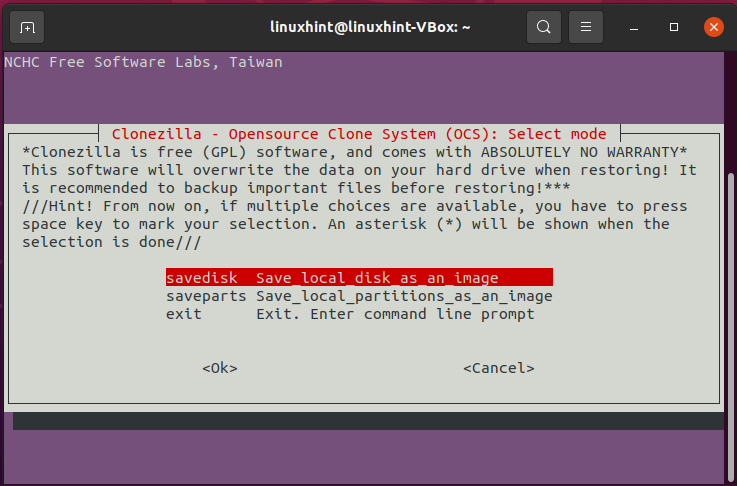
Select the mode of the Clonezilla application. We are cloning our hard drive as an image, whereas Clonezilla also provides you the option to save your local partition as an image:
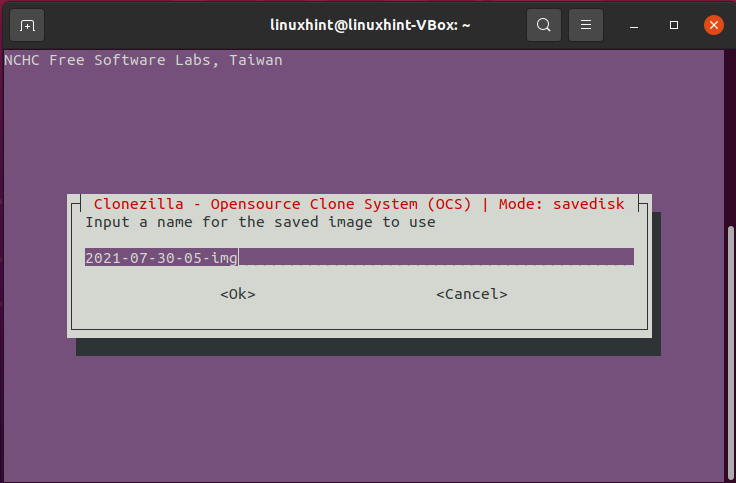
The final step is to enter the name of your image, in which you cloned all of your hard drive data. Input a name, and you are all done!
Conclusion
Storage devices can get corrupt anytime. As a result, having a hard drive data backup is critical. Linux users frequently struggle to discover the best disk cloning software according to their requirements. We solve this dilemma by providing three different methods for cloning your hard drive on Linux. According to our practical demonstration of the cloning process, we recommend the “dd” tool as the best cloning utility, as it can save a lot of your precious time while cloning your hard drive using a single command.
About the author
Talha Saif Malik
Talha is a contributor at Linux Hint with a vision to bring value and do useful things for the world. He loves to read, write and speak about Linux, Data, Computers and Technology.
How to Clone a Partition or Hard drive in Linux
There are many reasons why you may want to clone a Linux partition or even hard drive, most of which are related to creating backups of your data. There are multiple ways you can achieve this in Linux by using some external tools such as partimage or Clonezilla.
However in this tutorial we are going to review Linux disk cloning with tool called dd, which is most commonly used to convert or copy files and it comes pre-installed in most Linux distributions.
How to Clone Linux Partition
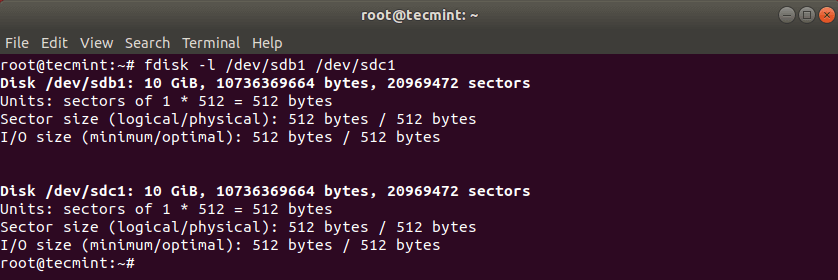
With dd command you can copy entire hard drive or just a Linux partition. Lets start with cloning one of our partitions. In my case I have the following drives: /dev/sdb, /dev/sdc.. I will clone /dev/sdb1/ to /dev/sdc1.
First list the these partitions using the fdisk command as shown.
Now clone a partition /dev/sdb1/ to /dev/sdc1 using the following dd command.
The above command tells dd to use /dev/sdb1 as input file and write it to output file /dev/sdc1.
After cloning Linux partition, you can then check both partitions with:
How to Clone Linux Hard Drive
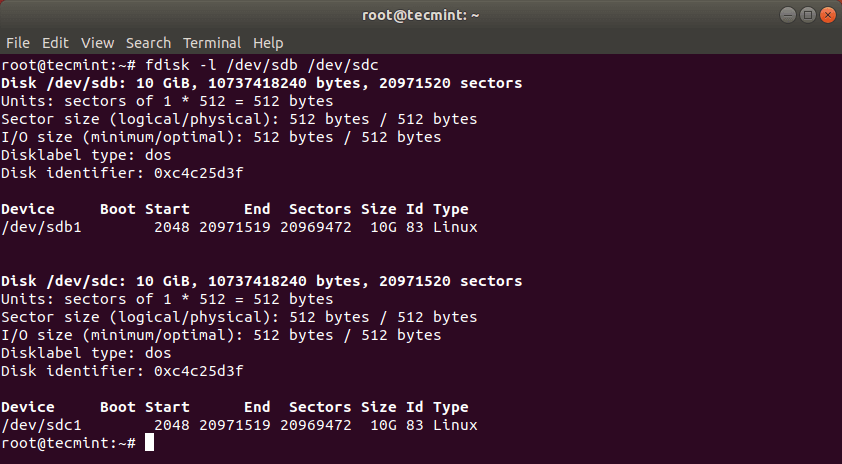
Cloning a Linux hard drive is similar to cloning a partition. However, instead of specifying the partition, you just use the entire drive. Note that in this case it is recommended that the hard drive is same in size (or bigger) than the source drive.
This should have copied the drive /dev/sdb with its partitions on the target hard drive /dev/sdc. You can verify the changes by listing both drives with fdisk command.
How to Backup MBR in Linux
dd command can also be used to backup your MBR, which is located at the first sector of the device, before the first partition. So if you want to create backup of your MBR, simply run:
# dd if=/dev/sda of=/backup/mbr.img bs=512 count=1.
The above command tells dd to copy /dev/sda to /backup/mbr.img with step of 512 bytes and the count option tells to copy only 1 block. In other words you tell dd to copy the first 512 bytes from /dev/sda to the file you have provided.
That’s all! dd command is a powerful Linux tool that should be used with caution when copying or cloning Linux partitions or drives.
