How to Create User on Ubuntu Linux in Multiple Ways
Do you need to give someone access to your Ubuntu desktop temporarily? Or do you manage an Ubuntu server, and you must create a user account for a new team member? Whatever the reason, there are multiple ways to create user on Ubuntu.
This tutorial will walk you through the different ways to create a user on Ubuntu Linux through the graphical user interface and the command line.
Prerequisites
This tutorial will be a hands-on demonstration. If you’d like to follow along, be sure you have an Ubuntu system set up. This guide uses Ubuntu 20.04, but the commands and procedures should work on any recent version of Ubuntu.
Creating a User from the GUI
If you’re Ubuntu has a desktop environment and prefers to do things from the GUI, then this section is for you. Creating a user in the GUI has minimal options and is limited to setting the name, username, user type, and password.
To add a user using the GUI, follow these steps. This example depicts using the GNOME shell, the default desktop environment.
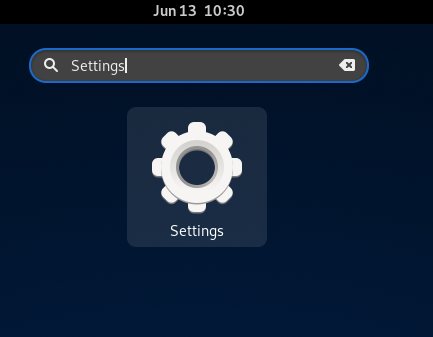
1. On your Ubuntu desktop, press the Super key (❖) on your keyboard or click the Show applications button.

2. Type Settings into the search bar and click on the setting icon that appears.
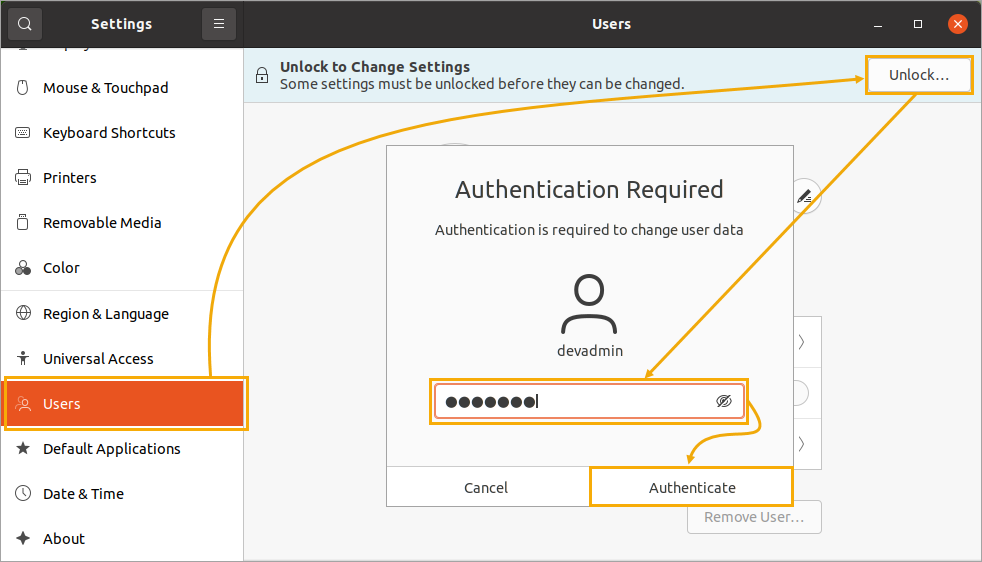
3. Click Users → Unlock → enter your password → Authenticate to unlock the Users settings.
4. After unlocking the Users settings, click the Add User button on the top of the window.

5. Provide the following information about the user you are creating. When satisfied with the new user details, click the Add button on the top right.
- Account type: Choose whether the new user account will be a Standard or Administrator account. A standard user has limited access to the system, while an administrator has full access.
- Full name: The user’s full name.
- Username: The new account’s username.
- Password: Choose whether to Allow user to set a password when the next login or Set a password now. If you choose the latter, enter the new password into the Password and Confirm boxes.
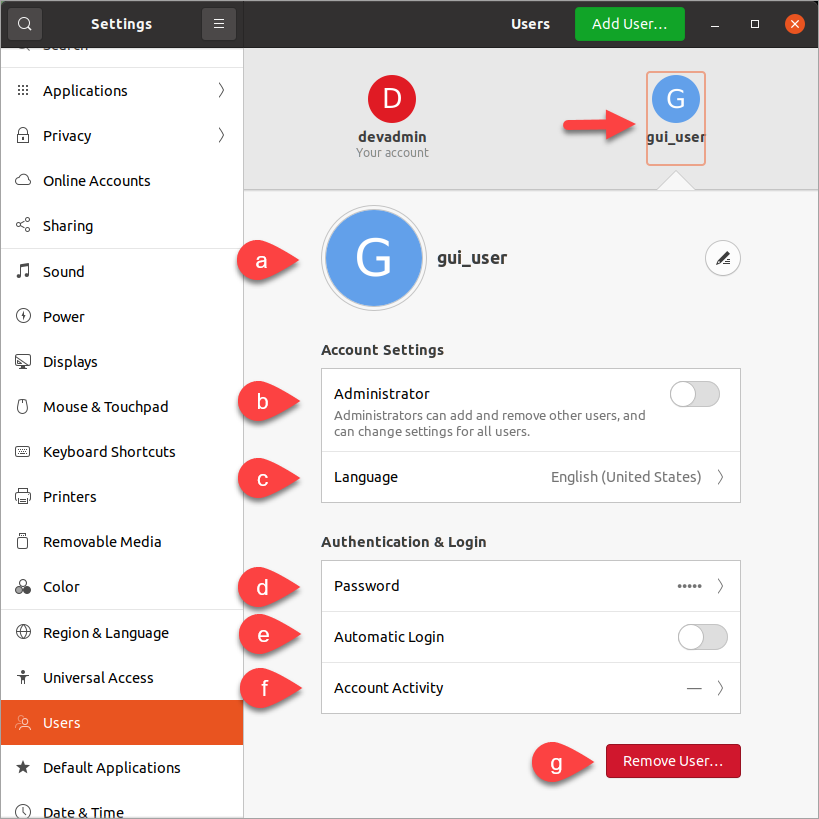
The screenshot below shows an example of creating a standard user whose username is gui_user and setting the password now.

6. Click the new user account to display its properties. As you can see below, this page is where you can modify the user’s account settings, such as:
b. Switching the account type to an Administrator or Standard.
c. Changing the preferred Language.
e. Enabling or disabling automatic login (require or do not require a password to log in).
f. Viewing the account activity logs (login times and sessions).
g. Removing the user account.
Creating a User from the Command Line
While creating a user using the graphical user interface may be convenient and intuitive, the options are limited. Conversely, creating a new user from the command line gives you more control and options for provisioning.
Why create users in the command line?
- The Ubuntu computer does not have a desktop environment, especially on servers.
- Creating a user account with more options not available in the GUI.
- Opportunity for automation like bulk user creation or user account provisioning workflow.
With a Default Home Directory Path
To create a user using the command line, follow these steps:
1. On a desktop environment, press CTRL+ALT+T to open a terminal window. On a non-desktop environment, log in to Ubuntu using your preferred SSH client.
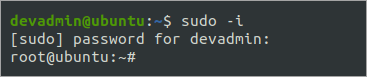
2. Creating a user account is a privileged operation that requires elevation. To avoid running each command with sudo at the beginning, switch to the root shell now.
3. Run the following command to add a standard user named cli_user1. Specify a different username as you wish. The -m flag tells the system to create a home directory for the user. By default, the home directory path is /home/ where is the new account’s username.
# Create a standard user account useradd -m cli_user1Alternatively, to create the new user as an administrator, specify the -G sudo option. The -G option means you’re adding the new user as a member of the sudo group.
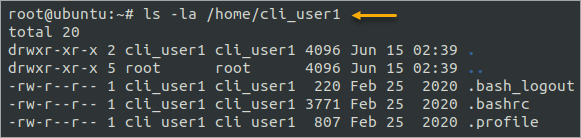
# Create an administrator user account useradd -m cli_user1 -G sudo4. At this point, you should have a new user account with a home directory in the default location. Run the command below to list the new user’s home directory.
The below screenshot shows the default files the system creates for new accounts.
With a Custom Home Directory Path
The default home directory for new user accounts is at /home/ . Should you need to create a new user with a custom home directory, you can do so by specifying the -d or —home-dir option. Both options are the same and interchangeable.
Run the following command to create a user named tmp_user with a home directory under /tmp/home .
# Create the user with a custom home directory useradd -m -d /tmp/tmp_user tmp_user # List the custom home directory ls -la /tmp/tmp_user Note: The custom home directory parent must already exist before creating the user account. For example, if the custom home directory path is /tmp/tmp_user, then the parent directory /tmp must already exist.

With a Specific User Identifier ID (UID)
By default, the system generates a random user identifier (UID) number for each new user. But some instances may require assigning a pre-defined UID, such as migrating users from another system or cloning application settings that rely on specific UIDs.
To create a new user and specify a UID, you must activate the -u flag followed by the UID.
Verify the new user’s UID by running the id command, which prints out information about the current user, including the UID.
The output will look something like the one below. You can see that the UID ****for the user is 1234 , which is what you specified.

If the UID is unavailable, useradd will return an error: “UID is not unique”.
With an Expiration Date
In some cases, you may want to create a user that will only have temporary access to the system. After that specific duration, the user can no longer log on to the system.
This approach applies in situations like when someone’s helping you with a project, and they only access within specific dates. Linux provides a way to do this by setting an expiry date for a user account using the -e flag followed by the date. The date value must be in the format of YYYY-MM-DD.
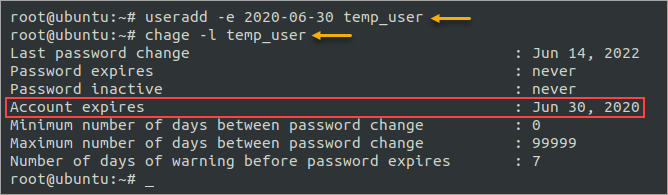
For example, run the below command to create a user on Ubuntu named temp_user with a specific expiration date of June 30, 2022.
useradd -e 2020-06-30 temp_user Verify the new user by running the chage command with the -l flag. The chage command displays information about when a user’s password will expire.
You will see an output similar to the one below. You can see that the Account expires field value is June 30, 2022.
Setting the New User Password
Each time you create a user account using the previous steps, the new user does not have a password. As such, the new user cannot log in to the system.
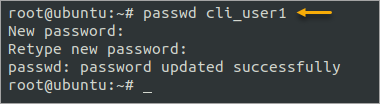
1. To set the new account password, run the passwd command like so.
2. Type in and confirm the new password. If the passwords match, you should see a message saying the password updated successfully.
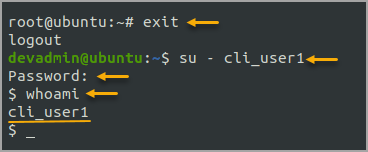
3. Confirm that the account works by switching to the new user account with the su command. Make sure to enter the new user’s password at the prompt.
# Exit the root shell exit # Switch to the new user account su - cli_user1 # Show the current user account whoamiThe image below shows the successful login to the new user account.
Conclusion
In this tutorial, you’ve learned how to create a user on Ubuntu using the GUI and command line, so you may choose which method you prefer. Creating a user in the GUI is the most convenient but has limited options while creating a user in the terminal offers more control and flexibility.
With your newfound knowledge, do you feel confident creating users in the GUI or the CLI? Which method do you prefer? Also, would you be willing to automate user access provisioning in your Linux systems using these techniques?
Hate ads? Want to support the writer? Get many of our tutorials packaged as an ATA Guidebook.