- Use the Crontab Utility to Schedule Tasks on Oracle Linux
- Background
- What Do You Need?
- Objectives
- List the contents of your crontab file
- Create or edit your crontab
- Check your cron entry output
- Crontab time sequence options
- Edit the crontab to try different running commands at different time sequences
- Crontab command syntax
- Edit your crontab to experiment with command syntax
- Access crontab output in the local mail spool
- Remove the entire crontab
- Video Demonstration
- More Information
- More Learning Resources
- How to configure Crontab on Linux
- Getting Started with Crontab
- Crontab Fields and Allowed Ranges
Use the Crontab Utility to Schedule Tasks on Oracle Linux
This tutorial shows you how to use the crontab command on Oracle Linux.
Background
Oracle Linux can run programs automatically as scheduled tasks or jobs. You can either schedule programs to run as system-level tasks by editing cron configuration in /etc/cron* ; or you can schedule programs to run as jobs within your user crontab. If you do not have system administrator access on a system or the programs that you wish to schedule are specific to your user account, the crontab utility provides a good mechanism to run programs on a regular schedule under your own user credentials. The crontab allows you to schedule jobs to run as often as every minute or as infrequently as once a year; however you should note that cron job will not run if the system is down during the time that the job was scheduled to run.
Note that cron configuration is standard on most Linux systems and has been available for Unix-like systems since 1975. More complex scheduling solutions are included in Systemd in the form of timers and users are encouraged to explore Systemd timers in more depth to solve specific requirements. However, this tutorial provides foundational training that is more suitable for the average user.
What Do You Need?
Objectives
In this tutorial you learn to:
- List the contents of an existing crontab
- Create and edit crontab entries
- Access crontab output
- Remove the full crontab for a user
List the contents of your crontab file
Note: When using the free lab environment, see Oracle Linux Lab Basics for connection and other usage instructions.
Use the crontab -l command to list the contents of your crontab file.
If no crontab entry exists for the user, the following message is displayed:
Create or edit your crontab
- You can jump to the bottom of the file by pressing ‘Shift-g’.
- Hit the ‘i’ key to enter insert mode.
- Enter the crontab line.
- Hit the ‘Esc’ key to exit insert mode.
- Enter ‘:wq’ to write the file and to quite the editor.
This step installs the crontab and makes it active immediately:
crontab: installing new crontab Each job appears on its own line in the crontab. The crontab has 5 space separated fields that define the different time periods that can be configured, followed by the command that is run for the job. The command can be equivalent to any command that you can run on the command line on the system, allowing you to run your own scripts or to take advantage of pipes and redirection operators.
Check your cron entry output
No Mail Transport Agent (MTA) is installed on a minimal Oracle Linux system or on an Oracle Linux platform image, by default. When no MTA is found, the cron daemon directs the output from commands specified in the crontab to the Syslog daemon. On a new install of Oracle Linux, you can view crontab output in the log file at /var/log/cron .
Run the following command to view the output generated by your new crontab entry:
Note that the cron task only runs every minute, so you may need to wait for a minute before you run the command. The output for this cron entry should appear similar to:
Jun 30 12:39:02 ol-server CROND[68564]: (oracle) CMD (echo "Hello World") Jun 30 12:39:02 ol-server CROND[68551]: (oracle) CMDOUT (Hello World) This output shows the user that the command is run as, the command that was run and then shows the command output.
If an MTA, such as postfix or sendmail is installed, cron directs the output from the crontab entry to the mail spool for the user that the crontab entry runs as. This is discussed further, later in this tutorial.
Crontab time sequence options
Crontab time fields are defined in the following sequence:
- minute: From 0 to 59
- hour: From 0 to 23
- day: From 1 to 31
- month: From 1 to 12, or the name of the month
- day-of-week: From 0 to 7, or the abbreviated name of day. Note that 0 and 7 both represent Sunday.
Special characters can be used within any of the time fields:
- Asterisk (*): Specifies that the command should be run for every instance of the field
- Hyphen (-): Can be used to indicate a range. For example, in the day-of-week field, you might specify 1-5 to schedule the task to run from Monday to Friday, but not to run on Saturday or Sunday.
- Comma (,): Can be used to specify a list of values for a field. For example, in the hour field, you might specify 6,18 to schedule the task to run at 6am and 6pm.
- Forward slash (/): Can be used to specify step values. For example, you could specify */15 in the minutes field to schedule a task to run every 15 minutes.
The crontab also allows you to use a special shorthand extension to replace the time fields for general time requirements. Importantly, this shorthand also includes an option to run a command after reboot:
- @reboot : Run once after reboot.
- @yearly : Run once a year, ie. “0 0 1 1 *”.
- @annually : Run once a year, ie. “0 0 1 1 *”.
- @monthly : Run once a month, ie. “0 0 1 * *”.
- @weekly : Run once a week, ie. “0 0 * * 0”.
- @daily : Run once a day, ie. “0 0 * * *”.
- @hourly : Run once an hour, ie. “0 * * * *”.
Note that the crontab only provide 1 minute granularity. It is not straightforward to set a crontab entry that runs more frequently than every minute. If you are looking for a tool that can handle this, consider looking into Systemd timer units.
Edit the crontab to try different running commands at different time sequences
*/15 * * * * echo "This crontab entry runs every 15 minutes" 10 * * * * echo "This crontab entry runs at 10 minutes past every hour" 30 13 * * 3 echo "This crontab entry runs at 13h30 on every Wednesday" @reboot echo "This command runs once after a reboot event" Crontab command syntax
The crontab command runs under the credentials of the user that the crontab belongs to and runs with some default environment variables set, including:
- HOME: The home directory for the user that the crontab runs as
- LOGNAME: Equivalent to the user name of the user that the crontab runs as
- USER: The user name of the user that the crontab runs as
- SHELL: The shell binary that is used to run commands. This is set to /bin/sh by default.
- PATH: The path available to the crontab utility. This is set to /usr/bin:/bin by default.
You can set alternate environment variables by specifying them as lines within the crontab that do not include time fields, for example if you would prefer to use the bash shell and you want to regularly import all of the variables and settings withing your personal .bashrc configuration, you may edit your crontab to look as follows:
SHELL=/bin/bash * * * * * source $HOME/.bashrc; Since the command run for a crontab job is executed within a shell environment, standard shell syntax applies and can be used to pipe or redirect output. For example to redirect all output to /dev/null, disabling any mailed output for the job as a result, use standard shell redirects for the STDOUT and STDERR output on the command:
* * * * * /path/to/command > /dev/null 2>&1 Alternately, you could redirect output to append to a file that you could use to track command output for each time it is run:
* * * * * /path/to/command >> $HOME/command.log Edit your crontab to experiment with command syntax
*/15 * * * * echo "This 'silent' crontab entry runs every 15 minutes but output is redirected to /dev/null" > /dev/null 2>&1 * * * * * echo "The date and time is $(date +\%Y-\%m-\%d\ \%H:\%M:\%S)" >> $HOME/crontab.log Within a minute, a crontab.log file should appear in the $HOME directory. You can view the contents of this file by running:
Access crontab output in the local mail spool
If an MTA is installed, all crontab output is mailed to the user’s system mail spool, by default.
Note: The following instructions are for example purposes only, and do not describe a complete configuration for a mail transfer agent (MTA). The configuration defaults may not be appropriate for your installation. If you are enabling postfix on a system, please also read Oracle Linux: Install the Postfix Email Server for information on configuring it properly.
For crontab mail handling to work correctly, you must install, configure and enable an MTA correctly. For the purpose of this exercise, you can simply perform the following steps to enable the postfix MTA to handle local mail:
sudo dnf install -y postfix sudo systemctl enable --now postfix.service sudo systemctl restart crond.service If you have not configured your crontab to redirect output to an alternate mail address or to discard output for your cron jobs, the output for each job is automatically delivered into the local mail spool for the user. The mail spool is usually stored as a single mail file that can be accessed at /var/spool/mail/$USER. If you are simply monitoring recent activity, it is easiest to tail this file to see mail as it is delivered:
To review the output of each cron job in a manageable interface, install the mailx package and use the mail command to view the contents of the mail spool:
Mail is listed in the following way:
Mail version 12.5 7/5/10. Type ? for help. "/var/spool/mail/oracle": 1 messages 1 new >N 1 (Cron Daemon) Wed Aug 5 23:48 30/1436 "Cron oracle & Enter the number of the mail message to view. For example, enter 1 to view the first message in the queue:
Use the header command to return to the mail headers listing, or use the quit command to exit the application.
You can change the email address that is used to mail cron output by setting the MAILTO environment variable in your crontab, but your system must be configured to handle external mail delivery. If you set the MAILTO environment to an empty value, output is discarded and no mail is sent for any cron job in the crontab.
Remove the entire crontab
Use the crontab -r command to remove the entire crontab for a user.
This command removes all cron job entries that you have specified for your user. If you only want to remove a specific job entry, use crontab -e to edit the crontab and remove the line for the job that you want to remove.
Check out man 5 crontab and man systemd.timer for more details on these features.
Video Demonstration
A video demonstration is provided at Oracle Linux Automating Tasks Cron Utility if you need more information on working with the crontab utility on Oracle Linux.
More Information
More Learning Resources
Explore other labs on docs.oracle.com/learn or access more free learning content on the Oracle Learning YouTube channel. Additionally, visit education.oracle.com/learning-explorer to become an Oracle Learning Explorer.
For product documentation, visit Oracle Help Center.
Use the Crontab Utility to Schedule Tasks on Oracle Linux
Copyright © 2021, Oracle and/or its affiliates.
How to configure Crontab on Linux
Scheduling in Linux is being done by a system daemon named cron. The cron daemon executes tasks at specific time and these tasks are called cron jobs. The cron jobs are mostly used to automate system maintenance or administration. You can automate almost everything with cron daemon. For instance, you can set cron job to backup your home directory, send alerts, install software and many more.
The cron daemon is kicked off automatically from /etc/init.d once you enter multi-user run level. The cron jobs are listed in crontab files and are located in the cron spool area /var/spool/cron/crontabs. Cron searches for these files and load them in the memory for execution. Another file cron read is /etc/crontab. In Debain and Ubuntu /etc/crontab executes programs written under directories /etc/cron.daily, /etc/cron.hourly, /etc/cron.weekly and /etc/cron.monthly on daily, hourly, weekly and monthly basis.
Crontab is a utility that maintains crontab files for individual users. Crontab file is a simple text file having a list of commands that are executed at specific times. It is recommended to use crontab command to access and update crontab files in /var/spool/cron/crontabs. Crontab stands for «cron table» which the cron daemon uses for scheduling jobs. Every user has a crontab file which is regularly checked by cron daemon regardless of whether the user is actually logged in to the system or not.
In the Webdock control panel it is easy to manage your Crontab entries for any user on your server. Check out the Cron Jobs server screen for more information.
Getting Started with Crontab
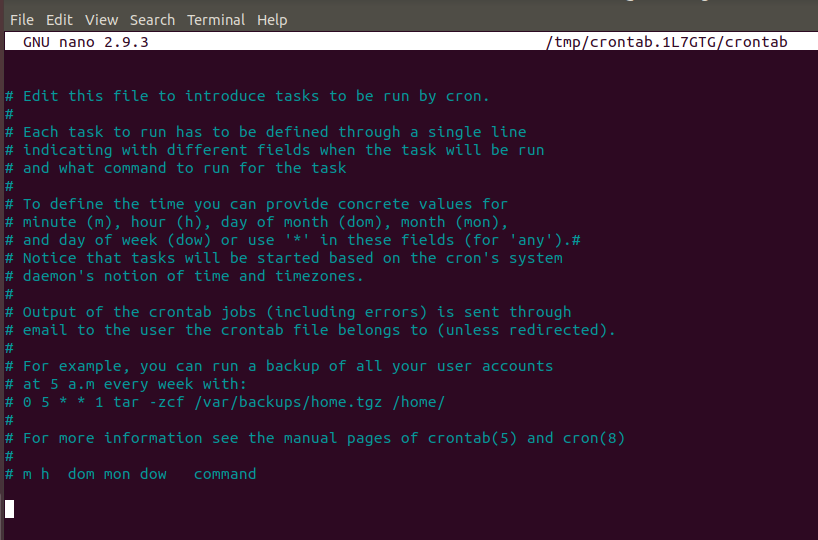
To edit or create a crontab file for the currently logged in user, issue following command:
This will open crontab file in your favorite editor located at /var/spool/cron/crontabs/edward (edward is our username in this example, it may differ in your case). Output of the above command will be (our editor here is nano):
To specify a task to run at a particular time, you have to enter the following six fields separated by a space.
Crontab Fields and Allowed Ranges
Description
Allowed Value