- How to Install FFmpeg 5 on Ubuntu 22.04 | 20.04
- What’s new in FFmpeg 5?
- Step 1: Update Ubuntu
- Step 2: Import FFmpeg PPA
- Step 3: Install FFmpeg 5
- FFmpeg Command Examples
- Conclusion: Installing FFmpeg 5 on Ubuntu
- Installing FFmpeg on Ubuntu
- Install FFmpeg on Ubuntu with apt
- Step 1: Update the Repository
- Step 2: Install FFmpeg
- Step 3: Verify the Installation
- Install FFmpeg on Ubuntu with snappy
- Step 1: Install Snap
- Step 2: Install FFmpeg
- Step 3: Verify the Installation
How to Install FFmpeg 5 on Ubuntu 22.04 | 20.04

FFmpeg 5 is a major release of the popular open-source multimedia framework, offering a powerful command-line tool for processing and converting audio and video files. This update has many new features and improvements that make it an attractive choice for developers, video editors, and anyone needing to work with multimedia files.
Note: FFmpeg 6 has been released, which can be installed by visiting our guide “How to Install FFmpeg 6 on Ubuntu” for those seeking version 6 instead of version 5.
What’s new in FFmpeg 5?
Here are some of the new features and improvements that were introduced in FFmpeg 5:
- AV1 Codec Support: FFmpeg 5.0 includes support for the AV1 codec, a royalty-free video codec developed by the Alliance for Open Media. AV1 is designed to provide high-quality video compression while being efficient and scalable, making it an attractive choice for many applications.
- WebP Animation Support: FFmpeg 5.0 can now handle WebP animations, a sequence of WebP images played back in a loop to create an animated effect. This is an excellent addition for anyone who works with WebP images and wants to create animated graphics for the web.
- New Filters: FFmpeg 5.0 includes several new video and audio filters, such as the chromahold filter, which replaces the chroma of a video frame with a solid color, and the balance filter, which adjusts the balance between the left and right audio channels.
- Hardware Acceleration: FFmpeg 5.0 supports hardware acceleration on various platforms and devices, including ARM Mali, VideoCore IV GPUs, and the NVIDIA Jetson platform.
- Improved Documentation: FFmpeg 5.0 features improved documentation, with more comprehensive and up-to-date information on how to use the various features and options of the tool. This will be especially helpful for newcomers to FFmpeg who are just starting with the tool.
The following guide will demonstrate how to install FFmpeg 5 on Ubuntu 22.04 Jammy Jellyfish or Ubuntu 20.04 Focal Fossa with the command line terminal and a well-known PPA by Rob Savoury.
Step 1: Update Ubuntu
Before installing FFmpeg on your Ubuntu system, it is recommended to update your system to ensure a smooth installation process and avoid potential conflicts. This will also ensure that any dependencies or packages required by FFmpeg are up-to-date and compatible with your system. You can update your system by running the following command in your terminal:
sudo apt update && sudo apt upgradeStep 2: Import FFmpeg PPA
In order to begin the installation of FFmpeg 5, it is necessary to import the FFmpeg Personal Package Archive (PPA) maintained by Rob Savoury. In addition to importing the FFmpeg 5 PPA, you must also import his FFmpeg 4 repository, as it contains dependencies required for the FFmpeg 5 PPA. You can achieve this by executing the following command:
sudo add-apt-repository ppa:savoury1/ffmpeg4 -y sudo add-apt-repository ppa:savoury1/ffmpeg5 -y Before proceeding any further, it is recommended to run a quick upgrade by using the following command:
Step 3: Install FFmpeg 5
Now that the PPA repository has been added to your system, you can install FFmpeg 5. This can be done by running the following command in your terminal:
After the installation process is complete, you can verify the installation by running the following command:
This command will display the FFmpeg version installed on your system. You should see an output similar to the following:
ffmpeg version 5.1.2-0ubuntu1~22.04.sav2 Copyright (c) 2000-2022 the FFmpeg developersIf you wish to view the encoders and decoders available for FFmpeg 5, you can use the following commands:
To view the available encoders:
To view the available decoders:
These commands will display a list of available encoders and decoders, respectively. By using these commands, you can better understand the capabilities of FFmpeg 5 and the available options for encoding and decoding media files.
FFmpeg Command Examples
Once FFmpeg 5 is installed on your system, you can use it to perform various tasks. The following commands provide some commonly used examples:
Converting a video file from one format to another:
ffmpeg -i input.mp4 output.aviIn this command, “input.mp4” is the source file’s name, and “output.avi” is the destination file’s name.
Extracting audio from a video file:
ffmpeg -i input.mp4 -vn -acodec copy output.aacIn this command, “-vn” disables video output, “-acodec copy” copies the audio stream without re-encoding, “input.mp4” is the source file, and “output.aac” is the name of the destination file.
Extracting a single frame from a video file:
ffmpeg -i input.mp4 -ss 00:00:10 -frames:v 1 output.jpgIn this command, “-ss 00:00:10” seeks to the 10th second of the video, “-frames:v 1” specifies the number of frames to output, “input.mp4” is the name of the source file, and “output.jpg” is the name of the output file.
Merging two video files together:
ffmpeg -i input1.mp4 -i input2.mp4 -filter_complex "[0:v][1:v]concat=n=2:v=1[outv]" -map "[outv]" output.mp4In this command, “-filter_complex” specifies the filter graph, “n=2:v=1” specifies the number of inputs and the output video stream, “outv” is the name of the output video stream, and “output.mp4” is the name of the output file.
Scaling a video file to a specific size:
ffmpeg -i input.mp4 -vf scale=640:360 output.mp4In this command, “scale=640:360” specifies the target size of the video, “input.mp4” is the source file, and “output.mp4” is the name of the output file.
Adding subtitles to a video file:
ffmpeg -i input.mp4 -vf subtitles=subs.srt output.mp4In this command, “subtitles=subs.srt” specifies the path to the subtitle file, “input.mp4” is the source file, and “output.mp4” is the name of the output file.
Changing the video codec of a file:
ffmpeg -i input.mp4 -vcodec h264 output.mp4In this command, “-vcodec h264” specifies the H.264 video codec, “input.mp4” is the source file, and “output.mp4” is the name of the output file.
Extracting frames from a video at regular intervals:
ffmpeg -i input.mp4 -vf fps=1/10 output%03d.jpgIn this command, “fps=1/10” specifies that one frame should be output every ten seconds, “input.mp4” is the source file, and “output%03d.jpg” is the naming pattern for the output files.
Removing the audio from a video file:
ffmpeg -i input.mp4 -an output.mp4In this command, “-an” disables the audio output, “input.mp4” is the source file, and “output.mp4” is the name of the output file.
Extracting metadata from a video file:
ffmpeg -i input.mp4 -f ffmetadata metadata.txtIn this command, “-f ffmetadata” specifies the metadata output format, “input.mp4” is the source file, and “metadata.txt” is the name of the output file.
Conclusion: Installing FFmpeg 5 on Ubuntu
In conclusion, FFmpeg is a powerful and versatile multimedia framework that enables Ubuntu users to decode, encode, transcode, and stream audio and video files. FFmpeg 5 is now considered an older stable release, with FFmpeg 6 surpassing it. However, for better stability, using this version maybe more beneficial, depending on your situation.
Installing FFmpeg on Ubuntu
FFmpeg is a command-line tool that records, transcodes, mixes, formats, and streams multimedia content. This cross-platform framework is open-source and shares audio and video libraries (libavutil, libavcodec, libavformat, libavdevice, libavfilter, libswscale, and libswresample) with users for free.
In this tutorial, you will learn about installing FFmpeg on Ubuntu using two methods.
- Ubuntu installed (this guide uses Ubuntu 20.04).
- A user with root or sudo privileges.
- Access to the terminal.
Install FFmpeg on Ubuntu with apt
The FFmpeg package is included in Ubuntu repositories, but the version may not be the latest. Still, apt is frequently used as it is one of the easiest ways to install FFmpeg on Ubuntu.
Step 1: Update the Repository
Update and upgrade the system packages to get the FFmpeg version currently available in the repository. Execute the following command:
sudo apt update && sudo apt upgrade
Hit y to continue when prompted:
Step 2: Install FFmpeg
After upgrading the repository, install FFmpeg by running the following:
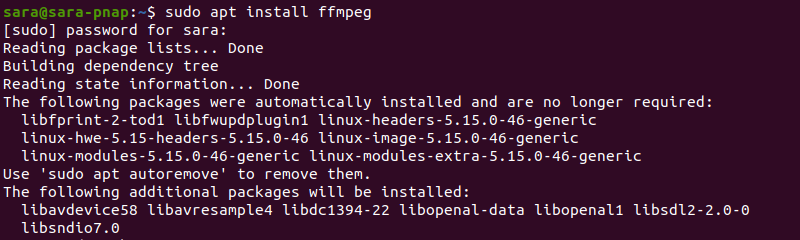
Step 3: Verify the Installation
Confirm that FFmpeg has been installed with:

The command verifies that the 4.2.7 version of FFmpeg is installed. The 4.2.7 is the latest stable FFmpeg version in the Ubuntu 20.04 repositories. However, apps in Ubuntu repositories are not always up-to-date.
To update FFmpeg to the latest version, use snappy.
Install FFmpeg on Ubuntu with snappy
Get the latest version of FFmpeg with the Snap package manager (snappy).
The snap tool packs an app and its dependencies in a snap package, a container that works on any Linux distribution. Moreover, unlike FFmpeg packages in official Ubuntu repositories, snaps are updated automatically and continually, ensuring users get the latest FFmpeg version.
Step 1: Install Snap
Start by checking whether Snap is already installed on the system, as is the case on Ubuntu. Execute the following:

The output verifies that Snap is running. In case Ubuntu does not have Snap, the command prints the following:

To add Snap to the machine, follow these steps:
1. Update and upgrade the repository with:
sudo apt update && sudo apt upgrade
2. Install Snap by running:

3. Verify the installation using:

Step 2: Install FFmpeg
![]()
The terminal displays the progress bar. Once the installation completes, the output looks like this:

Note: If you previously installed ffmpeg using apt, uninstall the tool, restart the system, and then use snap to install ffmpeg again.
Step 3: Verify the Installation
To verify that FFmpeg is installed, run:

The version of FFmpeg installed with Snap is 4.3.1, a more recent version than the one installed via apt (4.2.7).
After going through this tutorial, you now understand how to install FFmpeg on Ubuntu using apt or snappy. Next, learn about the differences between Snap, Flatpack, and AppImage package formats.
If you are a Windows user, read our tutorial and learn how to install FFmpeg on Windows, and if you are a Mac user, learn how to install FFmpeg on MacOS..
Sara Zivanov is a technical writer at phoenixNAP who is passionate about making high-tech concepts accessible to everyone. Her experience as a content writer and her background in Engineering and Project Management allows her to streamline complex processes and make them user-friendly through her content.
A bad internet connection or misconfigured third-party installers can corrupt packages and cause problems on your computer. This article will show.
This tutorial will show you how to create a bootable USB and reinstall Ubuntu. Reinstalling the OS is sometimes the easiest solution for fixing issues with drivers or after an upgrade failure.
Ubuntu 22.04 LTS is the newest Ubuntu version with great new features. Follow this guide to install Ubuntu 22.04 in no time.
Having a precise list of installed packages helps system admins maintain, replicate, and reinstall systems. In this tutorial, learn how to list all.