- Минимальная установка Fedora
- Минимальная установка Fedora
- Шаг 1. Установка системы
- Шаг 2. Настройка сети
- Шаг 3. Установка X сервера
- Шаг 4. Установка GNOME
- Шаг 5. Установка KDE Plasma
- Шаг 6. Установка XFCE
- Step 1. Begin the installation
- Step 2. Setup the keyboard and timezone
- Step 3. Disk partitioning
- Step 4. Begin the installation and reboot
- Step 5. Finish installation
- Getting Started
- Introduction
- Fedora Variants and how to install
- General preparations
- Download the software deliverables
- Prepare boot media
- Getting Additional Help
Минимальная установка Fedora
Многим людям не нравится набор приложений по умолчанию в составе дистрибутива или его спинов. Они являются популярными и часто и используемыми, но не обязательно теми которые нужны именно вам. Выпиливание всего ненужного часто приводит к поломке системы и является не лучшей идеей. Но и в тоже время несколько одинаковых, однотипных приложений в системе тоже режет глаз. Хотя у Fedora еще не самые жирные сборки относительно других дистрибутивов.
Этот тип установки, очевидно, будет не таким простым, как установка группами (в прошлой статье). Здесь требуется опыт работы с обычной установкой, пакетным менеджером, терминалом и т.д. Также можно добиться некоторого прироста производительности (или большей экономии ресурсов) и несомненно, получить немного больше знаний о системе.
Если вы не уверены, сначала попробуйте собрать, проверить и протестировать систему в виртуальной машине, прежде чем делать это на своей основной машине. Как собственно буду делать и я, для написания этой статьи.
Минимальная установка Fedora
Шаг 1. Установка системы
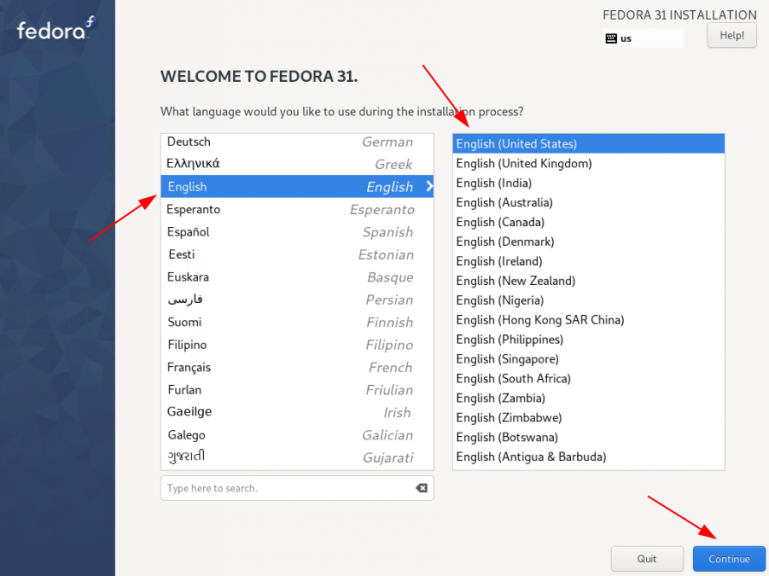
Загрузите и запишите на флэшку Fedora-Everything-netinst-x86_64-31-1.9.iso, который можно скачать по ссылке. Запускаем установку на английском языке. Создадим пользователей, установим пароли, настроим сеть, время, репозиторий установки, разделы системы.
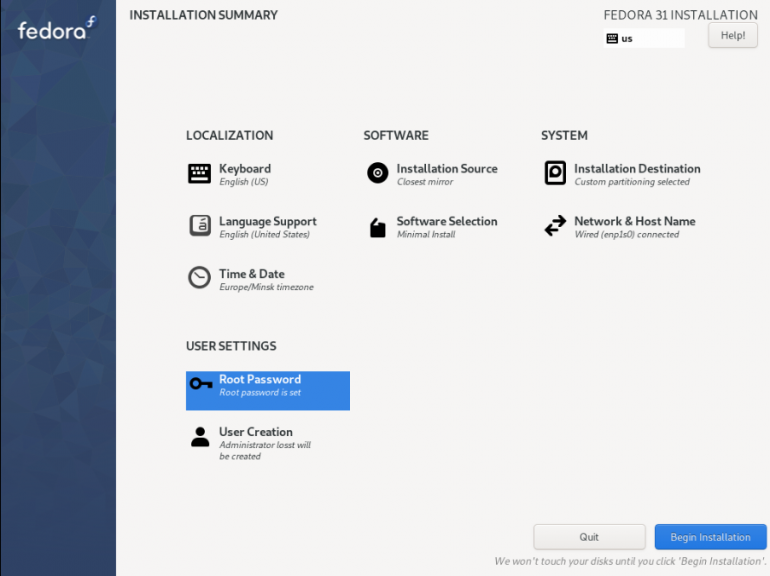
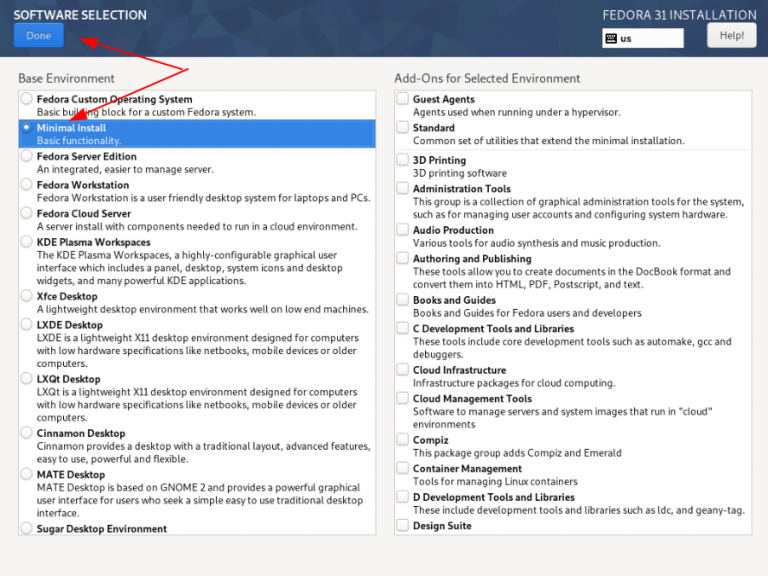
В меню Software selection выбираем: Minimal install и жмем Done.

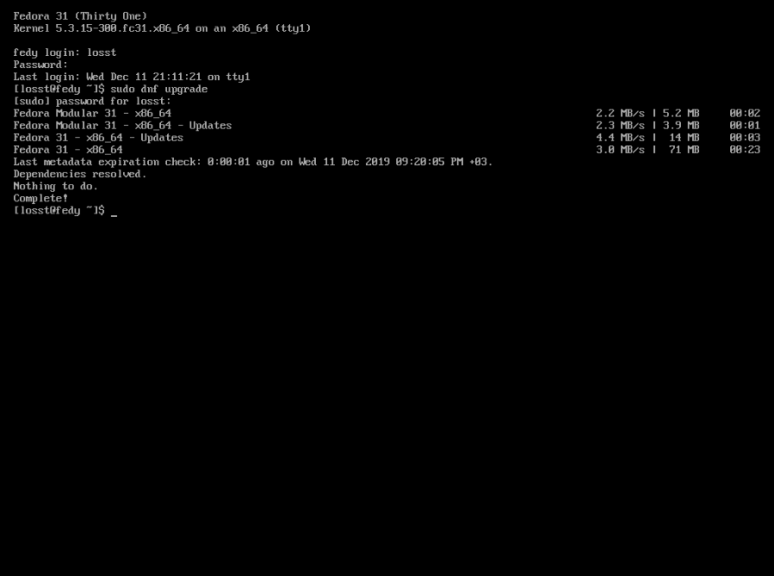
После перезагрузки попадаем прямо в консоль TTY, где входим под своим именем пользователя и паролем:
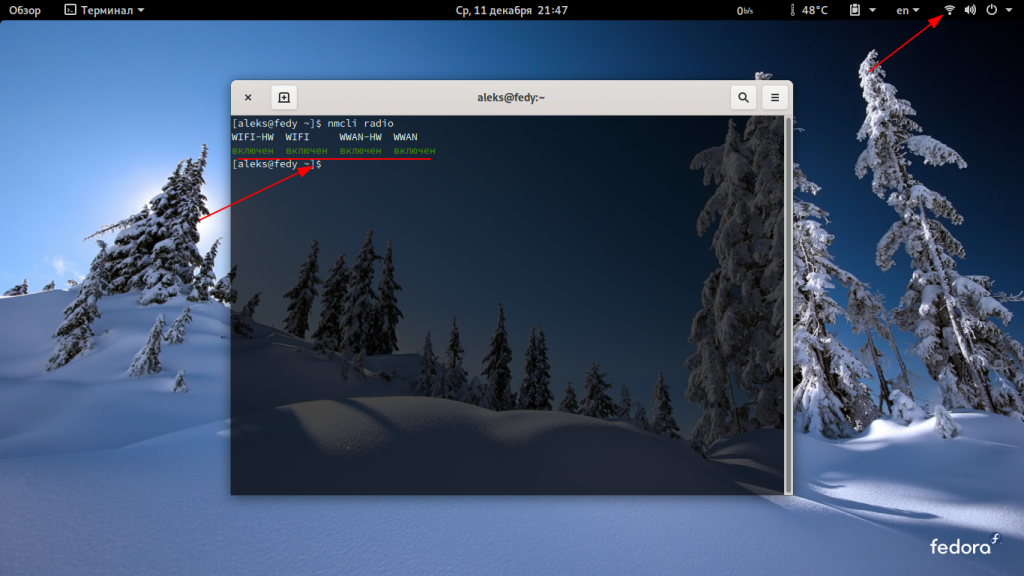
Шаг 2. Настройка сети
Если используется кабельный интернет, он уже подключен, а если используется wi-fi с помощью команды можно посмотреть активен он или нет:
В виртуальной машине у меня нет wi-fi, подключение я покажу на своей системе.
Если wi-fi отключен, вводим команду:
Затем снова вводим команду чтобы убедиться, что она активирована:
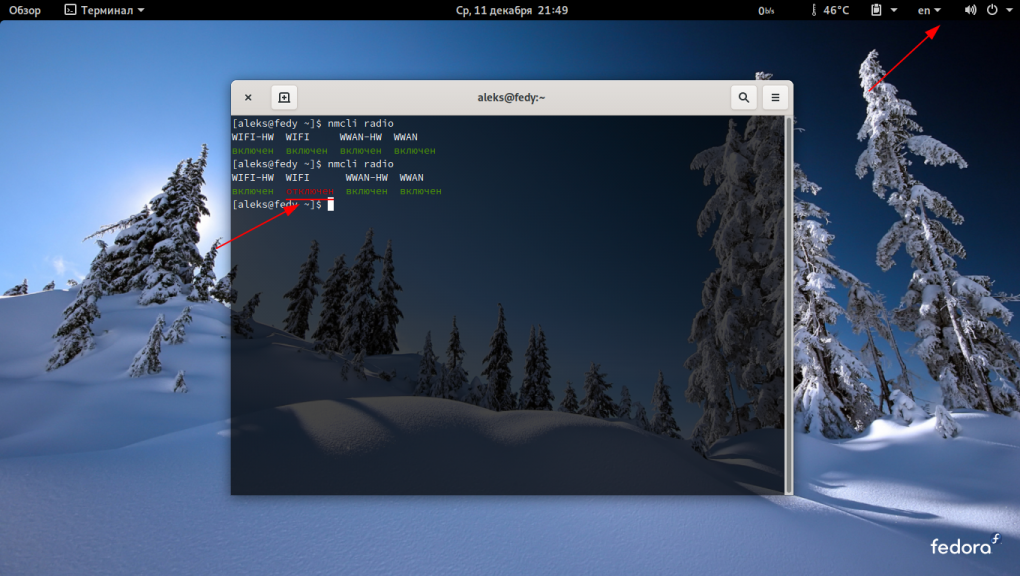

Теперь посмотрим точки подключения wi-fi:
nmcli device wifi rescan
nmcli device wifi list
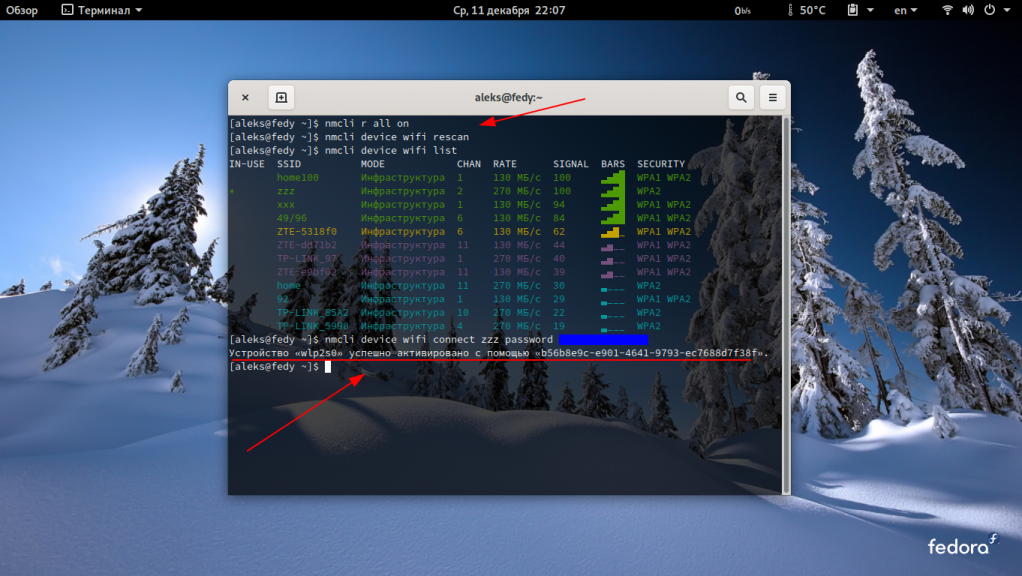
Если wi-fi не подключен, подключимся с помощью команды:
nmcli device wifi connect «моя сеть» password «мой пароль»
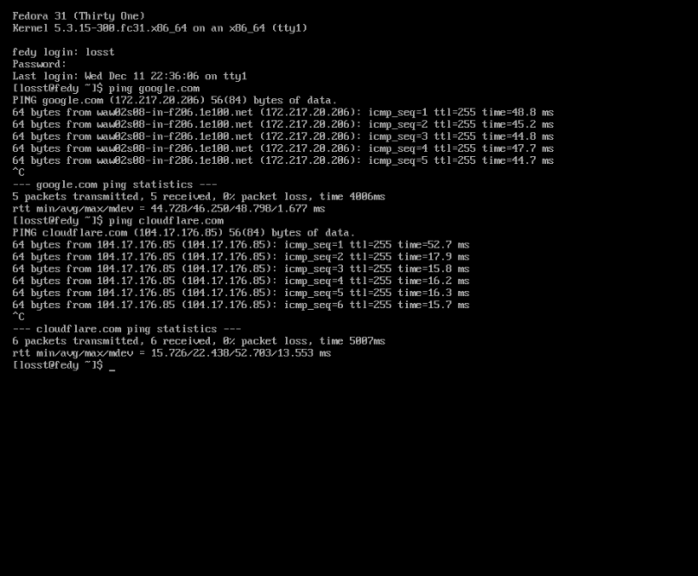
Здесь меняем моя сеть и мой пароль на свои имена и пароли. Возвращаемся в виртуальную машину. Для проверки сети можно использовать пинг (или попробовать обновить систему, как я уже сделал выше):
Нажмите Ctrl+C, чтобы остановить тест:
Шаг 3. Установка X сервера
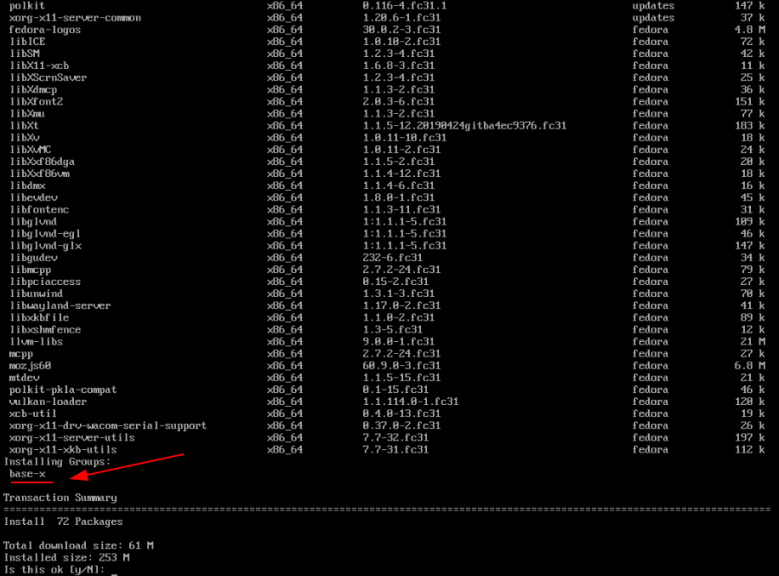
Теперь, когда сеть подключена, установим иксы. Установив группу пакетов @base-x, мы получим видеодрайвера для Nvidia (nouveau), Intel и AMD(ati).
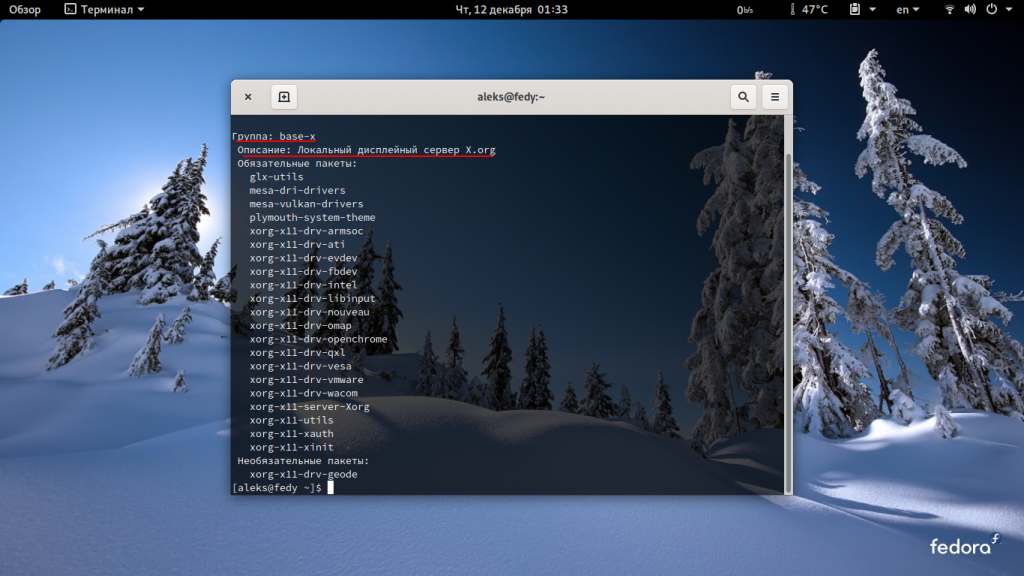
Если вы используете более новую версию AMD, вам понадобится пакет: xorg-x11-drv-amdgpu. Если вы не уверены, установите оба(у меня Intel, я ставлю только иксы):
sudo dnf install @base-x
sudo dnf install xorg-x11-drv-amdgpu
Далее установим рабочее окружение. Здесь можно выбрать все, что захотите, я расскажу об установке GNOME, KDE Plasma и XFCE.
Шаг 4. Установка GNOME
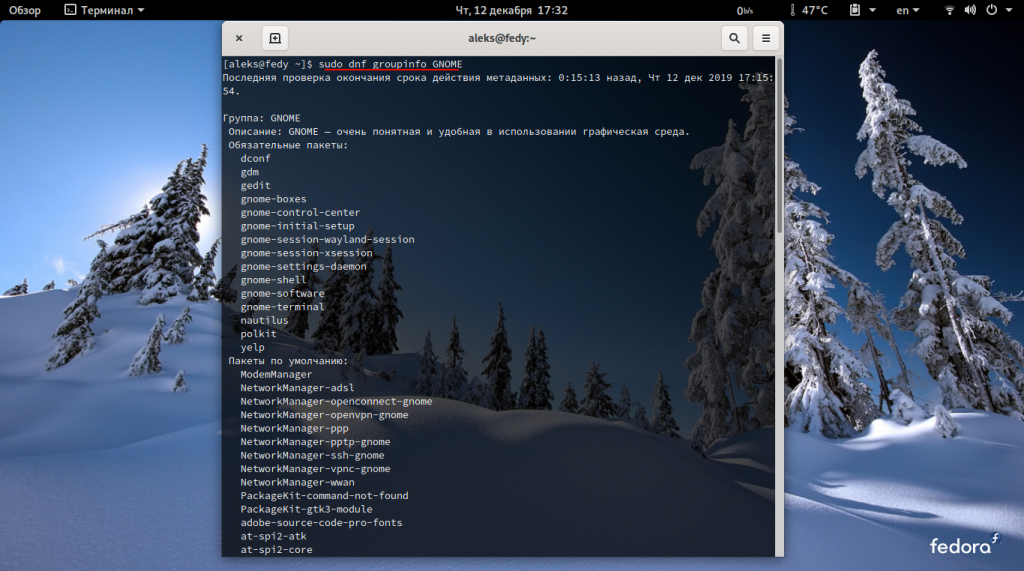
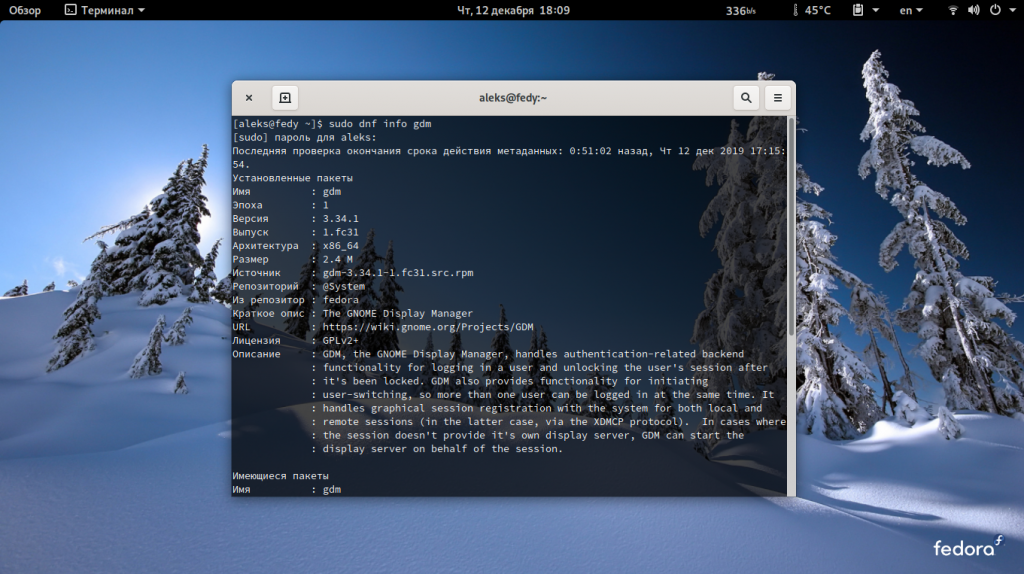
Сначала установим графический дисплейный менеджер и базовые пакеты. Список пакетов вы можете изменять в соответствии с вашим опытом предпочтениями и знаниями.
sudo dnf install gdm gnome-shell nautilus gnome-terminal gnome-system-monitor xdg-user-dirs-gtk fedora-workstation-backgrounds
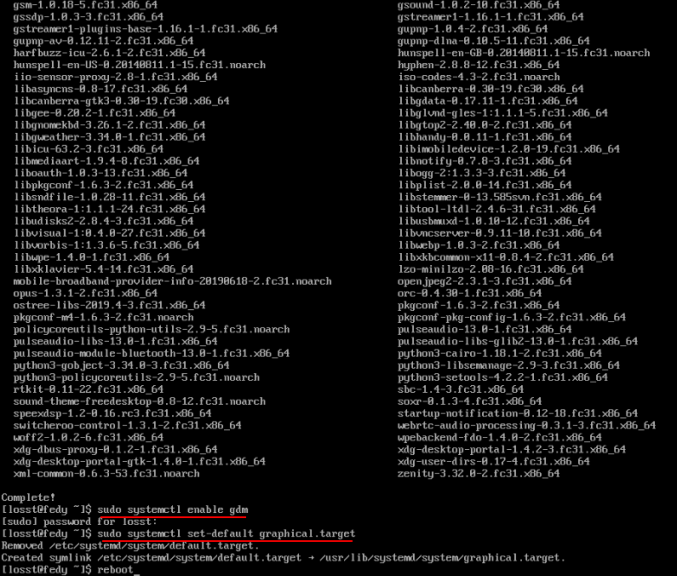
Далее включим его, переключимся в графический режим, перезагрузимся:
sudo systemctl enable gdm
sudo systemctl set-default graphical.target
reboot
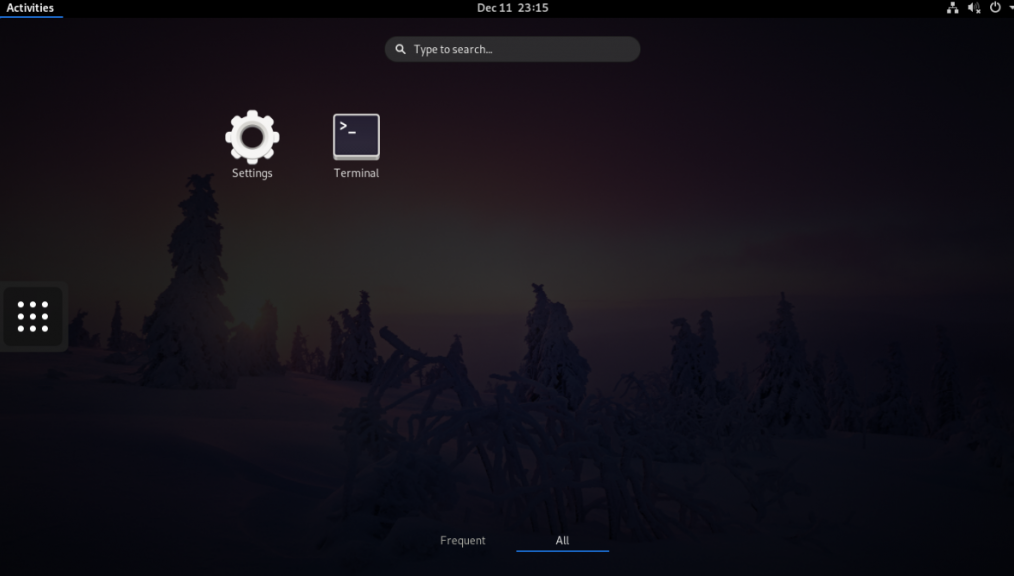
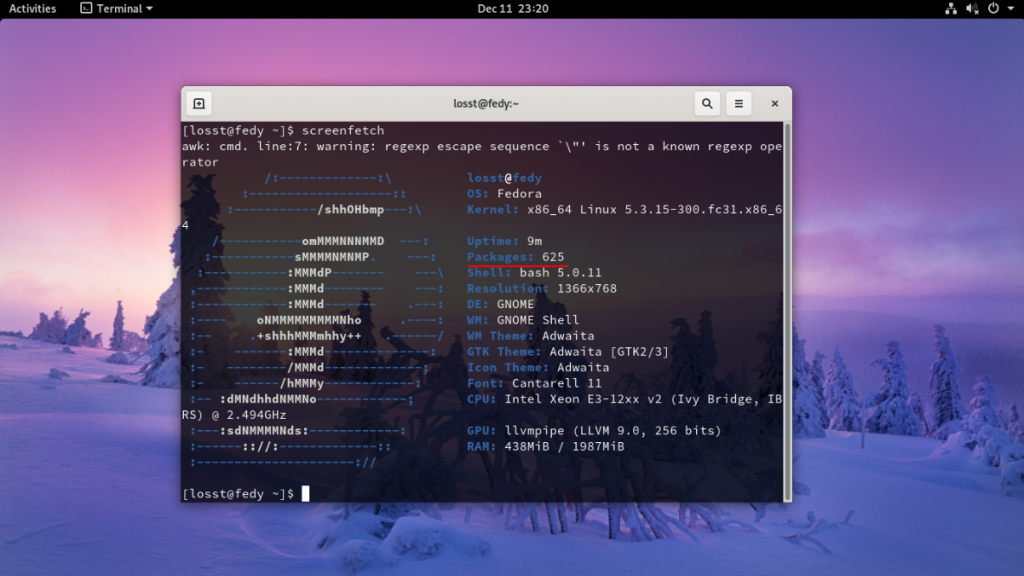
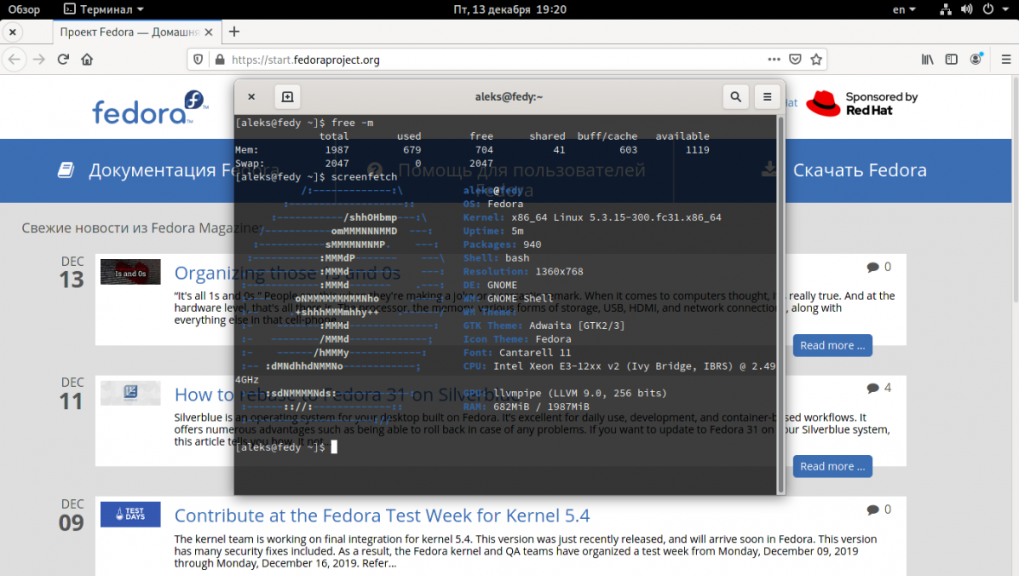
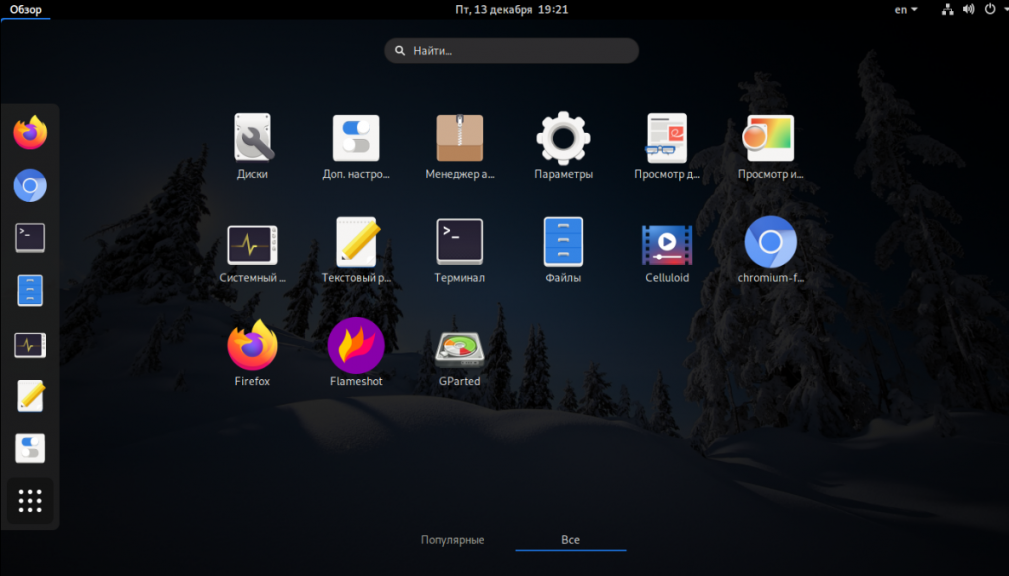
Здесь я установил систему с одним терминалом, nautilus, gnome-system-monitor и другие пакеты можно установить в графическом режиме.
Далее можно устанавливать дополнительные пакеты по своему усмотрению, также в соответствии с вашим опытом предпочтениями и знаниями. Сведения и названия пакетов можно искать при помощи пакетных менеджеров DNF, Dnfdragora.
Установка дополнительных пакетов:
firefox gnome-software file-roller gedit gnome-terminal-nautilus gvfs-mtp
После сборки системы ее можно русифицировать, установив недостающие языковые пакеты:
sudo dnf install langpacks-ru
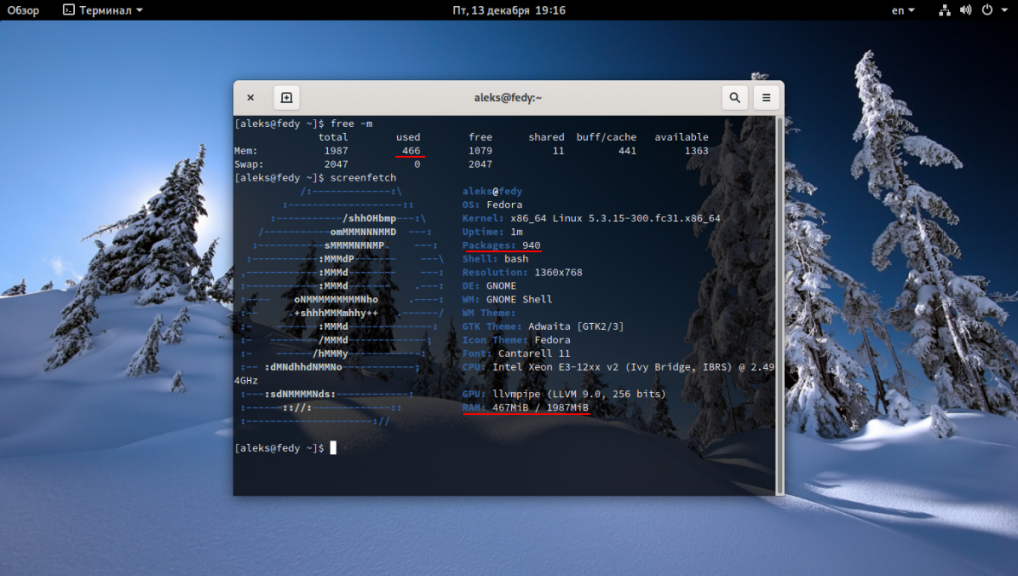
Также проверить на ошибки:
Вот пример сборки для интернета и мультимедиа:
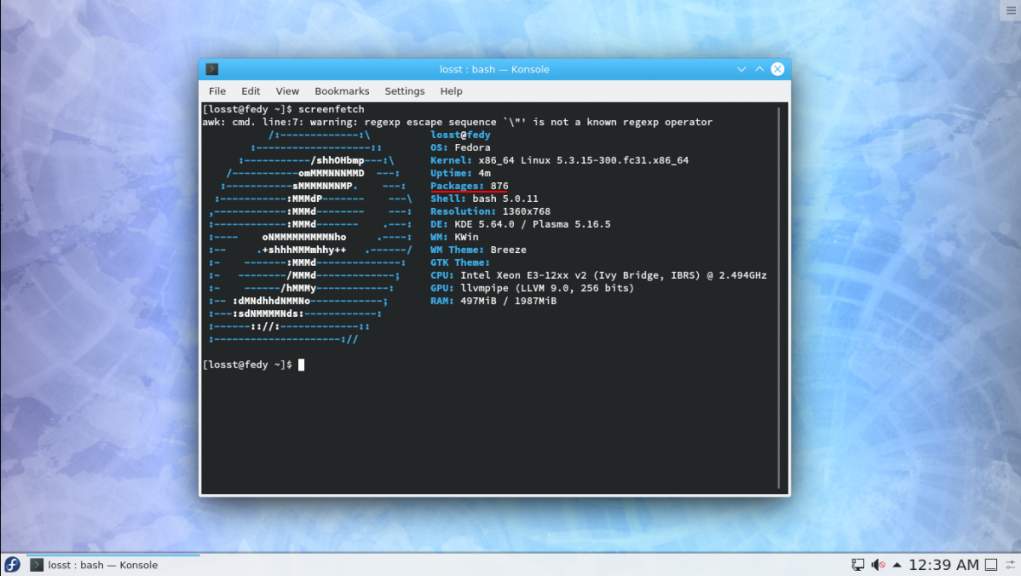
Шаг 5. Установка KDE Plasma
Здесь также установим графический дисплейный менеджер и базовые пакеты. Список пакетов вы можете изменять в соответствии с вашим опытом предпочтениями и знаниями:
sudo dnf install sddm plasma-desktop plasma-nm konsole kcm_colors kcm-fcitx kuser kscreen ksysguard spectacle plasma-user-manager dolphin
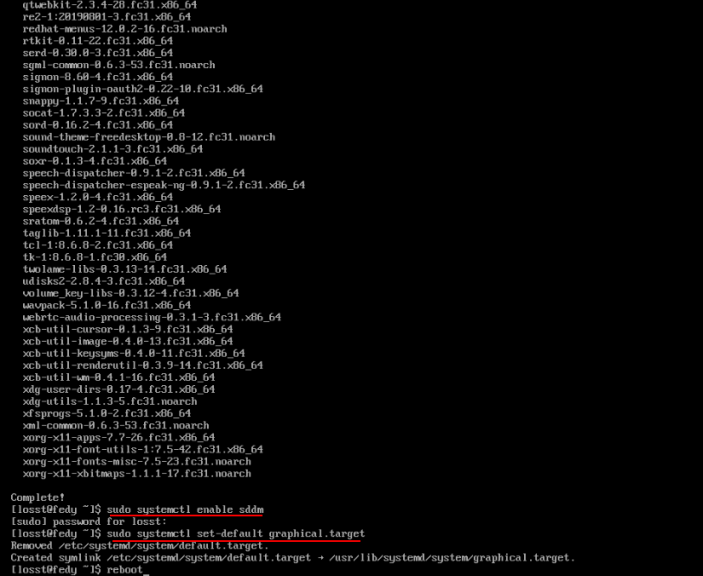
Далее включим его, переключимся в графический режим, перезагрузимся:
sudo systemctl enable sddm
sudo systemctl set-default graphical.target
reboot
Дополнительные пакеты:
sudo dnf install firefox kate plasma-discover yakuake okular kcm_colors kcm_systemd ImageMagick gwenview sddm-kcm sddm-themes sddm-breeze kgamma colord-kde kdegraphics-thumbnailers kffmpegthumbnailer NetworkManager-config-connectivity-fedora kdeplasma-addons kinfocenter ksysguard kde-partitionmanager gvfs-mtp
Шаг 6. Установка XFCE
Здесь также установим графический дисплейный менеджер и базовые пакеты. Список пакетов вы можете изменять в соответствии с вашим опытом предпочтениями и знаниями:
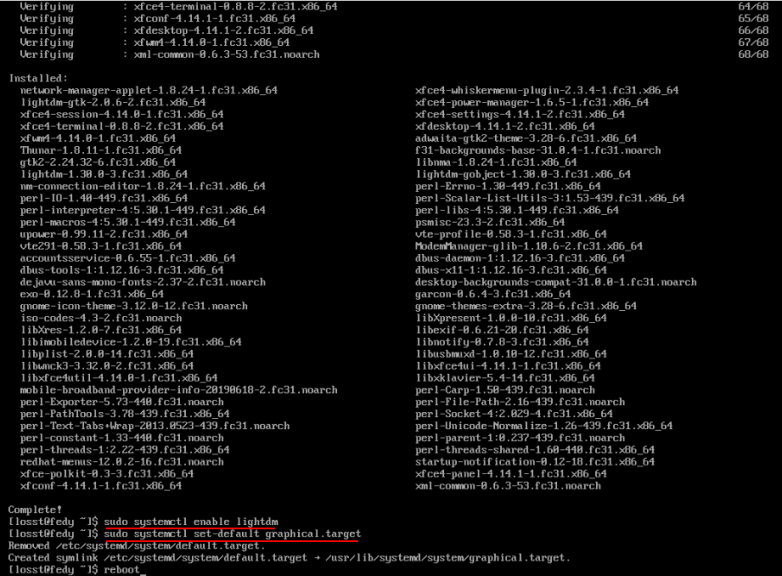
sudo dnf install network-manager-applet xfwm4 xfce4-power-manager xfce4-session xfce4-settings xfce4-whiskermenu-plugin xfdesktop lightdm-gtk xfce4-terminal
Далее включим его, переключимся в графический режим, перезагрузимся:
sudo systemctl enable lightdm
sudo systemctl set-default graphical.target
reboot
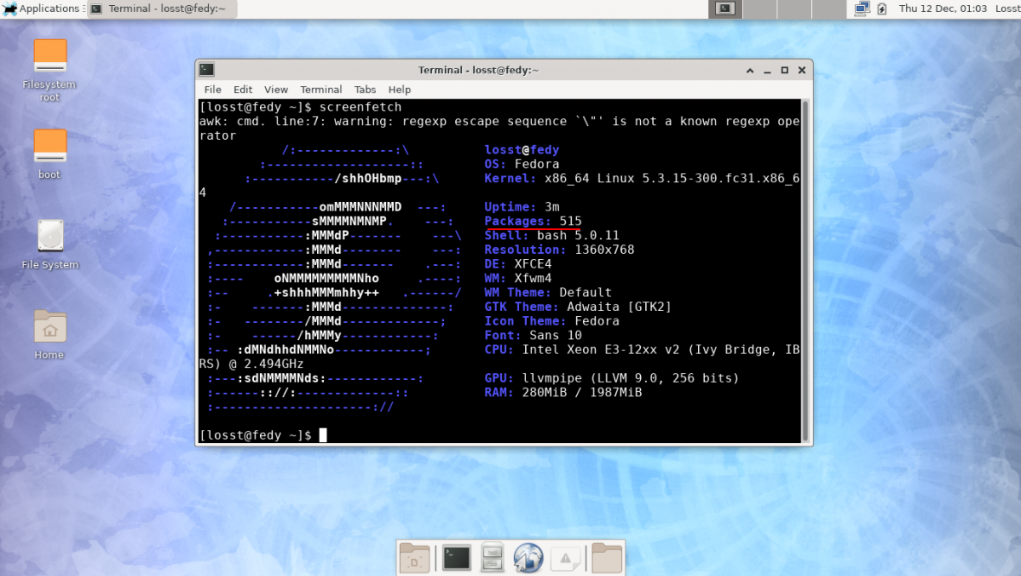
Как мы знаем задачу в Linux можно решить различными способами. И это один из них. Таким образом можно собрать Fedora со своим набором пакетов и рабочим окружением.
Обнаружили ошибку в тексте? Сообщите мне об этом. Выделите текст с ошибкой и нажмите Ctrl+Enter.
Step 1. Begin the installation
Start the installer by clicking Activities -> Install Fedora, and then select English as language.
Step 2. Setup the keyboard and timezone
In this second page, you are asked to do 3 things:
Firstly, select Keyboard option -> choose English (US) -> click Done.
Secondly, select Time & Date option -> choose the country and city where you live in -> click Done.
Thirdly, select Installation Destination.
Step 3. Disk partitioning
In this third page, you will need to create disk partitions for Fedora as the following:
1. An EFI system partition.
3. A root partition (represented by a slash sign).
The initial page will show like below (left, INSTALLATION DESTINATION). In that page, select the hard disk drive (HDD) * meant for Fedora system storage -> select Custom under configuration -> click Done.
Once you clicked Done, you will see the next page as the following (right, MANUAL PARTITIONING). You should read it says «New Fedora 38 Installation» to the top. This is the Custom Disk Partitioning page.
*) Once again, this doesn’t mean it must be a HDD, as you can choose an SSD or a USB flash drive as a replacement if you want to.
Partitions creation is shown by three pictures below.
1. Create the smallest partition
Click plus button -> a dialog will show -> select mount point /boot/efi -> fill the size 300 -> click Add mount point -> an EFI partition is created.
2. Create the middle partition
Do the same but select ‘swap‘ and fill in 1500 instead.
3. Create the largest partition
Do the same but select ‘slash‘ ( / ) and let it blank instead.
To this point, you have created 3 partitions with one of them formatted as BTRFS filesystem. If you want to change the filesystem format, click the slash ( / ) partition -> see right sidebar -> switch BTRFS to EXT4 or EXT2 or any other filesystem you want. We recommend EXT2 if you install Fedora into a USB flash drive.
Step 4. Begin the installation and reboot
You will go back to Step 2 after partitioning. Now, click Begin Installation -> wait for the process to take place -> once finished, click Finish button -> restart -> remove the installation medium -> computer boots up Fedora Workstation 38.
Step 5. Finish installation
Once booted up into new Fedora Workstation, you will be asked for further configurations:
- Welcome page: click Start Setup
- Privacy page: skip this one, the default options should be fine.
- Repositories page: skip, it can be enabled later anyway.
- Online accounts page: skip, you can configure this later.
- User account page: create your username, password, and name your computer here.
- Click the last button Start Using Fedora GNU/Linux.
Now Fedora 38 is ready to use. Congratulations!
This article is licensed under CC BY-SA 3.0.
Getting Started
This manual explains how to install Fedora on 64-bit AMD, Intel and Arm SystemReady machines. The guide and its further detailed guides about different variants are intended for users of all levels of experience. However, it describes the installation process and its many options in far greater detail than most users are likely to require. This should help new users to complete the installation process without interruptions. Users may skip section about familiar topics.
Introduction
This guide covers installation of Fedora, a Linux distribution built on free and open source software. This manual helps you install Fedora on desktops, laptops, and servers. The installation system is easy to use, even if you lack previous knowledge of Linux or computer networks. If you select default options, Fedora provides a complete desktop operating system, including productivity applications, Internet utilities, and desktop tools.
Fedora is provided in several distribution items tailored for special Purposes. We call it Editions and spins.
Because of these differences, there is no single installation procedure.
Most editions and spins, but not all, use Anaconda, the Fedora installer, but in a way that is quite different in detail.
Therefore, each edition describes the installation separately. Most spins are based on one of the editions, mostly Fedora Workstation, and use the corresponding installation procedure.
Nevertheless, there are some preparatory steps that are almost the same for all variants, e.g. you need to prepare an installation media.
Fedora Variants and how to install
This variant is installed by using a Live CD
Most spins use a Live CD for installation as well.
This variant provides a flexible and highly adaptable Server, suitable to provide a wide range of services.
The project provides a dedicated installation guide and documentation about usage and administration.
This variant implements a server for the ‘Internet of Things’ or ‘edge computing’
The project provides a dedicated installation guide and documentation about usage and administration.
A minimal, container-focused operating system, designed for clusters but also operable standalone. The project provides a Getting Started guide.
An immutable desktop variant of Fedora Workstation Edition, featuring the Gnome desktop, and an excellent platform for container-focused workflows.
An immutable desktop variant of Fedora Workstation Edition, featuring the KDE desktop, and an excellent platform for container-focused workflows.
As the name indicates, it focuses on Fedora on cloud networks. Installation and usage follows the respective cloud systems.
Curated bundles of purpose-driven software, maintained by community members. The respective compilations are either installed as independent, complete Fedora versions or complement existing Fedora installations.
According to different usage und purposes the variation not only differ in their installation process, they differ in administration and usage. To learn how to use an installed Fedora system, see the manuals available at the specific variant documentation pages.
Regarding installation, be especially prepared for the fact that each variant requires additional post-installation processes.
General preparations
Despite all the differentiation, some things are the same for all variants.
Download the software deliverables
The differentiation according to tasks and areas of application corresponds to a differentiation of the download options and the further processing.
To find out more about Fedora download options, see Downloading Fedora.
Visit the Fedora Project downloads site to download a distribution file.
Prepare boot media
An install on hardware usually requires to transfer the download file to a bootable medium, mostly an USB stick. Fedora Media Writer is an appropriate tool.
Alternatively you may try balenaEtcher or the Ventoy project, both available for Linux, MacOS, and Windows. The latter is specifically usefull if you want to have several distributions and versions available on one stick.
Getting Additional Help
If you encounter any problems which are not described in documentation, you might get help from members of the community — developers, users, and others. There are many ways to get help: the Ask Fedora website, mailing lists, forums, or IRC.
The discussion forum askfedora is the recommended way to start with. See Getting help for detailed information.
All Fedora Documentation content available under CC BY-SA 4.0 or, when specifically noted, under another accepted free and open content license.

Last build: 2023-07-17 08:50:10 UTC | Last content update: 2023-03-09