- Quick Guide: Installing Ubuntu from a USB memory stick
- This guide will assume that you are running Windows
- What do I need to get started?
- Get a copy of the Ubuntu installer
- Put the installer on a memory stick
- Start the Ubuntu installer
- Install Ubuntu
- What next?
- What if things go wrong?
- I can’t boot from USB even though I have USB Disk (or similar) as the first option in my boot list
- Is it safer to resize my partition in Windows?
- References and further help
- How to Install Linux OS on USB Drive and Run it On Any PC
- Requirements:
- Step 1: Create Bootable Linux Installation Media
- Step 2: Create Partitions On Main USB Drive
- Step 3: Install Linux on USB Drive
- Step 4: Customize the Lubuntu System
Quick Guide: Installing Ubuntu from a USB memory stick
This guide will help you install Ubuntu on your computer by using a USB memory stick. USB memory sticks are sometimes known as flash drives, memory pens or USB Mass Storage devices.
Installing from a memory stick is useful if you have a computer without a CD drive (such as a netbook), or prefer the convenience of a memory stick. Alternative methods are available.
It should take around 30 minutes to complete this process, plus the time it takes to download the 700MB installer file. Downloading from a torrent is by far the fastest way of getting it.
This guide will assume that you are running Windows
This guide will assume that you are running Windows. More comprehensive documentation which covers other operating systems is available at Installation/FromUSBStick.
What do I need to get started?
- A memory stick with a capacity of at least 2GB. It will be formatted (erased) during this process, so copy any files that you want to keep to another location. They will all be permanently deleted from the memory stick.
- A computer that can boot (start-up) from a USB memory stick. Many older computers can’t boot from USB – check the boot options in your BIOS (see Start the Ubuntu installer) to see if yours can.
- A computer with
- at least 384MB of system memory (RAM) for Lubuntu Alternate 32-bit. Other flavours of Ubuntu need at least 1 GB RAM, standard Ubuntu and Kubuntu need 2 GB RAM to work well.
- 6GB of available hard disk space and
- a 700MHz or faster x86 processor for Lubuntu. Other flavours of Ubuntu need a more powerful processor, at least a Pentium 4 or similar processor (made around 2004 or later). Most Intel and AMD processors are x86 processors. 32-bit and 64-bit processors are supported.
Get a copy of the Ubuntu installer
- Go to www.ubuntu.com/getubuntu/download.
- The version 16.04.1 LTS of standard Ubuntu or one of the community flavours (Kubuntu, Lubuntu . Xubuntu) is a good choice.
- Choose your country (or one nearby) from the Download location drop-down list.
- Click Begin download to download the .iso image file needed to install Ubuntu. This will be about 700MB in size.
You can choose other options, like a 64-bit CD image or a BitTorrent download, by clicking Alternative download options.
Put the installer on a memory stick
- Extract the iso file
- Plug-in your USB memory stick.
- Go to https://rufus.akeo.ie/ and download the Rufus USB installer. Put it on your Desktop or somewhere convenient.
- See the detailed instructions at the Rufus website or at https://www.ubuntu.com/download/desktop/create-a-usb-stick-on-windows
Start the Ubuntu installer
To start your computer from a memory stick, you might need to change the order of boot devices:
- Plug-in the memory stick and restart your computer.
- BIOS mode: You should see a purple Ubuntu boot screen with white icons at the bottom (Figure 1).
- UEFI mode: You should see a black screen with a GNU GRUB menu.
- If your computer boots back into Windows, it is not yet set-up to boot from USB, so continue following these steps. Otherwise your computer has successfully booted from the memory stick. Skip to the Install Ubuntu section.
- If your computer boots back into Windows, restart the computer again. As soon as the first text appears on the screen, press the button to enter your BIOS/system setup. There should be a message telling you how to do this. You normally need to press one of the following keys: F1, F2, Del, Esc, F10, F11, or F12.
- A BIOS screen should appear. Find the option to change the Boot Order and change the first item in the boot order list to be USB Disk, or similar.
- The USB Disk option may have a different name on your computer, for example: Removable Drive; USB-HDD; USB Mass Storage; or USB.
- If there is no option to boot from USB Disk, your computer may not be able to boot from USB. See the http://www.pendrivelinux.com/testing-your-system-for-usb-boot-compatibility/ for a tool to test if your computer can boot from USB.
- After you have changed the boot order, save your changes and restart the computer. It should now start from the memory stick.
Install Ubuntu
- In BIOS mode: Wait a few seconds and Ubuntu will start loading. Otherwise, you can press a key and a boot menu with more options will appear.
- Press the F5 key to access universal access options like the screen reader and magnifier.
- After a few second or a minute or two (depending on your hardware), an Install window will appear. Select your language from the list to the left of the screen and select
- Try Ubuntu or
- Install Ubuntu
- If you want to keep Windows installed and choose whether to start Windows or Ubuntu each time you start the computer, choose Install Ubuntu alongside Windows. This is called a dual-boot setup. Use the slider in the next window to choose how to share disk space between Windows and Ubuntu (Ubuntu should have at least 8 GB of space. It works better with 16 GB or more, which should be possible in a not too old computer).
- If you want to remove Windows and replace it with Ubuntu, choose Erase disk and install Ubuntu. All of the files on the disk will be deleted before Ubuntu is put on it, so make sure you have backup copies of anything you wanted to keep.
- For more complicated disk layouts, choose Something Else. You can manually add, modify and delete disk partitions using this option.
What next?
- Click the Applications menu at the top of the screen to start a program.
- Click the Network Manager icon (near to the speaker icon) at the top right of the screen to connect to the Internet.
- Use the System menu to change settings.
- You can find help by clicking System -> Help and Support.
What if things go wrong?
I can’t boot from USB even though I have USB Disk (or similar) as the first option in my boot list
Sometimes the memory stick will not be recognized when you boot. Leave it plugged in for 30 seconds or so, then restart with it left plugged-in. Or, unplug the memory stick, restart the computer and then plug it in as soon as anything appears on the screen (i.e. as early in the boot process as possible).
Also, some BIOS options could interfere with USB booting. Go into the BIOS and try enabling or disabling options like Fast Boot, USB keyboard support and USB 2.0 support. Finally, make sure you haven’t selected a USB-FDD or USB-ZIP boot option. These will not work.
Is it safer to resize my partition in Windows?
Some people experience problems when booting into Windows, after they have resized the Windows partition using the Ubuntu installer. See HowtoResizeWindowsPartitions for a guide on an alternative method of resizing a Windows partition which is less likely to cause problems.
References and further help
Installation/FromUSBStickQuick (последним исправлял пользователь h196n2 2017-02-04 14:16:21)
The material on this wiki is available under a free license, see Copyright / License for details
You can contribute to this wiki, see Wiki Guide for detailsHow to Install Linux OS on USB Drive and Run it On Any PC
Ever thought of using any computer which is not yours, with all your personal stuff and configuration? It is possible with any Linux distribution. Yes! You can use your own, customized Linux OS on any machine with just a USB drive.
This tutorial is all about installing Latest Linux OS on your pen-drive ( fully reconfigurable personalized OS, NOT just a Live USB ), customize it, and use it on any PC you have access to. Here I am using Lubuntu 18.04 Bionic beaver for this tutorial (but, you can use any Linux distribution). So let’s gets started.
Requirements:
- One Pendrive 4GB or More (Let’s call it as Main USB drive/Pendrive).
- One more Pen drive or DVD disk to use as bootable Linux installation media.
- Linux OS ISO file, for example Lubuntu 18.04.
- One PC (Warning: Disconnect internal hard drives to prevent boot record alteration).
Important: While this procedure will not cause loss of data, some users have experienced changes to their internal drive’s bootup behavior depending on Linux distributions selected. To prevent any possibility of this occurrence, you may wish to disconnect your hard drive before continuing with the USB install portion of the tutorial.”
TIP: Use 32 bit Linux OS to make it compatible with any available PC.
That’s it! Go, and collect all of these. It’s time to do something new.
Step 1: Create Bootable Linux Installation Media
Use your Linux ISO image file to create a bootable USB installation media. You can use any software like Unetbootin, Gnome Disk Utility, Yumi Multi Boot, xboot, Live USB Creator, etc. to create bootable USB with the help of ISO image file.
Alternatively, you can use DVD disk by writing that ISO image to it (but that is the old school method).
Step 2: Create Partitions On Main USB Drive
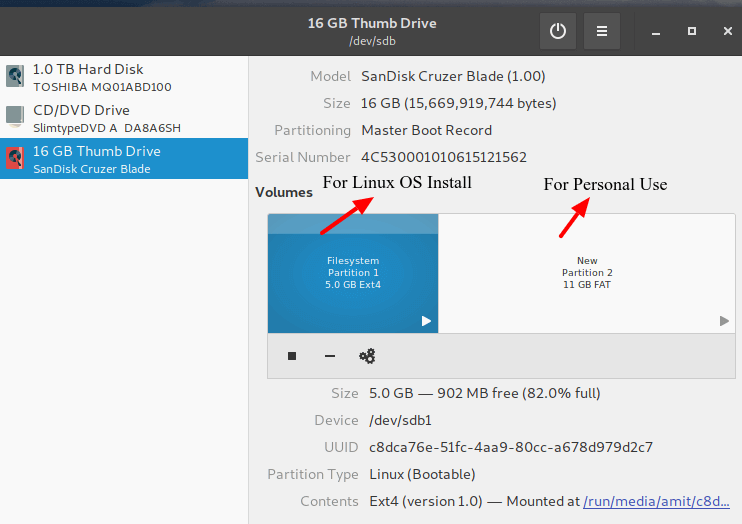
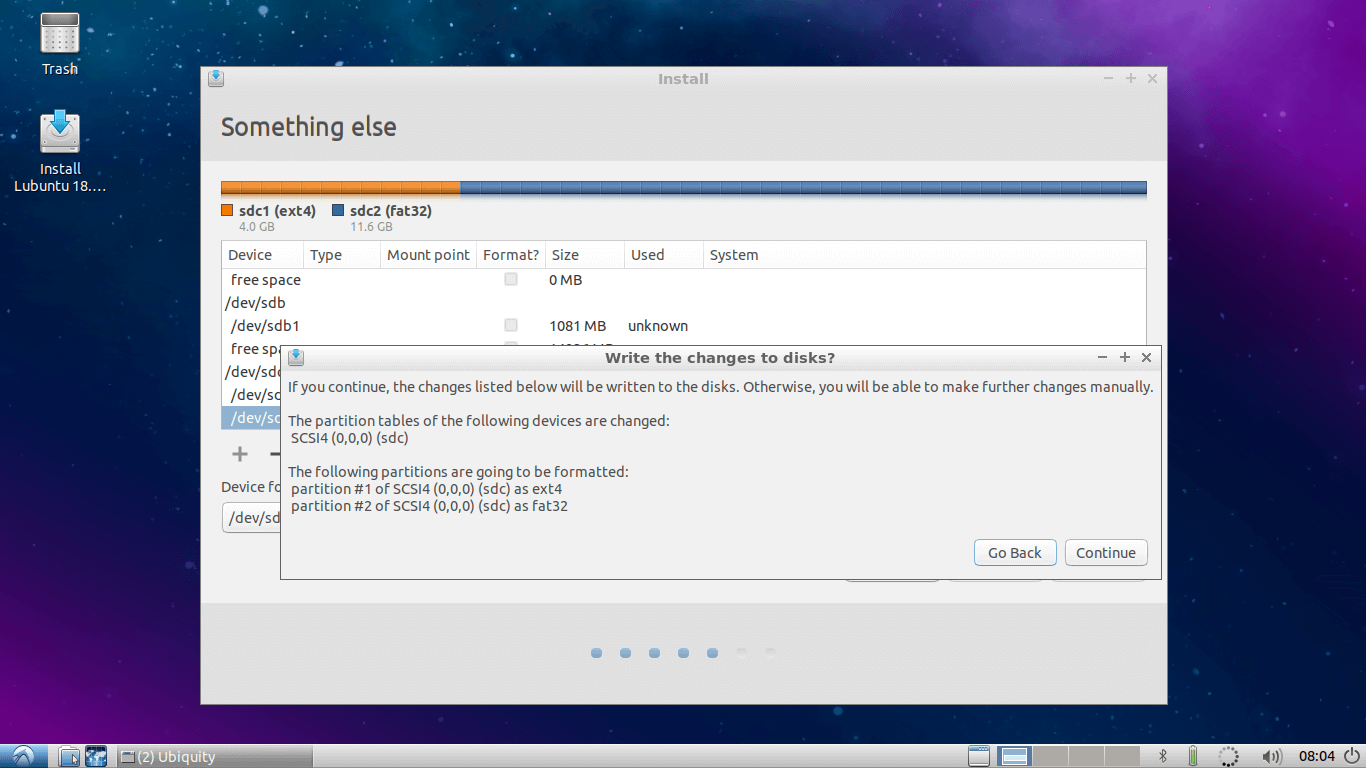
You have to make two partitions on your Main USB drive using Gparted or Gnome Disk Utility, etc.
- The root partition of format ext4 of size according to your use.
- Optionally you can use the rest of the space as a FAT partition for using it as a normal USB drive.
I am having 16GB USB drive and I have created one root partition of 5GB and using rest 11GB as normal FAT partition. So my 16 GB USB drive is converted to 11GB drive for normal use on any PC. Sounds good.
This step you can do while installing Linux also, but it will be very complex while installing Operating Systems like Arch Linux.
Once you have created required partitions on the Main USB drive. Now take a deep breath because it’s time to go for Linux installation section.
Step 3: Install Linux on USB Drive
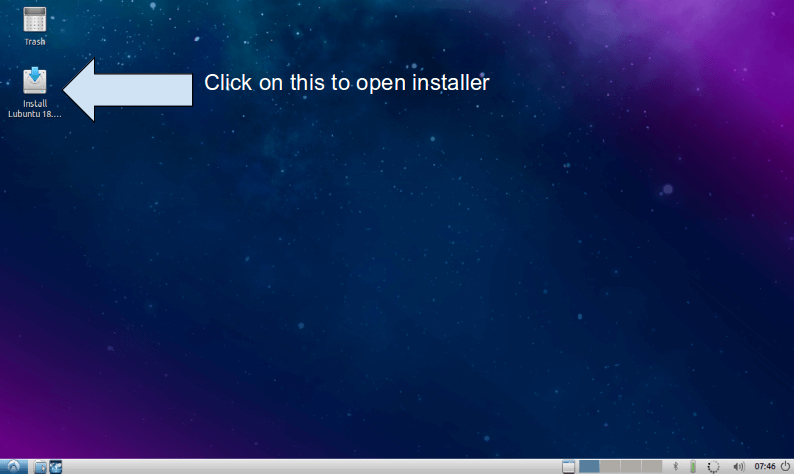
1. First, boot Linux OS (Lubuntu 18.04) from your bootable installation media and launch installation application from a live session. Live session of Lubuntu 18.04 will look like this.
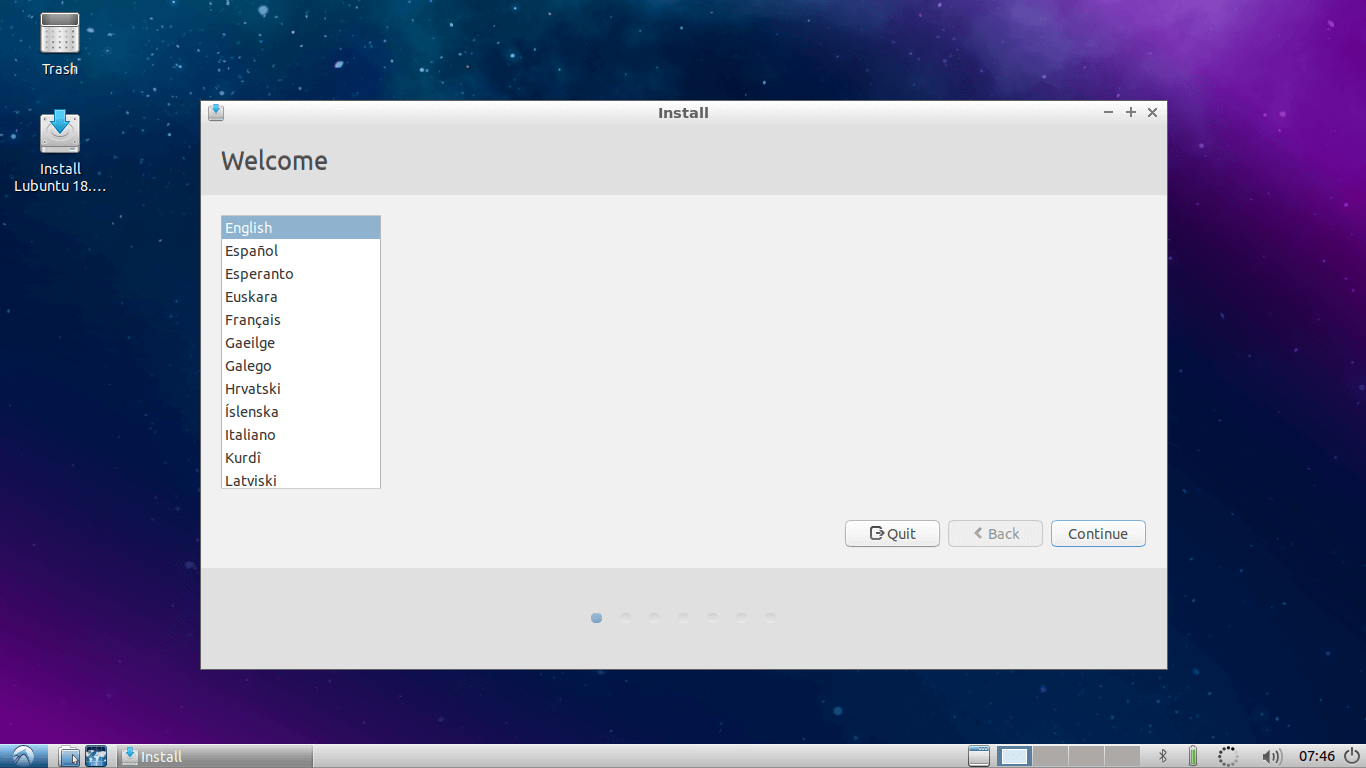
2. Installer welcome screen will appear, select Language there and hit Continue.
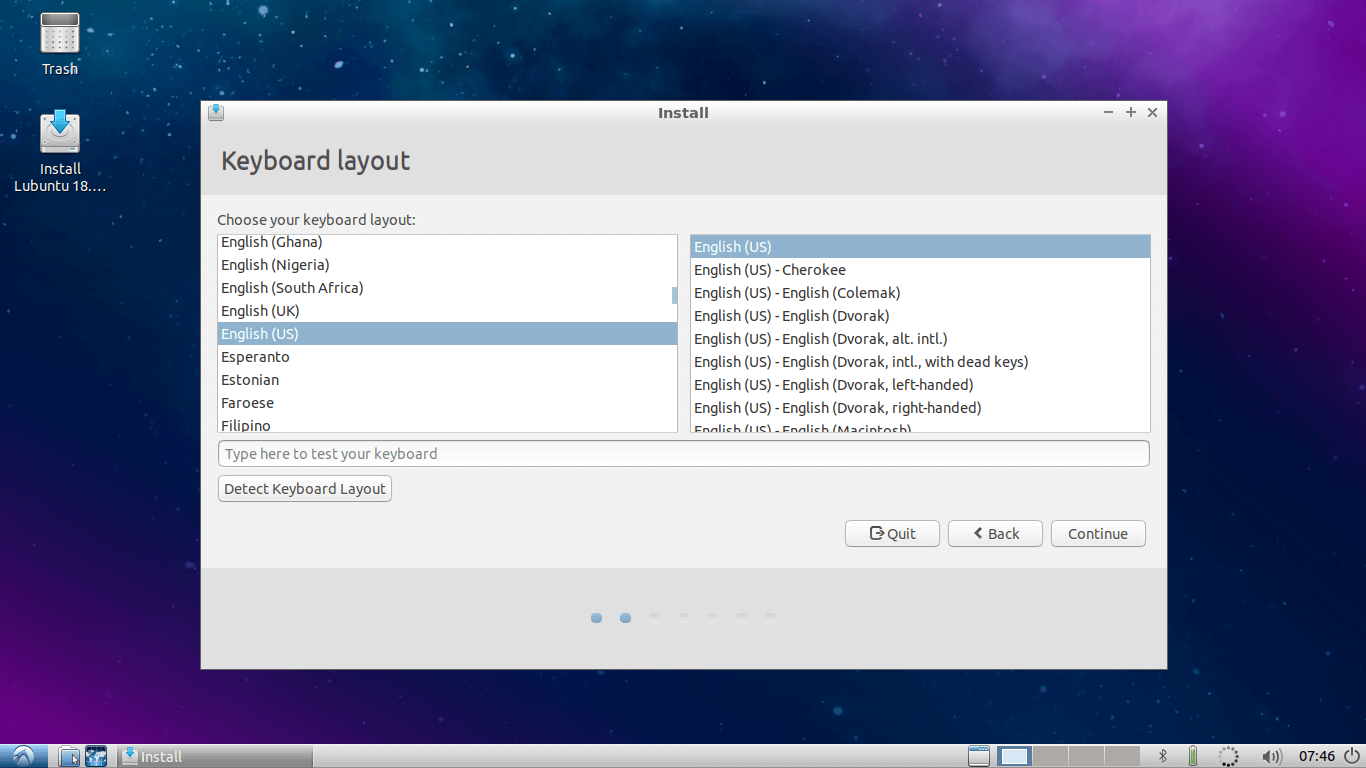
3. Select Keyboard Layout and continue…
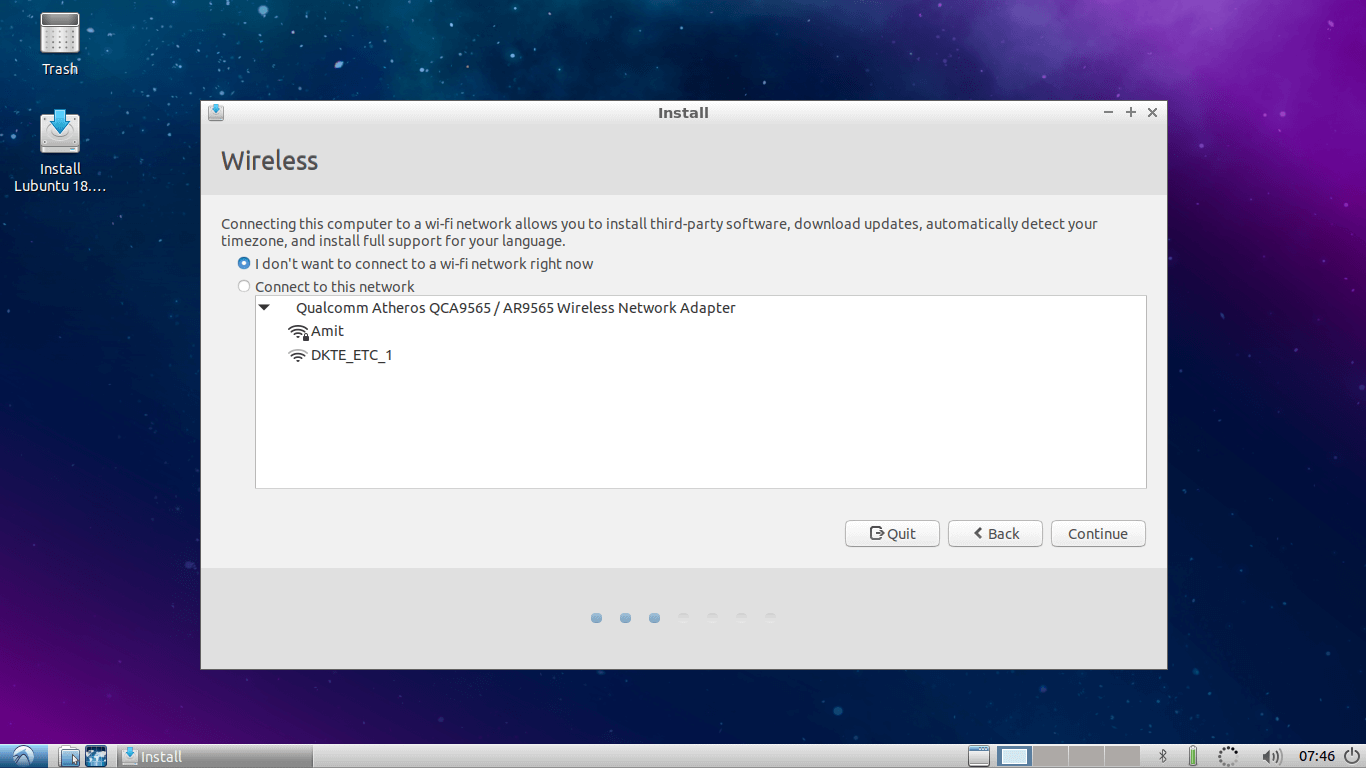
4. Select Wifi internet if you want to update Lubuntu while installation. I will skip it.
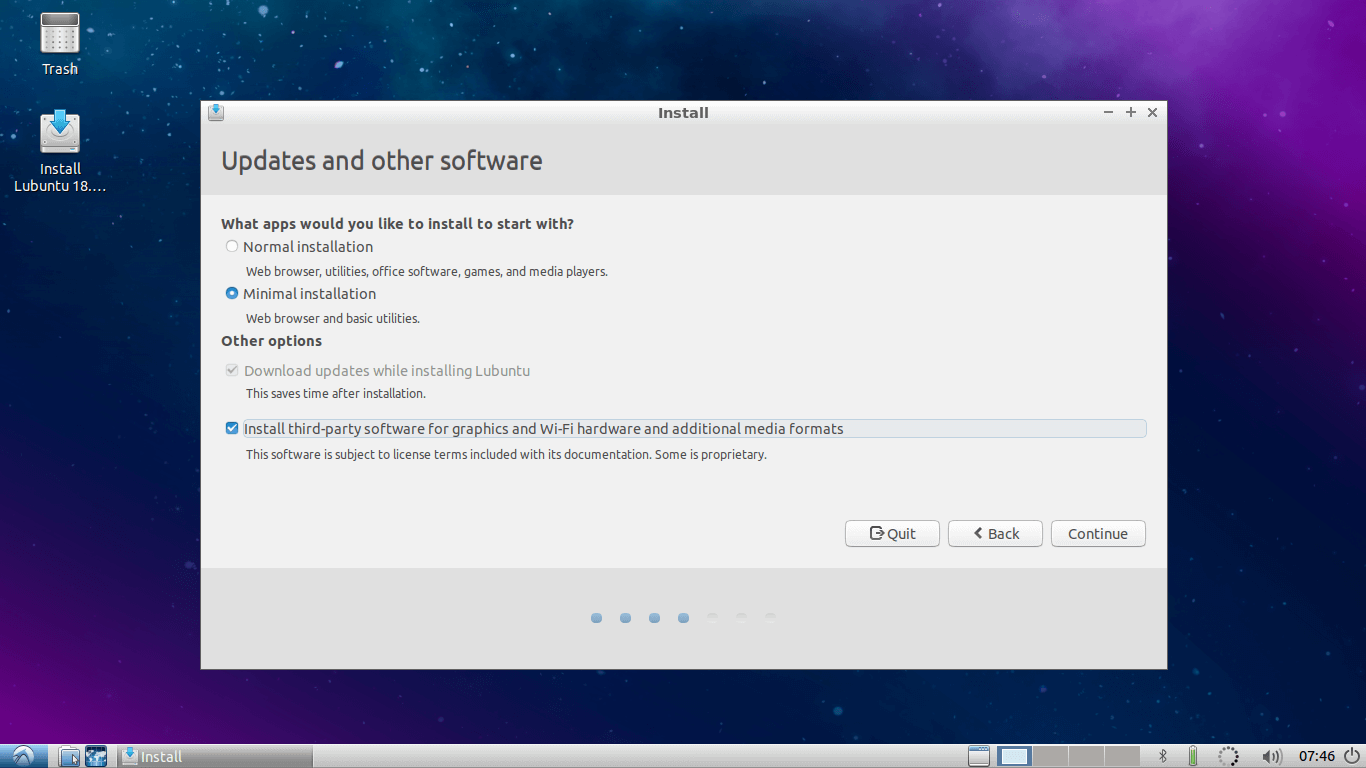
5. Select Installation Type and Third-party installation as per your choice and go to next..
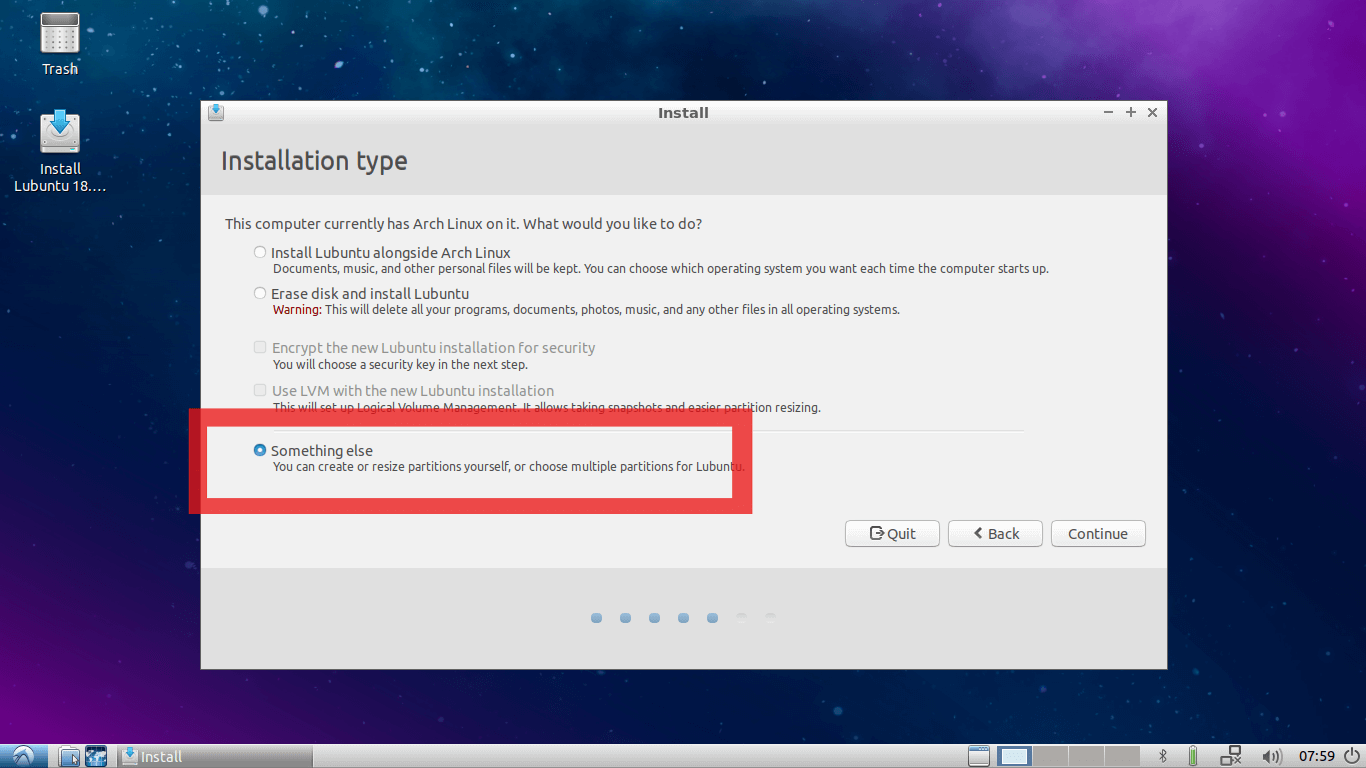
6. Here select Something Else Option (It is Mandatory) and go to next…
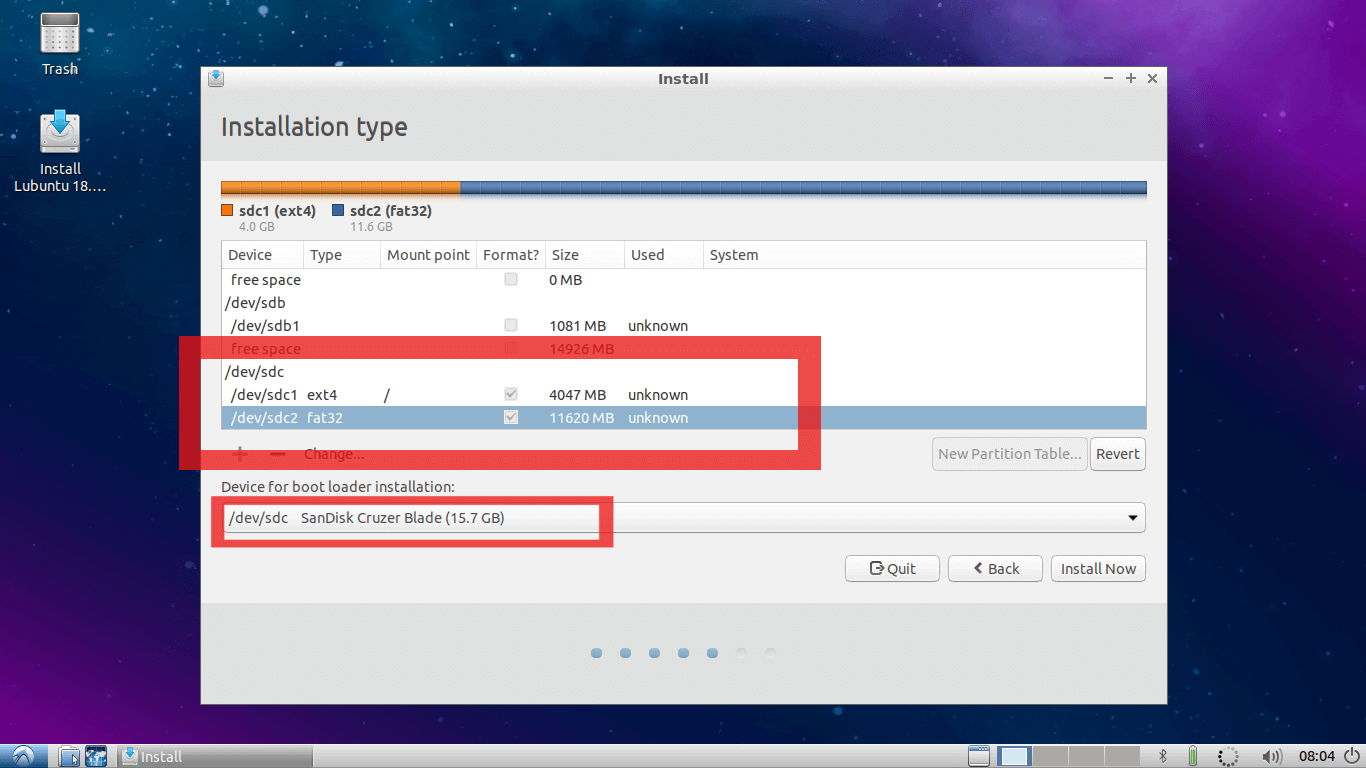
7. This is an Important step, here you need to find out where your Main USB drive is mounted.
In my case /dev/sda are an internal hard disk of the PC and I am using /dev/sdb is USB Lubuntu Installation media from where this live session is booted.
And /dev/sdc is my Main USB drive where I want to install my Linux system and where I have made two partitions in step number 2. If you have skipped step 2, you can also make partitions in this window.
First, change the mount point of the first partition on this Main USB drive to ROOT (i.e. “ / ” ). And as shown in the second red square select bootloader installation device as the Main USB drive.
In my case it is /dev/sdc . This is the most important step in this tutorial. If it is not done correctly your system will boot only on the current PC you are using, which is exactly opposite of your motivation to follow this tutorial.
Once it is completed, double-check it and hit continue. You will get a small window showing devices and drive which will be affected.
8. Make sure that the device and drives shown on this window are of your Main USB drive, which is in my case /dev/sdc . Hit continue…
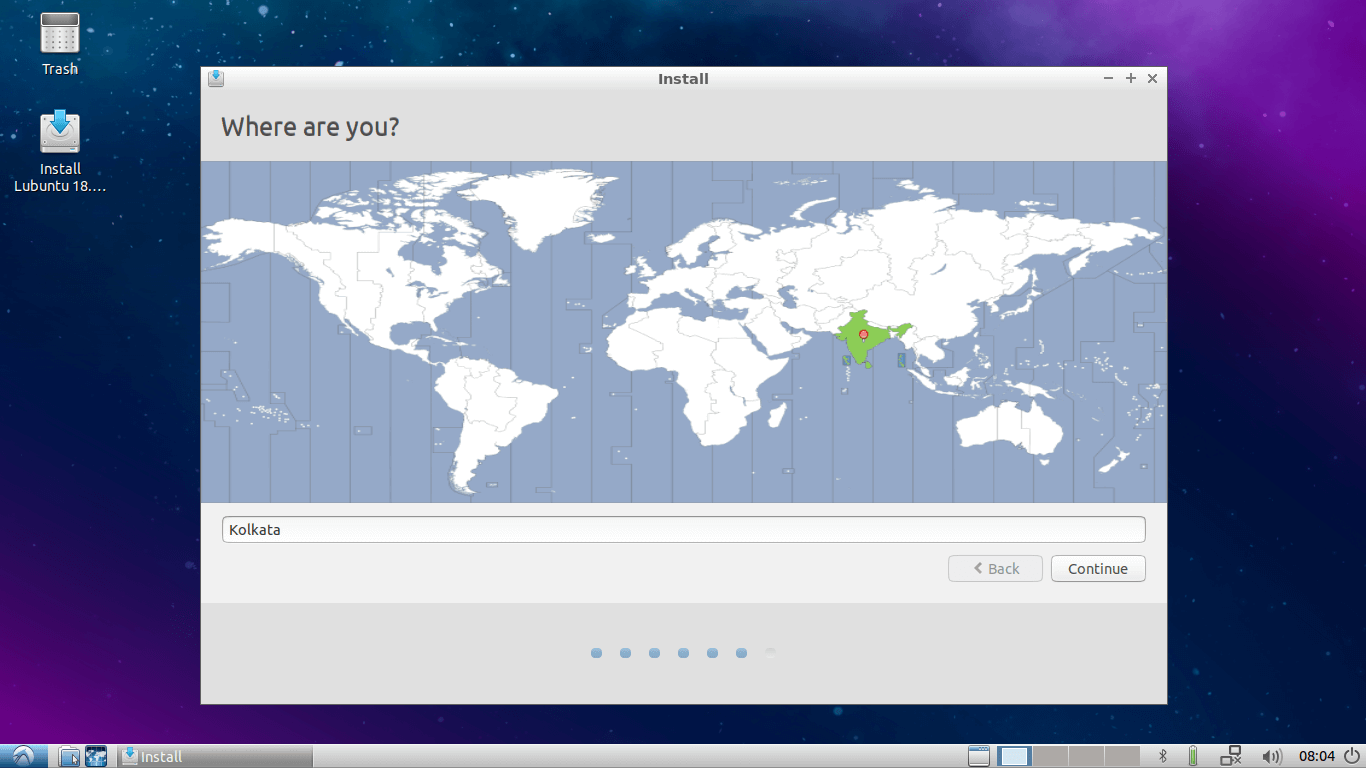
9. Now select your Region and hit Continue…
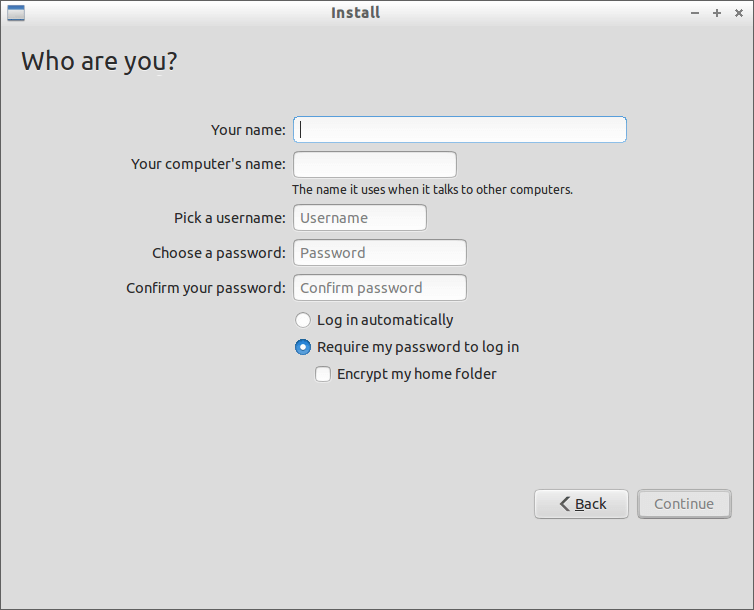
10. Add username, password, and hostname, etc…
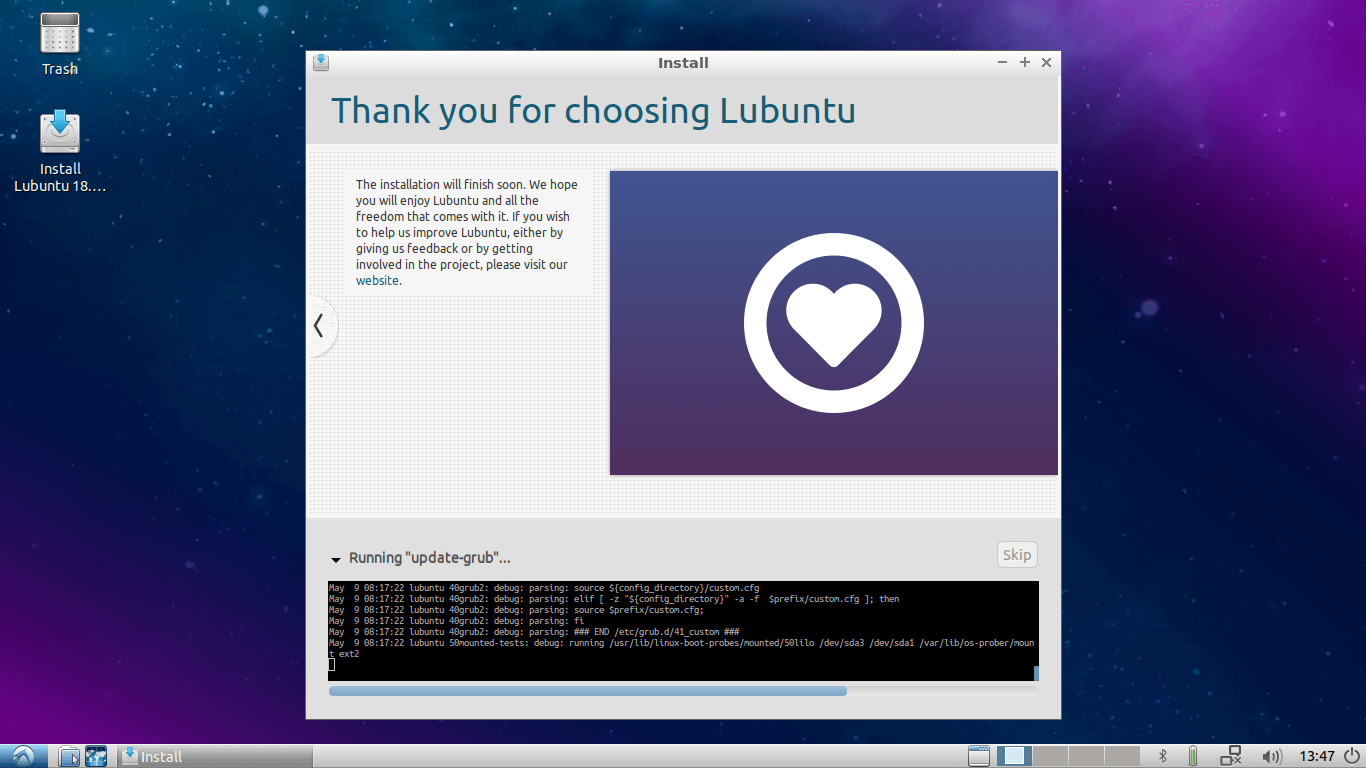
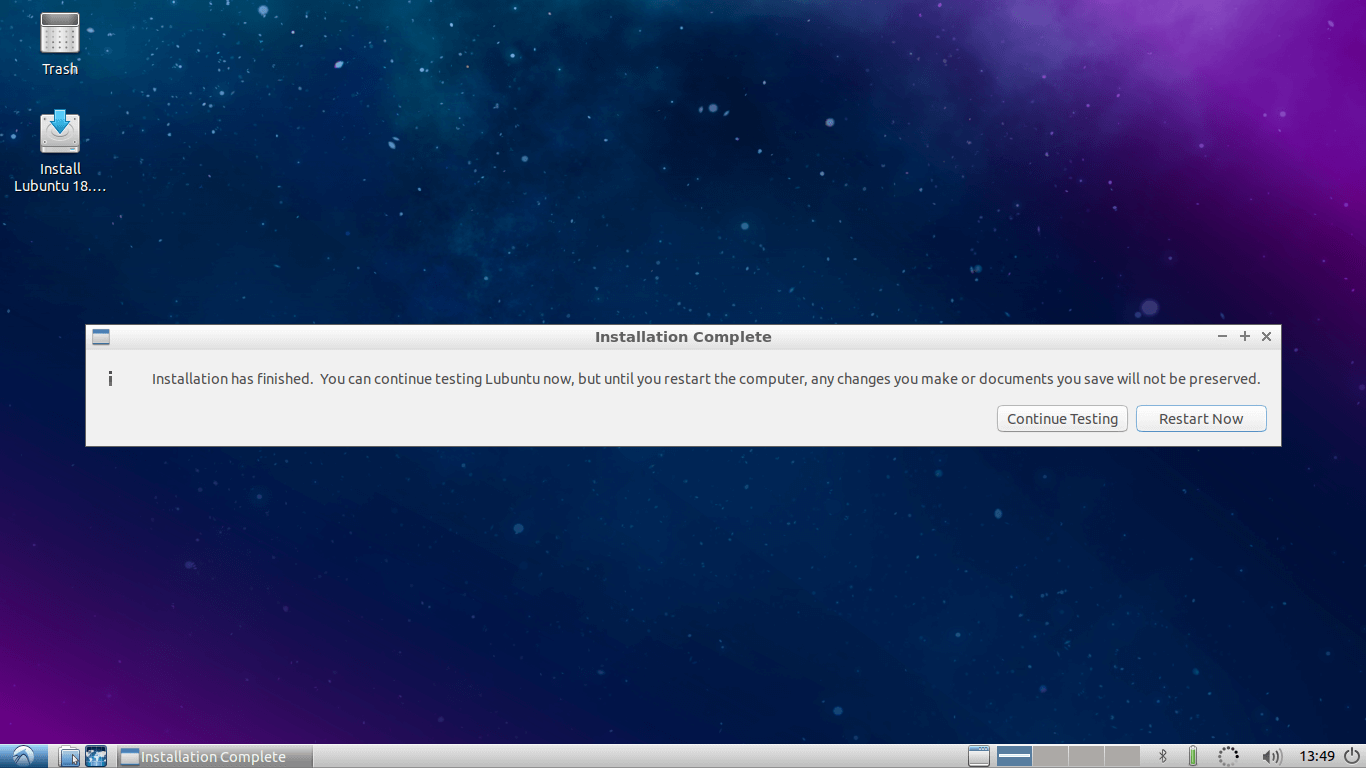
11. Let the installation finish.
12. After completing installation hit restart and remove your installation media and press Enter.
13. Congratulations, you have successfully installed your own Linux OS on your pen drive to use it on any PC. Now you can connect a USB drive to any PC and start your system on that PC by simply selecting boot from USB option while booting.
Step 4: Customize the Lubuntu System
Now it’s time for fun. Just boot your system on any PC and start customizing. You can install any software you want. You can change Themes, Icon themes, install docker.
You can add and store your online accounts on it. Install/modify/customize whatever you want. All the changes will be permanent. They will not change or reset after rebooting or booting on other PCs.
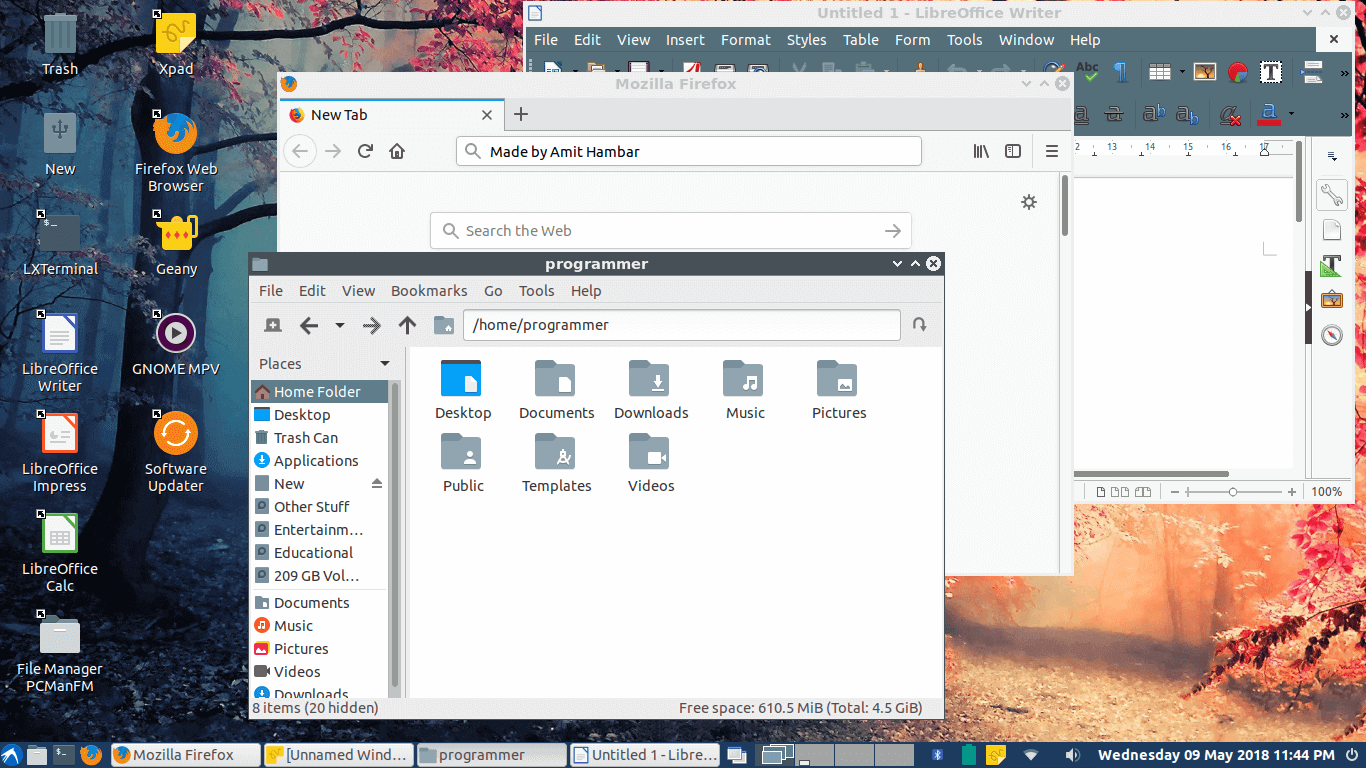
The following figure shows my customized Lubuntu 18.04.
The main advantage of this method is you can use your personal stuff, your online accounts securely on any PC. You can even do secure online transactions as well on any available PC.
I hope it will be helpful for you, if you have questions regarding this article, please feel free to ask in the comment section below.
