- How to install opencv linux
- Installing OpenCV-Python from Pre-built Binaries
- Building OpenCV from source
- Required build dependencies
- How To Install OpenCV in Ubuntu
- Installing OpenCV in Ubuntu
- 1. Install OpenCV via Repository
- 2. Install OpenCV via Source Code
- Conclusion
- About the author
- Denis Kariuki
- How to install opencv linux
- Required Packages
- Getting OpenCV Source Code
- Getting the Latest Stable OpenCV Version
- Getting the Cutting-edge OpenCV from the Git Repository
- Building OpenCV from Source Using CMake
- Detailed process
- Install compiler and build tools
- Download sources
- Configure and build
- Check build results
- Install
How to install opencv linux
In this tutorial We will learn to setup OpenCV-Python in Ubuntu System. Below steps are tested for Ubuntu 16.04 and 18.04 (both 64-bit).
OpenCV-Python can be installed in Ubuntu in two ways:
- Install from pre-built binaries available in Ubuntu repositories
- Compile from the source. In this section, we will see both.
Another important thing is the additional libraries required. OpenCV-Python requires only Numpy (in addition to other dependencies, which we will see later). But in this tutorials, we also use Matplotlib for some easy and nice plotting purposes (which I feel much better compared to OpenCV). Matplotlib is optional, but highly recommended. Similarly we will also see IPython, an Interactive Python Terminal, which is also highly recommended.
Installing OpenCV-Python from Pre-built Binaries
This method serves best when using just for programming and developing OpenCV applications.
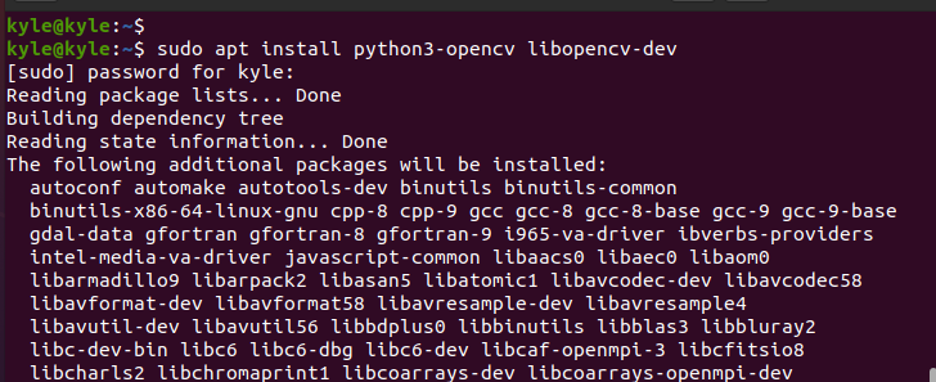
Install package python3-opencv with following command in terminal (as root user).
Open Python IDLE (or IPython) and type following codes in Python terminal.
If the results are printed out without any errors, congratulations . You have installed OpenCV-Python successfully.
It is quite easy. But there is a problem with this. Apt repositories may not contain the latest version of OpenCV always. For example, at the time of writing this tutorial, apt repository contains 2.4.8 while latest OpenCV version is 3.x. With respect to Python API, latest version will always contain much better support and latest bug fixes.
So for getting latest source codes preference is next method, i.e. compiling from source. Also at some point in time, if you want to contribute to OpenCV, you will need this.
Building OpenCV from source
Compiling from source may seem a little complicated at first, but once you succeeded in it, there is nothing complicated.
First we will install some dependencies. Some are required, some are optional. You can skip optional dependencies if you don’t want.
Required build dependencies
We need CMake to configure the installation, GCC for compilation, Python-devel and Numpy for building Python bindings etc.
How To Install OpenCV in Ubuntu
![]()
The open-source Computer Vision Library is a popular computer vision library with bindings for different languages, including Java, Python, and C++. Furthermore, it supports other Operating Systems and has multiple applications, such as tracking moving objects, 3D-model extractions, facial recognition, and image analysis.
For developers, OpenCV offers an extensive collection of algorithms, especially for 3D modelling, and things can’t get any better than when using the tool. If you are looking for how to install OpenCV on Ubuntu and spice your support vector projects or enhance algorithms, you are in the right place. This guide covers two easy ways of installing OpenCV.
Installing OpenCV in Ubuntu
The OpenCV platform has two installation methods. Either using the repository or directly from the source. We will cover the steps for each method.
1. Install OpenCV via Repository
It is the easiest of the two methods as only two commands are needed.
First, update your repository.
Next, install OpenCV using the following command:
That’s it! OpenCV is successfully installed on your system. You can confirm by checking its version using the C++ binding. Run the following command:
The output should return the current version, as shown in the image below:

2. Install OpenCV via Source Code
One shortcoming of installing OpenCV using the repository is that you may not get the latest version. The solution is to install it directly using its source code. Besides, this method optimizes OpenCV per your system, giving you absolute control over its build options. That said, the following steps will guide you.
Step 1. Install OpenCV Dependencies and Build Tools
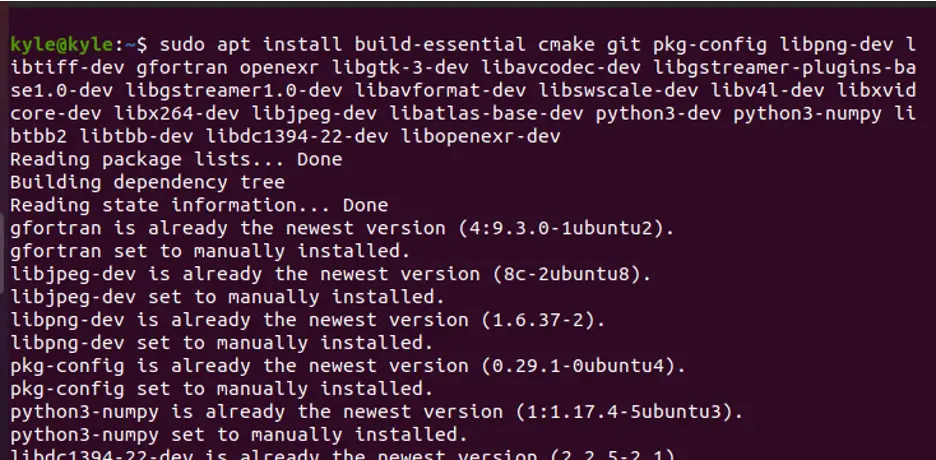
The OpenCV is dependent on some packages for it to run. Therefore, copy the following command to install the necessary dependencies and build tools.
$ sudo apt install build-essential cmake git pkg-config libgtk-3-dev \ libavcodec-dev libavformat-dev libswscale-dev libv4l-dev \ libxvidcore-dev libx264-dev libjpeg-dev libpng-dev libtiff-dev \ gfortran openexr libatlas-base-dev python3-dev python3-numpy \ libtbb2 libtbb-dev libdc1394-22-dev libopenexr-dev \ libgstreamer-plugins-base1.0-dev libgstreamer1.0-dev
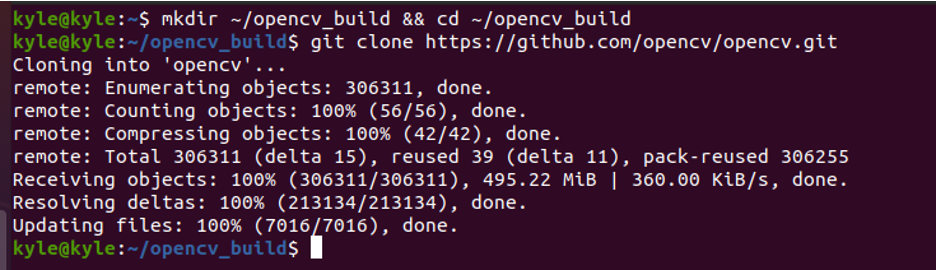
Step 2. Clone OpenCV and Its Repositories
OpenCV can be cloned from its GitHub repository.
Start by creating a directory on your system.
Next, clone OpenCV using the following command:
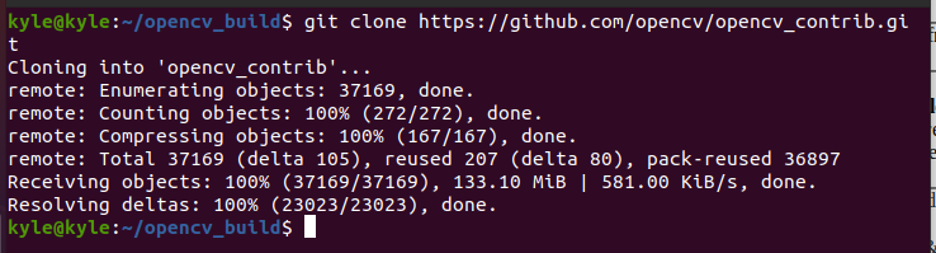
Finally, clone its contrib repositories.
The previous steps installed the current version of OpenCV, but you can also choose to go with an older version. All you need is to navigate into the opencv and opencv_contrib directories, then run the following command:
Step 3: Create a Build Directory
A temporary build directory is required where the OpenCV will get set up using CMake.
To create and navigate into the directory, use the commands shown below.
Next, use CMake to set up OpenCV build using the following command:
$ cmake -D CMAKE_BUILD_TYPE=RELEASE \ -D CMAKE_INSTALL_PREFIX=/usr/local \ -D INSTALL_C_EXAMPLES=ON \ -D INSTALL_PYTHON_EXAMPLES=ON \ -D OPENCV_GENERATE_PKGCONFIG=ON \ -D OPENCV_EXTRA_MODULES_PATH=~/opencv_build/opencv_contrib/modules \ -D BUILD_EXAMPLES=ON ..
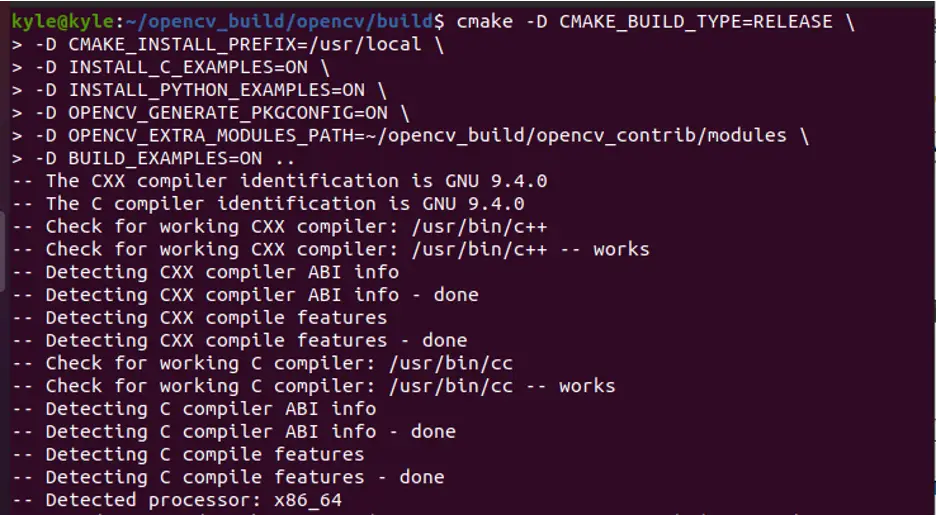
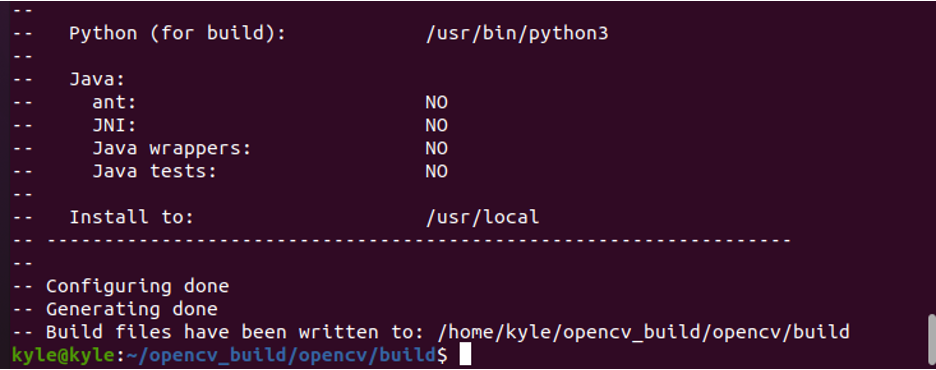
You should note an output showing the configuration and generating is done and the path to the build files.
Step 4: Start Compilation
Once the build is done, it’s time to initiate the compilation. However, first, check the number of processors you have using the nproc Linux command.

Once checked, run the following command and replace the number after j with your processors:
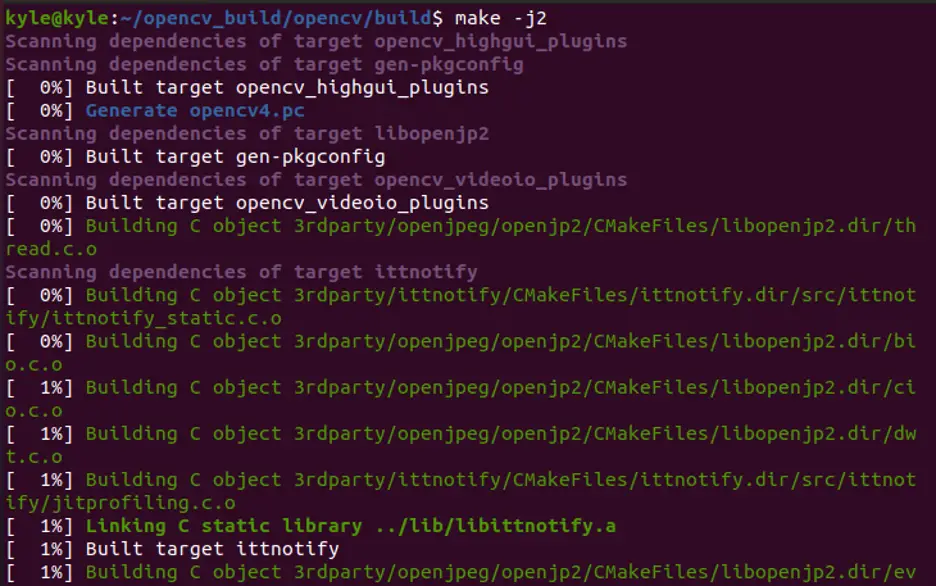
The compilation is time-consuming, so be patient.
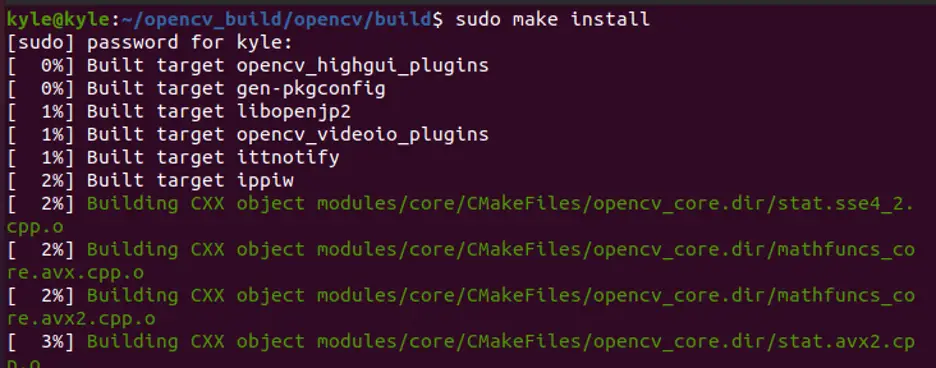
Step 5: Install OpenCV
The final step is to run the following command, which installs OpenCV:
Step 6: Confirm Installation
Check the OpenCV version using bindings for different programming languages to verify the installation. We already checked the C++ bindings in method 1. Let’s use Python in this method. The command is:
Depending on when you are reading this article, your output may be the same or a newer version than the following image provided:

Conclusion
The OpenCV is a tool you can’t ignore if you are a computer vision developer. It has different applications and algorithms at your disposal. If you are stuck installing it on Ubuntu, this guide is your best friend as it offers two ways to go about it. One method should work for you.
About the author
Denis Kariuki
Denis is a Computer Scientist with a passion for Networking and Cyber Security. I love the terminal, and using Linux is a hobby. I am passionate about sharing tips and ideas about Linux and computing.
How to install opencv linux
The following steps have been tested for Ubuntu 10.04 but should work with other distros as well.
Required Packages
- GCC 4.4.x or later
- CMake 2.8.7 or higher
- Git
- GTK+2.x or higher, including headers (libgtk2.0-dev)
- pkg-config
- Python 2.6 or later and Numpy 1.5 or later with developer packages (python-dev, python-numpy)
- ffmpeg or libav development packages: libavcodec-dev, libavformat-dev, libswscale-dev
- [optional] libtbb2 libtbb-dev
- [optional] libdc1394 2.x
- [optional] libjpeg-dev, libpng-dev, libtiff-dev, libjasper-dev, libdc1394-22-dev
- [optional] CUDA Toolkit 6.5 or higher
The packages can be installed using a terminal and the following commands or by using Synaptic Manager:
[required] sudo apt-get install cmake git libgtk2.0-dev pkg-config libavcodec-dev libavformat-dev libswscale-dev
[optional] sudo apt-get install python-dev python-numpy libtbb2 libtbb-dev libjpeg-dev libpng-dev libtiff-dev libjasper-dev libdc1394-22-dev
Getting OpenCV Source Code
You can use the latest stable OpenCV version or you can grab the latest snapshot from our Git repository.
Getting the Latest Stable OpenCV Version
Getting the Cutting-edge OpenCV from the Git Repository
Launch Git client and clone OpenCV repository. If you need modules from OpenCV contrib repository then clone it as well.
Building OpenCV from Source Using CMake
- Create a temporary directory, which we denote as , where you want to put the generated Makefiles, project files as well the object files and output binaries and enter there. For example
- set full path to OpenCV source code, e.g. /home/user/opencv
- set full path to , e.g. /home/user/opencv/build
- set optional parameters
- run: “Configure”
- run: “Generate”
- build type: CMAKE_BUILD_TYPE=Release\Debug
- to build with modules from opencv_contrib set OPENCV_EXTRA_MODULES_PATH to
- set BUILD_DOCS for building documents
- set BUILD_EXAMPLES to build all examples
- PYTHON2(3)_EXECUTABLE =
- PYTHON_INCLUDE_DIR = /usr/include/python
- PYTHON_INCLUDE_DIR2 = /usr/include/x86_64-linux-gnu/python
- PYTHON_LIBRARY = /usr/lib/x86_64-linux-gnu/libpython.so
- PYTHON2(3)_NUMPY_INCLUDE_DIRS = /usr/lib/python/dist-packages/numpy/core/include/
- Unset parameter: BUILD_SHARED_LIBS
- It is useful also to unset BUILD_EXAMPLES, BUILD_TESTS, BUILD_PERF_TESTS — as they all will be statically linked with OpenCV and can take a lot of memory.
Detailed process
This section provides more details of the build process and describes alternative methods and tools. Please refer to the OpenCV installation overview tutorial for general installation details and to the OpenCV configuration options reference for configuration options documentation.
Install compiler and build tools
- To compile OpenCV you will need a C++ compiler. Usually it is G++/GCC or Clang/LLVM:
- Install GCC.
Download sources
There are two methods of getting OpenCV sources:
- Download snapshot of repository using web browser or any download tool (~80-90Mb) and unpack it.
Configure and build
Check build results
After successful build you will find libraries in the build/lib directory and executables (test, samples, apps) in the build/bin directory:
CMake package files will be located in the build root:
Install
Warning The installation process only copies files to predefined locations and does minor patching. Installing using this method does not integrate opencv into the system package registry and thus, for example, opencv can not be uninstalled automatically. We do not recommend system-wide installation to regular users due to possible conflicts with system packages.
By default OpenCV will be installed to the /usr/local directory, all files will be copied to following locations:
- /usr/local/bin — executable files
- /usr/local/lib — libraries (.so)
- /usr/local/cmake/opencv4 — cmake package
- /usr/local/include/opencv4 — headers
- /usr/local/share/opencv4 — other files (e.g. trained cascades in XML format)
Since /usr/local is owned by the root user, the installation should be performed with elevated privileges ( sudo ):
Installation root directory can be changed with CMAKE_INSTALL_PREFIX configuration parameter, e.g. -DCMAKE_INSTALL_PREFIX=$HOME/.local to install to current user’s local directory. Installation layout can be changed with OPENCV_*_INSTALL_PATH parameters. See OpenCV configuration options reference for details.

Generated on Fri Jul 14 2023 23:31:03 for OpenCV by 1.8.13
