- shamiul94 / How to install opengl in ubuntu.txt
- myconlineblog
- Installing OpenGL and SDL on Linux Mint and Ubuntu
- How to Install OpenGL on Ubuntu 20.04 Linux
- How to Install OpenGL on Ubuntu Linux
- How to Install OpenGL Library on Ubuntu 20.04 LTS (Focal Fossa)
- How to Install OpenGL Library on Ubuntu 20.04 LTS (Focal Fossa)
- Step 1: Prerequisites
- Step 2: Update Your Server
- Step 3: Install OpenGL Library
- Step 4: Verify Installation
- Step 5: Uninstall OpenGL Library
shamiul94 / How to install opengl in ubuntu.txt
This file contains bidirectional Unicode text that may be interpreted or compiled differently than what appears below. To review, open the file in an editor that reveals hidden Unicode characters. Learn more about bidirectional Unicode characters
| What Is OpenGL? |
| OpenGL is a Graphics rendering API which is operating system independent, window system independent and has high-quality color images composed of geometric and image primitives. |
| OpenGL APIs can use following … |
| Gl |
| OpenGL API implementation (http://www.opengl.org) |
| Glu |
| OpenGL Utility |
| Glut – GLUT (OpenGL Utility Toolkit) – Glut is portable windowing API and it is not officially part of OpenGL. |
| OpenGL Utility Toolkit (http://www.opengl.org/resources/libraries/glut/) |
| FLTK |
| FlashLight ToolKit (http://www.fltk.org/) |
| GLEW… |
| Now lets see How to install OpenGL on out Ubuntu OS. |
| Now because GLUT (OpenGL Utility Toolkit) depends upon OpenGL and a number of other related libraries, if we install GLUT then OpenGL will be automatically be installed. |
| Run the following commands to install OpenGL. |
| $ sudo apt-get update |
| $ sudo apt-get install libglu1-mesa-dev freeglut3-dev mesa-common-dev |
| Now to test if OpenGl libraries are working fine on our Linux, we will create a C++ program and test it. |
| So create a following C++ Program. |
| #include |
| void displayMe(void) |
| glClear(GL_COLOR_BUFFER_BIT); |
| glBegin(GL_POLYGON); |
| glVertex3f(0.5, 0.0, 0.5); |
| glVertex3f(0.5, 0.0, 0.0); |
| glVertex3f(0.0, 0.5, 0.0); |
| glVertex3f(0.0, 0.0, 0.5); |
| glEnd(); |
| glFlush(); |
| > |
| int main(int argc, char** argv) |
| glutInit(&argc, argv); |
| glutInitDisplayMode(GLUT_SINGLE); |
| glutInitWindowSize(400, 300); |
| glutInitWindowPosition(100, 100); |
| glutCreateWindow(«Hello world!»); |
| glutDisplayFunc(displayMe); |
| glutMainLoop(); |
| return 0; |
| > |
| Now give the command below to compile your code. |
| $ g++ main.cpp -o firstOpenGlApp -lglut -lGLU -lGL |
| Now run your OpenGl program with following command |
| $ ./firstOpenGlApp |
myconlineblog
Installing OpenGL and SDL on Linux Mint and Ubuntu
Installing OpenGL and SDL can be a right pain if you try to do it on windows especially if you are using Code::Blocks however on Linux Mint and Ubuntu it is exceptionally easy. Generally for programming and installing Libraries for C++ or modules for Python Linux is the easier option of the 2. This is due to the package manager system which Linux employs and because they are then available for your use so long as you know how to compile programs with them or have set your IDE up to use them in the project. For this example I am going to be using Code::Blocks.
SDL and OpenGL are the two foundations to making GUI programs. These two libraries make up the basics (although they are far from basic themselves) of GUI programming. Both are very powerful and when used together there is not much that cannot be accomplished with SDL being able to read keystrokes and mouse movements and OpenGL being the backbone of drawing graphics on the screen.
I’ve discussed how easy Linux is to use before however when installing OpenGL and SDL I found that I could not get my programs to compile on Windows meaning that when I am developing using these two libraries I use my Linux machine instead (in fact it is for this very reason that my Linux machine has once again become my more commonly used machine).
How do you install OpenGL and SDL on a Linux Mint or Ubuntu machine? Well four commands should do it however it is not so simple to compile so I think that will be a topic for Saturdays post.
Installing OpenGL and SDL is incredibly easy and here is how you do it:
sudo apt-get update sudo apt-get install libglm-dev sudo apt-get install libglew-dev sudo apt-get install libsdl2-dev
So that’s it. Those are the development libraries for OpenGL and SDL2 installed. I warn you though these are not the easiest of things to get started with and I would recommend that you proceed slowly and take your time when trying to learn these libraries although they are great fun to learn.
How to Install OpenGL on Ubuntu 20.04 Linux
In this post we will see how to install OpemGL on Ubuntu.In order to install OpenGlL you need to type only few commands .Here we will be looking at step by step process to install OpemGL:
1.First open your terminal and update the repository using command : $ sudo apt update
After entering your password your update will be done .
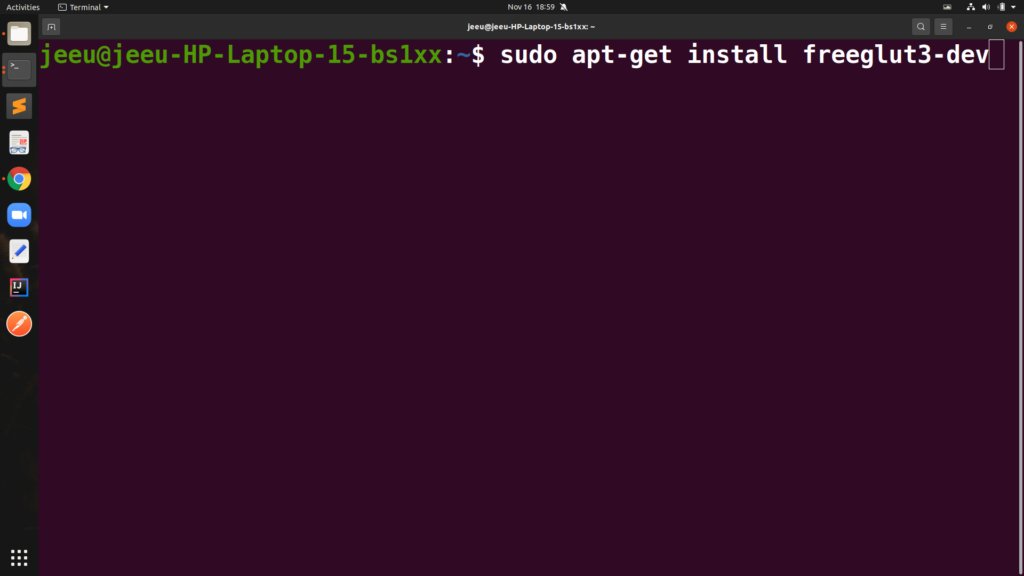
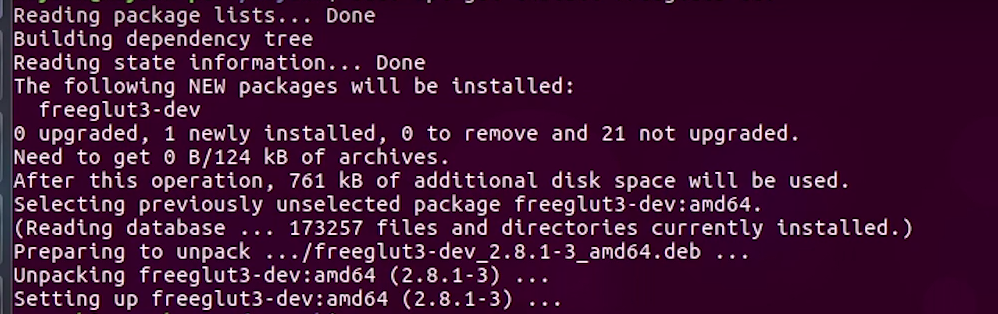
2.In this command your installation will be completed.Type the following command : $sudo apt-get install freeglut3-dev
After completion it will look like this :
.
3. To test if OpenGl libraries are working fine on our Linux, we will create a C++ program and test it.
So create a following C++ Program.
#include void displayMe(void) < glClear(GL_COLOR_BUFFER_BIT); glBegin(GL_POLYGON); glVertex3f(0.5, 0.0, 0.5); glVertex3f(0.5, 0.0, 0.0); glVertex3f(0.0, 0.5, 0.0); glVertex3f(0.0, 0.0, 0.5); glEnd(); glFlush(); >int main(int argc, char** argv)
Now give the command below to compile your code.
$ g++ main.cpp -o firstOpenGlApp -lglut -lGLU -lGL Now run your OpenGl program with following command $ ./firstOpenGlApp

If a window pops up when you run the program, then OpenGL is working on your Ubuntu OS.In this way , following these steps you will be able to install OpenGL and use it.
How to Install OpenGL on Ubuntu Linux
What Is OpenGL?
OpenGL is a Graphics rendering API which is operating system independent, window system independent and has high-quality color images composed of geometric and image primitives.
OpenGL APIs can use following …
- Gl
- OpenGL API implementation (http://www.opengl.org)
- OpenGL Utility
- OpenGL Utility Toolkit (http://www.opengl.org/resources/libraries/glut/)
- FlashLight ToolKit (http://www.fltk.org/)
Now lets see How to install OpenGL on out Ubuntu OS.
Now because GLUT (OpenGL Utility Toolkit) depends upon OpenGL and a number of other related libraries, if we install GLUT then OpenGL will be automatically be installed.
Run the following commands to install OpenGL.
$ sudo apt-get update $ sudo apt-get install libglu1-mesa-dev freeglut3-dev mesa-common-dev
Now to test if OpenGl libraries are working fine on our Linux, we will create a C++ program and test it.
So create a following C++ Program.
#include void displayMe(void) < glClear(GL_COLOR_BUFFER_BIT); glBegin(GL_POLYGON); glVertex3f(0.5, 0.0, 0.5); glVertex3f(0.5, 0.0, 0.0); glVertex3f(0.0, 0.5, 0.0); glVertex3f(0.0, 0.0, 0.5); glEnd(); glFlush(); >int main(int argc, char** argv)
Now give the command below to compile your code.
$ g++ main.cpp -o firstOpenGlApp -lglut -lGLU -lGL
Now run your OpenGl program with following command

If a window pops up when you run the program, then OpenGL is working on your Ubuntu OS.
How to Install OpenGL Library on Ubuntu 20.04 LTS (Focal Fossa)

In this article, I will take you through the steps to install OpenGL Library on Ubuntu 20.04 LTS (Focal Fossa). OpenGL is a free and open source cross platform API library for rendering 2D and 3D graphics. This API library is designed to interact with Graphics Processing Unit(GPU) to achieve hardware accelerated rendering. There are multiple OpenGL libraries available for various graphical features. Here we will see the steps to install freeglut OpenGL library on Ubuntu 20.04 LTS based systems. freeglut is an alternative to the OpenGL Utility Toolkit (GLUT) library. More on official website.
How to Install OpenGL Library on Ubuntu 20.04 LTS (Focal Fossa)
Step 1: Prerequisites
a) You should have a running Ubuntu 20.04 LTS Server.
b) You should have sudo or root access to run privileged commands.
c) You should have apt or apt-get utility available in your Server.
Step 2: Update Your Server
In the first step, you need to install all the available updates from default Ubuntu repo by using sudo apt update command and then upgrade the packages to the latest version by using sudo apt upgrade command as shown below.
cyberithub@ubuntu:~$ sudo apt update && sudo apt upgrade Hit:1 https://dl.google.com/linux/chrome/deb stable InRelease Hit:2 http://in.archive.ubuntu.com/ubuntu focal InRelease Get:3 http://security.ubuntu.com/ubuntu focal-security InRelease [114 kB] Get:4 http://in.archive.ubuntu.com/ubuntu focal-updates InRelease [114 kB] Hit:5 https://download.sublimetext.com apt/stable/ InRelease Get:6 http://security.ubuntu.com/ubuntu focal-security/main amd64 DEP-11 Metadata [60.0 kB] Get:7 http://in.archive.ubuntu.com/ubuntu focal-backports InRelease [108 kB] Get:8 http://security.ubuntu.com/ubuntu focal-security/universe amd64 DEP-11 Metadata [94.3 kB] Get:9 http://in.archive.ubuntu.com/ubuntu focal-updates/main amd64 Packages [2,385 kB] Get:10 http://security.ubuntu.com/ubuntu focal-security/multiverse amd64 DEP-11 Metadata [940 B] Get:11 http://in.archive.ubuntu.com/ubuntu focal-updates/main i386 Packages [788 kB] Get:12 http://in.archive.ubuntu.com/ubuntu focal-updates/main amd64 DEP-11 Metadata [275 kB] .Step 3: Install OpenGL Library
In the next step, you can install OpenGL Library from default Ubuntu repo by using sudo apt install freeglut3-dev command as shown below. This will download and install the package along with all its dependencies.
cyberithub@ubuntu:~$ sudo apt install freeglut3-dev Reading package lists. Done Building dependency tree Reading state information. Done The following packages were automatically installed and are no longer required: gir1.2-goa-1.0 libfwupdplugin1 libllvm11 libncurses-dev libxmlb1 Use 'sudo apt autoremove' to remove them. The following additional packages will be installed: freeglut3 libxt-dev Suggested packages: libxt-doc The following NEW packages will be installed: freeglut3 freeglut3-dev libxt-dev 0 upgraded, 3 newly installed, 0 to remove and 3 not upgraded. Need to get 593 kB of archives. After this operation, 2,484 kB of additional disk space will be used. Do you want to continue? [Y/n] Y .
Step 4: Verify Installation
After successful installation, you can verify the installed files path by using dpkg -L freeglut3-dev command as shown below.
cyberithub@ubuntu:~$ dpkg -L freeglut3-dev /. /usr /usr/include /usr/include/GL /usr/include/GL/freeglut.h /usr/include/GL/freeglut_ext.h /usr/include/GL/freeglut_std.h /usr/include/GL/glut.h /usr/lib /usr/lib/x86_64-linux-gnu /usr/lib/x86_64-linux-gnu/libglut.a /usr/share /usr/share/doc /usr/share/doc/freeglut3-dev /usr/share/doc/freeglut3-dev/copyright /usr/share/doc/freeglut3-dev/download.html /usr/share/doc/freeglut3-dev/freeglut.html /usr/share/doc/freeglut3-dev/freeglut_logo.png /usr/share/doc/freeglut3-dev/freeglut_user_interface.html /usr/share/doc/freeglut3-dev/index.html /usr/share/doc/freeglut3-dev/ogl_sm.png /usr/share/doc/freeglut3-dev/progress.html /usr/share/doc/freeglut3-dev/structure.html /usr/lib/x86_64-linux-gnu/libglut.so /usr/share/doc/freeglut3-dev/changelog.Debian.gzStep 5: Uninstall OpenGL Library
Once you are done using freeglut library, you can choose to uninstall it from your system by using sudo apt remove freeglut3-dev command as shown below.
Please be careful in running below command as sometimes removal of this package might impact other active running applications.
cyberithub@ubuntu:~$ sudo apt remove freeglut3-dev [sudo] password for cyberithub: Reading package lists. Done Building dependency tree Reading state information. Done The following packages were automatically installed and are no longer required: freeglut3 gir1.2-goa-1.0 libfwupdplugin1 libllvm11 libncurses-dev libxmlb1 libxt-dev Use 'sudo apt autoremove' to remove them. The following packages will be REMOVED: freeglut3-dev 0 upgraded, 0 newly installed, 1 to remove and 3 not upgraded. After this operation, 761 kB disk space will be freed. Do you want to continue? [Y/n] Y (Reading database . 198408 files and directories currently installed.) Removing freeglut3-dev:amd64 (2.8.1-3) .