HOW TO: Dual Boot macOS and Linux
Dual-booting Linux ( or Windows ) alongside macOS is easy. Learn how to do it.

You can install macOS Catalina and macOS Big Sur on Linux. You can even install macOS Catalina in a Docker contrainer in Linux. So how about today we’re switching things around, and install Linux on a Mac? But instead of virtualizing it, which is trivial, we install Linux on bare metal.
A WORD ABOUT T2 Macs
Back in 2018, Apple started shipping Macs with a new T2 security chip. The chip is responsible for a lot of things, and one of them is not allowing you to boot from an external device.
Some people would argue that this security setting is recommended for most users. I would argue that it’s detrimental to most users. Most or, better said, the average user doesn’t have to worry about evil maid attacks.
The average user has to worry about the day an external device boot is required in order to save the data on that Mac. Anyway, long story short… it might be a good idea to disable this feature before it’s too late.
- iMac (Retina 5K, 27-inch, 2020)
- iMac Pro
- Mac Pro (2019)
- Mac Pro (Rack, 2019)
- Mac mini (2018)
- MacBook Air (Retina, 13-inch, 2020)
- MacBook Air (Retina, 13-inch, 2019)
- MacBook Air (Retina, 13-inch, 2018)
- MacBook Pro (13-inch, 2020, Two Thunderbolt 3 ports)
- MacBook Pro (13-inch, 2020, Four Thunderbolt 3 ports)
- MacBook Pro (16-inch, 2019)
- MacBook Pro (13-inch, 2019, Two Thunderbolt 3 ports)
- MacBook Pro (15-inch, 2019)
- MacBook Pro (13-inch, 2019, Four Thunderbolt 3 ports)
- MacBook Pro (15-inch, 2018)
- MacBook Pro (13-inch, 2018, Four Thunderbolt 3 ports)
Another way to check if your Mac has the T2 chip or not:
- Press and hold the Option key while choosing Apple menu > System Information.
- In the sidebar, select either Controller or iBridge, depending on the version of macOS in use.
- If you see “Apple T2 chip” on the right, your Mac has the Apple T2 Security Chip.

To allow T2 Macs to boot from external devices, restart the Mac and hold cmd + R to boot into Recovery mode.
Once in Recovery mode, authenticate with your account, go to Utilities in the menu bar and choose Startup Security Utility
Enter your admin password again, and select Allow booting from external media . Exit and reboot your Mac.

And if you’re wondering about the M1 Macs. I wouldn’t be too hype on them. At least for now. Let’s wait for second or even third gen.
But, maybe we’ll hear some good news sooner rather than later as developer Hector Martin ( guy who put Linux on the PS4 ) wants to port Linux to Apple M1.
Ok, now let’s move on to the dual boot. But before we get started, you should know that you’re not limited only to Linux. You can also dual-boot Windows this way. Or more than one Linux distro. And so on…
HOW TO DO IT
1. BACK UP! Use Time Machine, use whatever you want but BACK UP your Mac. You can get a working system back, but your data will be gone in case of any screw-ups. So BACK UP! Generally a good idea anyway….
2. You need to partition your Mac’s drive. To do that, you’re going to use Disk Utility. Make sure it’s set to show all devices, select your drive and click on Partition.

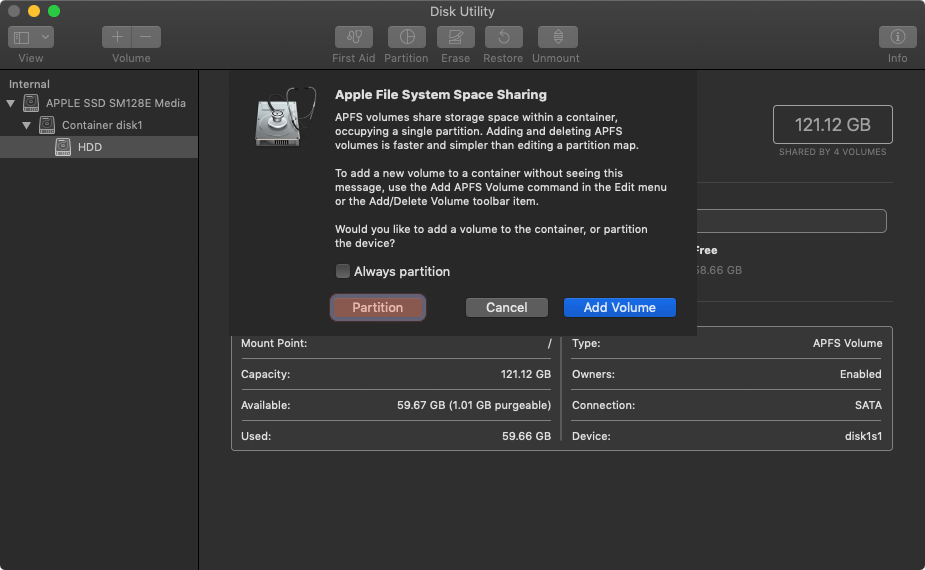
3. Click on the + to add a new partition.

4. Select the size of your Linux partition. You can either drag the sliders or manually enter its size. Name the parition if you want to ( not important ) and set it to be formated to MS-DOS (FAT) . Now click Apply and wait for your new parition to be created.


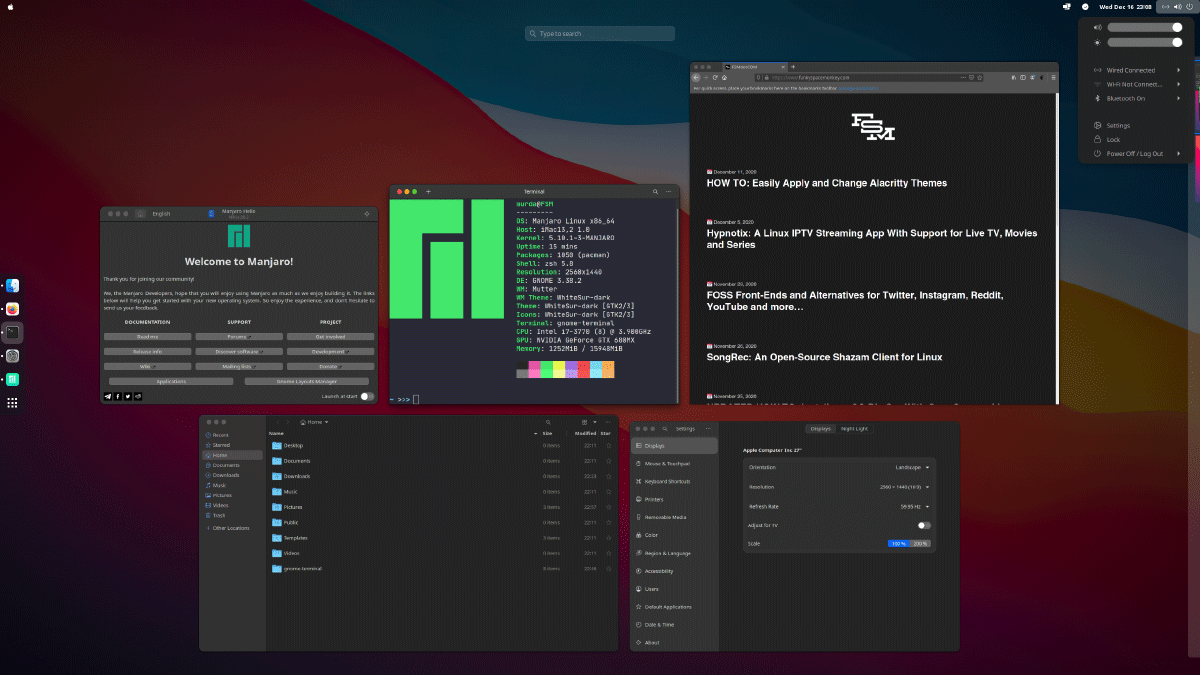
5. Download your preferred Linux distribution. This one is up to you. I’m going to use Manjaro GNOME edition. And “burn” it to a flash drive. I suggest using USBImager ( might require sudo to run macOS ) or Ventoy to create a multi-boot USB drive ( maybe you want to try multiple distros in the live enviorment before installing ).
6. Now the fun part begins. With the bootable USB drive plugged in, restart your Mac, and hold down the alt key to get into your Mac’s boot menu.
In the boot menu, select your USB drive ( most probably called EFI Boot ) and in a few seconds you’ll be able to play around in the live enviorment.
Now it’s a good time to check if everything works. Check your Wi-Fi, wired connection, bluetooth, sound, thunderbolt etc. Whatever you know you’re going to use, check if it works.
On my old ass iMac, almost everything works out of the box. Almost… I can’t set the screen brightness ( which, frankly, I don’t care about. There might be a fix, but I just don’t care ) and audio only comes out from the left speaker. That can be fixed. Not a perfect fix, but there is one. More on that later.

7. Once you confirm that everything works, you can start the installer. Most distros use a straight forward installer. You shouldn’t have any problems. But when it comes to choosing where the OS should be installed, make sure you use the FAT parition you’ve created with Disk Utility on macOS.
In my case, I chose to replace a parition, clicked on sda3 ( the FAT32 partition ) to choose it as the partition I want to replace. And that was it. Optionally you can choose to encrypt your system.


8. The installation begins. It will take just a few minutes. Literally. Assuming you have an SSD and depending on the distro and how bloated it might be ( or, if given the option, you choose to install updates ) the installation might take 10 minutes or so. Max. Manjaro takes around 4-5 minutes to install.


9. Restart your Mac and hold the alt key to get into your Mac’s boot menu. Now you should see your Mac’s drive and your Linux drive in there ( and the USB if you didn’t unplug it ).
It’s easy to recognize which is which because your Mac’s drive will be named whatever you named it and the Linux drive will be most likly called EFI boot .
NOTE: if you chose to encrypt your system, your Linux boot will hang on a black screen with some weird text on it. Don’t worry, everything is fine.
That’s the LUKS pre-boot authentication asking you for a password to decrypt the volume. Enter the password set during installation and press Enter .
10. You’re done, congrats! Now just go ahead and theme your Linux distro to look just like macOS. Probably better. Definitely snappier and less of a resource hog. And if you choose XFCE as your desktop environment you’ll be flying…


Before we go further… you will have to understand that you’ve just installed Linux on a Mac. So don’t expect everything to just work. If everything works out of the box, you’re the luckiest SOB on the planet.
But even then, the keyboard will be a pain in the ass. You’ll probably have to swap some keys around if muscle memory is a problem…
I’ve mentioned that on my iMac almost everything worked out of the box except I can’t set the screen brightness and I only get audio out of the left speaker.
I can live with the screen brightness issue ( again, there might be a fix but I just don’t care ), but the audio output coming only from the left speaker drove me nuts. Luckily there’s a quick and relatively easy fix. NOT a perfect one, but one good enough.
I had to create a file called alsa-base.conf inside /etc/modprobe.d/ . And inserted this line options snd-hda-intel model=imac27 into the .conf file.
Upon reboot, I could select the audio card in AlsaMixer and unmute the channels. This + PulseEffects got me a decent sound. Not the rich full sound that I get on macOS, but pretty close.

NOTE: the audio output “fix” worked in my case. It’ll probably not work for you. This ArchWiki page is a very good place to start troubleshooting your errors.
HOW TO UNDO IT
I think that Linux will run just fine on most Macs, for most people. Especially if you are willing to do some research and thinker to fix the issues you might encounter.
- Delete Linux’s bootloader. To do that, boot in macOS, open up your preferred terminal emulator and run cd Desktop/ && mkdir boot && sudo mount -t msdos /dev/disk0s1 boot

The above command is actually 3 commands in 1. First you change your working directory to your Desktop/ . Next you create a folder called boot which will be used to mount the hidden EFI volume.
NOTE: feel free to change the location and folder name. If you do, change the path and name accordingly.

Once you input your password, the hidden EFI volume will be mounted and you will notice that the folder on your desktop will change to a drive and in Finder you will notice that a new drive was mounted.
Go to EFI and delete BOOT ( if present ) and Linux_Distro_Name folder ( in my case Manjaro . Yours might be Ubuntu or whatever you dual-booted with ).
When you’re done, just right-click on EFI and eject the volume. You can also delete the boot folder on your Desktop.

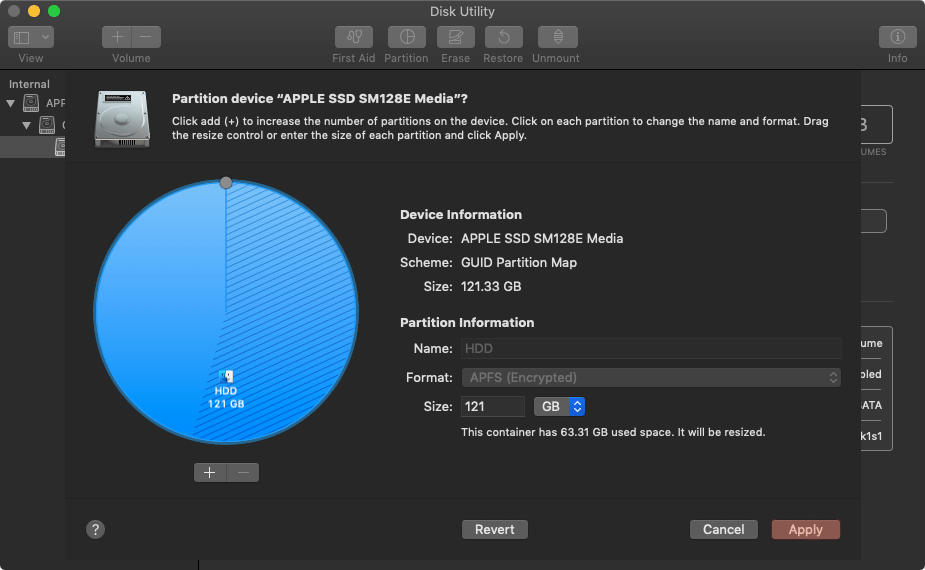
Now it’s just a matter of deleting your Linux parition. Open Disk Utility, select your driver and click on partition. Click on the Linux partition to select it and click the — button. Then apply the changes.

BOOT MANAGER
Let’s say you want to keep your dual-boot. It’s pretty annoying having to hold the option key, every time your Mac boots, in order to be able to choose if you want to boot into your Linux drive or macOS.
This is an easy fix too. Instaling a boot manager like rEFInd. Which is useful even if you don’t dual-boot as it will at least allow you to easily boot into Recovery mode.
1. Download rEFInd ( binary .zip file )
2. Unzip it on your Desktop
3. Reboot your Mac and hold cmd + R to enter Recovery.
4. If you use FileVault, you will need to mount your drive first. To do this, open Disk Utility, select your drive and click Mount . Enter your password and once your drive is mounted, exit Disk Utility.

5. Now, in the menu bar select Utilities > Terminal .

6. Run cd /Volumes/name-of-your-drive/name-of-your-user/Desktop/refind-bin-0.xx.x
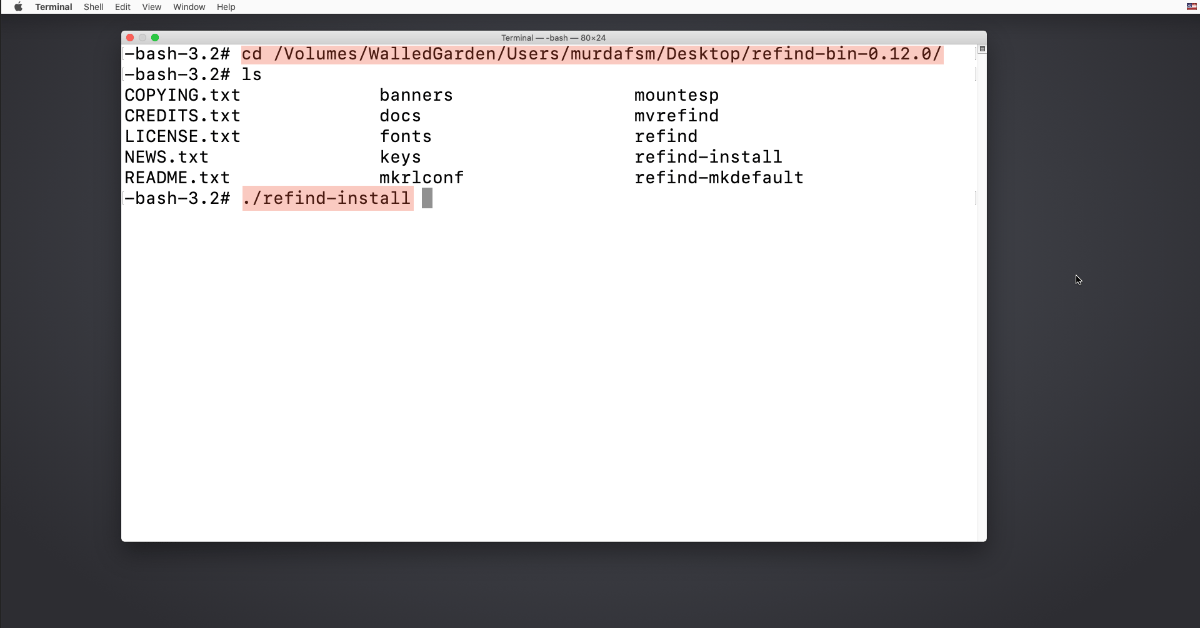
7.1 When prompted type Y and press Enter

8. When the installation is complete, run reboot to reboot your Mac.

Now, instead of booting straight into macOS ( if you don’t have any other OS installed ) or the last OS used, you will first see the boot manager. Which, let’s be honest, looks like shit ( see screenshot below ). But its functionality is important here, not the looks because rEFInd can be themed and configured.

You can create your own theme, or download ( and modify ) a theme. Just search for refind themes and you’ll find quite a few. Most of them on GitHub. Let’s use this one as an example and change the default view into something like this:

If the theme you want to use is available on GitHub, GitLab etc, you might want to install git on your mac first. The easiest way to do that is via Homebrew with brew install git .
Now mount the hidden EFI volume again. Run cd Desktop/ && mkdir boot && sudo mount -t msdos /dev/disk0s1 boot
Next steps you can either do with your preferred GUI programs or via your preferred terminal emulator.
Go to Desktop/boot/EFI/refind and create a new folder called themes .

Now clone the theme’s repository into the newly created themes folder with git clone https://github.com/lukechilds/refind-ambience.git themes . Alternatively, if you’re preferring the GUI way, download the theme, unzip it and copy it to the themes folder.

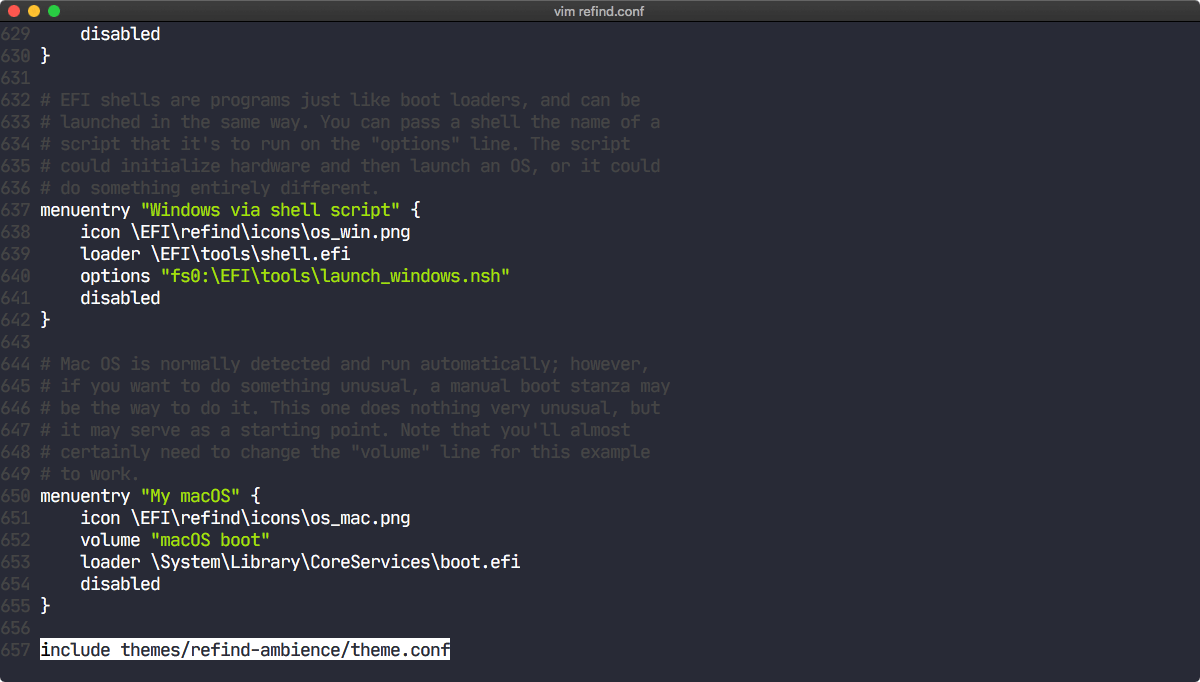
To activate the theme, you will need to edit refind.conf and add include themes/refind-ambience/theme.conf as the last line. Here, you can also edit the default time ( in seconds ) for the timeout autoboot.
Back in the themes folder, edit theme.conf to suit your needs. A clean minimal theme is nice, however I would suggest adding buttons for entering Recovery mode, restart and reboot.

Also any icon and wallpaper is fair game. Just use whatever icons and wallpapers you want.Now reboot and enjoy!
When you arrive at the rEFInd boot menu screen, you’ll see a bunch of boot options that you don’t really need on the screen. To hide them, just press the Del key. IF your Mac’s keyboard has such a key. If not, buy or borrow a keyboard that has the Del key. Read more here.
Recent Posts
Follow FSM

![]()


![]()
We don’t think that using an adblocker = piracy. That’s simply not true.
However, as a small non-corporate website, we would appreciate it if you’d consider whitelisting FSM in your adblock of choice.
Alternatively, consider donating using the options on this page .
LATEST ARTICLES
© 2008-2023 FSMdotCOM. All rights reserved. ✉️ [email protected] Privacy