- How to Mount Ext4 in Windows 10/11
- Mounting Ext4 in Windows Tutorial
- 1. Ext2fsd Driver
- 2. Linux Filesystems for Windows by Paragon
- Extract files from Ext4 partitions in Windows
- 1. Diskinternals Linux Reader
- 2. DiskGenius
- Wrapping Up
- Как открыть диск Linux в Windows — подключение разделов ext4, ext3, ext2
- Ext2 File System Driver (Ext2Fsd) — самый простой способ открыть раздел ext4/ext3/ext2 в Windows
- Доступ к разделам Linux средствами Подсистемы Windows для Linux (WSL)
- Другие способы
How to Mount Ext4 in Windows 10/11
If you want to use Windows in dual booting with Linux, sometimes you will need to copy files from one operating system to another. There are no problems with opening Windows partitions on Linux because it has excellent support for the NTFS file system. But you can’t open Ext4 or other Linux filesystems in Windows by default.
In this article, I will show a few ways to mount ext4 in Windows 10 or 11. You can add an Ext4 driver to the Windows or just extract required files using special applications.
Mounting Ext4 in Windows Tutorial
1. Ext2fsd Driver
First of all, you can use an open-source Ext* filesystems driver for Windows that is called ex2fsd. It hasn’t been updated since 2017, but still works. I was able to start and successfully use this driver in Windows 10 but not in Windows 11.
You can download an installer for your version of Windows on the releases page of the project on GitHub. The installation process is easy, just press the Next button in each installation wizard window. Only the following step is interesting:
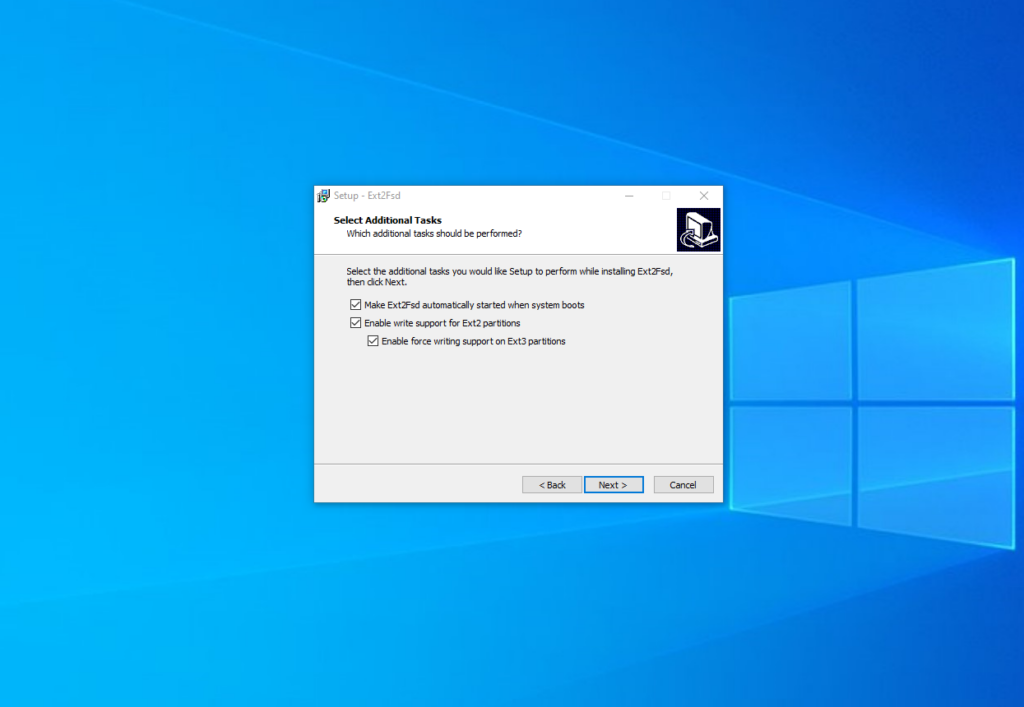
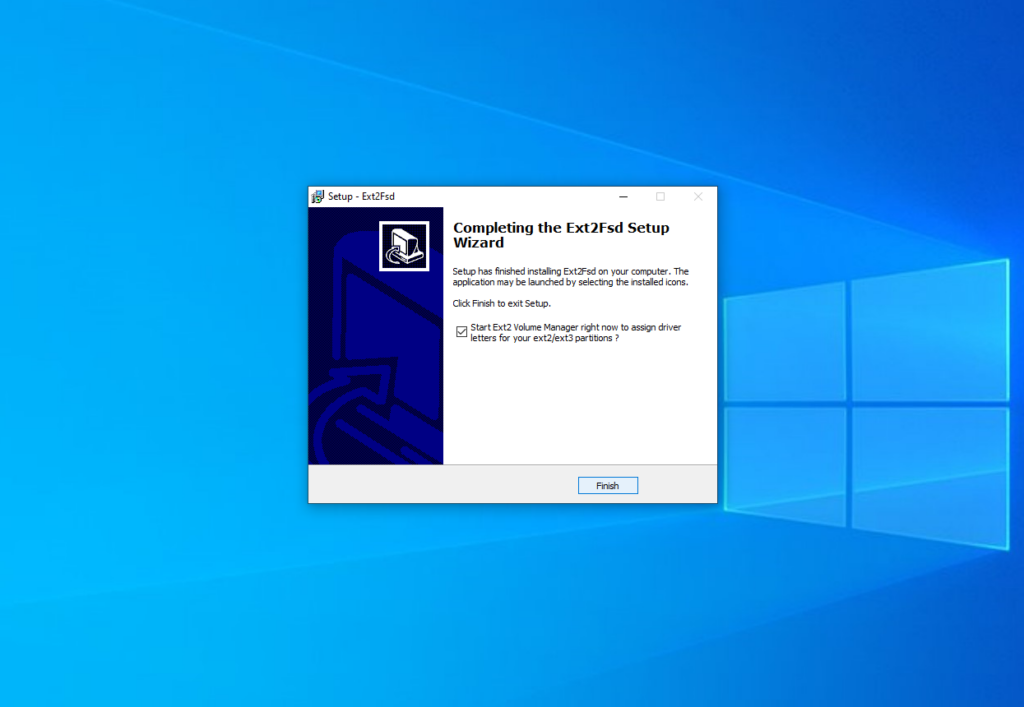
Here you can configure whether the driver should be loaded automatically on the system startup and whether it has writing support for Ext2 and Ext4 filesystems. Check the checkboxes which you want and press Next. In the next window check the Start Ext2 Volume Manager right now to assign drive letters for your ext2/ext3 partitions checkbox to start the mounting manager now:
Here is the main application window:
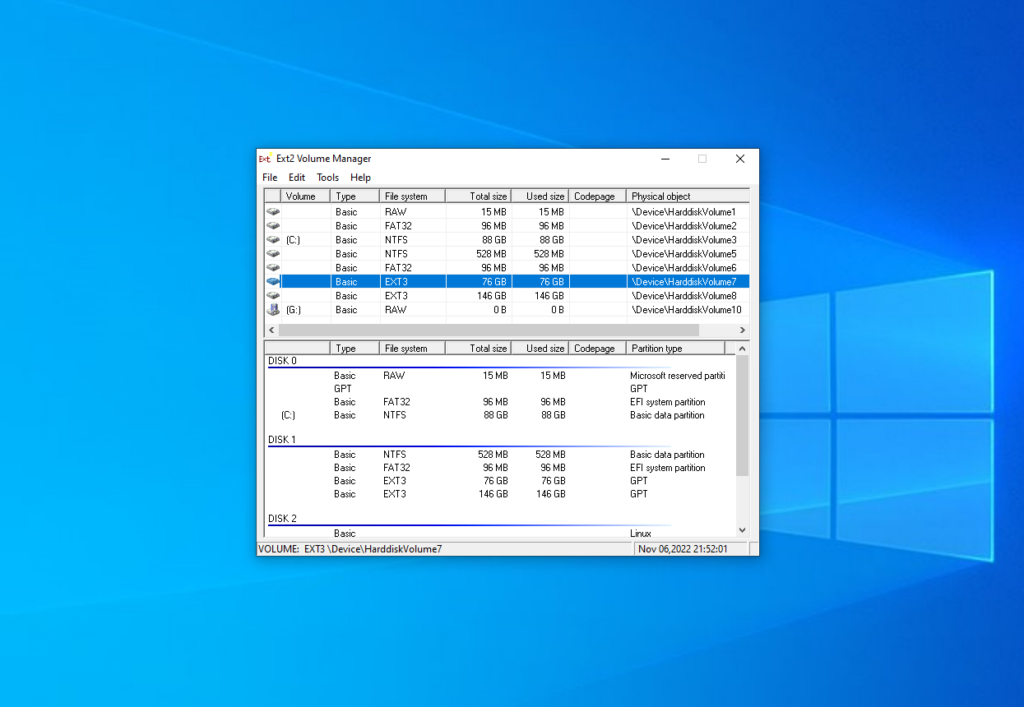
Here you can see all available partitions, their size, and their filesystem. Double-click on any of them to mount it.

Here are two mounting options:
- Automatically mount via Ext2Mgr — the partition will be mounted for the current session, the application will not mount it after reboot automatically.
- Mountpoint for fixed disk — the partition will be permanently mounted with the same name on the system startup.
Select the drive letter for the partition near the chosen mount type. Also, you can specify in the Hiding files with prefix field which prefixes are used for hidden files. By default, all files which start from a dot are hidden in Linux. After this press the Apply button.
Pay attention that the window with mounting settings should look as well as the window on the screenshot above. If it looks different, something went wrong. If the application does not work, ensure that there are no other applications for mounting Ext4 running or installed. Try to reinstall the application.
If everything is good, open This Computer and you will see your Ext4 drive mounted. The Ext2fsd driver allows you to work with Ext4 partitions as well as you work with regular NTFS or FAT partitions.
2. Linux Filesystems for Windows by Paragon
Paragon Software is the same company that added a new NTFS driver to the Linux kernel in 2021. Also, they developed an application for mounting Ext4 in Windows. It is a filesystem driver as well as Ext2fsd. Its main advantage is that it is actively maintained and developed. Also, it has a modern and pleasing user interface and pretty same functionality. You can mount and unmount Ext4 partitions for reading and writing. In addition, you can mount XFS and Btrfs but only for reading.
The application is paid, but it has a trial version that can be used for 10 days for free. Its price at the moment of writing is almost 20 euros.
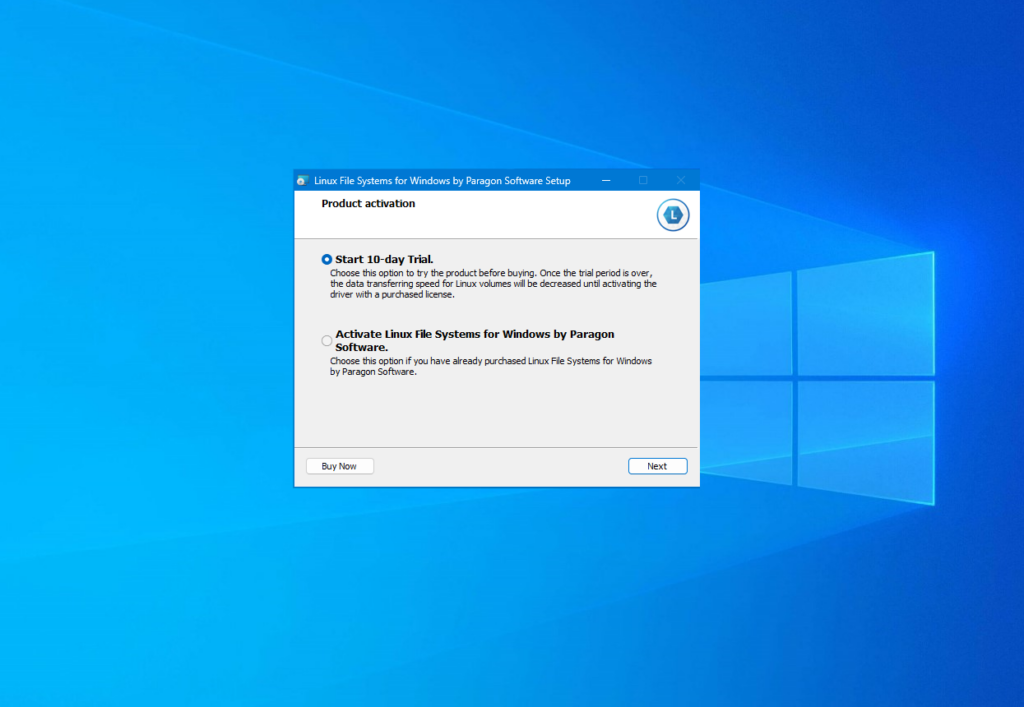
You can download a trial version from the official site. The installation process has nothing unusual, just press the Next button for each step as well as in the previous section. On the activation step, you should start your trial period or activate a license:
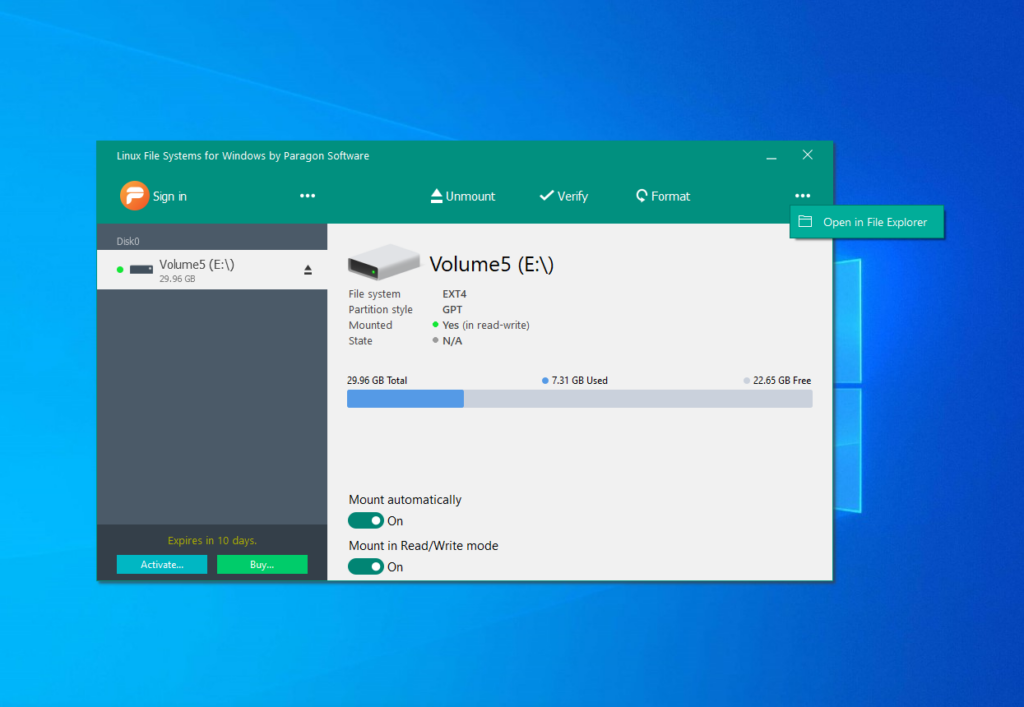
When the installation is complete, the main application window will be opened. The application will mount all available partitions with Linux filesystems:
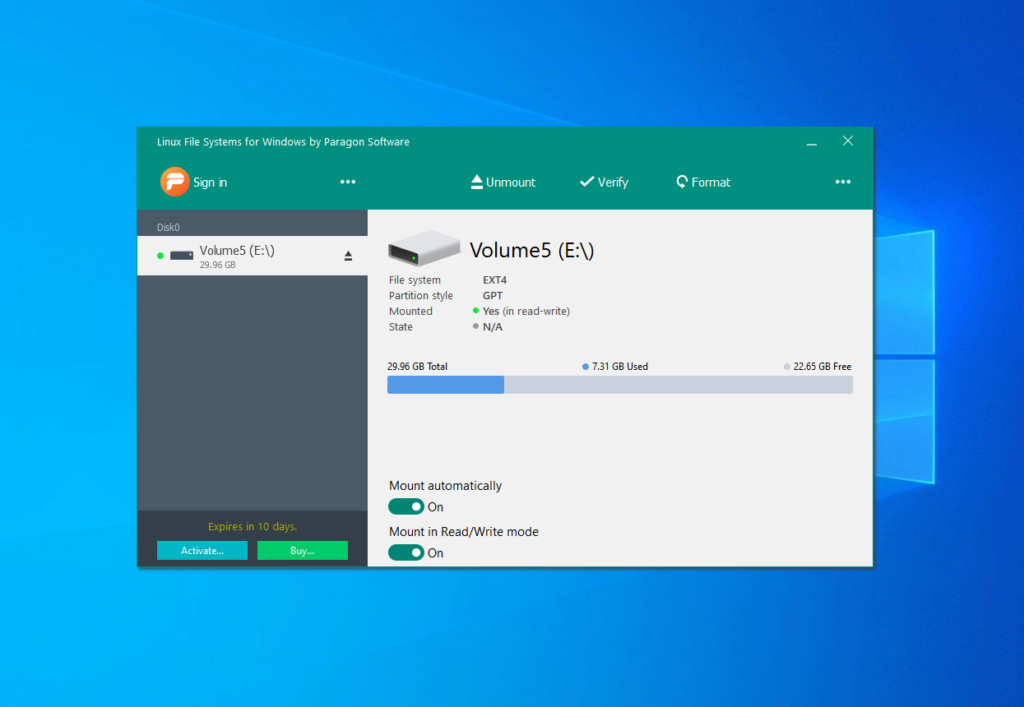
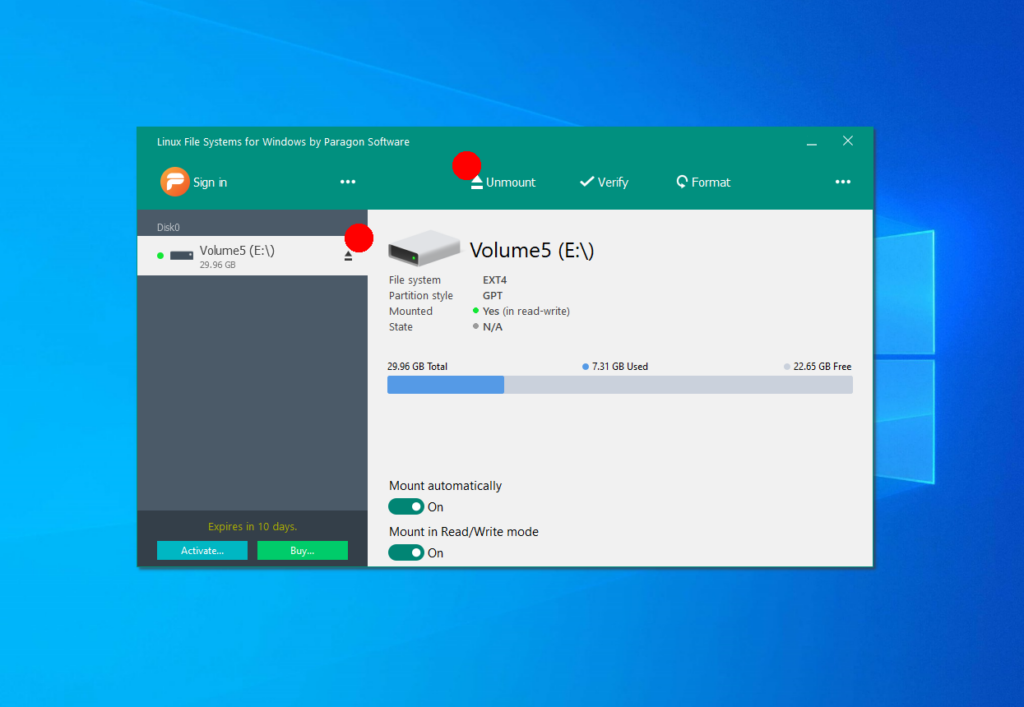
On the left side of the window, you can find the list of available partitions, and on the right — detailed information about each of them. You can unmount the partition by pressing the Unmount button or the button with an arrow near its name:
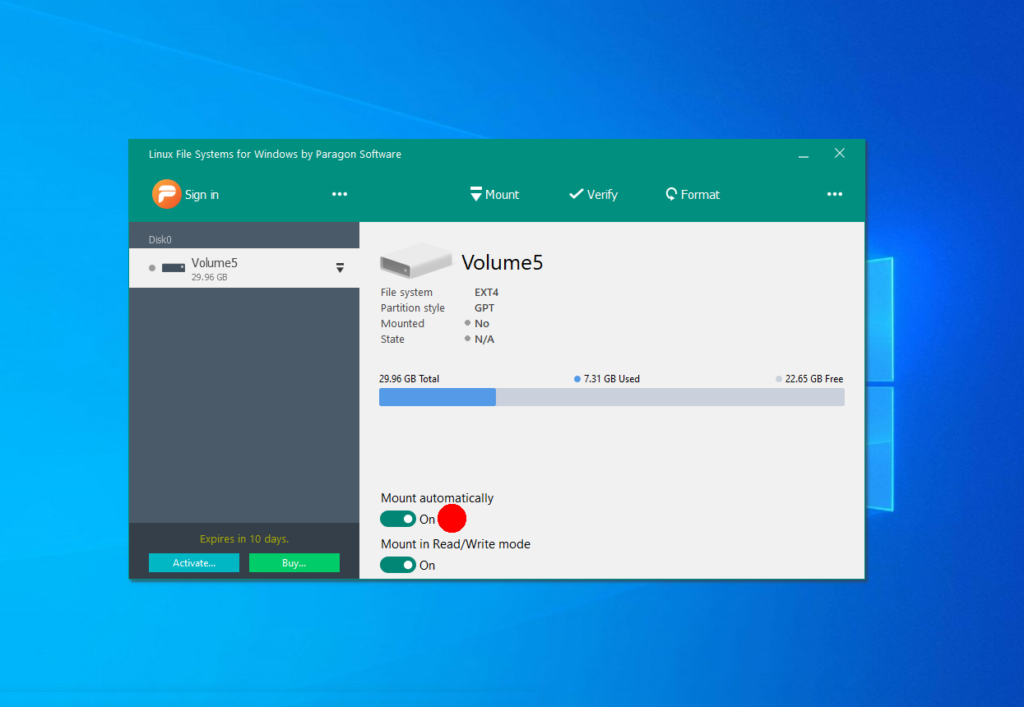
Also, you can check the partitions for errors using the Verify button or format it using the Format button. If you don’t want to mount this partition automatically in the future, disable this feature at the bottom of the window:
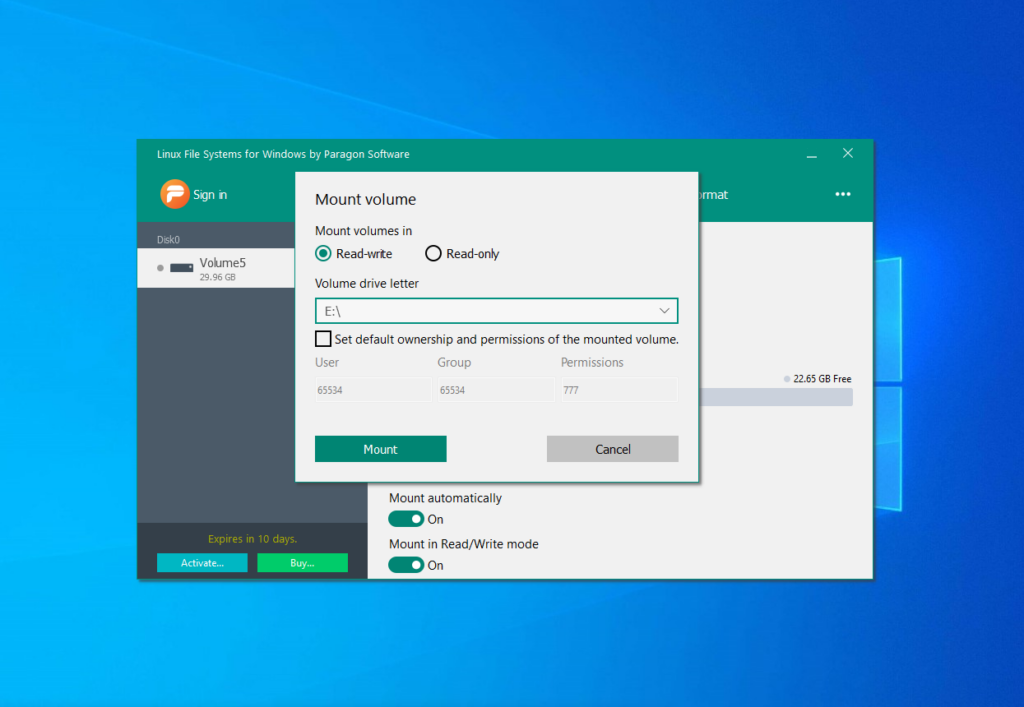
When a partition is unmounted you can mount it by clicking the Mount button. The application will open a new window when you can choose a mounting mode and a volume drive letter:
Then, just open This computer and choose the mounted disk to get access to your files. Now, all Linux partitions are available in Windows. Also, you can use the Open in Explorer button in the application:
Extract files from Ext4 partitions in Windows
1. Diskinternals Linux Reader
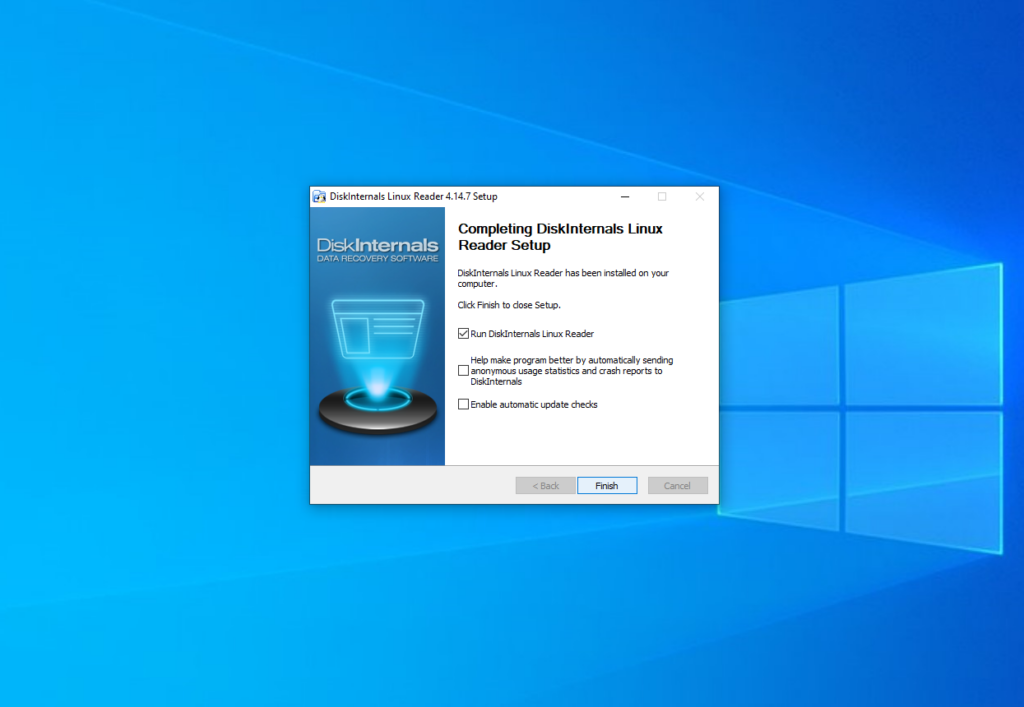
It is the simplest way to open Ext4 in Windows 10 or 11. This application can help you to extract required files from Linux partitions without adding support for this filesystem to Windows. You can download the application from the official site. Then run the installer and just continue pressing the Next button as well as for other applications.
The main application window looks like this:
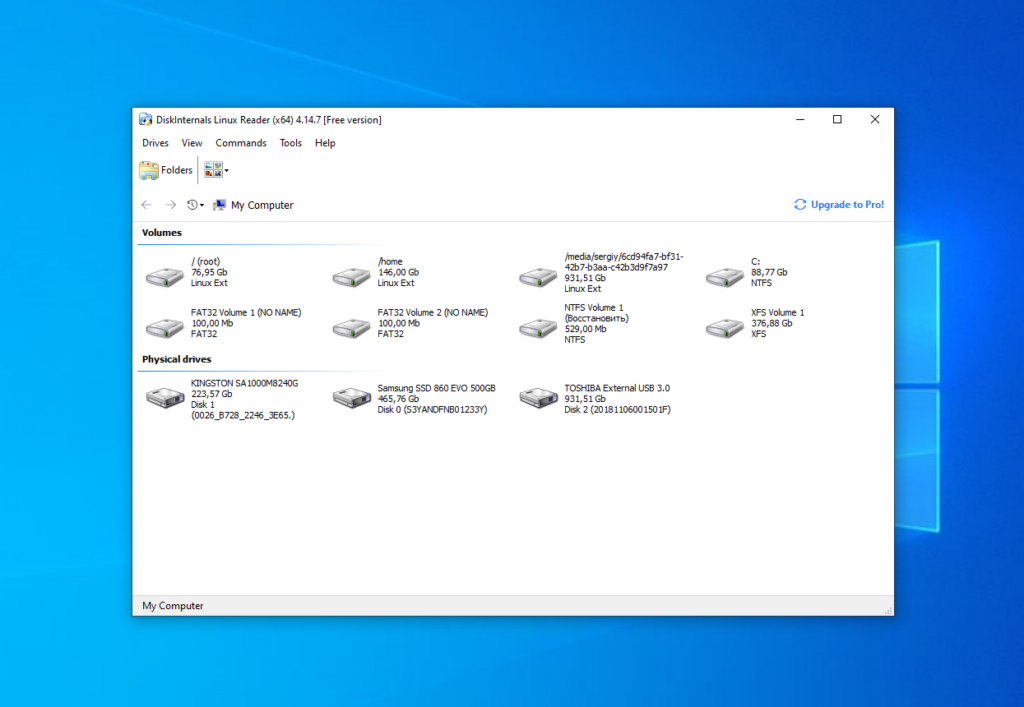
Here you can choose the required partition with the Ext4 filesystem and view all files which are located there:
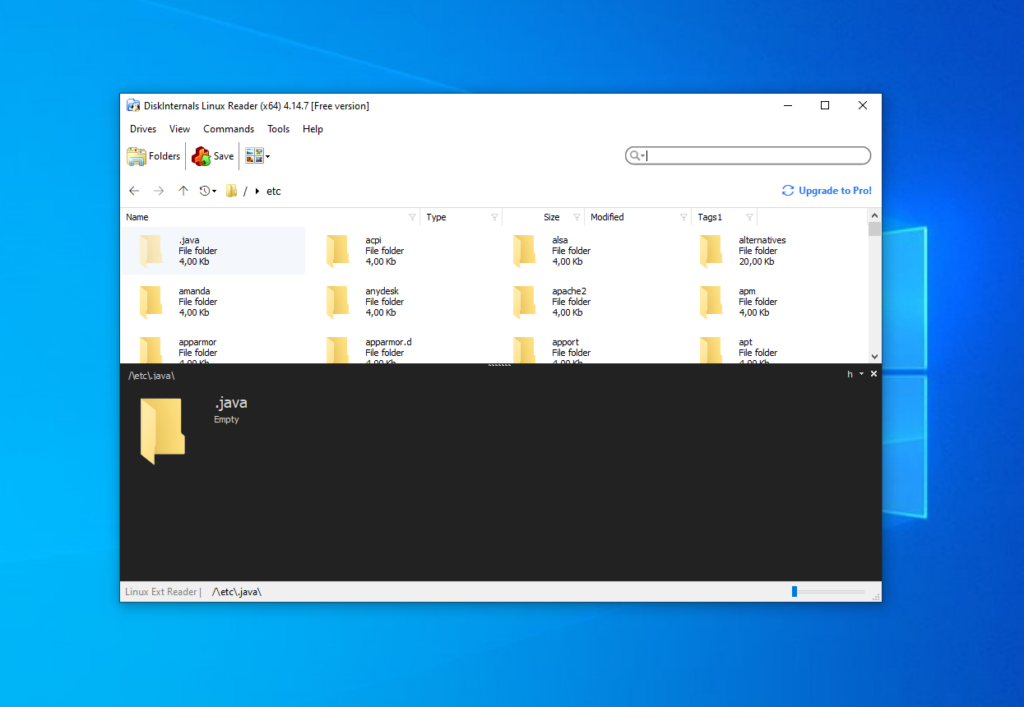
The application supports searching too. Just enter the file name, which you want to find and the application will highlight it in the list.
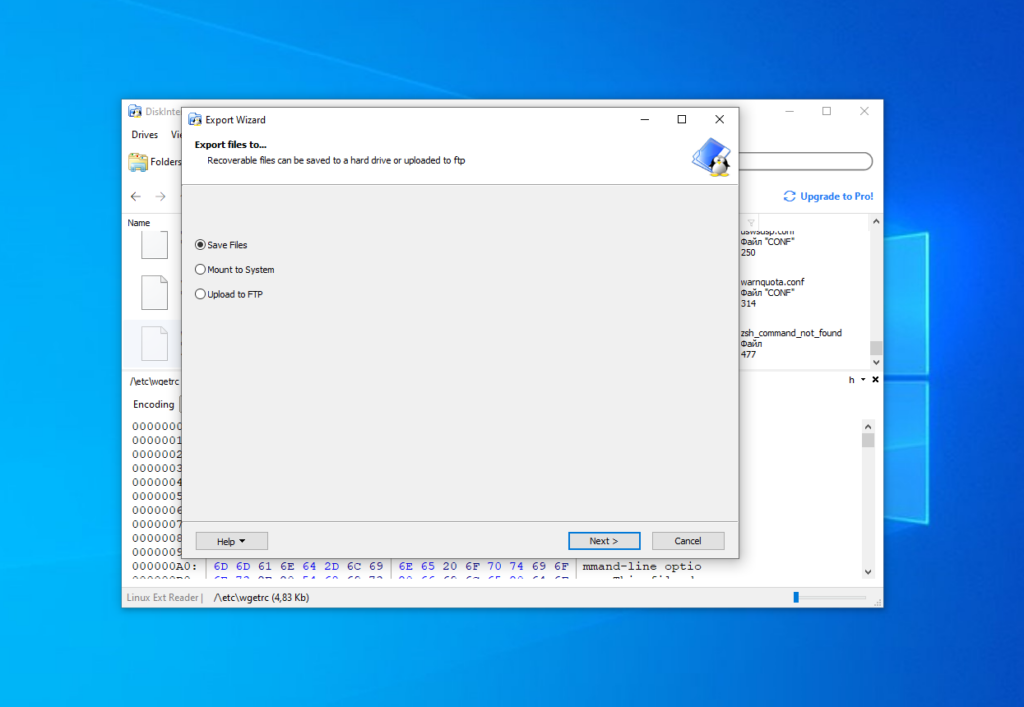
To extract any of the files or folders, right-click on it and choose Save in the contextual menu. Then choose Save files:
Then, choose the destination folder which will be used for saving the file:
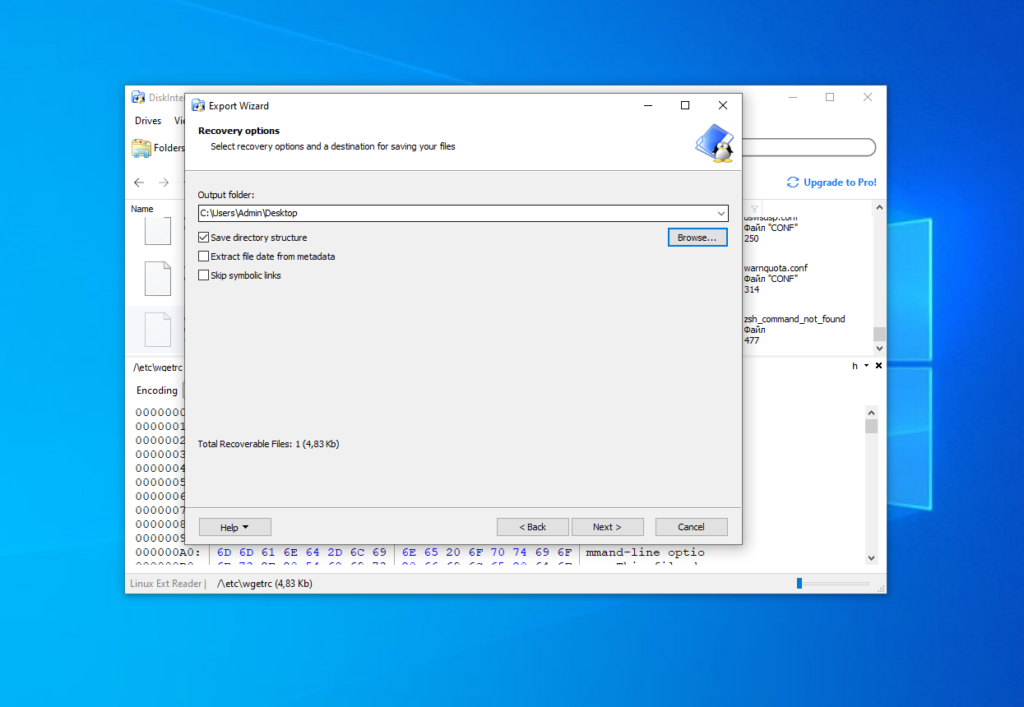
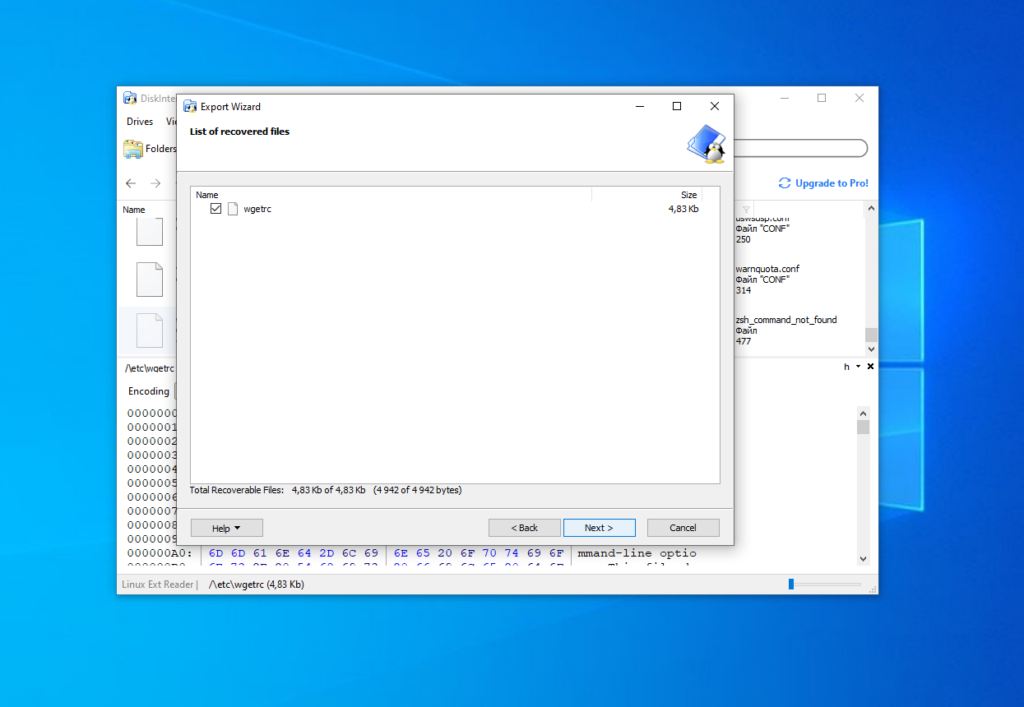
Check the Save directory structure flag if you want. On the next step ensure that all files which you want to extract are in the list and press the Next button:
Finally, wait until the extracting process is complete and do what you want with the files in Windows Explorer.
2. DiskGenius
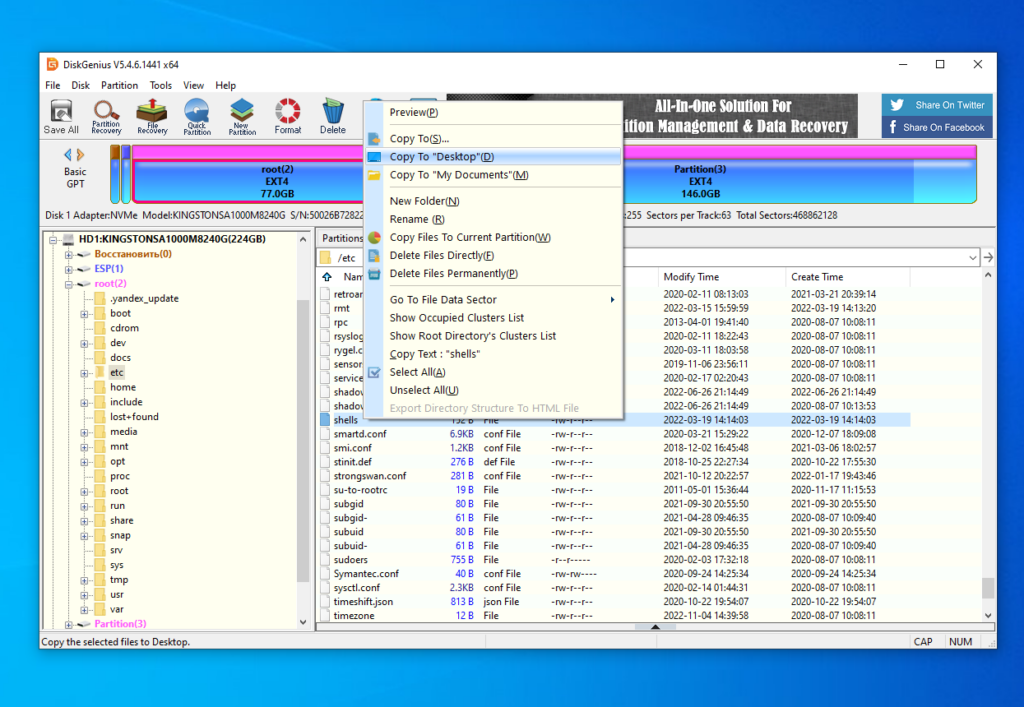
DiskGenius — is a utility for data recovery. It can recover deleted files, deleted partitions, or partition tables. The application supports Ext2/3/4 filesystems and can work not only with deleted files but with regular files too. The utility is paid, but it has a free version that is pretty enough for working with Ext4 partitions. You can download it from the official site. There is nothing remarkable in the installation process of DiskDenius, like other programs. DiskGenius main window looks like this:

You can find a list of available disks and partitions on the left side of the window. Detailed information about each of them is available on the right panel. You can open each partition and view the list of its directories. Make a double click on any directory to view its contents. It will be displayed on the right side of the window. If you want to extract a file to the desktop, open the contextual menu and click on Copy To «Desktop»:
Also, you can click on Copy To or Copy To «My Documents». After this the window with the copying state will be opened:
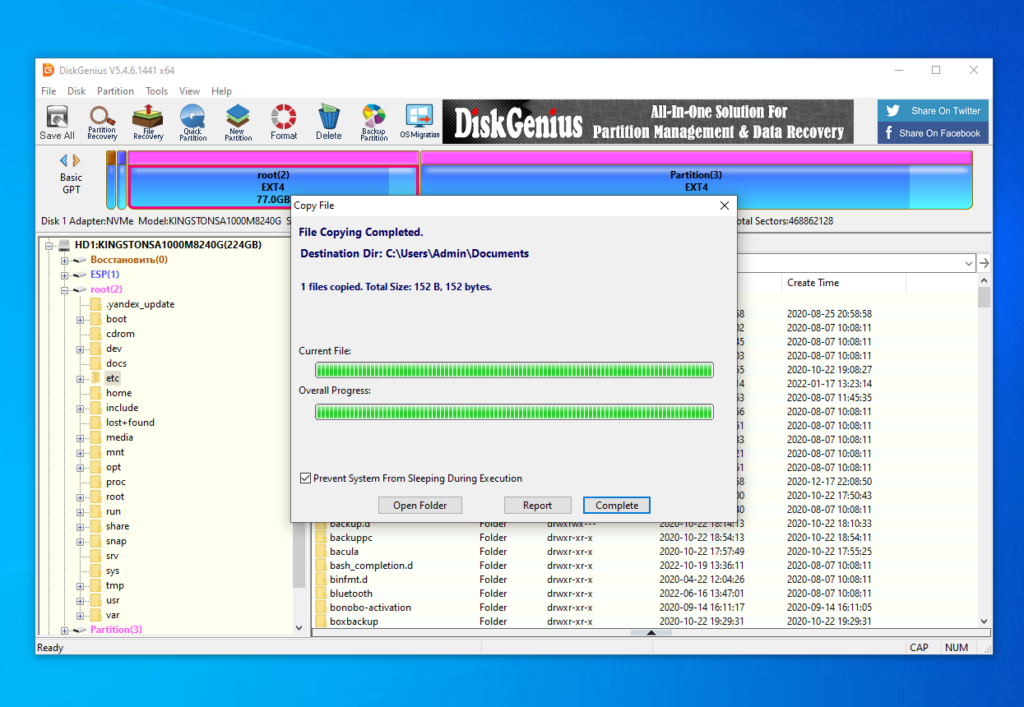
Then, you will see the file on your desktop or another destination folder which you selected.
Wrapping Up
Now, you have learned how to open Ext4 in Windows 10 and 11. The open-source driver Ext2fsd still works despite not being updated for a long time. If it does not work in your system, you can use Diskinternals or a propertiary driver from Paragon.
There also exist other tools which not described in this article. For example, e2explore. It was discontinued in 2012 and I was unable to launch it. Also, you can find information about utilities which can convert Ext4 into NTFS. But be careful with them. Don’t convert the root or home partition, because this will break your Linux system.
Which tools do you use to access Linux partitions on Windows? What do you prefer more? Tell using the comments section below.
Found a mistake in the text? Let me know about that. Highlight the text with the mistake and press Ctrl+Enter.
Как открыть диск Linux в Windows — подключение разделов ext4, ext3, ext2
В случае, если вам потребовался доступ из Windows к данным на разделе диска с файловой системой Linux — ext4/ext3/ext2, встроенными средствами системы сделать это не получится. Однако, возможности есть, причем реализовать это можно встроенными средствами системы или с помощью сторонних инструментов.
В этой инструкции подробно о способах подключить раздел диска в файловой системе Linux в Windows 11 и Windows 10 для доступа к данным на этом разделе как для чтения, так и для записи.
Ext2 File System Driver (Ext2Fsd) — самый простой способ открыть раздел ext4/ext3/ext2 в Windows
Ext2 File System Driver или Ext2Fsd — сторонний и полностью бесплатный драйвер для подключения разделов Linux во всех версиях Windows начиная с XP. Несмотря на название, поддерживаются не только разделы не только с файловой системой ext2, но и более новые ext4 и ext3.
Порядок использования Ext2 File System Driver для доступа к дискам Linux будет следующим:
- Загрузите установщик Ext2Fsd с сайта https://sourceforge.net/projects/ext2fsd/
- Установите драйвер, в параметрах установки как правило не требуется ничего изменять.
- По завершении установки вам будет предложено запустить Ext2 Volume Manager (менеджер томов), запустите его.
- Нажмите правой кнопкой мыши по разделу Linux ext4, ext3, ext2 и выберите пункт «Assign Drive Letter» — назначить букву диска.

- Для раздела будет автоматически назначена буква диска, и вы увидите раздел в Проводнике Windows с возможностью чтения и записи файлов на нём.


В дальнейшем вы тем же способом сможете удалить букву диска с раздела (опция «Change letter» — «Remove»).
Доступ к разделам Linux средствами Подсистемы Windows для Linux (WSL)
Подсистема Windows для Linux (WSL) также может быть использована для подключения дисков Linux в Windows таким образом, чтобы доступ к ним был возможен из проводника. Шаги будут следующими:
- Запустите командную строку, Терминал или PowerShell от имени администратора и по порядку введите команды
wsl --install wsl --set-default-version 2 dism.exe /online /enable-feature /featurename:VirtualMachinePlatform /all /norestart wsl --install -d Ubuntu

sudo mkdir -p /mnt/ext-drives/

для создания папки, к которой будут монтироваться диски.
В консоли Windows (командная строка, терминал, Powershell) введите команду
wmic diskdrive list brief

В консоли Ubuntu введите команду lsblk — это отобразит список подключенных дисков, разделов на них и их размер. В следующей команде используем имя нужного раздела для монтирования:
sudo mount /dev/sdИМЯ /mnt/ext-drives/


В дальнейшем для отключения диска от WSL можно использовать ту же команду, которая использовалась на 5-м шаге, заменив mount на unmount.
Другие способы
Есть и другие программы (драйверы) для доступа к разделам Linux из Windows, но не полностью бесплатные. Среди них:
- DiskInternals Linux Reader — в бесплатной версии доступно только чтение данных с разделов.
- Paragon Linux File Systems for Windows — бесплатная работа в течение пробной версии, затем необходимо приобретать лицензию.
А вдруг и это будет интересно:
- Лучшие бесплатные программы для Windows
- Не скрывается панель задач в полноэкранном режиме Windows 11 — варианты решения
- Создание отчета о состоянии батареи ноутбука средствами Windows 11
- Запуск драйвера для этого устройства заблокирован Код 48 — варианты решения
- Не работают Ctrl+C и Ctrl+V — варианты решения
- Интерфейс не поддерживается при открытии файлов в Windows 11 и Windows 10 — варианты решения
- Windows 11
- Windows 10
- Android
- Загрузочная флешка
- Лечение вирусов
- Восстановление данных
- Установка с флешки
- Настройка роутера
- Всё про Windows
- В контакте
- Одноклассники