- How do I share a folder with another Linux machine on the same home network?
- 9 Answers 9
- 1. Get IP-adresses of your Local & Remote Machines.
- 2. Install packages on Local and Remote Machines
- 3. Create a group fuse and add localuser to it
- 4. Enable «allow_other» in fuse config
- 5. Generate SSH keys on Local Machine
- 6. Transfer your Local machine public SSH key to the Remote machine
- 7. Create a directory on Local machine /mnt folder where you will mount the Remote machine /home folder.
- 8. Mount the Remote machine /home directory from terminal
- 9. Verify: Browse Remote Machine /home directory
- 10. Enable reconnect after reboot
- 11. Reboot
- 12. Repeat
- How to Share a Folder on the Local Network With Ubuntu
- Method to Share a Folder on the Local Network With Ubuntu 20.04 Linux System
- Conclusion
- About the author
- Kalsoom Bibi
How do I share a folder with another Linux machine on the same home network?
I’m trying to share a folder on one Ubuntu machine with another Ubuntu machine on the same home network. When I right click on the folder and choose Sharing Options, it tells me I need to install Windows network sharing services in order to share folders. What does Windows have to do with this? I’m not trying to share with a Windows machine.
9 Answers 9
What does Windows have to do with this? I’m not trying to share with a Windows machine.
You’re right, this can be confusing. So let me try to clarify the terms first of all:
The way Windows shares files and printers is called SMB. The people from the SAMBA project have implemented all of Microsoft’s protocols and specifications for Linux. Ubuntu therefore supports the same sort of file sharing as Windows, which is called Samba.
- You can use SAMBA to share files between Linux machines. In fact, you might prefer it in case you have, for example, have a friend over with their Windows computer.
- Alternatively, you can use The Linux Way of sharing files, which is NFS (Network File System) — This answer to a previous question explains how to do it. (but it’s rather technical)
So, when the Sharing Options dialogue asks you to install the packages, you’re not actually installing any Microsoft software or anything like that. Go ahead and do it, it’s perfectly safe.
You can try to just enable sharing before you follow Salih Emin’s instructions; if it doesn’t work, you will get a simple warning, you can then do the steps Salih describes if needed. I have tried it on a freshly installed and up-to-date system, and I indeed needed to do this.
Thanks for the explanation. Funny that I’m trying to get away from Microsoft, and it turns out that even Linux uses pieces of their work. Ugh.
Well, the samba people have implemented Microsoft’s protocols much better than Microsoft themselves. Some solace there 🙂
I find SSHFS to be native, stable and extremely fast. I have two xubuntu machines (18.04) sharing /home folders and an Intel NUC as ‘dropbox’ USB stick. All over sshfs.
UPDATE 2020-07-12: I found SSHFS for Windows. A clean beautiful GUI, zero config and works with the SSH keys from linux-machines.
Here’s how to set this up sshfs and automatically reconnecting after a reboot using fstab without having to provide a password. A big thank you to serverfault user kubanczyk for how to reconnect after a remote suspend/resume.
I’ll use «Local machine — surfbox» for computer you’re connecting from, and «Remote machine — devbox» for the computer you’re connecting to.
Check your userID och groupID, they should both be 1000.
GroupID: id -g localuser UserID: id -u localuser
1. Get IP-adresses of your Local & Remote Machines.
I’ll use 192.168.1.150 for Local Machine (‘surfbox’) and 192.168.1.151 for Remote Machine (‘devbox’)
2. Install packages on Local and Remote Machines
sudo apt install sshfs fuse ssh 3. Create a group fuse and add localuser to it
Create group: sudo groupadd fuse
Add localuser to the group: sudo usermod -a -G fuse $USER
4. Enable «allow_other» in fuse config
We will need this option when mounting in fstab
Edit /etc/fuse.conf with your command line editor. Remove the hashtag before user_allow_other and save.
5. Generate SSH keys on Local Machine
Do not provide a password when prompted. Just press Enter to leave blank.
ssh-keygen -t rsa -C youremail@example.com
Keys are stored in Local machine home directory /.ssh folder
6. Transfer your Local machine public SSH key to the Remote machine
ssh-copy-id -i ~/.ssh/id_rsa.pub remoteuser@192.168.1.151
You will be prompted for password for Remote user on Remote machine. Local machine public key is now added to the file ~/.ssh/authorized_keys on Remote machine.
7. Create a directory on Local machine /mnt folder where you will mount the Remote machine /home folder.
Choose any name which makes sense for your Remote machine.
8. Mount the Remote machine /home directory from terminal
sshfs [user@]host:[directory] mountpoint [options]
sudo sshfs [remoteuser]@192.168.1.151:/home/[remoteuser] /mnt/devboxhome -o allow_other,default_permissions -o identityfile=/home/[localuser]/.ssh/id_rsa
example: assuming «steve» is the username on both Local and Remote machines
sudo sshfs steve@192.168.1.151:/home/steve /mnt/devboxhome -o allow_other,default_permissions -o identityfile=/home/steve/.ssh/id_rsa
Since you have transferred the public RSA key to Remote machine you should not be prompted for remoteuser password.
You will get a warning that the machine is not trusted and prompted if it should be added. Add the Remote machine as trusted.
9. Verify: Browse Remote Machine /home directory
In terminal on Local machine you can now list Remote machine /home directory under /mnt/devboxhome
or use Nautilus to browse the directory. Great.
10. Enable reconnect after reboot
We will add an entry in /etc/fstab to make this happen. You will need your Local machine userid och groupid — see intro if you missed this. Edit /etc/fstab with your command line editor and add these two lines at the end of /etc/fstab
# Mount devbox at boot remoteuser@192.168.1.151:/home/[remoteuser]/ /mnt/devboxhome fuse.sshfs default_permissions,user,delay_connect,reconnect,ServerAliveInterval=15,ServerAliveCountmax=3,allow_other,identityfile=/home/[localuser]/.ssh/id_rsa,idmap=user,uid=1000,gid=1000 0 0
- delay_connect makes the kernel wait until the network is up until it tries to mount the directory on Remote machine.
- Since we are running as root during boot we have to specify the keyfile which is stored in localuser home directory.
- allow_other — users other than the one doing the actual mounting can access the mounted filesystem.
- idmap=user — only translate UID of connecting user
- reconnect, ServerAliveInterval, ServerAliveCountMax — ssh sends keep-alive pings. If ServerAliveCountMax consecutive pings fail, reconnect.
A user logging in as steve on Local and Remote machines would have:
steve@192.168.1.151:/home/steve/ /mnt/devboxhome fuse.sshfs default_permissions,user,delay_connect,reconnect,ServerAliveInterval=15,ServerAliveCountmax=3,allow_other,identityfile=/home/steve/.ssh/id_rsa,idmap=user,uid=1000,gid=1000 0 0
IMPORTANT: a slash after remote directory: steve@192.168.1.151:/home/steve/
11. Reboot
You should now be able to access Remote machine /home directory in the Local machine /mnt/devboxhome In Nautilus you can drag this folder to the Places bar
12. Repeat
Go through the same steps again on Remote machine to make the /home directory of Local machine shared.
How to Share a Folder on the Local Network With Ubuntu
![]()
It is not difficult to share a folder in Ubuntu 20.04 Linux system and access it over the network in other operating systems, such as Windows. The necessary packages are not enabled by default in Ubuntu 20.04 Linux system. However, you can use the Install Wizard to get the necessary software installed automatically to share a folder. For network sharing, Ubuntu 20.04 Linux system needs a network connection. Verify that your Ubuntu 20.04 Linux system is linked to the router and that it can communicate with other computers on the network. Other computers won’t be able to view or interact with the network shares you establish on Ubuntu if you don’t have a network connection.
Method to Share a Folder on the Local Network With Ubuntu 20.04 Linux System
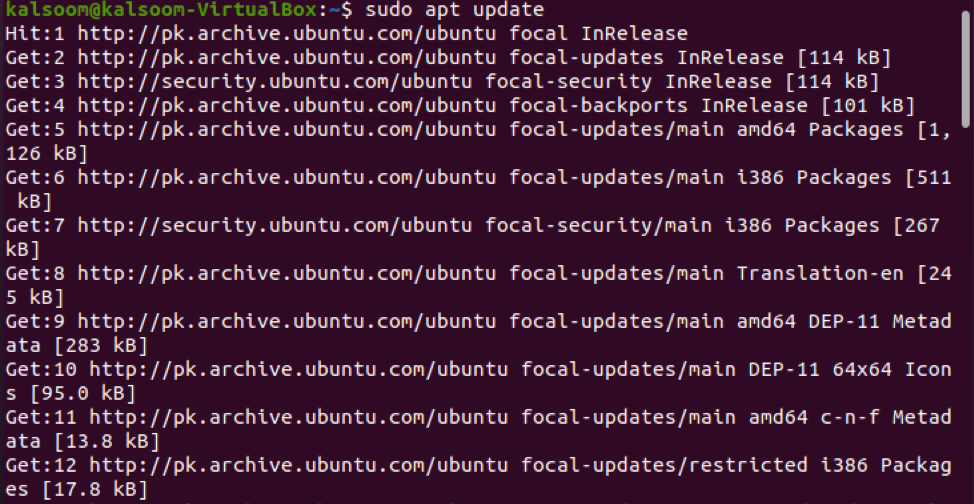
To share a folder on the local network with Ubuntu 20.04 Linux system, first, you have to install Samba on your system. You have to launch the command line shell in the Ubuntu 20.04 Linux system. Before downloading any new package or software, you need to update your system’s apt packages repository. To upgrade the apt repository, use the following affixed command:
After the update, install Samba by running the following affixed command shown in the screenshot below:

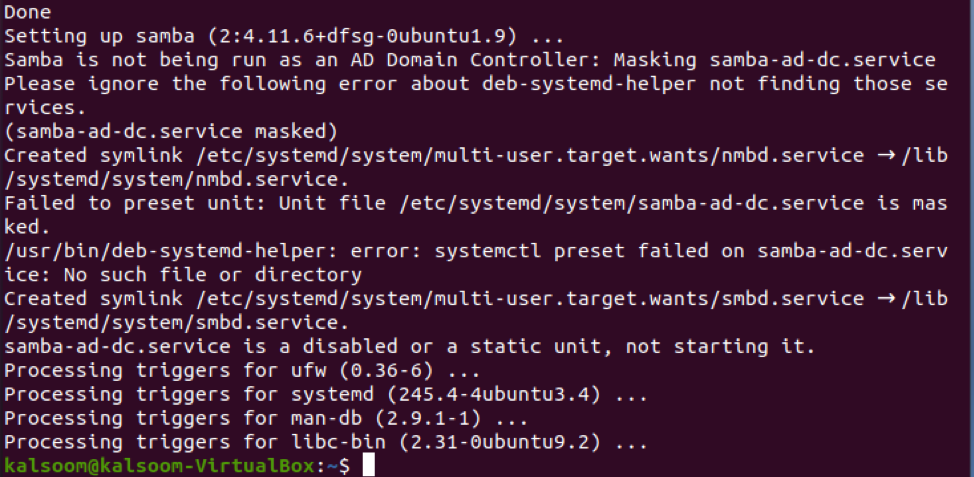
Tap “y” and afterward hit “Enter” to continue with the installation process. The installation of Samba on your machine will take some time.
Once it is installed, type the following cited command to check the status of the Samba operating service:
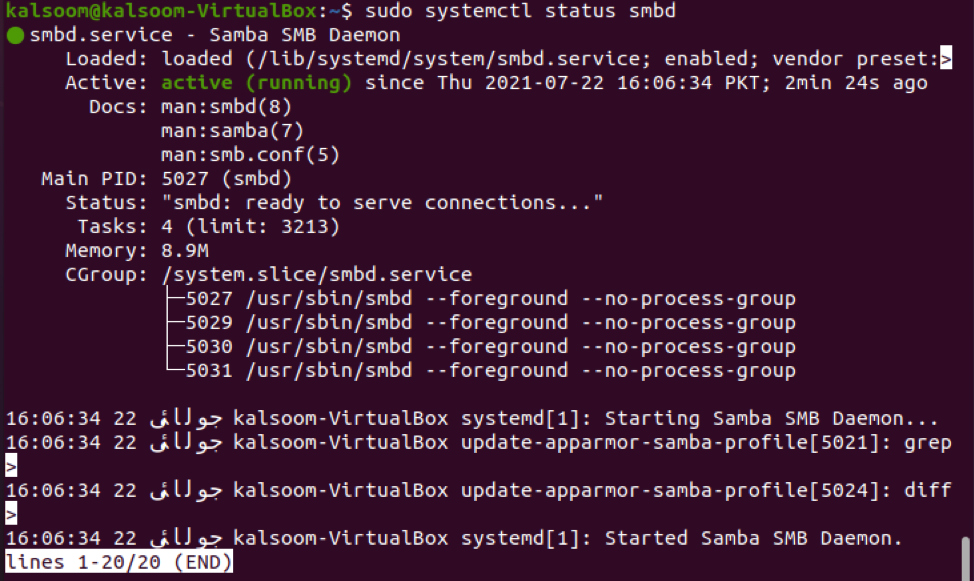
The output display indicates it is in “Active” (running) status. Now, we will change the firewall access guidelines to permit the “Samba” profile.

Rules will be updated after the execution of the command displayed above.
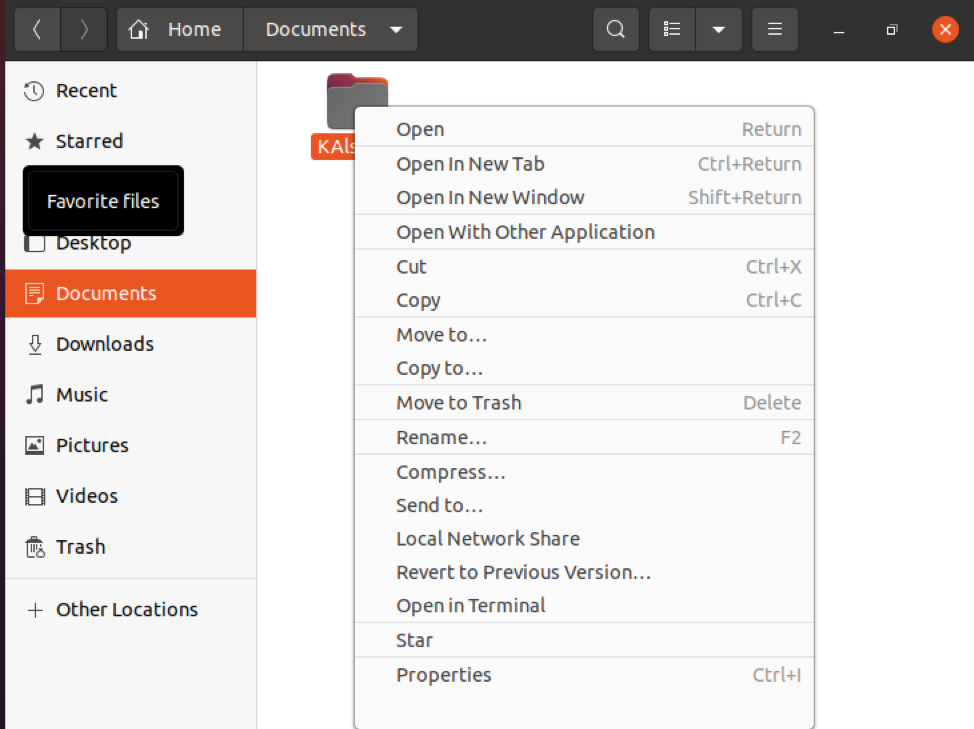
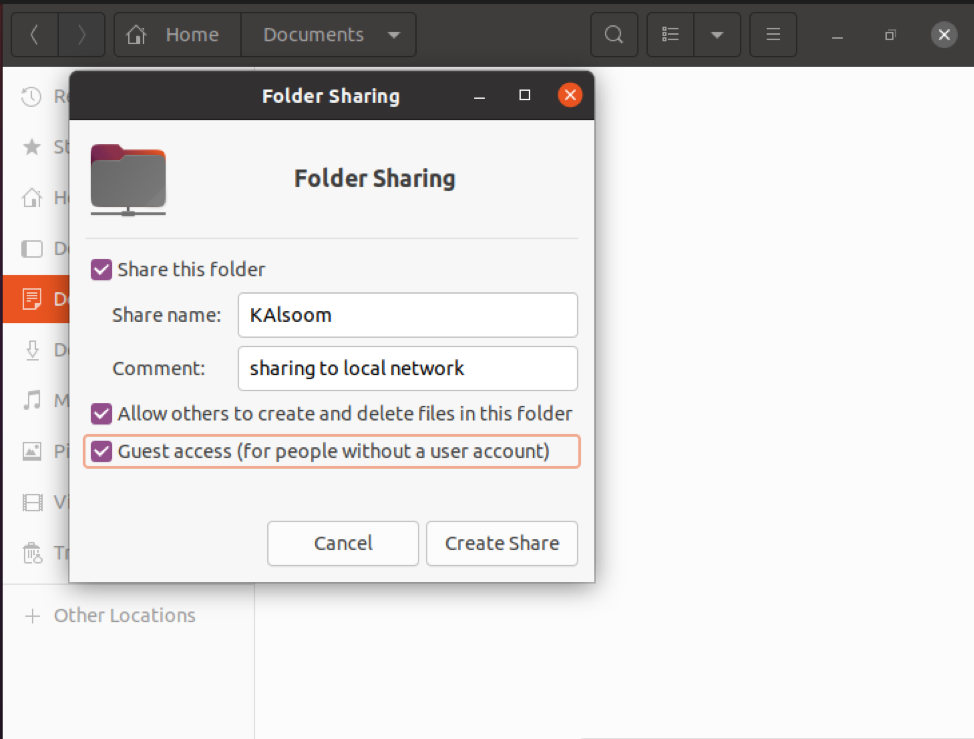
After installing Samba, we can now use the default Ubuntu file management application “Nautilus” to exchange folders or directories. Let’s take a look at how to use the Nautilus file manager to exchange directories. We have created a folder titled “kalsoom”. We will share this folder and use it in our complete guide. Navigate to the file manager and select a folder to share over your local network. Next, choose the “Local Network Share” selection from the displayed list items:
The screen shall show the following folder sharing dialogue. To share the folder, you must check the boxes displayed in the following attached screenshot and then click on the “Create Share” button:
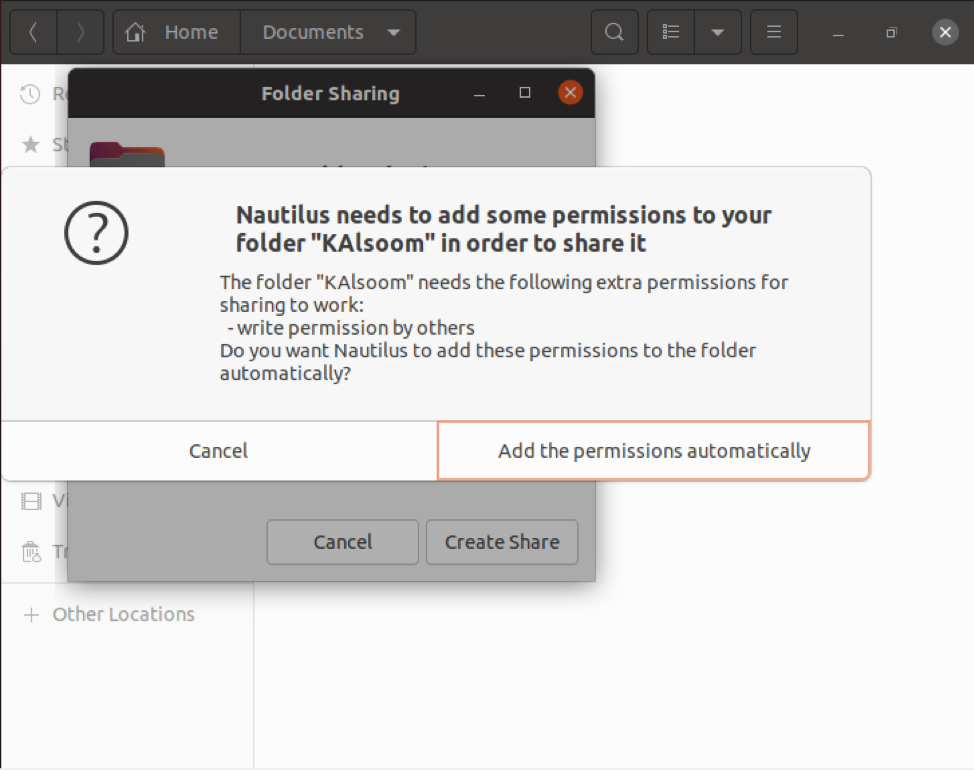
The following dialogue will appear on your system. After, tap the “Add the permissions automatically” button.
If you are a guest user, no user account authentication is required to access Samba shared folders. Everybody on the network can access the sharing folder by using guest shares. However, to grant permitted access to Samba shares, you will need a Samba user account. We have created a user titled “kalsoom”, as shown in the screenshot.
Tap “Enter” after entering a new password for a user. Rewrite the new password and press the “Enter” key once more. The new Samba user has been established successfully, and a new password has been set for the freshly created user, as shown in the attached image:

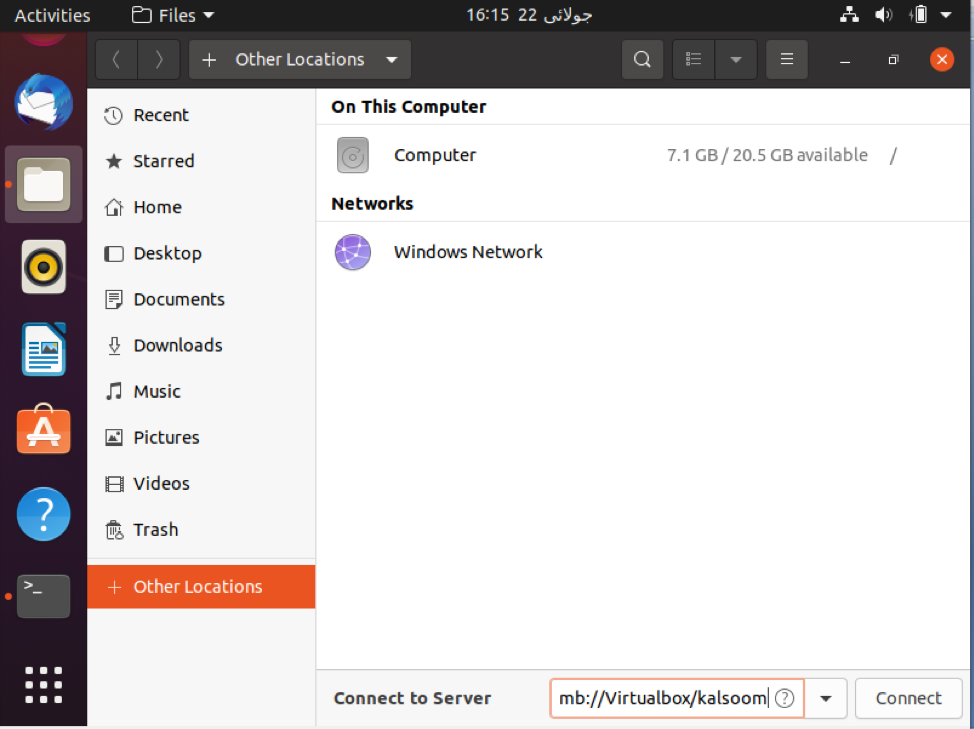
Now, it is time to access the Samba folder share on the Ubuntu 20.04 Linux system. In the other location section, type the address of Samba shares as seen in the following screenshot:
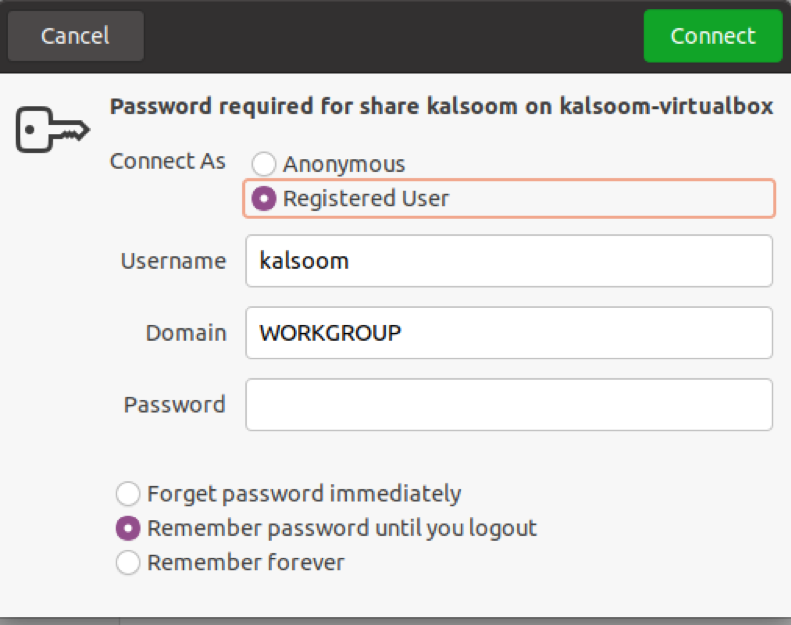
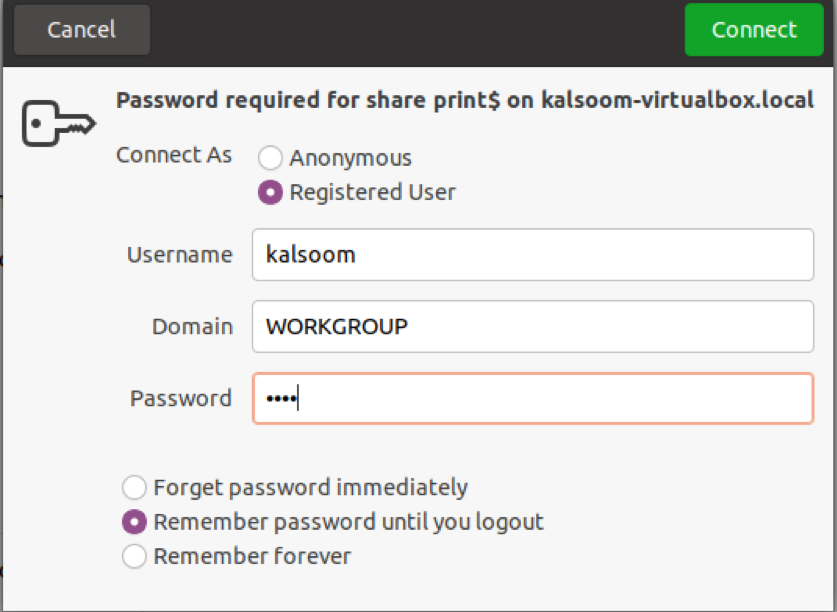
On your system, the following dialogue will appear, which is displayed in the screenshot below. You have the option of connecting as an “Anonymous” user or even as a “Registered user” in the image below. Type all the required fields, and tap on the “Connect” button.
Tap on the hostname or server. Again, you will be required to enter the following details displayed in the attached screenshot:
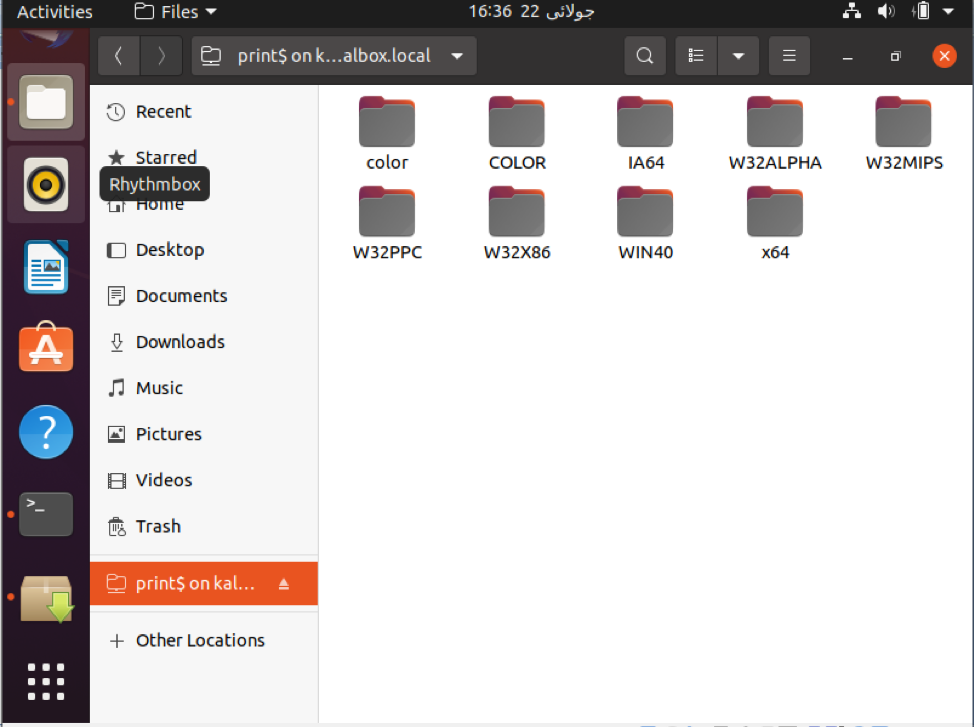
You could see that all of Samba’s folders are shared here in the attached screenshot:
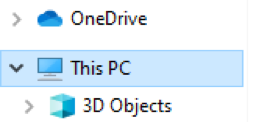
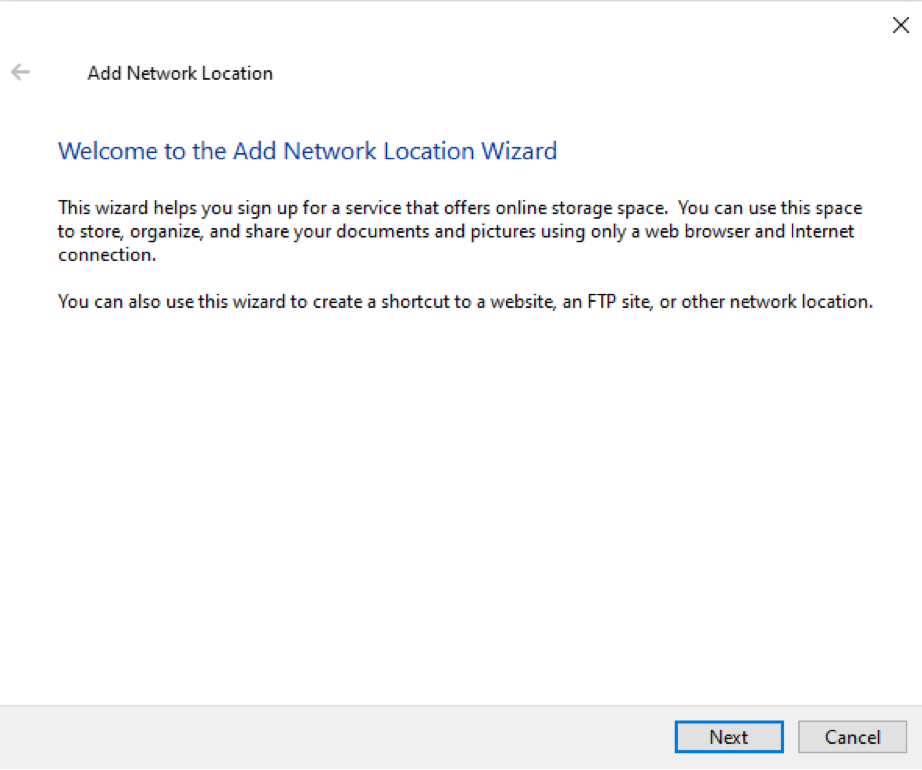
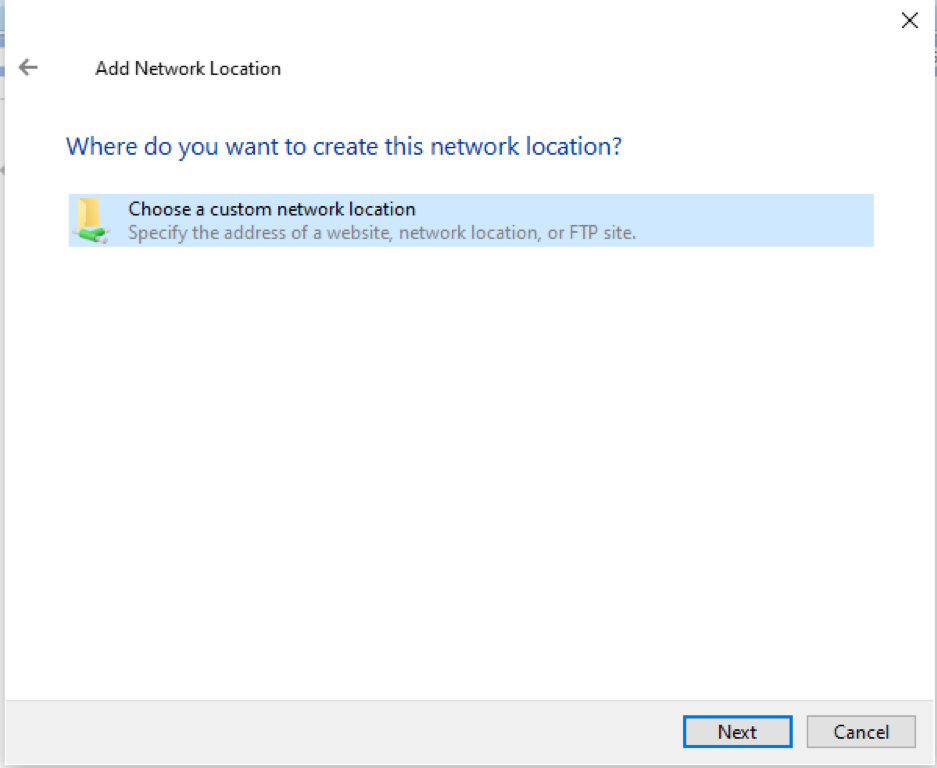
The basic method can be utilized by Windows users to connect to Samba shares. Right-click on the “This PC” option in the File Explorer and pick the “Add a Network Location” option from your Windows 10 system.
On the Windows 10 system, the following wizard will pop up. Hit the “Next” button to proceed further.
After that, another new window will pop up on Windows 10 system. Simply select the “Choose a custom network location” option.
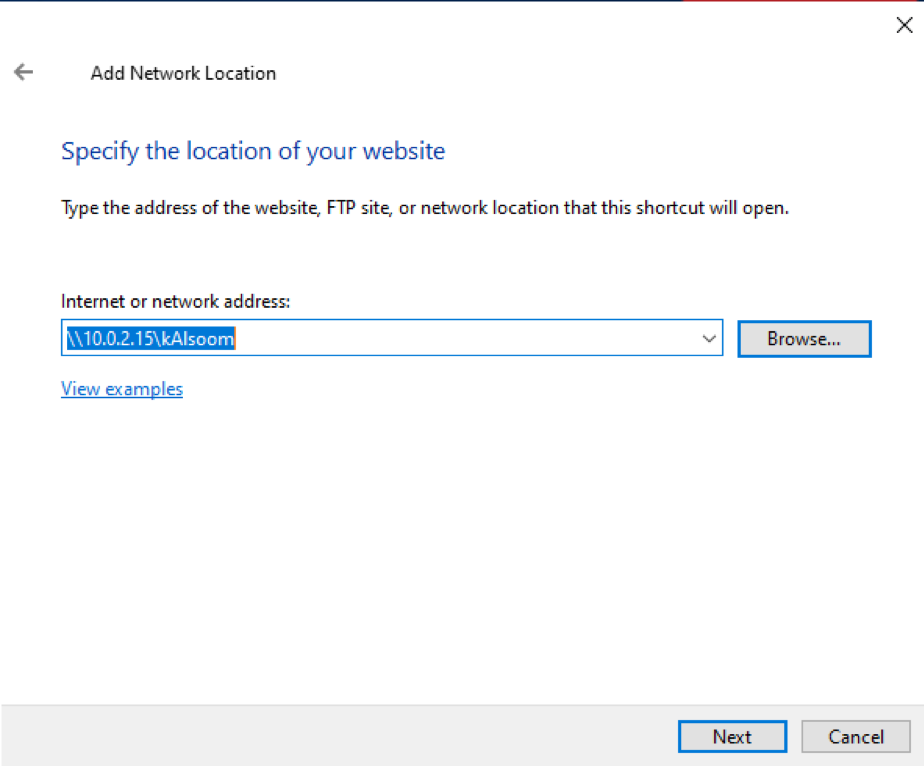
Now, you have to write the IP and the user-created for Samba shares in the same pattern shown in the following image. That’s how you can view all shared folders.
Now, in Ubuntu 20.04 Linux system, you can also enable a user by executing the following affixed command displayed in the attached screenshot:

The user will be activated.
Conclusion
We learned how to install Samba on an Ubuntu 20.04 Linux system in this article. We have demonstrated how to use Samba shares to share folders over a local network. I hope you have gained insights from this article to assist in your relevant work.
About the author
Kalsoom Bibi
Hello, I am a freelance writer and usually write for Linux and other technology related content