- How to write iso to usb linux
- Basics
- Fedora Media Writer
- Etcher
- UNetbootin
- If all else fails: dd
- Test it all — raw USB boot
- Other distributions & tools
- Conclusion
- Create a bootable USB stick on Ubuntu
- 2. Requirements
- 3. Launch Startup Disk Creator
- 4. ISO and USB selection
- 5. Confirm USB device
- 6. Installation complete
- Finding help
How to write iso to usb linux
Captain Obvious to the rescue. This sounds like a trivial topic. You’ve downloaded an ISO file of a Linux distribution, and you want it written to a USB drive so that you can boot and test it. This should pose no problems. Alas, it’s a tricky topic.
There are dozens of different filesystem formats, packaging methods and other fine nuances used in live distributions, leading to some rather unexpected results. The issue is further compounded by the existence of multiple USB image writing tools, each one ever so slightly different from the other, usually serving a particular distro or subset thereof. In this guide, I’d like to impose some order and clarity. Let’s briefly discuss the tools and methods to foolproof USB image writing. After me.
Basics
Image files may come in different formats. For the sake of simplicity, let’s focus on ISO files, even though the principle and commands listed before are fully applicable across a wider pool of formats. Furthermore, we will focus on the Linux side of things only.
In Windows, some if not most of the tools mentioned below also exist and can be used to create bootable media. Again, the mileage may vary, but you should be good to go in about 90% of cases with either theUniversal USB Installer or UNetbootin. That covered, let’s gingerly move on into the Linux territory and crack this nut open like the gentlest of sledgehammers.
Fedora Media Writer
Fedora comes with a very neat image writing tool. It will check for updates, it can download and install new Fedora images for you, including the upcoming betas and whatnot, and it can reset the USB device (basically a single FAT32 partition). The tool is also fairly reliable, and it works with the majority of distributions, including some rather hard to crack nuts. If you’re wondering, what about Ubuntu, well, it doesn’t have any flashy tools of its own. Noticed the pun? I sure did. If you’re wondering about other distributions, we will mention them, too. Relax.
Etcher
This is a relatively new, modern USB writing tool. It’s simple, portable, designed to work across a wide range of Linux distributions without any specific dependencies, thanks to the AppImage format. Elegant, fast and efficient, and it should handle the bulk of your writing. There are some isolated cases where it may not work, but it’s a great start. In fact, I liked it enough to write an entire article on how to use it.
UNetbootin
We come back to UNetbootin. This is a cross-platform USB creation tool, and it works fairly well. It’s simple to use, and it can even download distributions for you, if you want. Now, you may encounter some startup and usage problems, but this is why I’ve written a nice little tutorial to help you work around them.
UNetbootin should be your fallback for those distributions that do not cooperate well with Etcher or Fedora Media Writer. For instance, Nitrux, which comes with the new, interesting Nomad desktop, refused all writing efforts except UNetbootin. This is a big philosophical issue, which touches the fundamentals of Linux fragmentation and standards, but we won’t solve it today, and it’s not the purpose of this guide.
If all else fails: dd
Now, we’re well familiar with dd. It’s no stranger. What it does is simple — it copies, byte for byte, from input to output. It asks no questions, and discriminates against none. To that end, it’s slightly dangerous but brutally efficient. You can use it to write your ISO files directly to external media (be very careful selecting target devices) without having to resort to any GUI tools or wondering too much about the packaging and formatting. Now, in some cases, even this may not work, but it’s as good as it gets.
Replace /dev/* with relevant target, e.g. sdb, sdc, etc.
Test it all — raw USB boot
Now, what if you want to test the USB before you test it? In other words, how about making sure your image is sane, and it works as it should, and you can actually boot from the external media before you reboot your laptop or whatever?
Indeed, you can use virtualization software to test your USB drives. And we will do it by booting from the raw USB device. We will use the QEMU/KVM software for this purpose. VirtualBox can also do this, but you will actually need to convert the contents of the USB drive to a virtual hard disk.
There are several options here, all of which are valid. Some of the commands are symbolic links to others, but if you stumble upon a problem or there’s something missing, make sure you change them accordingly. Either one:
qemu-kvm -drive file=disk.qcow -usb -usbdevice host: -boot menu=on
Specifically for the second command, for example:
qemu-kvm -m 1024 -smp 1 -drive file=/home/roger/Downloads/disk.qcow -usb -usbdevice host:0781:5572 -boot menu=on
You can detect which USB device ID you need to use with the lsusb command:
lsusb
Bus 001 Device 002: ID 8087:8000 Intel Corp.
Bus 001 Device 001: ID 1d6b:0002 Linux Foundation 2.0 root hub
Bus 003 Device 001: ID 1d6b:0003 Linux Foundation 3.0 root hub
Bus 002 Device 005: ID 0bda:b728 Realtek Semiconductor Corp.
Bus 002 Device 004: ID 5986:0652 Acer, Inc
Bus 002 Device 003: ID 0bda:0129 Realtek Semiconductor Corp. RTS5129 Card Reader Controller
Bus 002 Device 010: ID 0781:5572 SanDisk Corp.
Bus 002 Device 002: ID 045e:0083 Microsoft Corp. Basic Optical Mouse
Bus 002 Device 001: ID 1d6b:0002 Linux Foundation 2.0 root hub
And you may need to create a disk file for this exercise:
qemu-img create -f qcow disk.qcow M
Formatting ‘disk.qcow’, fmt=qcow size=1073741824 encryption=off
If you have multiple virtualization products, you may not immediately succeed. Remember my article on KVM & VirtualBox on the same host? It is still applicable, so you need to make sure the latter is not running during the KVM test.
qemu-kvm -m 1024 -smp 1 -drive file=/home/roger/Downloads/disk.qcow -usb -usbdevice host:0781:5572 -boot menu=on
ioctl(KVM_CREATE_VM) failed: 16 Device or resource busy
failed to initialize KVM: Device or resource busy
And then, it should all be swell:
Other distributions & tools
Of course, it never ends. OpenSUSE, Manjaro, they all have their own unique features and options. But I think, in general, that Etcher and UNetbootin should satisfy most needs, and on the distro-specific front, Fedora Media Writer is ever so slightly more advanced and error-proof than others, hence its presence in the shortlist.
However, if you’re already using other Linux operating systems and their custom applications, do not let my guide deter you. After all, in this fragmented ecospace, there can be no perfection, only a rough asymptote, which we cover with the tools above. Etcher is probably the most convenient and friendly of the lot, UNetbootin is rugged but can be finnicky to operate, and Fedora has a great utility, but it mandates the use of the distro. Anyway, the world is your writer.
Conclusion
Like everything else in Linux, be it software, desktop environment, the choice of a distro, or any other aspect of the desktop usage, the methodology behind writing ISO images to a USB drive has many paths. Of course, you want the most successful one, to minimize time loss and frustration. There are no absolutes, but we can get near perfect.
Etcher and UNetbootin, in that order, are distro-agnostic tools with great value, and they will handle the bulk of tasks for you. Fedora is another great contender. You can always resort to dd, when things get tough, and wash it all down with KVM, with some funky raw USB boots, to make sure you really have nailed it. Not only do you get a bunch of tools and their reviews, but also workarounds around usage, virtualization hacks, and other neat tips and tricks. Not bad for a humble little tutorial. We’re done.
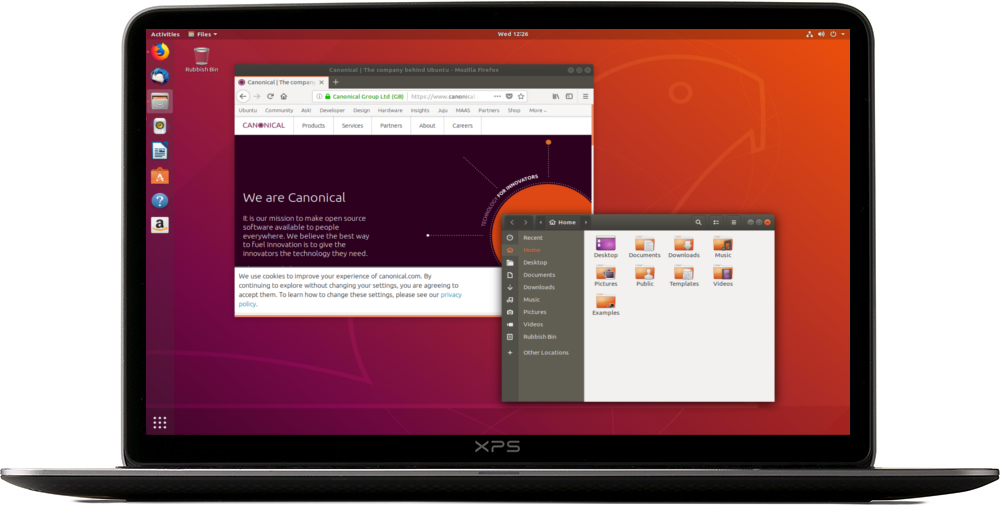
Create a bootable USB stick on Ubuntu
Creating a bootable Ubuntu USB stick is very simple, especially from Ubuntu itself, and we’re going to cover the process in the next few steps.
Alternatively, we also have tutorials to help you create a bootable USB stick from both Microsoft Windows and Apple macOS.
2. Requirements
- A 4GB or larger USB stick/flash drive
- Ubuntu Desktop 14.04 or later installed
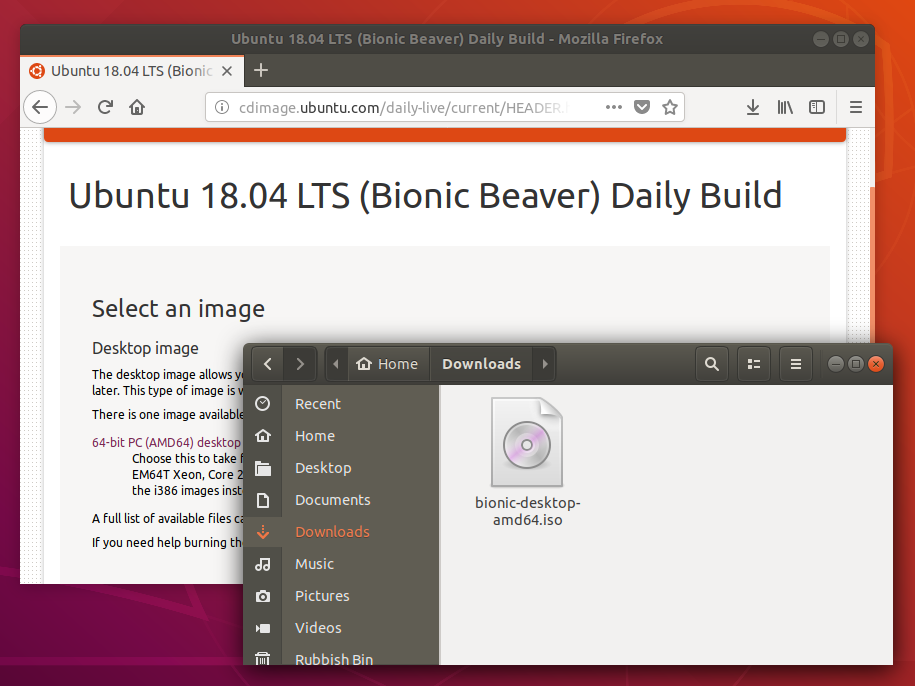
- An Ubuntu ISO file. See Get Ubuntu for download links
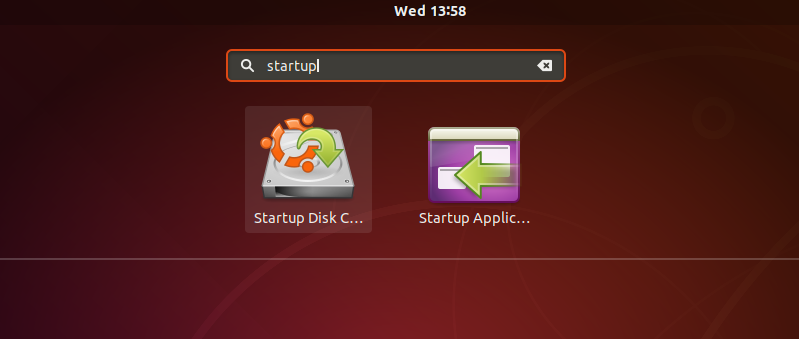
3. Launch Startup Disk Creator
We’re going to use an application called ‘Startup Disk Creator’ to write the ISO image to your USB stick. This is installed by default on Ubuntu, and can be launched as follows:
- Insert your USB stick (select ‘Do nothing’ if prompted by Ubuntu)
- On Ubuntu 18.04 and later, use the bottom left icon to open ‘Show Applications’
- In older versions of Ubuntu, use the top left icon to open the dash
- Use the search field to look for Startup Disk Creator
- Select Startup Disk Creator from the results to launch the application
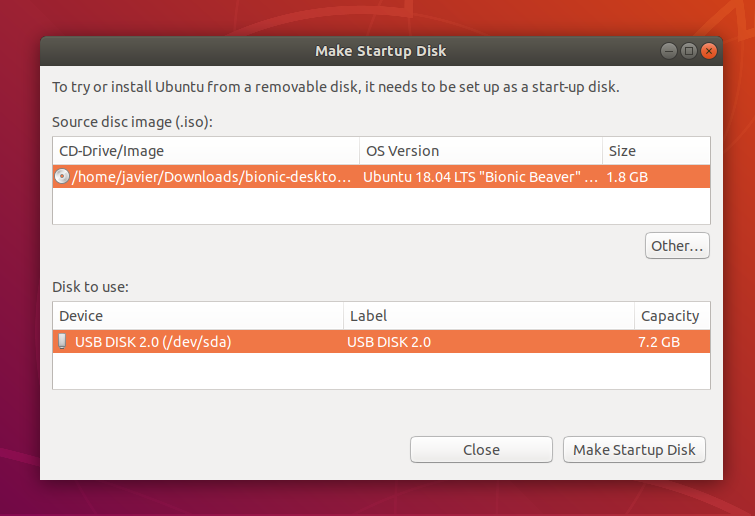
4. ISO and USB selection
When launched, Startup Disk Creator will look for the ISO files in your Downloads folder, as well as any attached USB storage it can write to.
It’s likely that both your Ubuntu ISO and the correct USB device will have been detected and set as ‘Source disc image’ and ‘Disk to use’ in the application window. If not, use the ‘Other’ button to locate your ISO file and select the exact USB device you want to use from the list of devices.
Click Make Startup Disk to start the process.
5. Confirm USB device
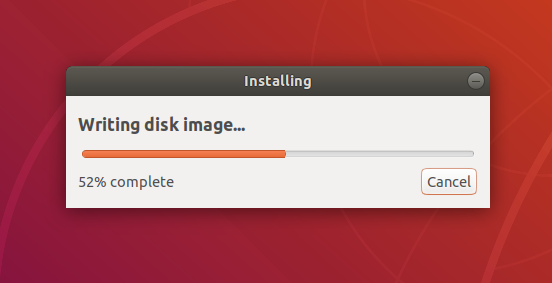
Before making any permanent changes, you will be asked to confirm the USB device you’ve chosen is correct. This is important because any data currently stored on this device will be destroyed.
After confirming, the write process will start and a progress bar appears.
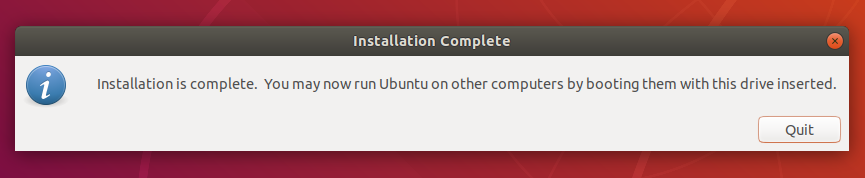
6. Installation complete
That’s it! You now have Ubuntu on a USB stick, bootable and ready to go.
If you want to install Ubuntu, take a look at our install Ubuntu desktop tutorial.
Finding help
If you get stuck, help is always at hand: