- Huawei connect to linux
- What You Will Create
- What You Will Learn
- Hardware Requirements
- Software Requirements
- Required Knowledge
- Creating a Project
- Installing BlueZ 5.52 and wpa_supplicant
- Configuring Environment Variables
- Sample Code Description
- Running the Demo Project
- Рука помощи
- 1. Установка необходимых пакетов
- 2.Создание конфигурационных фалов
- 3. Запуск необходимых служб
- 4. Диагностика проблем
Huawei connect to linux
As a cross-device file transfer solution, HUAWEI Share Engine uses Bluetooth to discover nearby devices and authenticate connections, then sets up Wi-Fi peer-to-peer channels to allow file transfers between phones, PCs, and other devices. File transfer speeds can reach 80 Mbps if the third-party device and environment allow.
The Share Engine capabilities are sealed deep in the package, and are open to developers of apps and smart devices. By integrating these capabilities, printers, cameras, and other compatible devices can easily share files with each other.
Three SDK development packages are offered to allow integration for Android, Linux, and Windows based apps and devices.
In this codelab, you will learn how to integrate Share Engine on Linux devices. When the integration is successful, images can be transferred between Linux devices and Huawei devices.
What You Will Create
In this codelab, you will create a demo project, integrate the Share Engine SDK into the demo project, and complete the overall setup of the Share Engine service.
What You Will Learn
- How to enable the Share Engine service.
- How to build a sample app and integrate the Share Engine SDK into the app.
- How to complete the overall setup of the Share Engine service.
Hardware Requirements
- A Huawei phone with a USB port and running EMUI 9.0 or later, which is used for developing and debugging the sample app
- A third-party device that runs Linux (Ubuntu 18.04 is recommended), which is used for developing and debugging the sample app
Software Requirements
- OpenSSL 1.1.1g
- BlueZ 5.52 Bluetooth protocol stack (other protocol stacks need adaptation) and wpa_supplicant support
- X86_64 or Arm64 architecture
Required Knowledge
- Linux app development basics
- Linux multithreading
- Wi-Fi and Bluetooth development basics
To integrate Share Engine, you must complete the following preparations:
Note: You need to register as a developer to complete the operations above.
Creating a Project
The specific procedure depends on the actual development environment. The sample code includes the southbound API adaptation reference and a demo for calling the APIs.
Installing BlueZ 5.52 and wpa_supplicant
1. Install BlueZ 5.52.
Download BlueZ 5.52 at http://www.bluez.org/.
Install BlueZ 5.52. For example, perform compilation from bottom to top based on the following dependencies:
bluez-5.52
|——–readline-8.0
|——–ncurses-6.1
|——–libxml2-2.9.9
|——–libical-3.0.6
|——–dbus-1.13.4
|—-glib-2.58.3
|—-zlib-1.2.11
|—-expat-2.2.9
|—-pcre3_8.39
|—-libffi-3.2.1
|—-util-linux_2.31.1
2. Install wpa_supplicant.
Download wpa_supplicant at https://w1.fi/wpa_supplicant/.
Install wpa_supplicant. The following is for reference:
a. Install libnl and OpenSSL.
b. Decompress the wpa_supplicant package.
c. Run cp .config wpa_supplicant-2.9/wpa_supplicant.
d. Run cd wpa_supplicant-2.9/wpa_supplicant.
e. Run export LD_LIBRARY_PATH=LD_LIBRARY_PATH:/usr/local/libnl/lib.
f. Run make BINDIR=/sbin LIBDIR=/lib -j8.
g. Run install -v -m755 wpa_ /sbin/.
Configuring Environment Variables
Refer to the makefile in the sample code.
Sample Code Description
After the environment variables are configured, you are ready to compile the sample code.
1. Receiving device: For details about the sample code, please refer to sharekit_demo_rx.c.
Returns the transfer progress.
Returns the status changes.
Previews the names and quantity of received files.
Returns the transfer result. (This function is reserved).
The API calling procedure is as follows:
a. Call InitShareKit to initialize Share Engine.
b. Call StartShareService to start the Share Engine service.
c. After the file transfer is complete, call StopShareService to stop the Share Engine service.
d. Call UninitShareKit to release resources when exiting the process.
2. Sending device: For details about the sample code, please refer to sharekit_demo_tx.c.
Returns the transfer progress.
Returns the status changes.
Returns the transfer result. (This function is reserved).
The API calling procedure is as follows:
a. Call ScanFileName to select files to be sent.
b. Call InitShareKit to initialize Share Engine.
c. Call StartShareService to start the Share Engine service. At this time, the device starts to scan for the receiving device through Bluetooth.
d. Call SelectDev to select the receiving device.
e. Call TransFile to send the files.
f. After the file transfer is complete, call StopShareService to stop the Share Engine service.
g. Call UninitShareKit to release resources when exiting the process.
Running the Demo Project

Perform the following steps:
1. On the receiving device:
a. Run the sharekit_demo_rx process. The following figure shows part of the running log, which indicates that the receiving device has been detected by the sending device.
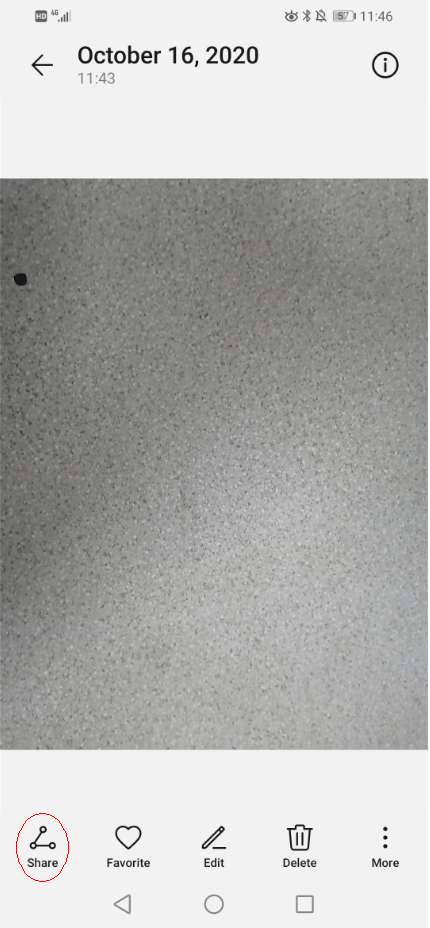
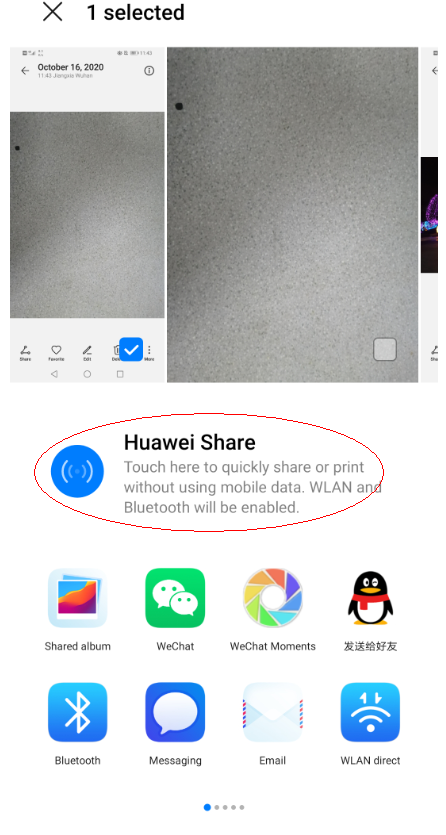
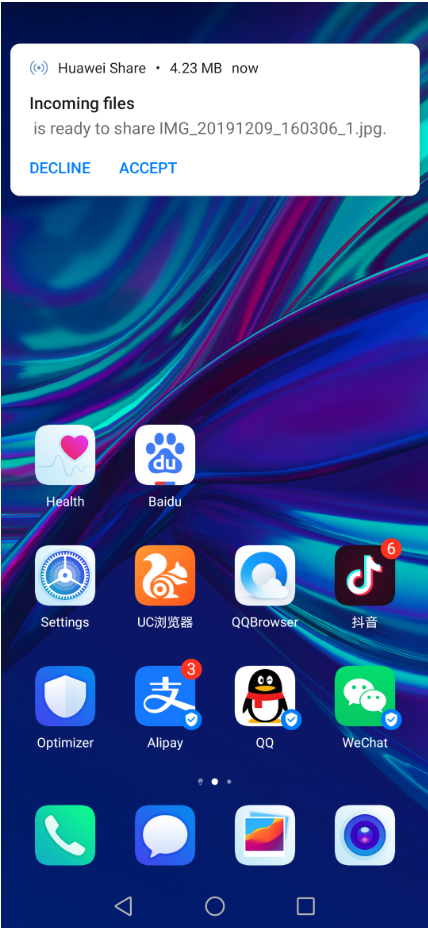
b. The sending device user selects the files to send, touches the share button, and selects Huawei Share, as shown in the following figure.
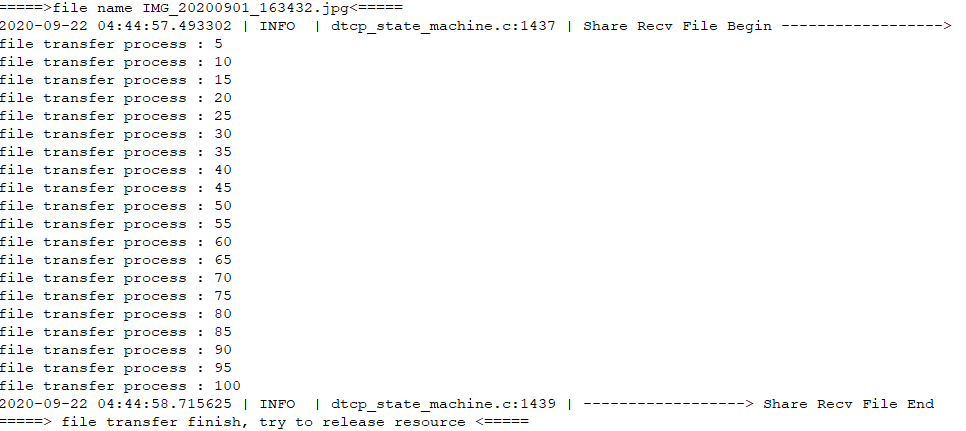
c. The receiving device receives the files. The following figure shows the running log.

2. On the sending device:
a. Start the sharekit_demo_tx process. The following figure shows part of the running log.

b. The sending device starts scanning immediately after the preceding process starts. The following figure shows the running log.
Note:Mac addr indicates the Bluetooth MAC address. Rssi indicates the signal strength. The detected devices are sorted by signal strength. Name indicates the device name, and the 20 digits following the name are the unique identification code of the phone.
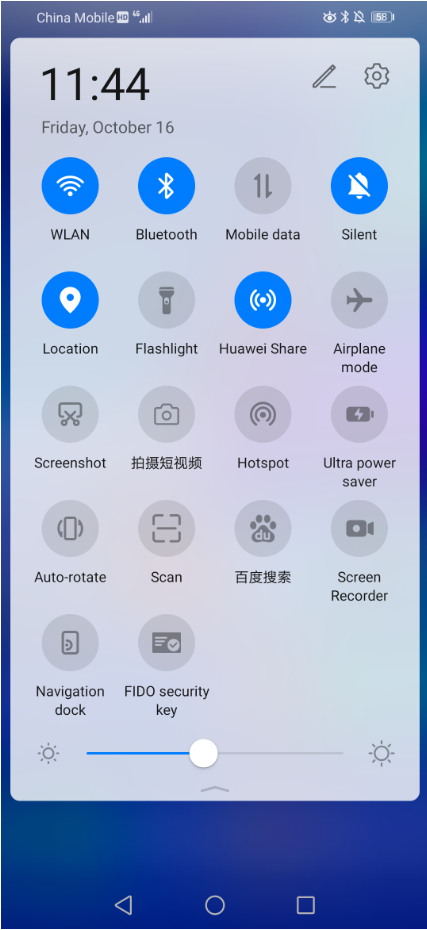
c. Ensure that Huawei Share has been enabled on the phone. Select the device from which you want to receive the files. A confirmation dialog box will be displayed on the phone, as shown in the following figure.
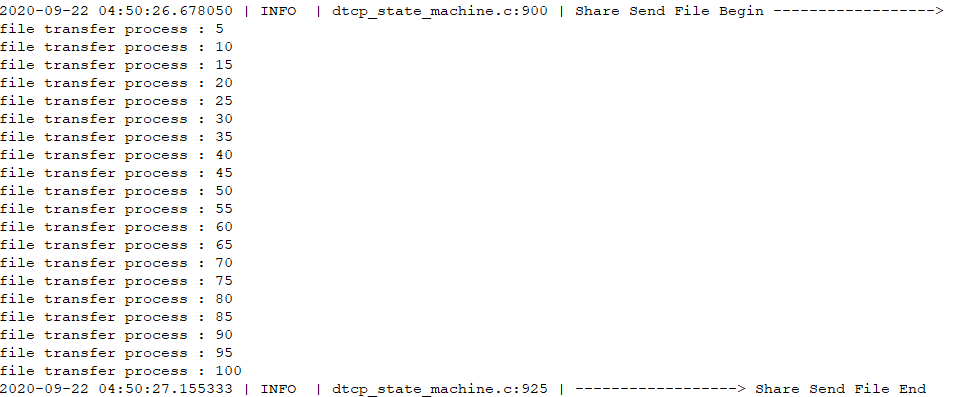
d. The sending device sends the files successfully, as shown in the following figure.
Well done. You have successfully completed this codelab and learned how to:
- Enable the Share Engine service.
- Build a sample app and integrate the Share Engine SDK into the app.
- Complete the overall setup of the Share Engine service.
For more information, please click the following links:
To download the sample code, please click the button below:
Рука помощи
Пришлось подключать и настраивать подключение модема Huawei EC306 на Ubuntu 16.04, включить модем и настроить подключение «с ходу» не получилось, что для меня было ожидаемо. Перечитав ряд форумов и статей, на которые были ссылки с результатов поиска Google, я не нашел необходимую информацию в полном объеме или она была для более ранних версий ОС.
Нужно было настроить подключение через модем, которое управлялось через Network manager и не требовало от пользователя дополнительных действий

Далее предлагаю Вам инструкцию по настройке модема Huawei EC306, которую можно адаптировать под другие модели
1. Установка необходимых пакетов
Большинство пакетов у Вас скорее всего уже установлены
2.Создание конфигурационных фалов
Смотрим, как система определяет модем
$ lsusb | grep uawei
Bus 002 Device 007: ID 12d1:1505 Huawei Technologies Co., Ltd. E398 LTE/UMTS/GSM Modem/Networkcard
12d1 — Id производителя
1505 — Id продукта
Эти данные необходимы для формирования конфигурационных файлов
Файл конфигурации udev
Создаем файл /etc/udev/rules.d/45-huawei.rules со следующим содержимым
ACTION==»add», SUBSYSTEM==»usb», ATTRS==»12d1″, ATTRS==»1505″, RUN+=»/usr/sbin/usb_modeswitch -v 12d1 -p 1505 -J»
В данном файле указано, какое действие необходимо выполнить в случае присоединения устройства 12d1:1505
Файл конфигурации usb_modeswitch
Для устройства, которое определятся 12d1:1505 создаем файл /etc/usb_modeswitch.d/12d1:1505
# Huawei EC156, Huawei E372u-8
TargetVendor=0x12d1
TargetProductList=»140b,140c,1506,150f,150a»
HuaweiNewMode=1
Данный файл, как и файлы конфигурации usb_modeswitch для других модемов, можно найти в архиве /usr/share/usb_modeswitch/configPack.tar.gz
Возможно, в ряде случаев, модем будет определяться сразу с необходимым ID продукта, тогда рекомендую несколько раз отключить/подключить, пока соединение не будет работать и после этого найти необходимые параметры для конфигурационных файлов.
3. Запуск необходимых служб
После установки ОС Ubuntu 16.04 служба ModemManager была установлена, но находилась в отключенном состоянии.
sudo systemctl enable ModemManager.service
sudo service ModemManager start
После этого перезагружаем и настраиваем подключение по модему через управление соединениями в графической оболочке
4. Диагностика проблем
В случае возникновения проблем Вам может быть полезен результат вывода
Ниже привожу пример результатов этих команд для работающего модема Huawei EC306
$ sudo service ModemManager status
● ModemManager.service — Modem Manager
Loaded: loaded (/lib/systemd/system/ModemManager.service; enabled; vendor preset: enabled)
Active: active (running) since Чтв 2019-02-07 14:40:26 EET; 1min 16s ago
Main PID: 2346 (ModemManager)
CGroup: /system.slice/ModemManager.service
├─2346 /usr/sbin/ModemManager
└─2537 /usr/lib/libqmi/qmi-proxy
Фев 07 14:41:41 notebook ModemManager[2346]: [/dev/cdc-wdm0] nas (1.4)
Фев 07 14:41:41 notebook ModemManager[2346]: [/dev/cdc-wdm0] qos (1.3)
Фев 07 14:41:41 notebook ModemManager[2346]: [/dev/cdc-wdm0] wms (1.3)
Фев 07 14:41:41 notebook ModemManager[2346]: [/dev/cdc-wdm0] pds (1.5)
Фев 07 14:41:41 notebook ModemManager[2346]: [/dev/cdc-wdm0] auth (1.1)
Фев 07 14:41:41 notebook ModemManager[2346]: [/dev/cdc-wdm0] voice (2.1)
Фев 07 14:41:41 notebook ModemManager[2346]: [/dev/cdc-wdm0] cat2 (2.0)
Фев 07 14:41:41 notebook ModemManager[2346]: [/dev/cdc-wdm0] uim (1.4)
Фев 07 14:41:41 notebook ModemManager[2346]: [/dev/cdc-wdm0] pbm (1.1)
Фев 07 14:41:41 notebook ModemManager[2346]: [/dev/cdc-wdm0] cat (0.0)
$ lsusb
Bus 002 Device 010: ID 12d1:1506 Huawei Technologies Co., Ltd. Modem/Networkcard
Также хочу заметить, что устанавливать соединение через модем можно не сразу, а по истечении нескольких минут, когда система его подготовит к работе.
При возникновении вопросов задавайте их в комментариях
Так, как было перечитано очень много, ниже привожу список ссылок, где я почерпнул больше всего информации: