Install IBM Websphere Application Server ( IBM WAS) in Linux

In this tutorial, you will learn how to install IBM Websphere Application Server in linux. WebSphere Application Server is the most popular JEE application platform in the world. Tens of thousands of businesses use it to run more than a million applications.
Prerequisites
- Need to have IBM id to install IBM WAS
- Super User or any normal user with SUDO privileges.
- IBM Installation Manager installed machine. You can install IBM installation manager using this guide.
Steps to install IBM
Step 1. Installation of Installation manager, creates a new directory in /opt named as IBM. Now go to this directory and list all available files
# cd /opt/IBM/InstallationManager/eclipse/tools/Step 2. Now find and save or copy either the latest online BASE repository or the composite repository to install WAS. At this time, following are the above mentioned repositories and THIS is the URL to find these repositories. In this tutorial we will use composite repositories to install IBM WAS.

Step 3. List all the available packages in the given repository. As mentioned, we will use the composite repository. And at the time of writing this tutorial, https://www.ibm.com/software/repositorymanager/V9WASBase is the composite repository.
# ./imcl listAvailablePackages -repositories https://www.ibm.com/software/repositorymanager/V9WASBase -prompt Note that, here you will be asked to enter the IBM login credentials, such as email id and password. To enter the same, press ‘P’ then ‘email-id’ and then password

If you are using composite repositories, you will see java jdk, java websphere appClient, websphere base, websphere IHS etc.
Step 4. Now install the IBM WAS of latest version and its corresponding Java version using the below command
# ./imcl install com.ibm.websphere.BASE.v90_9.0.0.20160526_1854 com.ibm.java.jdk.v8_8.0.7016.20220915_1446 -repositories https://www.ibm.com/software/repositorymanager/V9WASBase -prompt -showProgress -acceptLicense
And this is how you have learnt how to install IBM Websphere Application Server, WAS, successfully in linux using command line.
How to Download and Install WebSphere 9 ND in Linux?

Invicti Web Application Security Scanner – the only solution that delivers automatic verification of vulnerabilities with Proof-Based Scanning™.
Procedure to download & install IBM WAS 9 Network Deployment in Linux environments
IBM released WebSphere Application Server (WAS) 9 initially on their cloud – Bluemix. And now it’s available for you to download and install it.
I hope installation procedure will remain similar to the previous version but let’s see how it goes. If you are new to WebSphere then don’t forget to a chekout little introduction about it.
In this article, I’ll explain step-by-step from where to download WAS 9 and install it using IBM Installation Manager.
Download & Install IBM IM 1.8.5
IBM IM 1.8.5 or later is required to install WebSphere 9 so let’s get it installed.
http://www-01.ibm.com/support/docview.wss?uid=swg24041188#DNLD
I am not sure if it will work but you may try this direct link to download as well.
https://ak-delivery04-mul.dhe.ibm.com/sdfdl/v2/sar/CM/RA/06737/0/Xa.2/Xb.jusyLTSp44S03Q_q0Cd0hj9IqGeCC6EMY3WOBoWlDBTgttmTrTwqps88Q0Y/Xc.CM/RA/06737/0/agent.installer.linux.gtk.x86_64_1.8.5000.20160506_1125.zip/Xd./Xf.LPR.D1VC/Xg.10339932/Xi.habanero/XY.habanero/XZ.-asK8WoM4XRts1YNlqJTpBY6llI/agent.installer.linux.gtk.x86_64_1.8.5000.20160506_1125.zipIt’s around 164 MB for Linux 64bit so based on your internet speed it may take few minutes.
-rw-rw-r--. 1 chandan chandan 171715008 Nov 19 19:00 agent.installer.linux.gtk.x86_64_1.8.5000.20160506_1125.zipunzip agent.installer.linux.gtk.x86_64_1.8.5000.20160506_1125.zip[root@localhost ibmim]# ls -ltr total 260084 -rwxr-xr-x. 1 root root 71223 Aug 9 2012 userinstc -rwxr-xr-x. 1 root root 71223 Aug 9 2012 userinst -rwxr-xr-x. 1 root root 71223 Aug 9 2012 installc -rwxr-xr-x. 1 root root 71223 Aug 9 2012 install -rwxr-xr-x. 1 root root 71223 Aug 9 2012 groupinstc -rwxr-xr-x. 1 root root 71223 Aug 9 2012 groupinst -rwxr-xr-x. 1 root root 9926 Feb 25 2016 readme.html drwxr-xr-x. 11 root root 77824 May 6 2016 plugins drwxr-xr-x. 2 root root 4096 May 6 2016 Offerings drwxr-xr-x. 3 root root 16 May 6 2016 jre_7.0.9040.20160504_1613 -rwxr-xr-x. 1 root root 256 May 6 2016 user-silent-install.ini -rwxr-xr-x. 1 root root 202 May 6 2016 userinst.ini -rwxr-xr-x. 1 root root 247 May 6 2016 userinstc.ini drwxr-xr-x. 2 root root 66 May 6 2016 tools -rwxr-xr-x. 1 root root 249 May 6 2016 silent-install.ini -rwxr-xr-x. 1 root root 10892 May 6 2016 repository.xml -rwxr-xr-x. 1 root root 275 May 6 2016 repository.config drwxr-xr-x. 2 root root 4096 May 6 2016 native drwxr-xr-x. 2 root root 4096 May 6 2016 license -rwxr-xr-x. 1 root root 265 May 6 2016 install.xml -rwxr-xr-x. 1 root root 198 May 6 2016 install.ini -rwxr-xr-x. 1 root root 243 May 6 2016 installc.ini -rwxr-xr-x. 1 root root 200 May 6 2016 groupinst.ini -rwxr-xr-x. 1 root root 245 May 6 2016 groupinstc.ini drwxr-xr-x. 13 root root 4096 May 6 2016 documentation drwxr-xr-x. 3 root root 48 May 6 2016 configuration -rwxr-xr-x. 1 root root 4642 May 6 2016 con-disk-set-inst.sh
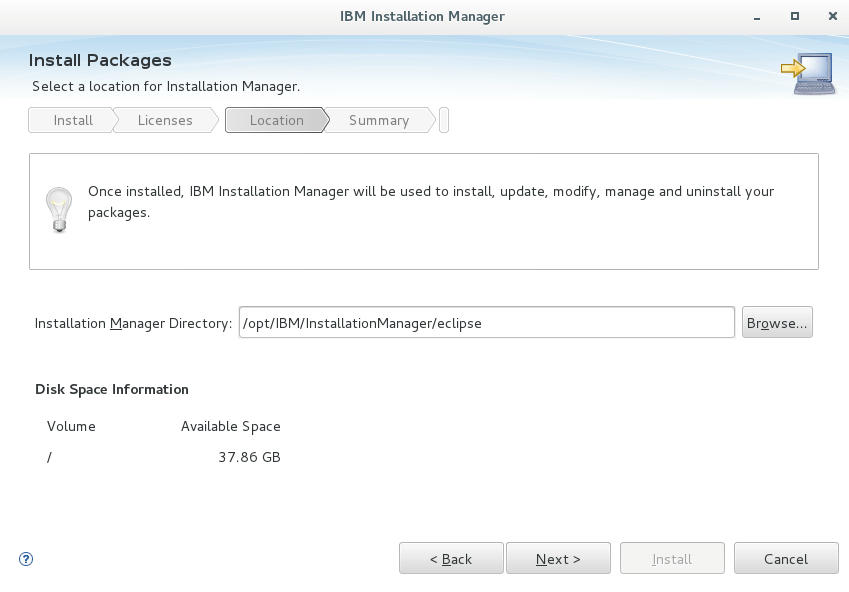
It’s time to install IBM IM 1.8.5 now by executing an install file.
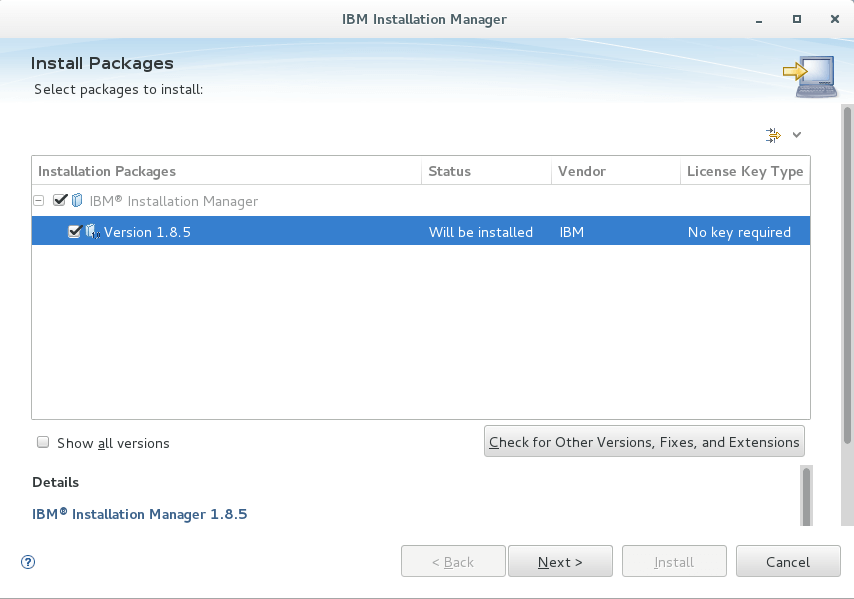
- Accept the license and click Next
- By default, it will install on /opt/IBM however, if you wish to change then you may do on next screen
- Review the summary information and click Install
- It will take few seconds and give you the confirmation on successfully installed
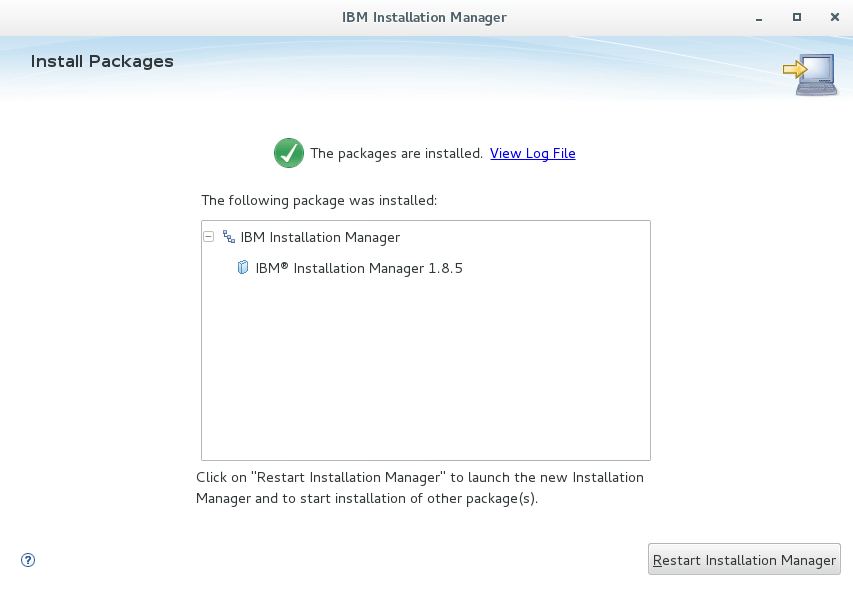
Nice, first pre-requisite is done.
Installing IBM WAS 9
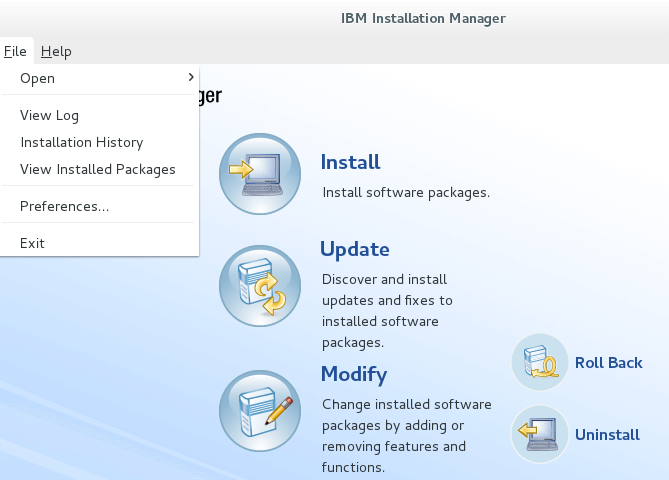
We will install WebSphere using IBM IM through an online repository. If not already, open IBM IM
- Click “Add Repository”, it will open a prompt where you can enter the repository path and click Ok
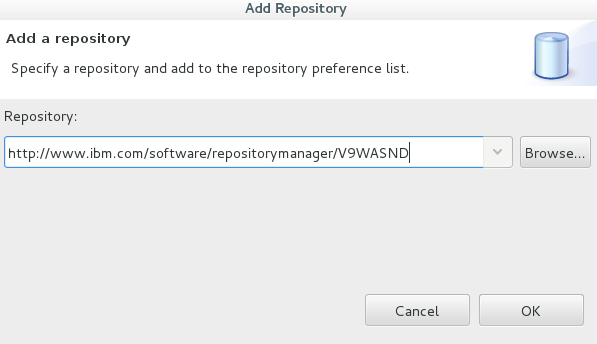
- WAS 9 ND repository – http://www.ibm.com/software/repositorymanager/V9WASND
- WAS 9 base repository – http://www.ibm.com/software/repositorymanager/V9WASBase
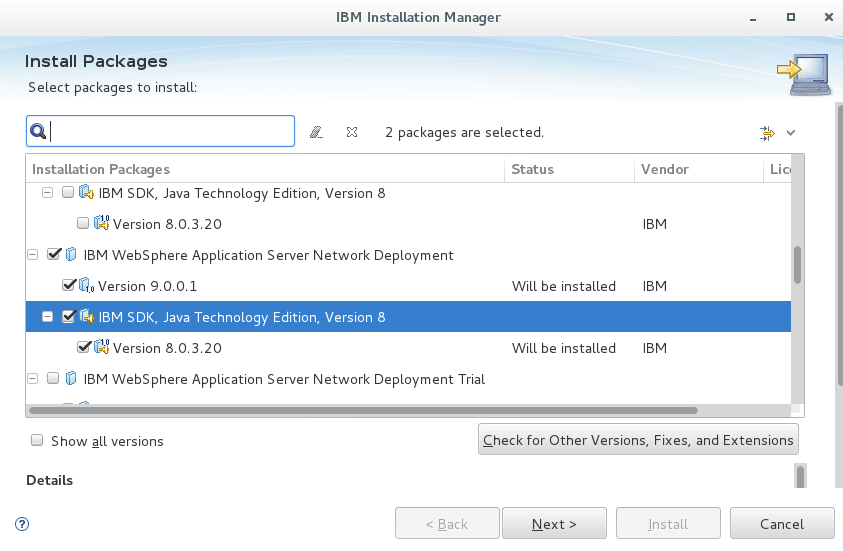
- Click “Install”
- Select the WAS ND 9 & Java 8 from the list and click Next
- Accept the license and click Next
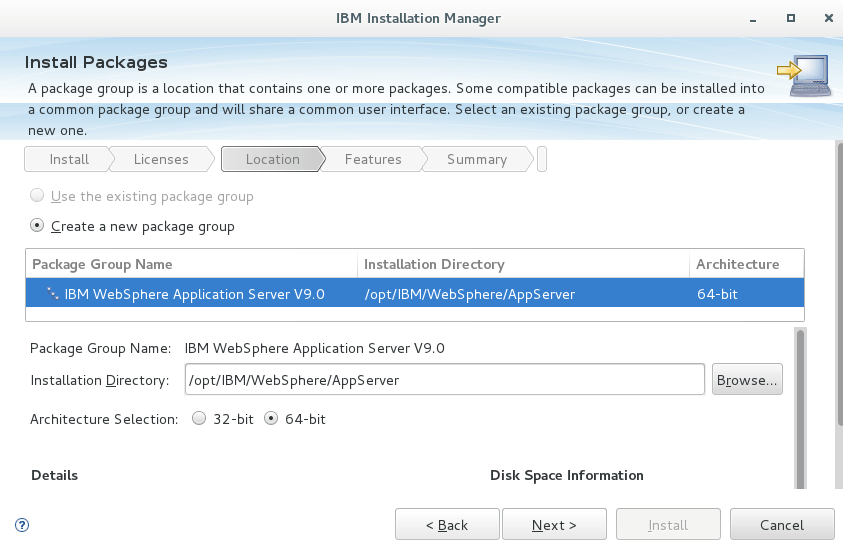
- By default, shared resources will be installed on /opt/IBM/IMShared and if you need, you can change on next screen

- Select the additional language if needed and click Next
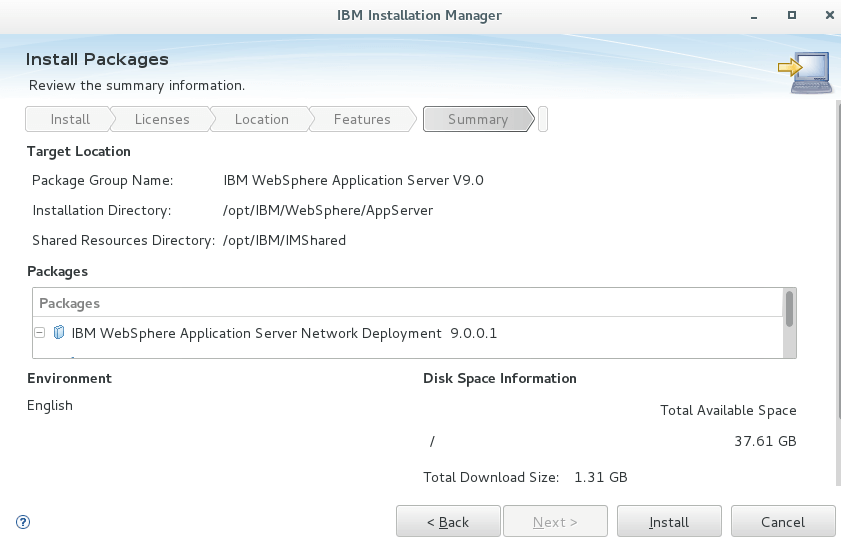
- Review the installation summary and click “Install”
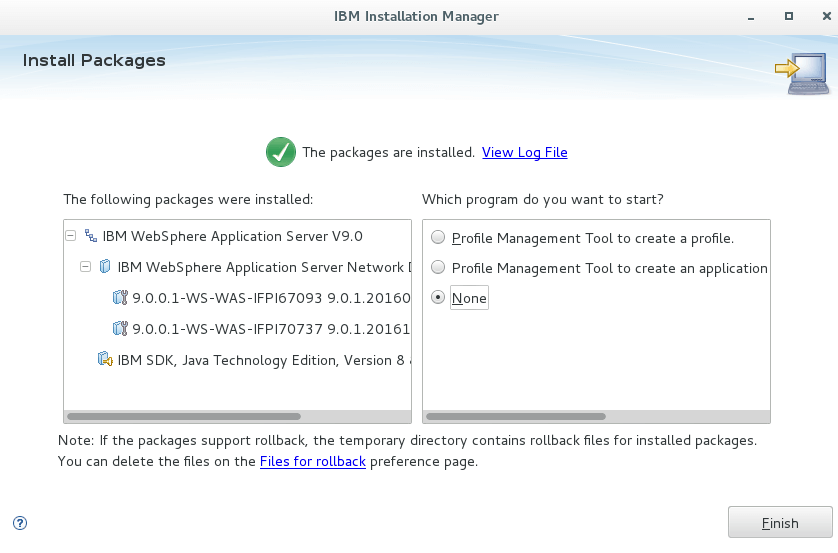
Well done, you’ve successfully installed WAS 9 ND. Stay tuned for next post on profile creation